

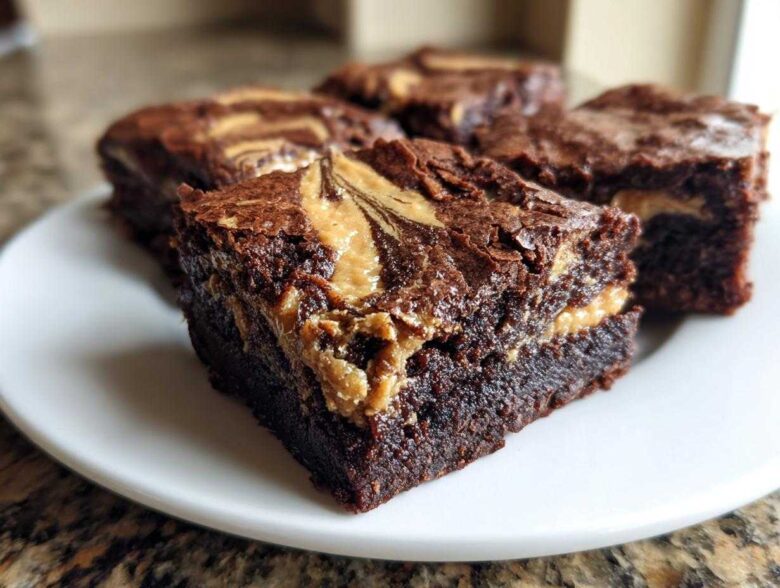
Oh my gosh, when I think about the peak of dessert heaven, it’s always that perfect moment where ultra-rich, dark chocolate meets creamy, salty peanut butter. It’s the dynamic duo of the baking world, right?
I have spent way too much time chasing that elusive, bakery-style brownie that is simultaneously fudgy, chewy, and topped with that beautiful, crackly, glossy crust. And folks, I finally nailed it with these fudgy brownies. But the real game-changer? Layering that sweet peanut butter right in the middle. I’m absolutely obsessed with how these peanut butter swirl brownies turn out. Seriously, the secret to getting the marbling just right took me about three batches of pure chaos in my kitchen, but now I’ve got the foolproof drizzle and swirl technique stamped into my memory. Trust me, these are going to be your new go-to for decadent chocolate peanut butter indulgence!
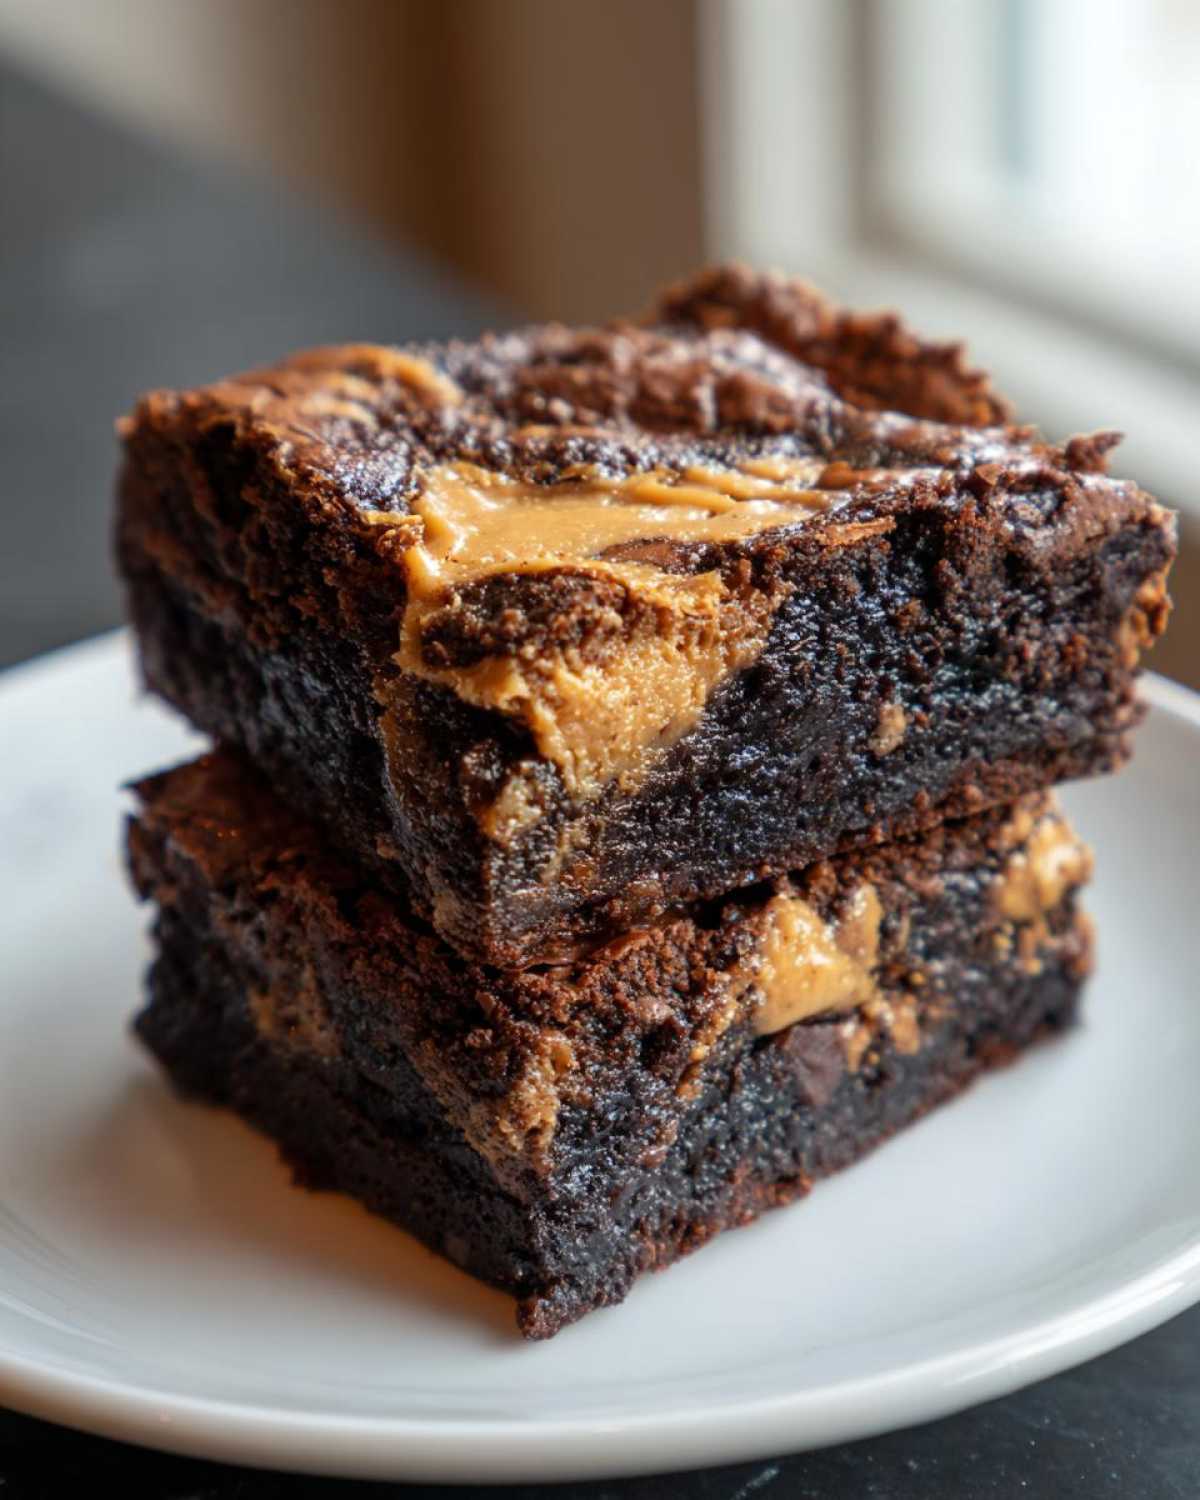
Why You Will Make The Best peanut butter swirl brownies From Scratch
When you bake these from scratch, you are taking total control over the texture, which is everything when it comes to brownie perfection. Forget those dry, cakey disappointments you sometimes get! These are designed to hit every sweet spot you look for in a truly incredible chocolate peanut butter treat.
- You get that ultra-fudgy center that melts in your mouth—no negotiating on texture here!
- That unbelievably sought-after, shiny, crackly crust develops on top when you mix the sugars just right.
- The warm, salty ribbon of peanut butter cuts through the richness of the dark cocoa perfectly.
- Since we’re using melted butter and no leavening agents (other than a tiny bit of baking powder), you guarantee those amazing, chewy brownies with peanut butter ribbon every time.
Ingredients for Ultra Fudgy peanut butter swirl brownies
When you’re aiming for gooey peanut butter brownies, you can’t cut corners on the foundational stuff, you know? The quality of these simple ingredients is what creates that amazing fudgy texture we are after. When I make this recipe, I always splurge a tiny bit on good cocoa powder because it absolutely makes a difference in the depth of flavor in these fudgy peanut butter swirl brownies.
Here’s what you need to gather up for this absolute dream batch:
- 1 cup (2 sticks) unsalted butter, melted
- 1 3/4 cups granulated sugar – this works with the brown sugar to make that shiny top!
- 1 cup packed light brown sugar
- 4 large eggs – don’t even think about counting out less than four!
- 1 tablespoon vanilla extract
- 3/4 cup unsweetened cocoa powder
- 1 cup all-purpose flour
- 1 teaspoon salt
- 1/2 teaspoon baking powder (just a touch for structure, not lift!)
- 1 cup semi-sweet chocolate chips (I always toss in extra, oops!)
- 1 cup creamy peanut butter, slightly warmed – this is crucial for a good drizzle!
If you’re looking for more ways to incorporate peanut butter into your baking, check out my guide on fudgy protein peanut butter treats, but for this scratch recipe, stick to these amounts for the best peanut butter swirl brownies recipe.
Step-by-Step Instructions for perfect peanut butter swirl brownies
Okay, this is where all the magic happens! Don’t stress about perfection here; these peanut butter swirl brownies are forgiving, but we do need to be mindful of one crucial thing: overmixing. Overmixing is the enemy of fudgy, so we’re going to be gentle.
We are aiming for those gorgeous, distinct layers—the creamy peanut butter hugging the rich chocolate. I used to blend the peanut butter in too much, and all I got was a weird, tan brownie. No good! We want ribbons!
Preparing the Pan and Dry Ingredients
First things first, let’s get set up! Preheat your oven to 350 degrees F. I always line my 9×13 inch pan with parchment paper, but make sure you leave some overhang on the sides. That overhang is your built-in handle later when you lift this decadent dessert out!
In a separate bowl, just whisk together your cocoa powder, flour, salt, and baking powder. Set that aside. It just ensures everything is evenly distributed so we don’t have weird pockets later.
Creating the Fudgy Brownie Base
Grab your big bowl. We start with the wet ingredients. Whisk together the melted butter, the regular sugar, and the *packed* brown sugar until it looks nice and smooth. Then, beat in those four eggs, one at a time, making sure each one is fully incorporated before adding the next. Follow that up with your vanilla.
Now, take your dry mix and add it to the wet ingredients gradually. Mix this until it’s *just* combined. I mean it—stop as soon as you don’t see streaks of flour anymore. If you mix too much here, you start building gluten, and boom! You’ve lost your fudgy texture. Finally, stir in those chocolate chips by hand.
Achieving the Creamy peanut butter swirl brownies Marble
This is the fun part, the technique for how to make peanut butter swirls in brownies! Take about two-thirds of that rich brownie batter and spread it into your prepared pan. It should look thick.
Now, for the peanut butter. Take your cup of creamy peanut butter and warm it up for about 15 to 20 seconds in the microwave. It doesn’t need to be hot, just flowable! Drizzle that warmed peanut butter all over the batter randomly. Then, dollop your remaining one-third of the batter gently over the top of the peanut butter drizzle.
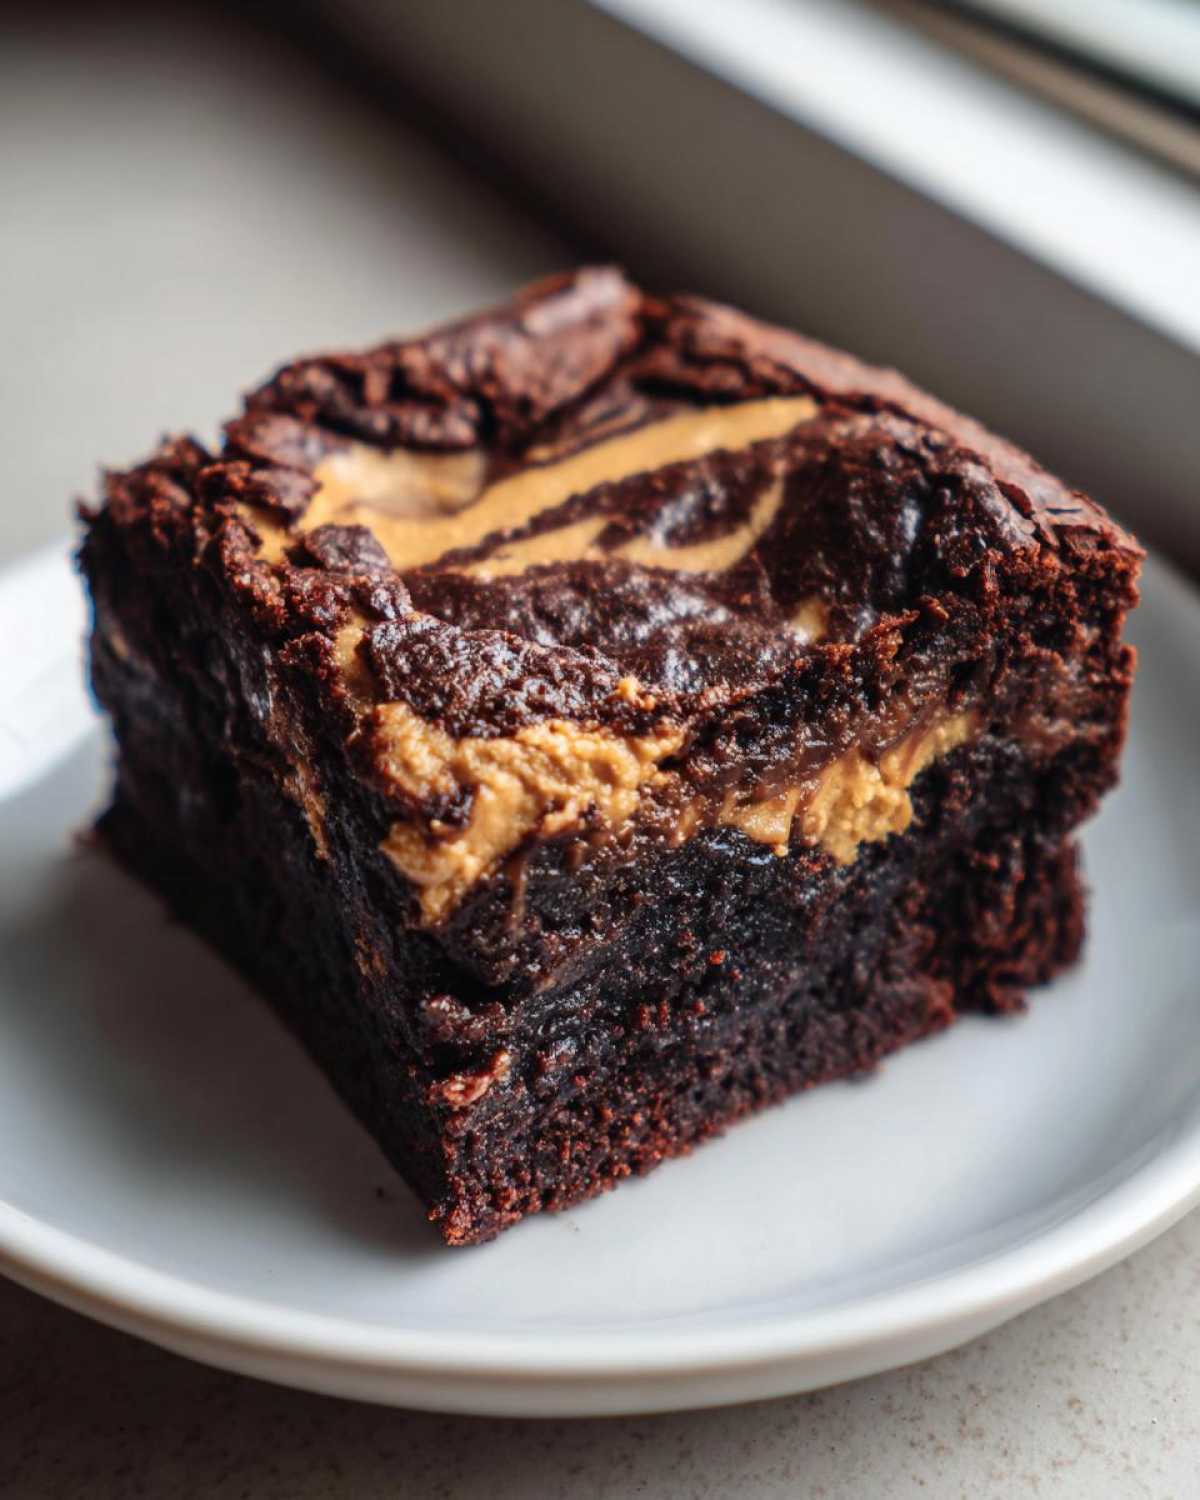
Grab a dull knife or a skewer. Gently run it through the layers in an S-pattern or figure-eight a few times. Do not go crazy! Over-swirling turns everything muddy. We just want a lovely, marbled effect for these easy homemade peanut butter brownies.
Baking and Cooling for Chewy brownies with peanut butter ribbon
Pop that pan into the 350 degree oven for about 30 to 35 minutes. You need to watch carefully! When you test them, you want a toothpick inserted near the center to come out with *moist crumbs* clinging to it—not wet batter, but not bone dry either. That’s the secret to those chewy brownies with peanut butter ribbon.
This final cooling step is brutal but necessary if you want that bakery style swirl brownies look. Let them cool *completely* in the pan on a wire rack. Once cooled, use those parchment overhangs to lift the whole slab out, and then slice them up. Patience pays off, I promise!
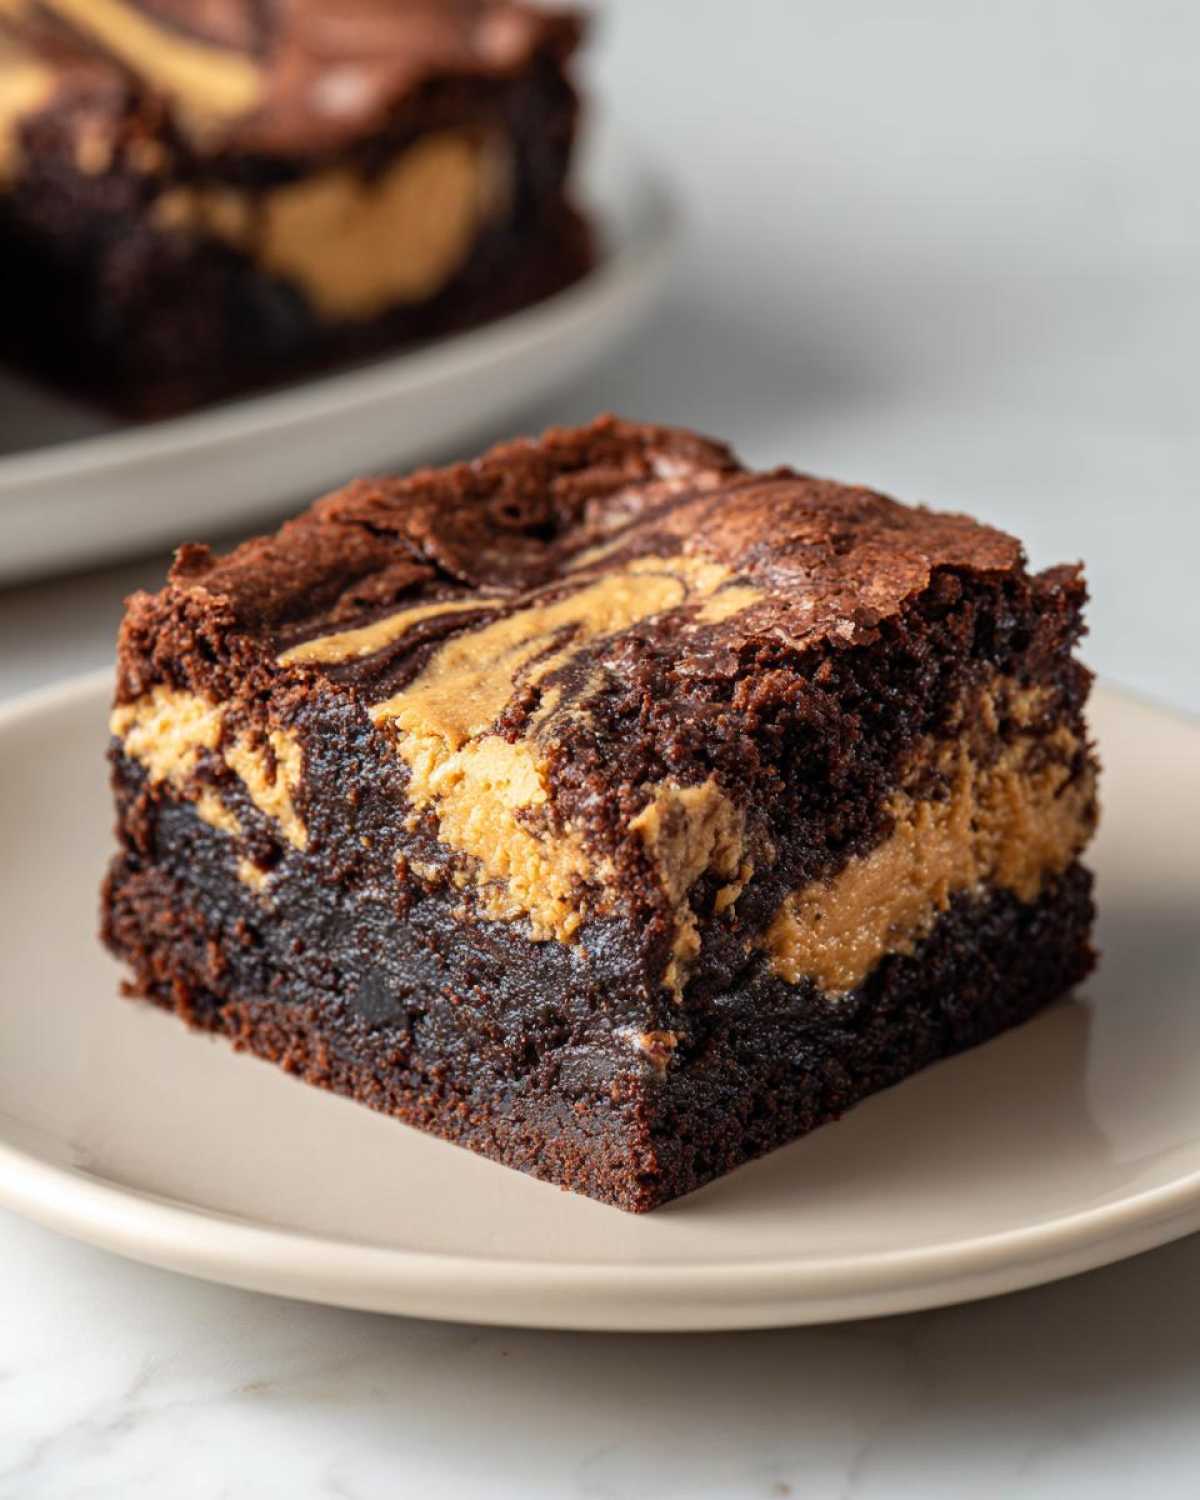
Expert Tips for the Best peanut butter swirl brownies Recipe
Even though these are fairly straightforward, I have a couple of tricks up my sleeve from all those test runs that you’ll want to know about. If you want the absolute thickest, most decadent slab of deliciousness, you can swap out that 9×13 inch pan for an 8×8 inch pan. Just remember, the pan needs to be smaller, meaning the heat has to travel further to the center, so you’ll need to add about 10 to 15 extra minutes to the baking time.
This is crucial for getting that truly signature fudgy texture—don’t rush it, or you’ll end up with undercooked goo in the middle! Also, if you’re making these ahead of time, I’ve found that storing them in an airtight container with a slice of bread (seriously, it works!) helps keep them fresh. For more quick, no-bake inspiration, check out my recipe for no-bake chocolate peanut butter cups!
Making Creamy peanut butter brownies: Ingredient Notes and Substitutions
Let’s talk specifics here, because sometimes grabbing the wrong jar from the pantry can totally derail a great batch of creamy peanut butter brownies. The star of this show, beyond the chocolate, is obviously the peanut butter itself! For the absolute best swirl texture—the one that melts beautifully into that gooey center—you really need to stick with standard, processed, creamy peanut butter. Think Jif or Skippy. Why? Because when you warm it up, it gets perfectly pourable.
Now, I know some of you out there are die-hard natural peanut butter fans, and you *can* use it, but be warned! Natural peanut butter separates when warmed, and you might end up with oily pockets in your swirl rather than a perfectly blended ribbon. If you insist, make sure you stir that separated oil right back into the solids before microwaving, or you might find your beautiful swirl turns into an oily mess.
As far as the dry stuff goes, I’m a purist here. For the ultimate decadent chocolate peanut butter dessert, you need that standard all-purpose flour and unsweetened cocoa powder. We aren’t using self-raising flour because that’s just asking for cake! And while I love experimenting, I find that substituting the cocoa powder throws off the crucial chocolate-to-sugar ratio needed for that crackly top. Stick to the script for this one, and you’ll never look back. For other ways I sneak peanut butter into treats, check out these chocolate peanut butter protein balls!
Storing and Reheating Your peanut butter swirl brownies
Okay, this is important: the proper storage of your peanut butter swirl brownies dictates how long that glorious fudgy texture lasts! Since these are so rich and moist, they actually hold up really well, but you do have to keep the air out.
I always store mine right on the counter, at room temperature, in a container that seals really tight. Seriously, an airtight container is your best friend here. They stay perfectly soft and gooey for about three days this way. If you try to put them in the fridge right away, and I mean *right* away, the butter tends to firm up too much, and you risk losing that luscious texture.
Room temperature storage works best for maintaining the brownie’s integrity. If, for some reason, you cut them but didn’t eat them all right away (unlikely, I know!), you can absolutely freeze them. Just make sure they are completely cooled, cut them into squares, place wax paper between layers, and pop them into a freezer-safe bag. They last ages in the freezer!
Now, if you’ve kept them in the fridge, or if you just like that gooey texture when you bite in, you might want to reheat them slightly. Pop a square on a microwave-safe plate for about 10 to 15 seconds. Not too long, or you’ll melt the swirl right out! That quick blast is just enough to bring back that warm, fresh-from-the-oven decadence.
Variations on Decadent chocolate peanut butter dessert
While I truly believe this recipe for peanut butter swirl brownies stands in a class all its own, sometimes I get that itch to switch things up! Baking is about making things your own, right? It’s all about jazzing up that amazing chocolate peanut butter base we built.
Here are a few little tweaks that keep my kitchen interesting without messing up the fudgy foundation. You don’t need a whole new recipe, just a small addition or two!
- That Flaky Salt Finish: Okay, this is my absolute favorite addition. Right after you finish gently swirling the layers, grab some flaky sea salt—Maldon is what I use—and sprinkle it lightly over the top. That little pop of salinity is incredible against the deep chocolate and the sweet peanut butter. It really takes these from homemade to *chef’s kiss*!
- Amp Up the Chocolate Factor: If you’re like me and believe you can never have enough chocolate, swap out the semi-sweet chips for dark chocolate chips. Then, when you’re drizzling the peanut butter, add a few spoonfuls of peanut butter chips right in with it. They melt beautifully and add a second texture you didn’t know you needed in your gooey peanut butter brownies!
- Add Some Crunch: If you have to use natural peanut butter because of dietary needs, remember how I said it gets oily? Well, you can mitigate that by using crunchy peanut butter instead, but you need to add a fun texture boost! Try mixing in a half cup of finely chopped peanuts with the chocolate chips in the brownie batter. It adds a satisfying bite that’s lovely with the creamy swirl.
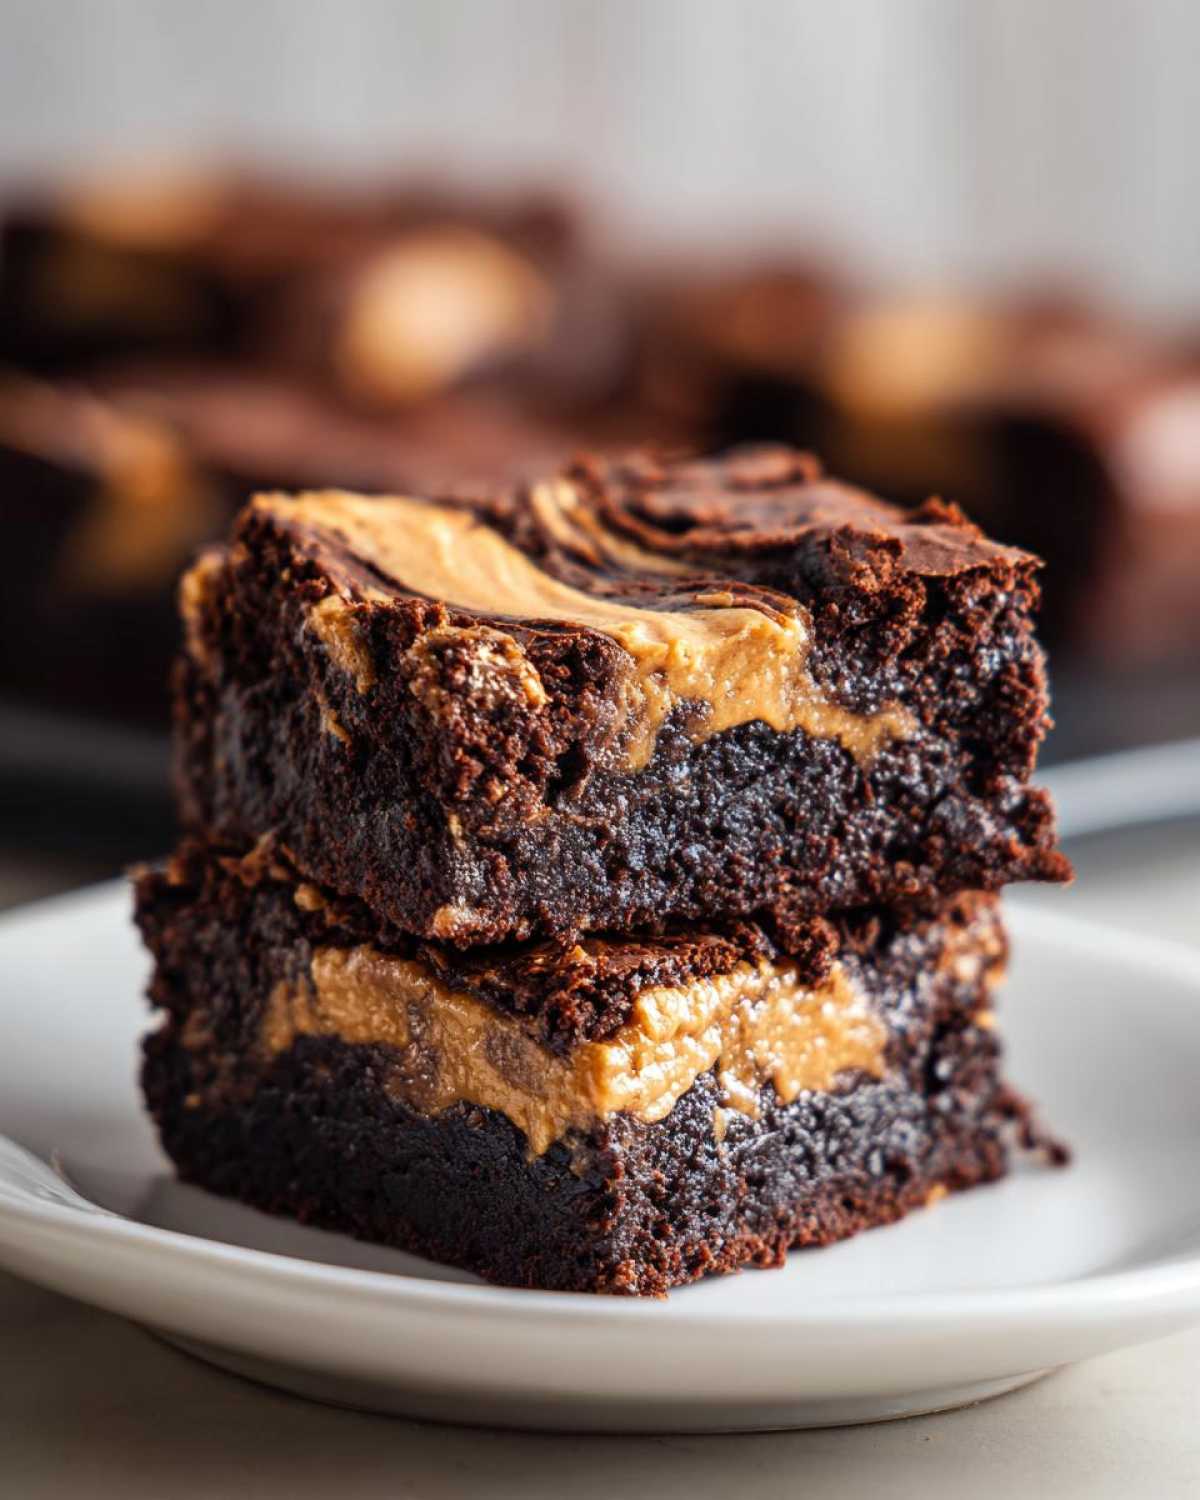
These little secrets are great for making a batch just for yourself or taking them to a party where everyone brings brownies! If you want to dive even deeper into the world of chocolate and peanut butter pairings, you have to check out my over-the-top Oreo Peanut Butter Brownie Cupcakes!
Frequently Asked Questions About peanut butter swirl brownies
I get so many questions when people try this recipe for the first time, mostly about the swirl and keeping that fudgy center intact! You’ve got questions; I’ve got answers based on what my kitchen experiments taught me. Here are the top things folks ask about making these peanut butter swirl brownies.
What is the secret to a glossy top on these peanut butter swirl brownies?
Ah, the shiny crown! Everyone wants that crackly, beautiful top that looks like it came straight from a fancy bakery. It all comes down to physics, really, but when you’re baking, it feels like magic. The main secret is the sugar ratio! We use a lot of that mixed granulated and brown sugar, melted with the butter first.
When you beat the eggs into that sugar/butter mixture, you’re creating a solution that—when baked—forms a meringue-like layer on top. And here’s the most important part to protect that layer: Do NOT overmix the batter once the flour goes in! Overmixing develops gluten, which pulls that shiny sugar layer down into the batter, making it flat and dull. Keep it mixed *just* until the flour disappears.
Can I use crunchy peanut butter for these gooey peanut butter brownies?
You absolutely *can*, and if you love texture, you might prefer it! I called for creamy peanut butter because warming it makes it super smooth and easy to drizzle into the batter for that beautiful, clean ribbon effect. Crunchy peanut butter tends to be thicker when warmed, and it’s harder to get those long, thin swirls; you’ll get more chunks interspersed.
If you use crunchy, just be prepared for a more speckled effect rather than a true swirl, which is totally fine if that’s what you like in your gooey peanut butter brownies! It still tastes amazing, of course. If you’re looking for some other great fudgy textures, you might enjoy my guide on Bayou Brownies!
Another common question I get is about make-ahead timing. Yes, you can totally make these ahead! I love them best when they’ve set up overnight in the fridge—it makes them even chewier. Just let them sit on the counter for about 30 minutes before serving to soften up just slightly.
Estimated Nutrition Data for This Decadent Dessert
Now, I’m going to be totally honest with you all: when you are making a dessert this rich and glorious, you probably aren’t reaching for it because you’re counting every single macro! These peanut butter swirl brownies are an indulgence, pure and simple. However, for those of you who like to keep track, I did assemble the estimates based on standard ingredient sizes for one square (cut into 16 pieces).
Please remember, this is just a guide! If you use natural peanut butter or add extra chocolate chips (which I highly recommend!), all those numbers will shift a bit. But this gives you a good baseline for enjoying this decadent chocolate peanut butter dessert responsibly!
Here is the breakdown for one serving:
- Serving Size: 1 square
- Calories: 280
- Sugar: 28g
- Fat: 17g
- Saturated Fat: 8g
- Carbohydrates: 30g
- Protein: 5g
- Sodium: 150mg
If you’re looking for something a bit lighter but still satisfying that chocolate craving, you might want to check out my recipe for moist chocolate chip banana bread. Either way, enjoy these—they are truly worth every bite!
PrintUltra Fudgy Peanut Butter Swirl Brownies
Make rich, fudgy brownies with a distinct, creamy peanut butter ribbon throughout. This scratch recipe delivers a perfect glossy top and decadent flavor.
- Prep Time: 15 min
- Cook Time: 35 min
- Total Time: 50 min
- Yield: 16 servings
- Category: Dessert
- Method: Baking
- Cuisine: American
- Diet: Vegetarian
Ingredients
- 1 cup (2 sticks) unsalted butter, melted
- 1 3/4 cups granulated sugar
- 1 cup packed light brown sugar
- 4 large eggs
- 1 tablespoon vanilla extract
- 3/4 cup unsweetened cocoa powder
- 1 cup all-purpose flour
- 1 teaspoon salt
- 1/2 teaspoon baking powder
- 1 cup semi-sweet chocolate chips
- 1 cup creamy peanut butter, slightly warmed
Instructions
- Preheat your oven to 350 degrees F. Line a 9×13 inch baking pan with parchment paper, leaving an overhang for easy removal.
- In a large bowl, whisk together the melted butter, granulated sugar, and brown sugar until smooth.
- Beat in the eggs one at a time until fully incorporated. Stir in the vanilla extract.
- In a separate bowl, whisk together the cocoa powder, flour, salt, and baking powder. Gradually add the dry ingredients to the wet ingredients, mixing until just combined. Do not overmix.
- Stir in the chocolate chips.
- Pour about two-thirds of the brownie batter into the prepared pan and spread evenly.
- Warm the peanut butter slightly so it is easily pourable. Drizzle the warmed peanut butter over the batter in random lines.
- Dollop the remaining one-third of the brownie batter over the peanut butter layer.
- Use a knife or skewer to gently swirl the peanut butter and chocolate layers together to create a marbled effect. Do not over-swirl.
- Bake for 30 to 35 minutes. The edges should look set, and a toothpick inserted near the center should come out with moist crumbs attached, not wet batter.
- Let the brownies cool completely in the pan on a wire rack before lifting them out using the parchment overhang and cutting them into squares.
Notes
- Warming the peanut butter briefly in the microwave (about 15-20 seconds) makes it easier to drizzle and swirl into the batter.
- For the best fudgy texture, avoid overbaking. Err on the side of underbaking slightly.
- If you prefer a thicker brownie, use an 8×8 inch pan instead, but increase the baking time by about 10-15 minutes.
Nutrition
- Serving Size: 1 square
- Calories: 280
- Sugar: 28
- Sodium: 150
- Fat: 17
- Saturated Fat: 8
- Unsaturated Fat: 9
- Trans Fat: 0
- Carbohydrates: 30
- Fiber: 2
- Protein: 5
- Cholesterol: 65