

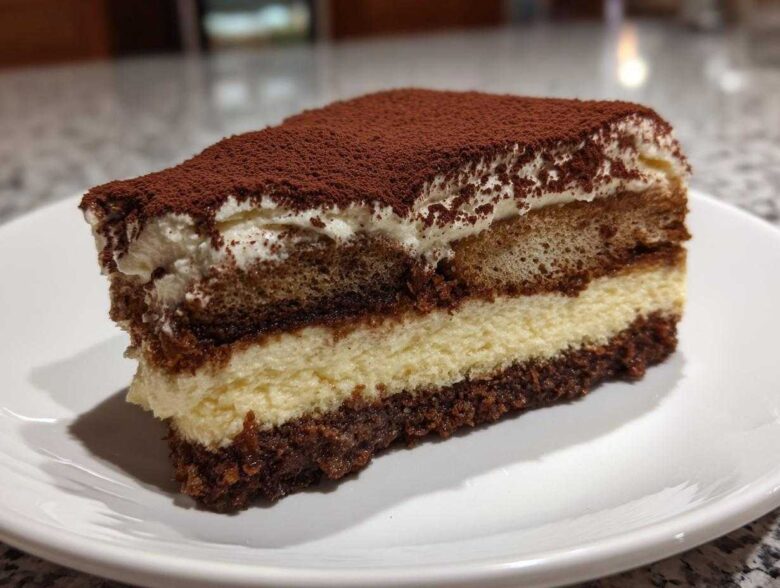
I love when two of my favorite desserts decide to get married in the kitchen! Seriously, who decided we had to choose between the bright tang of a creamy cheesecake and the rich, coffee-soaked bliss of authentic tiramisu? This fusion is genius, and trust me, this classic Italian dessert flavor profile absolutely shines in this ultimate treat that I call the No Bake tiramisu cheesecake. My first attempt was accidental—I mixed leftover mascarpone into a batch of cheesecake filling, and suddenly, I knew I had struck gold. This recipe is the perfect combination: all the decadent layers you crave without ever having to turn on the oven. It’s elegant, it’s easy, and you’re going to be asked for this recipe at every single gathering.
Why This No Bake tiramisu cheesecake is Your Next Favorite Dessert
Honestly, this dessert sells itself! It takes two heavy hitters and makes them better together, all without the stress of baking. It’s the definition of an easy, elegant dessert. You get all the wow factor with practically zero drama. Trust me on this one; it’s a crowd-pleaser.
Effortless Assembly for the Perfect tiramisu cheesecake
Since it’s a no-bake recipe, you skip the water baths and the cracking worries. This is truly a simple make ahead cheesecake option. Just mix, dip, layer, and chill. It sets up perfectly in the fridge, meaning you can make it completely the day before your party!
Intense Coffee Flavor in Every Layered Coffee Dessert Bite
The magic here is in the soaking time. Those ladyfingers soak up just enough of that strong espresso mixture to taste authentic. You get that gorgeous, complex coffee note blending right into the creamy, tangy filling. Every forkful is a perfectly balanced Layered Coffee Dessert experience.
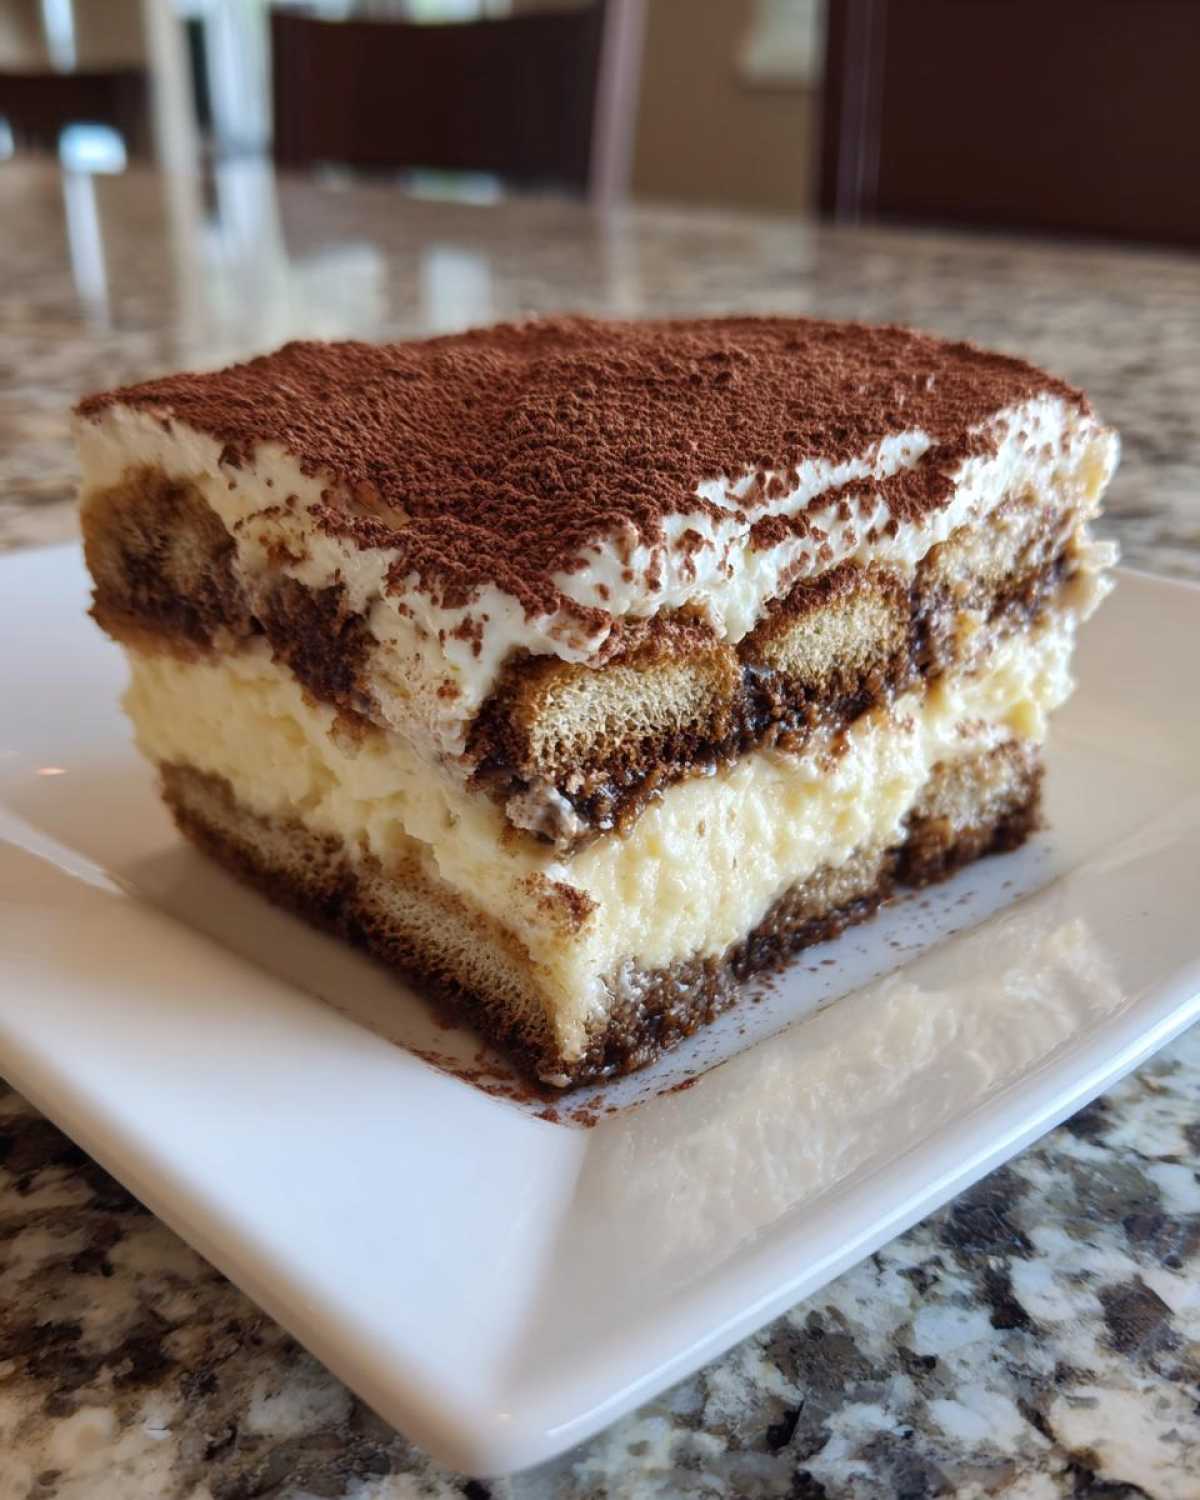
Essential Ingredients for a Silky Smooth tiramisu cheesecake
Okay, when we are making a no-bake cheesecake like this, the quality of the cold ingredients makes or breaks the texture. Since we aren’t baking away any water content, everything needs to be exactly right to achieve that truly Silky Smooth Cheesecake finish. Don’t even think about using cold cream cheese here; it will give you lumps, and we’re aiming for pure elegance! Let’s talk about what you need for the best tiramisu cheesecake fusion.
Crust Components and Preparation
For the base, you need graham cracker crumbs—I find they give the best sturdy foundation—mixed with just a dash of sugar and melted butter. You must press this mixture firmly into the bottom of your springform pan. Really pack down evenly with the bottom of a glass; a loose crust crumbles when you try to slice it later, and nobody wants that disappointment!
Mascarpone Cheesecake Filling Details
The star here is the dairy duo! You need a full pound of cream cheese, and don’t forget the mascarpone. I cannot stress this enough: both need to be completely softened at room temperature. This is your secret weapon for achieving that decadent, smooth texture. Add your powdered sugar slowly once the cheeses are beaten smooth—this keeps the mixture from getting grainy.
The Espresso Soaking Liquid
This is where the tiramisu flavor really kicks in. You must use strongly brewed, freshly cooled espresso, not weak drip coffee. If you want that grown-up kick, adding a splash of coffee liqueur is wonderful, but strong espresso alone works magic. Remember, this liquid gets absorbed, so it needs that deep, dark coffee punch!
Step-by-Step Instructions for the Ultimate tiramisu cheesecake
Now that everything is perfectly prepped and chilled, it’s time to bring this gorgeous dessert together. Assembly goes really fast once you get into the rhythm, but pay close attention to the ladyfinger dipping step. That’s the one part where people usually go wrong, ending up with either dry cookies or a soggy mess!
Creating and Chilling the Crust
First things first, make sure that crumb mixture is uniform and press it down hard into the bottom of that springform pan. If you’re using a 9-inch pan, you want that edge to be nice and solid. Pop that crust into the freezer or fridge for fifteen minutes while you whip up the filling. That little bit of chill time keeps it from mixing up with the creamy layers above it.
Mixing the Creamy Mascarpone Cheesecake Filling
This is where your softened cheeses pay off big time! Use your electric mixer on medium speed and beat the cream cheese and mascarpone together until they are completely lump-free. Seriously, stop and scrape down the sides often. Once it’s silky, slowly add the powdered sugar and vanilla. It blends so smoothly!
Layering the Espresso Ladyfinger Dessert
This is the crucial part for your clean slicing later! Grab your espresso and liqueur mixture. Dip each ladyfinger into the espresso bath for only one, maybe two seconds on each side—quick dip in, quick pull out! You want them moistened, not soggy. Lay that first layer down, spread half your filling over it gently, then repeat with the second layer of dipped cookies and the rest of your espresso ladyfinger dessert.
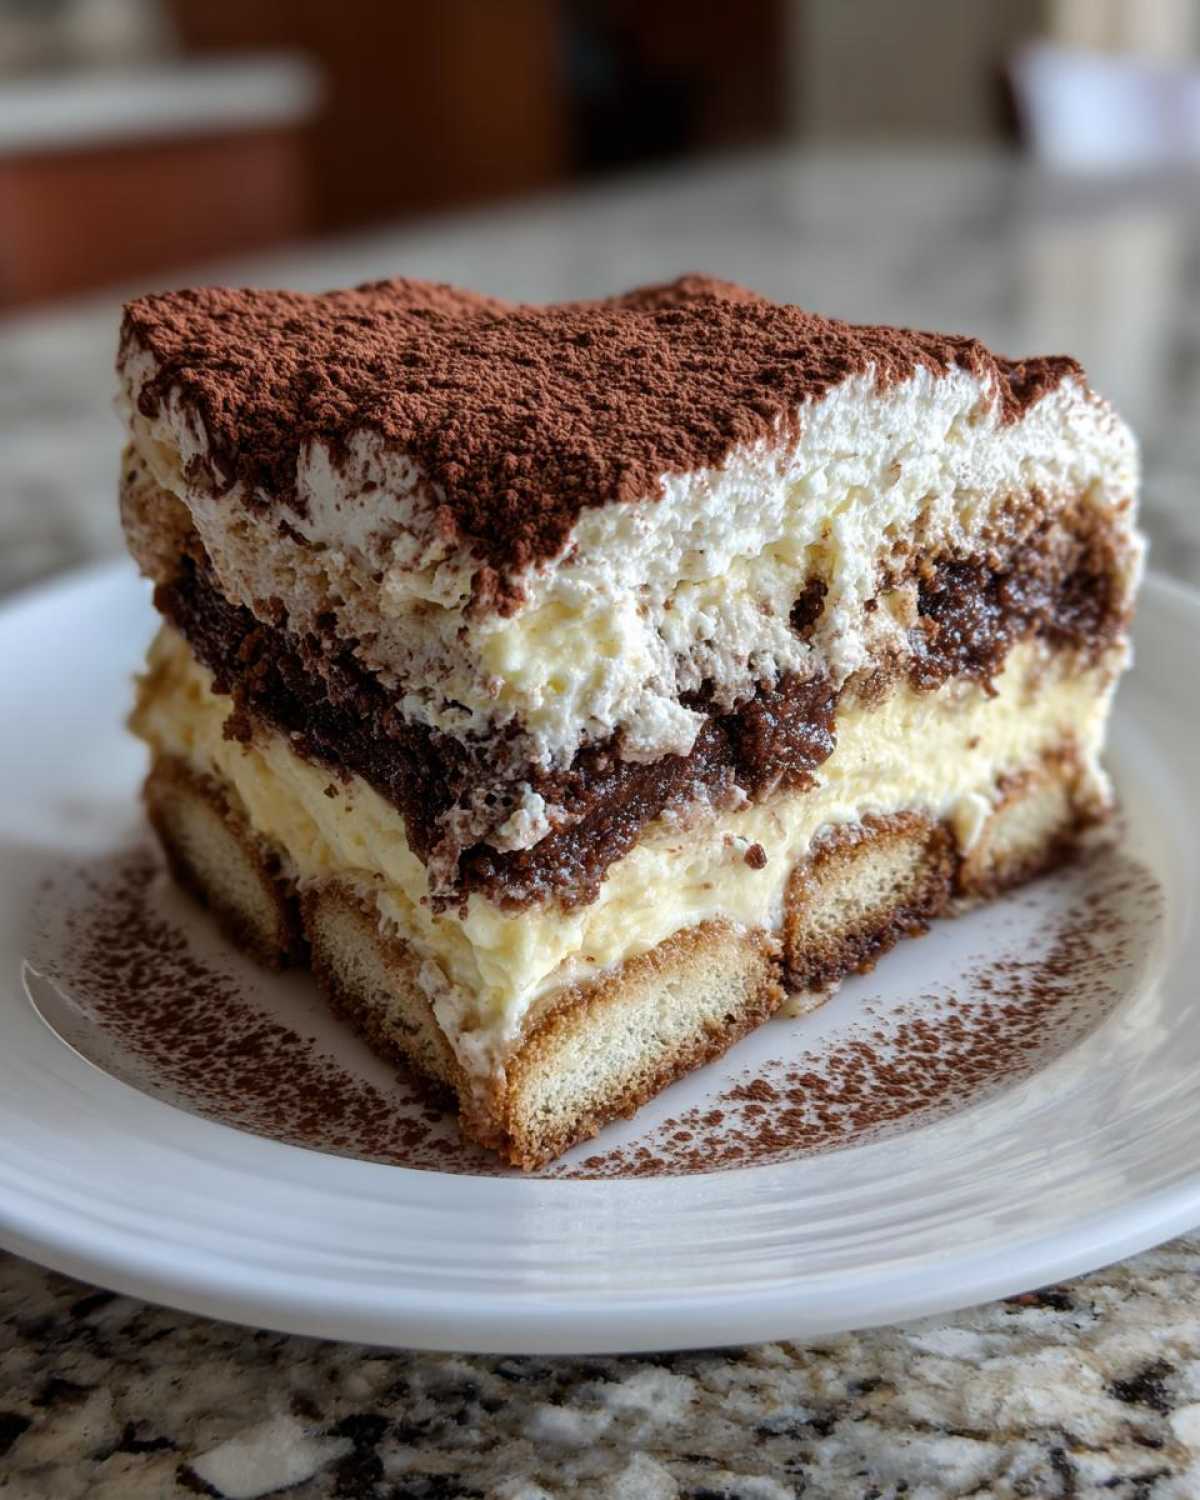
Setting and Finishing the tiramisu cheesecake
Once the top is smooth, cover it tightly with plastic wrap. It needs time to firm up, so don’t cheat the chill time! I always aim for overnight, but if you absolutely can’t wait, six hours is the minimum to get a sliceable tiramisu cheesecake. Right before serving, release the springform sides and dust the whole top beautifully with unsweetened cocoa powder. It’s stunning!
Tips for Achieving a Perfect No Bake tiramisu cheesecake
I have made this dessert dozens of times—for holidays, stressful Tuesdays, you name it. Over the years, I’ve learned a few little tricks that elevate it from just good to absolutely unforgettable, especially when aiming for that impossibly Creamy Tiramisu Cake texture.
Here are the survival tips I always pass along:
- Never Skip the Scrape Down: When mixing the mascarpone and cream cheese, you have to stop the mixer multiple times to scrape down the bowl. If you don’t, you’ll have little lumps of unmixed cheese hiding in your filling, especially where the beaters don’t quite reach. A smooth mixture equals a smooth cake!
- Espresso Strength is Everything: People often ask if they can use instant coffee. Sure, you *can*, but the flavor vanishes! You need strong, cooled, dark-roasted espresso. It’s the backbone of the tiramisu flavor, so go dark or go home on this one.
- Room Temperature Dairy is Non-Negotiable: I mentioned it before, but it’s worth repeating: if your cream cheese or mascarpone is even slightly cold, it won’t emulsify properly with the sugar. You’ll end up with a curdled look instead of that dreamy, velvety texture we’re after. Pull them out at least an hour before you start mixing.
- The Cocoa Must Be Unsweetened: When you dust the top, use pure, high-quality unsweetened cocoa powder. The light bitterness of the dark cocoa cuts through the richness of the cheesecake beautifully. If you use sweetened cocoa, it just tastes muddy and too sweet against the filling.
Serving Suggestions for Your Decadent Cheesecake Ideas
This Decadent Cheesecake Ideas is definitely fancy enough to be the centerpiece of any dinner party or holiday table. Since it’s already a very layered and richly flavored dessert, you don’t need to fuss too much with side dishes, but a few simple additions can really make the presentation sing!
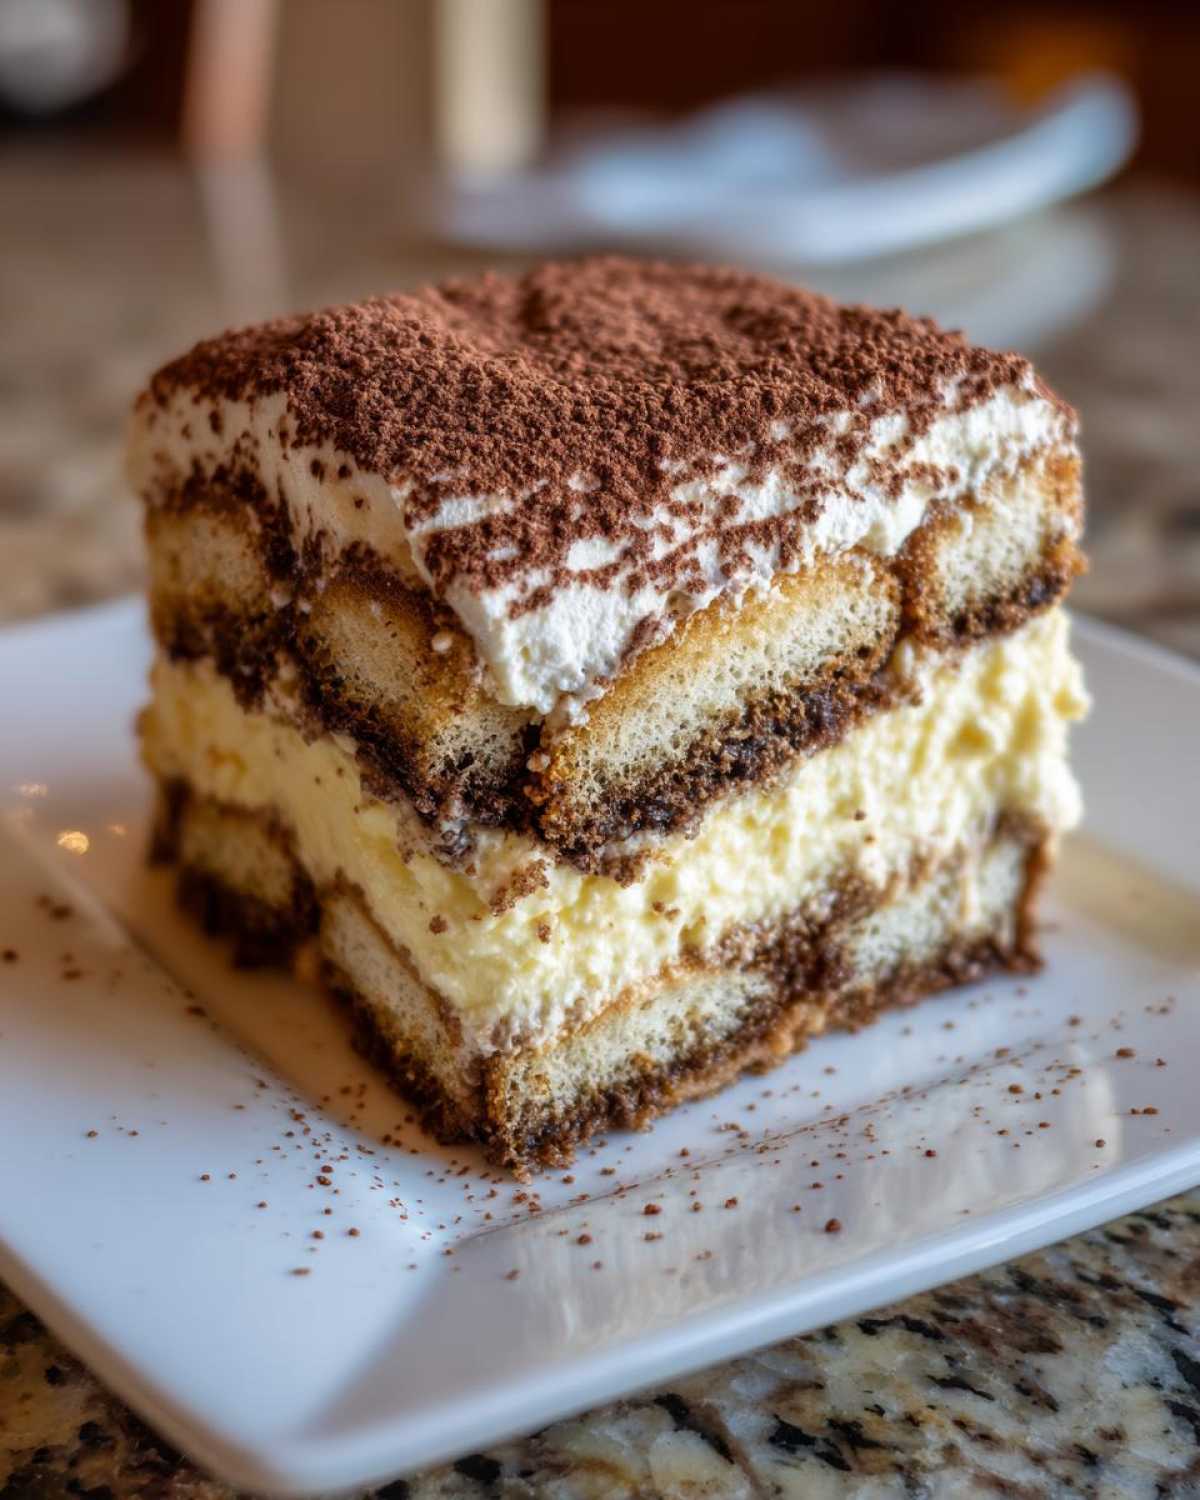
When you slice it, the cross-section showing the dark ladyfingers against the pale, creamy filling is stunning all on its own. But if you want to add just a little extra flair:
- Chocolate Shavings: Forget the cocoa powder for a moment! Use a vegetable peeler on a bar of high-quality bittersweet chocolate to create long, delicate curls right over the top just before serving. The texture contrast is divine.
- A Dollop of Cream: Since this is no-bake, it’s naturally lighter than its baked cousin. A very small quenelle (that’s fancy French talk for an oval scoop) of unsweetened or lightly sweetened whipped cream served right next to the slice adds a lovely softness.
- Raspberry Drizzle: Coffee and berries are an underrated pairing! If you have a couple of fresh raspberries or strawberries on your plate, the slight tartness brightens up the heavy coffee and cream flavor magnificently. Just don’t overdo it; we want the tiramisu flavor to lead the way!
Remember that because this is a freezer-set dessert, let it sit on the counter for about 10 or 15 minutes before slicing. That little bit of warming allows the knife to glide through cleanly, giving you those perfect, restaurant-quality slices every single time.
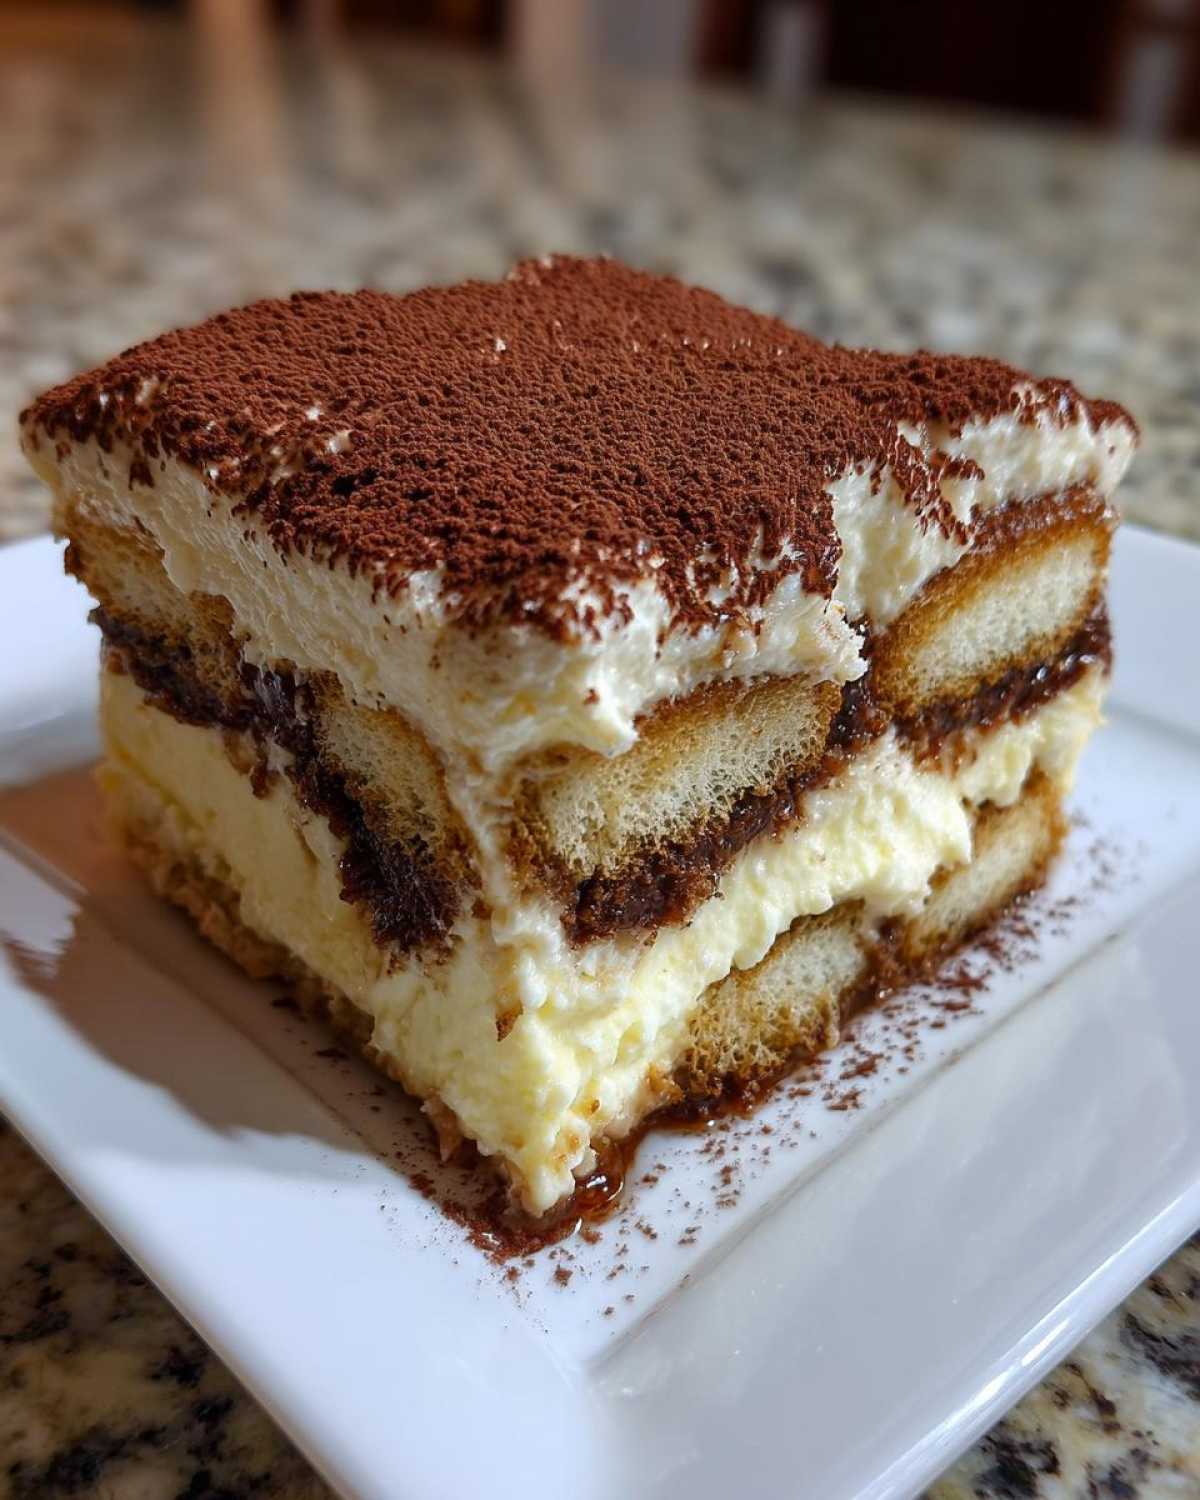
Storage and Make Ahead tiramisu cheesecake Tips
One of the best parts about this dessert truly being a Simple Make Ahead Cheesecake is that you can plan ahead! I often make this dessert the day before a party because, honestly, it tastes even better the next day. All those coffee flavors have more time to settle into the mascarpone filling, making the whole thing taste deeper and more complex. It’s a baker’s dream!
But how do you keep it fresh until serving time? That’s all about wrapping it tight.
Keeping Leftovers Fresh for Days
If you happen to have any left over after the party (which is rare in my house!), storage is easy. You need to seal that pan up tight. After releasing the springform sides, I usually slide the whole plate onto a slightly larger plate, cover the whole thing loosely with plastic wrap, and then pop it in the fridge. If you’re keeping it for more than two days, I recommend covering the top directly with parchment paper first, then the plastic wrap. This prevents the plastic wrap from sticking to the cocoa powder dusting—nothing worse than pulling off plastic and taking half the gorgeous chocolate topping with it!
Maximum Chill Time for Best Texture
For a truly firm set, you want to aim for overnight. Six hours is the absolute minimum for the filling to stop weeping and become sliceable, but 12 to 18 hours is my sweet spot. If you try to cut it too early, the richness of the mascarpone hasn’t quite solidified enough, and you end up with a beautiful puddle instead of an elegant slice. Patience truly pays off with this **tiramisu cheesecake**!
Freezing the Dessert?
Okay, this is controversial, but I have done it! Because it’s a no-bake recipe, you have to be careful because of the high dairy and moisture content. If you want to freeze it, do so *before* dusting the top with cocoa powder. Wrap the entire, assembled, chilled cheesecake extremely tightly in two layers of plastic wrap, followed by a layer of foil. Freeze it flat. Thaw it slowly in the refrigerator overnight. Once it’s thawed, you can decorate it with the fresh cocoa dusting. The texture usually holds up really, really well!
Common Questions About This tiramisu cheesecake Fusion
Whenever I post a picture of this amazing dessert fusion online—my ultimate Tiramisu Inspired Baking masterpiece—I always get the same questions flooding my DMs. It makes total sense; combining two beloved recipes always leaves people wondering about the fine line between perfection and disaster! Here are the most common things I hear about making this **tiramisu cheesecake**.
Can I use instant coffee instead of brewed espresso?
I get why people ask this! Instant coffee is so convenient, right? Look, for this recipe, I really, really suggest you don’t cut corners here. Instant coffee granules, even mixed with hot water, just don’t give you the depth of flavor you need for a real Italian dessert experience. The coffee has to stand up to the rich mascarpone and cream cheese. If you must use instant, use double the amount you think you need and make sure it’s a very dark roast blend. But honestly, brewing a strong pot of espresso or using instant espresso powder is the way to guarantee that classic kick!
Can I bake this instead of making it a no-bake cheesecake?
That’s a great question, and yes, you absolutely can, although this recipe is designed to be quick! If you decide to bake it, you’ll need to treat it much more like a traditional cheesecake. After pressing the crust and pouring in the filling, you’d bake it at a lower temperature—around 325°F—for about 50 to 60 minutes, until the center is just barely set. The crucial part is the cooling: you must cool it slowly in the oven with the door ajar to prevent cracking. But if you want the simplicity of the no-bake version, just stick to the chilling time, and you’ll still get that incredible, creamy texture!
My leftover cheesecake seems watery when I slice it the next day—why?
Ah, the dreaded weeping cheesecake! This usually happens for two reasons when dealing with a **tiramisu cheesecake** like this. First, if you didn’t press the crust down firmly enough, the moisture from the filling seeps down, making the base soggy. Second, and more common, is that the dairy wasn’t cold enough when you started mixing, or you didn’t chill it long enough. Make sure you hit that 6-hour minimum chill, ideally overnight. Also, when you take it out to serve, don’t let it sit on the counter for more than 30 minutes before slicing, or the filling starts to warm up too fast and loses its structural integrity.
How can I make this recipe just a little bit lighter on the sugar?
While the sugar is essential for setting this no-bake filling, I totally get wanting to dial it back a notch. The most effective way to cut sweetness without ruining the texture is to substitute some of the powdered sugar with a high-quality erythritol or monk fruit blend meant for baking. Powdered sugar blends the smoothest, so if you swap more than half, you might notice a slight graininess. More importantly, make sure you are using unsweetened cocoa powder on top—that slight bitterness is what balances the sweetness of the filling perfectly!
Estimated Nutritional Overview
I always try to keep track of what we’re eating, even with a decadent dessert like this **tiramisu cheesecake**! Now, you have to promise me you’ll take these numbers with a grain of salt, okay? Since this recipe uses real butter, rich mascarpone, and graham crackers, it’s definitely an indulgent treat. I ran the ingredients through a standard nutrition calculator, but variations in brands and exact measurements mean these are just good ballpark figures for comparison.
Whenever I serve this for a party, I just tell everyone it’s rich, homemade, and worth every single bite. Transparency is key for building trust, right?
Here is what you can generally expect per slice (assuming 10 servings):
- Serving Size: 1 delicious slice
- Calories: Around 450 calories
- Total Fat: Roughly 30g (Be mindful of that saturated fat content—it’s the butter and cream cheese doing their delicious work!)
- Carbohydrates: About 38g
- Protein: Approximately 8g
- Sugar: Sadly, about 35g (That’s the powdered sugar and ladyfingers adding up!)
- Cholesterol: Around 95mg
Remember, these numbers only apply if you stick to the recipe amounts and you get exactly 10 nice servings out of your 9-inch pan. If you cut bigger slices for your hungry guests, those numbers go up immediately! Enjoy in moderation, and maybe have an extra cup of coffee with it!
Share Your Homemade Italian Inspired Desserts
Now that you’ve got the secrets to making my favorite Homemade Italian Inspired Desserts fusion—the No Bake tiramisu cheesecake—I want to see them! I live for those moments when you all try my recipes and send me pictures of your amazing results. Seriously, do not keep that beautiful creation hidden on your kitchen counter!
Snap a photo once you give that final dusting of cocoa powder. Tag me on all the social spots! Seeing your layers come out perfectly set is the best reward for all that chilling time you put in.
And hey, cooking is all about questions, right? If you made this and you had a little hiccup, or if you tried swapping cream cheese for something else, shout it out in the comments below! I read every single comment, and I love helping troubleshoot or just hear how much everyone enjoyed this spectacular dessert. Did your ladyfingers get too soggy? Did you use Kahlua instead of liqueur? Tell me everything so we can share the knowledge. Happy baking—or, well, happy *chilling*!
PrintNo Bake Tiramisu Cheesecake
A creamy, no-bake cheesecake that combines the rich flavor of tiramisu with a classic cheesecake base, featuring espresso-soaked ladyfingers.
- Prep Time: 30 min
- Cook Time: 0 min
- Total Time: 6 hr 30 min
- Yield: 10 servings
- Category: Dessert
- Method: No Bake
- Cuisine: Italian Inspired
- Diet: Vegetarian
Ingredients
- 1 1/2 cups graham cracker crumbs
- 1/4 cup granulated sugar
- 6 tablespoons unsalted butter, melted
- 16 ounces cream cheese, softened
- 1 cup mascarpone cheese
- 1 cup powdered sugar
- 1 teaspoon vanilla extract
- 1/4 cup strong brewed espresso, cooled
- 1/4 cup coffee liqueur (optional)
- 1 package (7 ounces) ladyfingers
- Cocoa powder, for dusting
Instructions
- Combine graham cracker crumbs and 1/4 cup granulated sugar in a bowl. Pour in melted butter and mix until crumbs are evenly moistened. Press the mixture firmly into the bottom of a 9-inch springform pan. Chill the crust for 15 minutes.
- In a large bowl, beat the softened cream cheese, mascarpone cheese, and powdered sugar with an electric mixer until smooth and creamy. Beat in the vanilla extract.
- In a small bowl, mix the cooled espresso and coffee liqueur, if using.
- Quickly dip each ladyfinger into the espresso mixture for just 1-2 seconds per side; do not over-soak. Arrange a single layer of the dipped ladyfingers over the chilled crust.
- Spread half of the cheesecake filling evenly over the layer of ladyfingers.
- Arrange a second layer of espresso-dipped ladyfingers over the filling.
- Top with the remaining cheesecake filling and smooth the top with a spatula.
- Cover the pan tightly with plastic wrap and refrigerate for at least 6 hours, or preferably overnight, until firm.
- Before serving, carefully remove the sides of the springform pan. Dust the top generously with cocoa powder.
Notes
- For a silkier texture, ensure your cream cheese and mascarpone are fully at room temperature before mixing.
- If you prefer a baked version, bake the crust for 10 minutes at 350°F, then bake the filled cheesecake at 325°F for 50-60 minutes, then cool slowly.
- Use high-quality, strong brewed espresso for the best coffee flavor.
Nutrition
- Serving Size: 1 slice
- Calories: 450
- Sugar: 35g
- Sodium: 250mg
- Fat: 30g
- Saturated Fat: 18g
- Unsaturated Fat: 12g
- Trans Fat: 0g
- Carbohydrates: 38g
- Fiber: 1g
- Protein: 8g
- Cholesterol: 95mg