

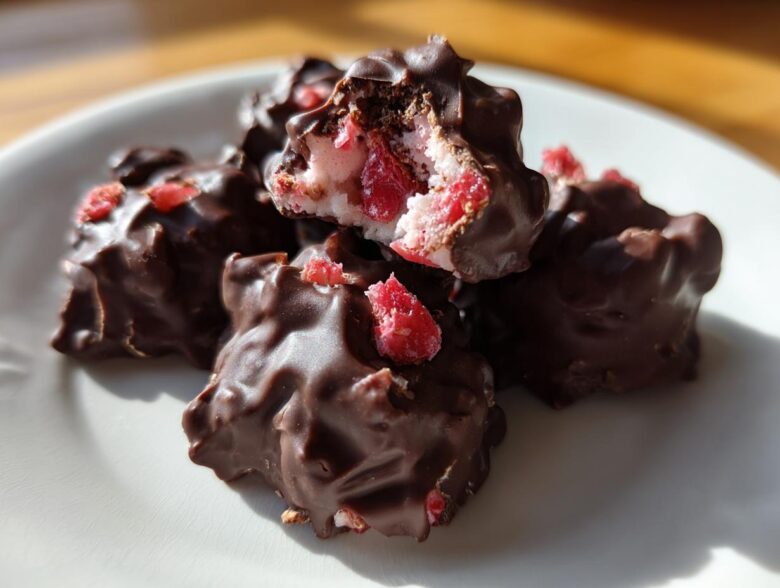
If you’re anything like me, when that summer heat hits, the last thing you want to do is turn on the oven for an hour. I live for quick fixes, especially when they taste like a decadent treat but sneak in some protein! Trust me, these No-Bake Chocolate Strawberry Yogurt Clusters changed my afternoon snack game completely. They are ridiculously easy—the hardest part is waiting for them to freeze solid!
The magic here is the combination: tangy Greek yogurt, sweet strawberries, and that satisfying snap of chocolate coating. I started whipping these up last year because my kids were constantly asking for ice cream bars, and I needed something fast, filling, and lower effort. These clusters are my go-to healthy chocolate snack when I need a satisfying bite that takes maybe fifteen minutes of actual hands-on time. Seriously, you scoop, you freeze, you dip. That’s it!
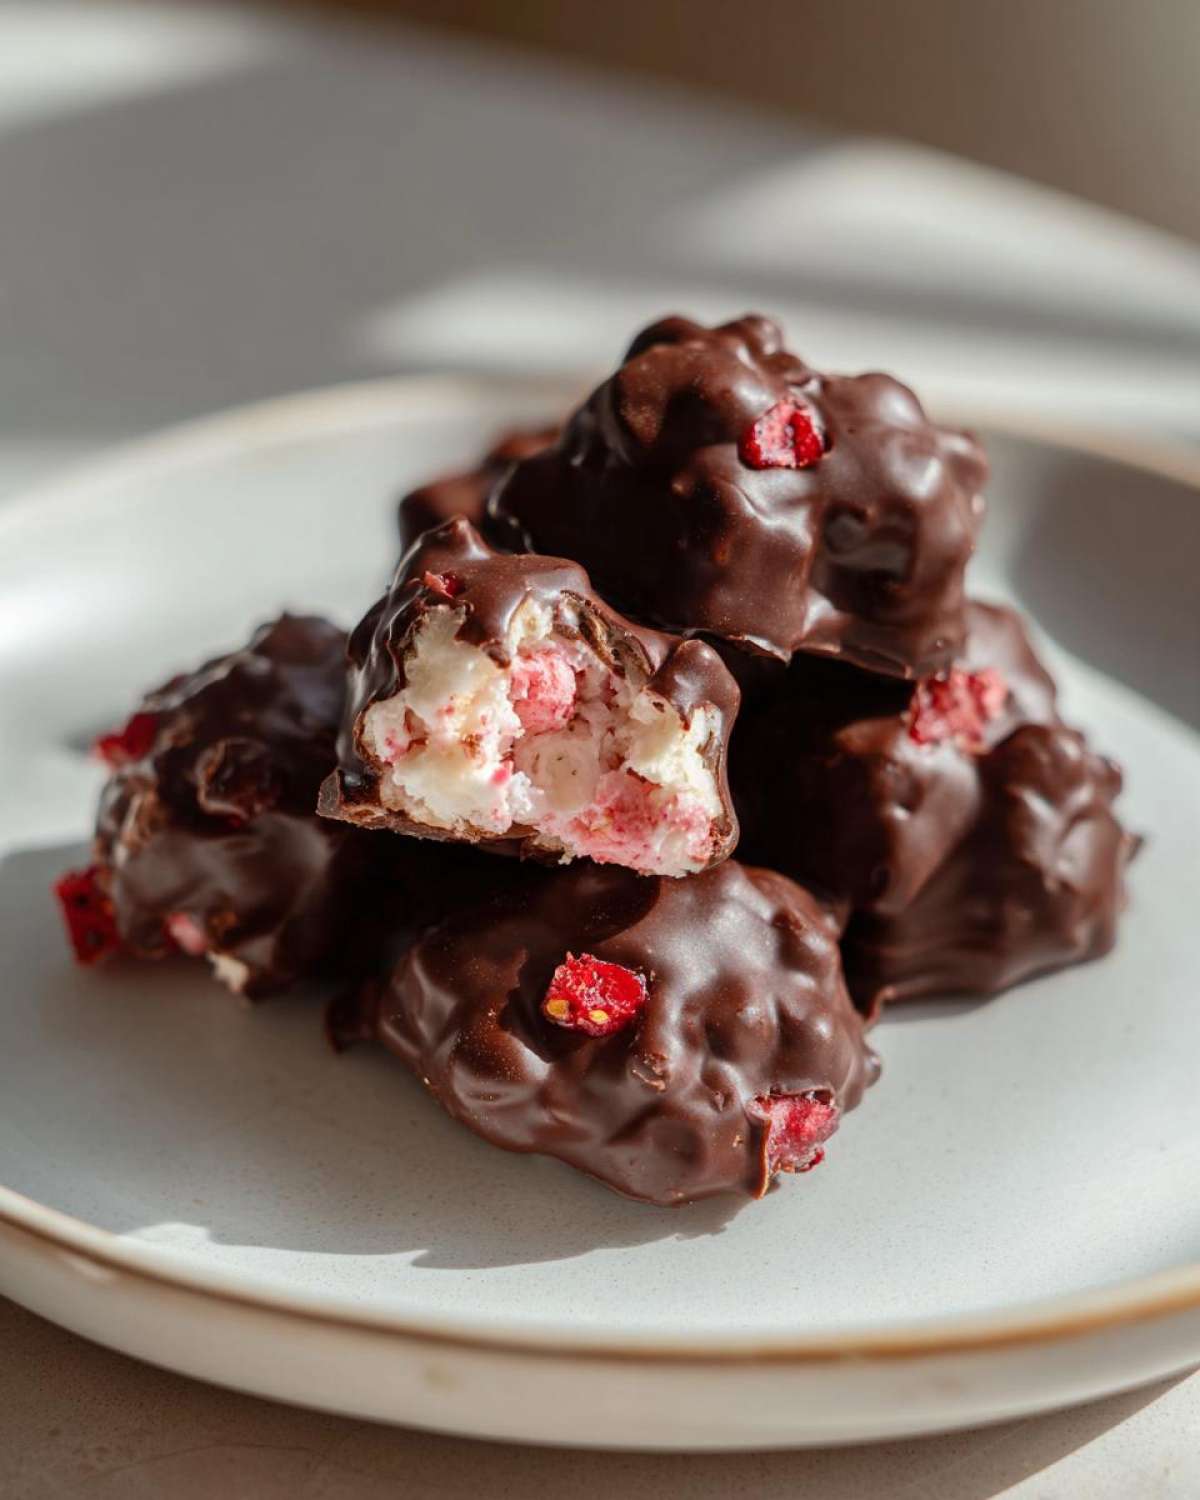
Why You Will Love These No-Bake Chocolate Strawberry Yogurt Clusters
I’m telling you, these little bites are sunshine in a freezer bag. Everything about this recipe screams ‘easy summer fix,’ and they disappear way too fast in my house. If you need a new staple in your rotation of No Bake Snacks, these are it!
- Zero Oven Time Required: Seriously, the freezer does all the heavy lifting here! This means the kitchen stays cool, and cleanup is a breeze.
- Perfect Portion Control: These are naturally bite-sized scoops, so you feel good grabbing just one or two. They make fantastic Quick Dessert Bites when you need something sweet right now.
- Flavor Bomb: That little bit of tang from the yogurt cuts through the richness of the chocolate wonderfully. The strawberries add just enough fruity freshness.
- Quick Prep Time: You are looking at maybe 15 active minutes total before they head to the freezer. It’s the perfect recipe for when you only have a little window of energy.
- Freezer Friendly Snacks: Keep a batch stashed away! They are incredible straight from the freezer on a hot afternoon.
Essential Ingredients for Perfect No-Bake Chocolate Strawberry Yogurt Clusters
Okay, this is where we build the magic! Because these clusters are all about simple, quality components, you really want to pay attention to what you’re putting in. Since we aren’t baking anything, the yogurt’s texture is everything. For the best results—and trust me on this one—you need that full-fat or 2% Greek yogurt. Non-fat just gets too icy! I always keep a list handy, just in case I’m whipping these up on autopilot.
Speaking of tips, if you are looking to tweak the protein ratio in your yogurt base, check out my notes on protein ratios in puddings—it helps stabilize things if you decide to reduce the sugar slightly!
Here is exactly what you need right on your counter:
- 1 cup Greek yogurt, full fat or 2% (Remember, full fat wins for texture!)
- 1/2 cup fresh strawberries, finely diced (We want small pieces so they freeze evenly!)
- 1/4 cup powdered sugar
- 1 teaspoon vanilla extract
- 1 cup semi-sweet chocolate chips
- 1 tablespoon coconut oil (This helps everything melt smoothly for dipping.)
- 1/4 cup chopped nuts or seeds (Totally optional, but I love a little crunch!)
Step-by-Step Guide to Making No-Bake Chocolate Strawberry Yogurt Clusters
Getting these No-Bake Chocolate Strawberry Yogurt Clusters together is truly a snap, but the timing of the freezing steps is what separates a perfect cluster from a melty puddle. Think of this like building layers—we have to build the ice structure before we can dip it in that gorgeous chocolate shell. Don’t rush the freeze! We need these solid as rocks before they even think about meeting the warm melted chocolate.
Preparing the Yogurt Base and Freezing
First things first, line up your baking sheet with parchment paper—trust me, you don’t want these sticking later! Now grab a bowl and gently fold together that beautiful Greek yogurt, your finely diced strawberries, powdered sugar, and vanilla extract. You only want to mix until everything is *just* incorporated. If you stir these too vigorously, you break down the yogurt structure, and they won’t hold their shape as well when they freeze. Once mixed, use a tablespoon or a small cookie scoop to drop little dollops onto the parchment. These will be your initial clusters. Now, they go straight into the freezer for a minimum of two hours. They absolutely must be rock hard before moving on.
Melting the Chocolate Coating for Your No-Bake Chocolate Strawberry Yogurt Clusters
While those are hardening up, let’s get our chocolate ready. Grab a microwave-safe bowl—use glass or ceramic, not plastic, please! Toss in your chocolate chips and that tablespoon of coconut oil. The oil is our secret weapon for a smooth, dippable consistency, so don’t skip it! Microwave in quick 30-second bursts. After each burst, take it out and stir it really well, even if it looks mostly melted. Chocolate is sneaky; it looks fine until you stir, and then suddenly it’s seizing up on you! We want silky smooth, not chunky. Be patient, keep stirring, and you’ll have perfect dipping chocolate.
Dipping and Setting the Final Chocolate Yogurt Bites
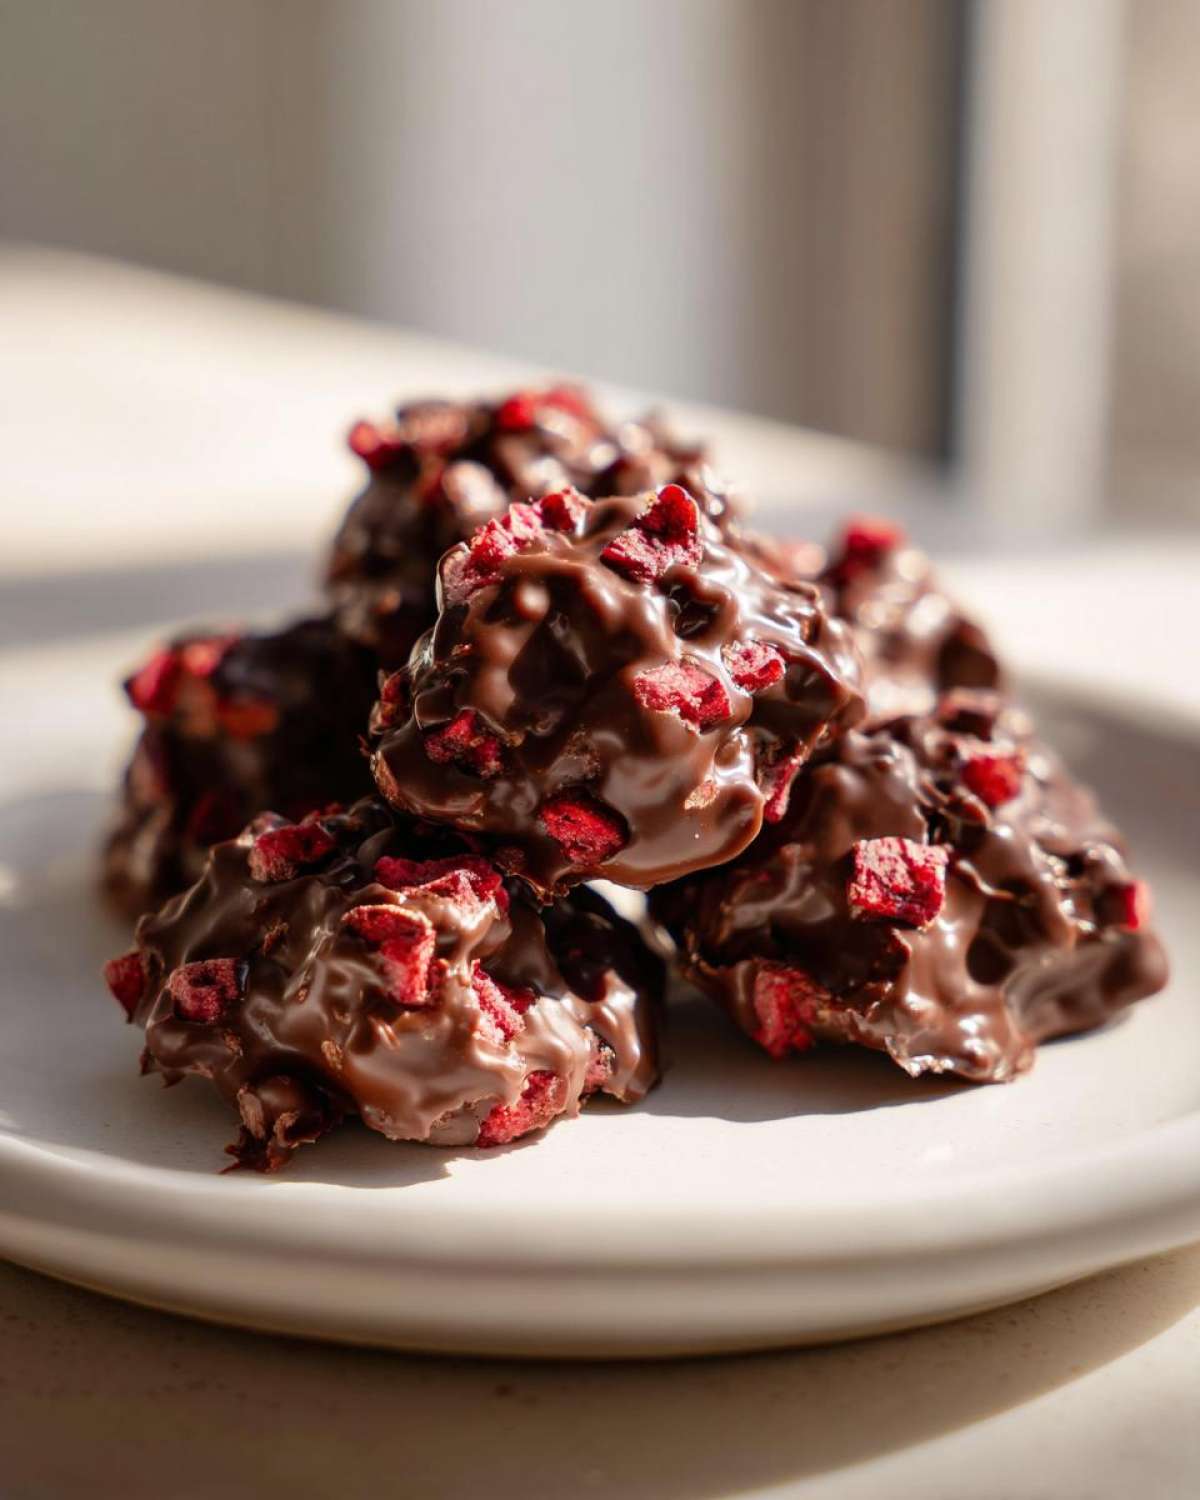
Time for the fun part! Pull those frozen yogurt mounds out of the freezer. You have options here: you can quickly dip each cluster right into the chocolate bowl, or if you prefer smaller chocolate-to-yogurt ratios, just drizzle it right over the top. If you’re adding those optional chopped nuts or seeds, sprinkle them on right after dipping while the chocolate is still wet. Pop the finished Chocolate Yogurt Bites back onto that parchment-lined tray for a final 15-minute freeze. This sets the chocolate fast, giving you that satisfying *snap* when you bite into your No Bake Snacks!
Tips for Success with Frozen Strawberry Treats
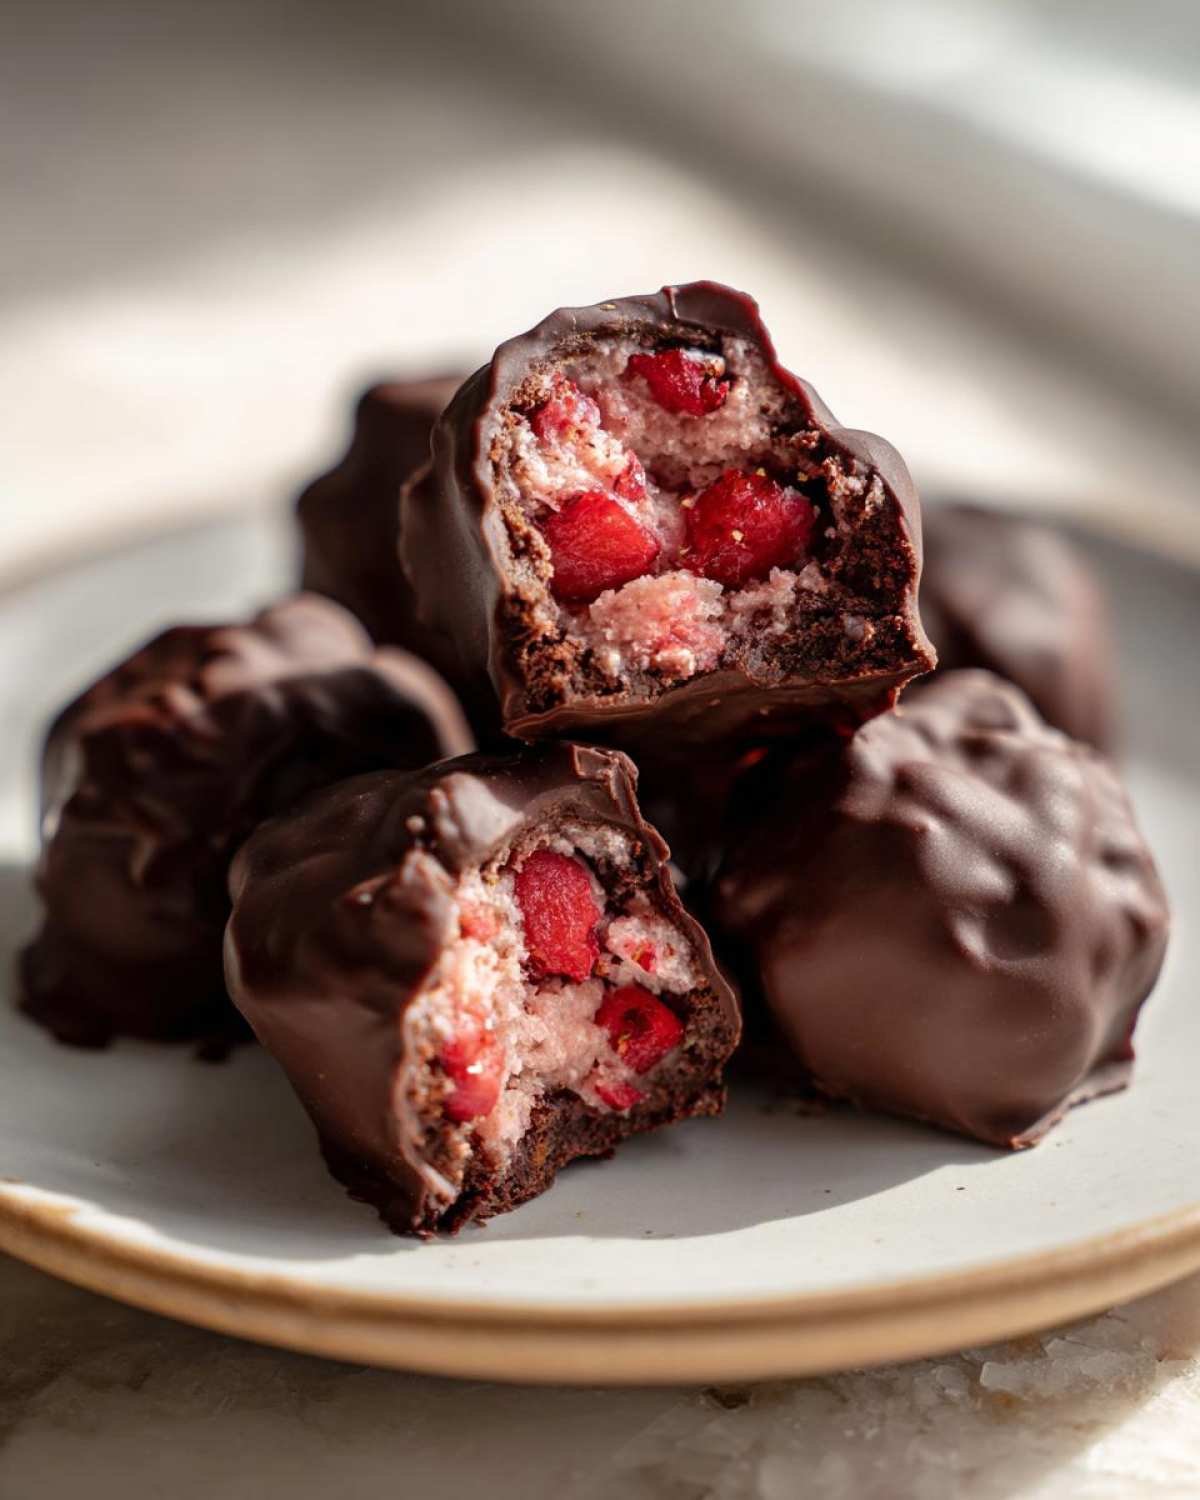
Honestly, making these Frozen Strawberry Treats work perfectly every time comes down to battling the ice and making sure the chocolate plays nice. Since we aren’t dealing with oven heat, the freezer is our primary tool, which means timing is everything. If you’re finding your clusters are crumbling when you pull them out to dip, don’t panic! It just means they weren’t quite solid enough, or maybe you stirred the yogurt base too much.
Here are the few things I learned the hard way:
- The Full-Fat Rule is Non-Negotiable: I mentioned this before, but seriously, use the thickest Greek yogurt you can find—ideally full-fat. When that water content freezes out, the lower-fat stuff turns rock-hard and chalky. Full-fat yogurt stays creamy inside the shell, even when totally frozen.
- Strawberry Size Matters: Make sure those strawberries are diced super, super fine. If you leave big chunks, those pieces freeze into hard little pebbles inside your yogurt scoop, and you end up with a jagged cluster that cracks your chocolate coating immediately. Small dice equals smooth freeze!
- Work Fast During the Dip: When you pull those rock-hard yogurt clusters for the chocolate dipping stage, you have to move quickly. If the cluster starts to sweat or warm up even slightly, the warm chocolate will just melt the surface, leading to a weak, gooey shell instead of that nice brittle snap. If your kitchen is warm, chill your parchment sheet in the freezer while you melt the chocolate.
- Coconut Oil Magic: Don’t swap the coconut oil for butter when melting the chocolate. Butter has water content and can mess with the smoothness of the chocolate melt. Coconut oil lowers the melting point just enough to make dipping easy, and it sets really firm once it hits the frozen yogurt, giving you that great *clink* when you tap it.
Follow those little points, and you’ll have perfect **Chocolate Covered Fruit Clusters** every single time!
Ingredient Notes and Substitutions for Easy Yogurt Clusters
As much as I preach using full-fat yogurt, I know sometimes you only have what’s in the fridge, or maybe you’re trying to boost the protein way up! When we talk about these yogurt bagels, I stress density, and that philosophy applies here too. You can certainly play around with the ingredients while keeping the core structure of the recipe intact. The key is understanding what role each component plays when you’re making Easy Yogurt Clusters.
Let’s talk about swapping things out without turning your snack into a sticky mess!
- The Yogurt Situation: Listen, if you only have non-fat yogurt, you *can* use it, but you need to temper your expectations. Non-fat yogurt has way more water, and when frozen, it turns very icy and hard. If you must use it, I suggest mixing in maybe a teaspoon of pudding mix or just cutting the vanilla extract a bit. If you are watching fat intake but want creamy texture, try using a very thick Skyr instead of standard non-fat Greek.
- Chocolate Flexibility: Semi-sweet is my favorite because it balances the sugar in the yogurt, but feel free to go dark if you like a richer, less sweet coating. Milk chocolate works fine too, but be careful not to overcook it since it has more milk solids, which can make it seize easier during melting. White chocolate lovers? Go for it, but maybe add a tiny squeeze of lemon juice to the white chocolate just to cut the sweetness a little bit.
- Nut Alternatives: The nuts or seeds are just there for a little textural interest and healthy fat. If you have nut allergies, don’t sweat it! Omit them entirely—the clusters are great plain. My best suggestions for crunch without nuts include toasted unsweetened coconut flakes or even some mini gluten-free pretzels, chopped roughly, for a salty element.
The less liquid you introduce into the yogurt base before freezing, the better these **Protein Yogurt Bites** will hold up!
Variations on No-Bake Chocolate Strawberry Yogurt Clusters
The base recipe for these clusters is fantastic because it’s so simple, but honestly, sometimes I get bored eating the same thing all week! Since they are essentially just frozen yogurt discs dipped in chocolate, the customization options are huge. I love changing these up based on what fruit is perfectly ripe or what flavor mood I’m in. We’ve made everything from peanut butter swirls to lemon blasts using this exact freezing method.
If you’re looking to try something new next time, here are some of my favorite ways to remix these **Yogurt Berry Bites** without messing up that vital freeze:
First up, let’s talk citrus, because it woke up my plain batch last week. If you grate just a half teaspoon of fresh orange or lemon zest directly into the yogurt mixture before you freeze it, you get this unbelievable bright pop when you bite through the dark chocolate. It’s amazing! I found that the orange zest pairs especially well with the semi-sweet chocolate, turning it into something that feels way more gourmet than what it actually is.
Next, think extracts! Vanilla is standard, but have you ever tried almond extract? Just use half a teaspoon instead of vanilla. Almond and strawberry are such a classic pairing, and it gives the clusters a totally different, almost marzipan-like background flavor. It’s a subtle change that makes a big difference.
And finally, the fruit swap! You don’t have to stick strictly to strawberries. If you have beautiful blueberries, dice those up just as finely, or try using frozen raspberries—though you might want to thaw them just for five minutes first so they don’t pull too much immediate moisture out of the yogurt when mixing. I even tried using dried, finely chopped apricots once, which made for almost chewy clusters!
If you want a truly decadent shift, you could try moving toward a cheesecake vibe. I have a great recipe for No-Bake Strawberry Cheesecake Cups that uses a similar cream cheese tang, which you could adapt to a cluster if you swap some of your Greek yogurt for cream cheese. Just thinking about that makes me want to make a batch right now!
Storage and Make Ahead Sweet Treats Advice for No-Bake Chocolate Strawberry Yogurt Clusters
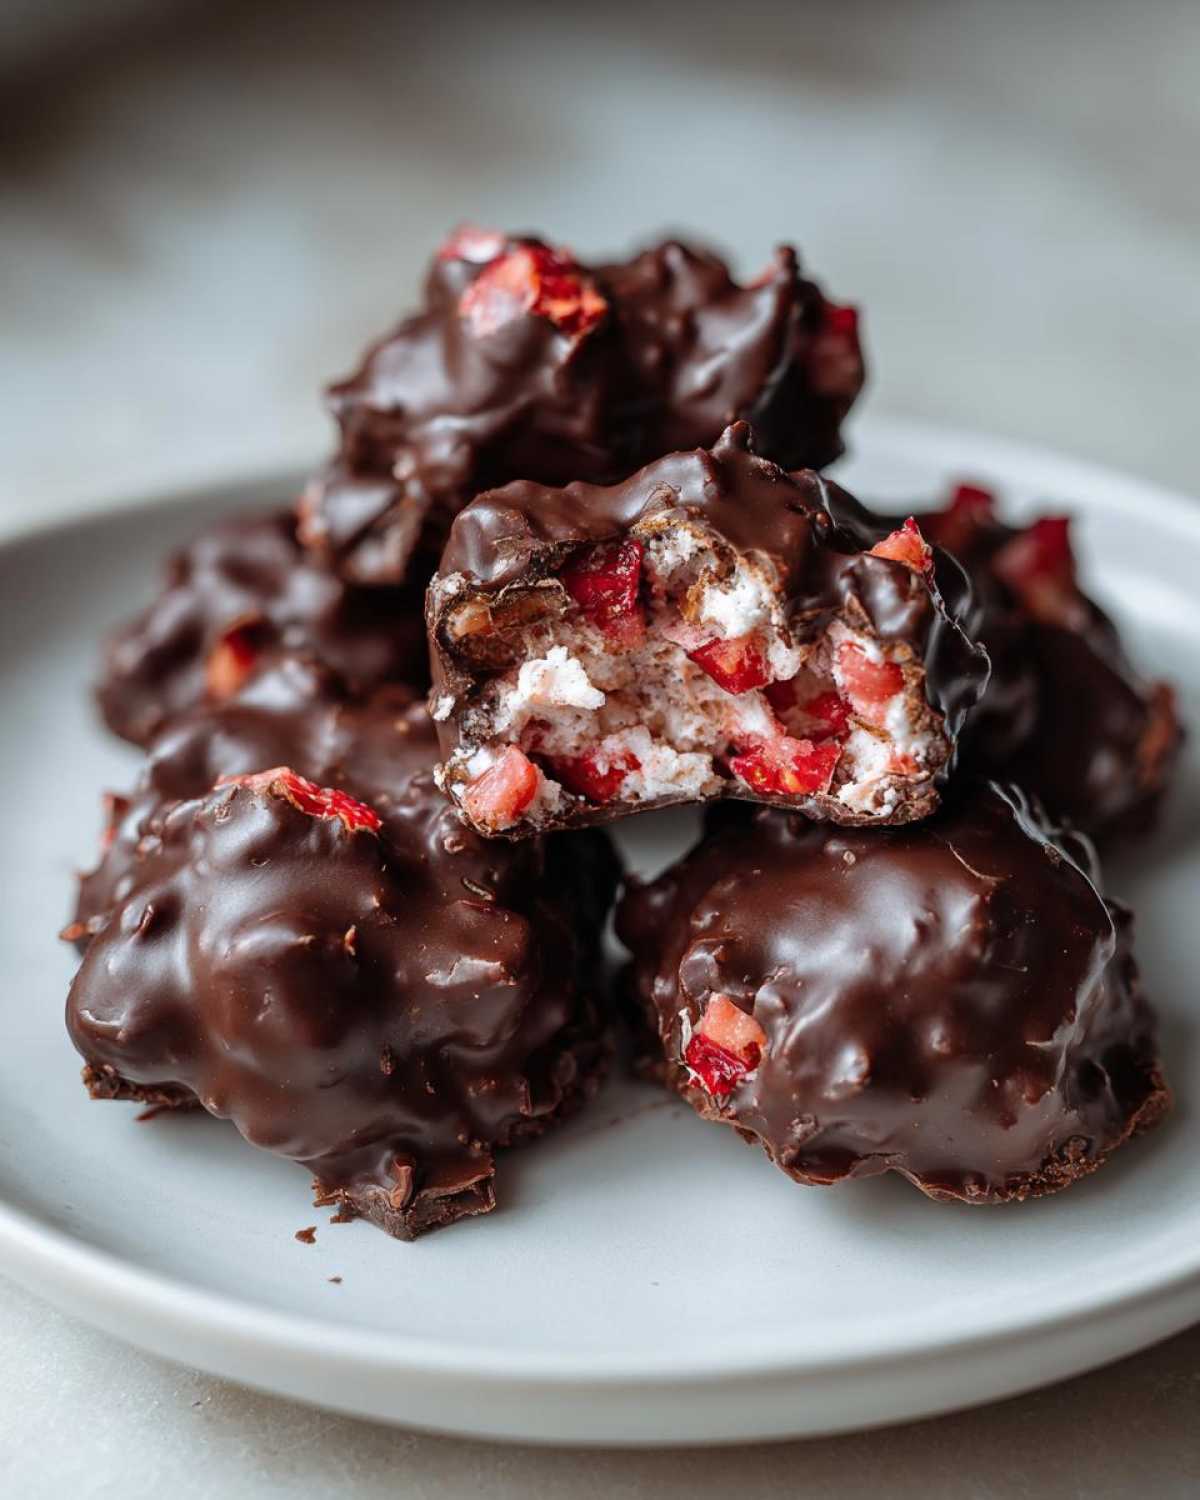
This is the best part about these Make Ahead Sweet Treats: they get better the longer they sit in the cold! Since these **No-Bake Chocolate Strawberry Yogurt Clusters** are essentially frozen dairy pops dipped in chocolate, the freezer is their permanent home. They thrive in the cold, and honestly, waiting a day or two lets the flavors of the strawberry and yogurt meld just perfectly against that chocolate shell.
You absolutely want to plan ahead with these. Making a big batch when you have time to dip and freeze them all is such a great idea for busy weeks. Forget about grabbing those packaged, overly sugary things at the store; these homemade ones are just as convenient!
Here’s my routine for keeping them fresh and delicious:
- Airtight is Key: Once the chocolate is completely set (give them a solid 15 minutes after the final dip), you need to transfer them immediately to an airtight container. If you leave them exposed on the sheet pan, they can start to absorb any weird freezer smells, and that’s just not okay for a sweet treat!
- Parchment Paper Layering: This is crucial! Never pile the clusters directly on top of each other. They will weld themselves together into one giant chocolate-covered berry ice cube. Lay a piece of parchment paper inside the bottom of your container, layer your first batch of clusters in a single layer, cover them with another sheet of parchment, and then add the next layer. This protects the chocolate coating.
- Shelf Life Expectations: Because these are mostly just frozen yogurt, they last a really long time! I have kept batches in the deepest, coldest part of my freezer for up to two months, and they are still perfect when thawed briefly. They freeze so solid that they don’t really degrade quickly like baked goods do. They are truly excellent **Freezer Friendly Snacks**.
When you want to eat one, just pull it out and let it sit on the counter for about five minutes. That little bit of warming softens the yogurt just enough so it’s creamy inside but still has that satisfying, solid snap from the chocolate! Enjoy!
Frequently Asked Questions About Chocolate Yogurt Bites
I totally get it; sometimes you need a quick answer before you dive headfirst into mixing! People always ask me the same few things about these Chocolate Yogurt Bites, usually revolving around timing and what happens when I try to substitute things. Since these involve freezing, the timing questions are the most important ones to nail down!
How long do the clusters *really* need to freeze before dipping them in chocolate?
This is the most crucial freezing step! You need them completely solid, not just firm, or they will squish when you try to dip them. I insist on a minimum of two full hours in the freezer for the yogurt base. If your yogurt mixture was a little runnier than mine (maybe you used a less-thick yogurt), you might even want to go three hours. When you pick one up, it should feel heavy, cold, and totally unyielding. You shouldn’t be able to press a fingerprint into it at all!
Can I use frozen strawberries instead of fresh ones in these No Bake Snacks?
Oh, that’s a smart question, especially if fresh berries are out of season! You *can* use frozen, but you have to handle them delicately. If you put frozen berries straight into the yogurt mix, they will start to water down the base immediately, weakening the final frozen structure. My trick is this: If you use frozen strawberries, thaw them slightly on a paper towel first—just until the surface moisture is gone but the berry is still partially frozen. Dice them up then, and work quickly when mixing the base so that initial melting doesn’t happen.
What happens if I skip the coconut oil when melting the chocolate?
If you skip the coconut oil, you run into a few issues, which is why I listed it as essential for the smooth dipping texture in my recipe! Without that little bit of added fat, the chocolate chips melt much thicker, making it nearly impossible to get a thin, even coating on your frozen clusters. Furthermore, when that thicker chocolate hits the frozen yogurt, it sets up almost instantly and becomes very brittle and hard to bite, kind of like a candy shell that cracks off in large chunks. The coconut oil keeps the coating pliable and glossy, which is perfect for these Healthy Chocolate Snacks.
Are these truly better if I make them ahead of time?
Absolutely! These are amazing Make Ahead Sweet Treats. Unlike things with dry ingredients that can get soggy, freezing keeps these incredibly stable. Once they are fully set in their airtight container, they are perfect for grabbing straight from the freezer anytime you need a quick, cool bite. I usually make a huge batch on Sunday, and we snack on them all week!
Estimated Nutritional Snapshot for These Healthy Chocolate Snacks
Okay, now for the nitty-gritty! We all want to know what we are putting into our bodies, even when we’re grabbing a quick little indulgence. Since these **Healthy Chocolate Snacks** are made with yogurt and fruit, they feel great to snack on, but I always want to give you a heads-up on the numbers. They really depend on what kind of chocolate you use and whether or not you skip those optional nuts!
Please remember, these figures aren’t coming from some lab—they are estimates based on the recipe details I provided, assuming standard full-fat Greek yogurt and semi-sweet chips. They are a great guide, but keep that in mind!
When you look at the numbers for one cluster, you can see why I love having them around for a little afternoon boost. They hit that sweet spot between satisfying and smart.
- Calories: About 110 per cluster. A nice manageable number!
- Protein: Roughly 4 grams per cluster, thanks entirely to that Greek yogurt base. This is why they keep me full longer than just eating chocolate alone.
- Total Fat: Around 7 grams. Remember, we’re using relatively high-quality fat from the yogurt and the coconut oil here.
- Carbohydrates: About 11 grams.
- Sugar: Nearly 10 grams. Most of this comes naturally from the strawberries and the powdered sugar we use to sweeten the yogurt, plus the chocolate itself.
- Sodium: Super low, usually around 15mg.
If you’re tracking macros, these are a fantastic low-effort dessert option! Just be mindful that if you switch to ultra-dark chocolate with zero sugar, the overall sugar count will drop significantly, but the fat might change a bit too. Happy snacking!
PrintNo-Bake Chocolate Strawberry Yogurt Clusters
Make simple, bite-sized clusters using yogurt, fresh strawberries, and a chocolate coating. These require no baking and freeze well.
- Prep Time: 15 min
- Cook Time: 0 min
- Total Time: 2 hr 15 min
- Yield: About 18 clusters
- Category: Snack
- Method: Freezing
- Cuisine: American
- Diet: Vegetarian
Ingredients
- 1 cup Greek yogurt, full fat or 2%
- 1/2 cup fresh strawberries, finely diced
- 1/4 cup powdered sugar
- 1 teaspoon vanilla extract
- 1 cup semi-sweet chocolate chips
- 1 tablespoon coconut oil
- 1/4 cup chopped nuts or seeds (optional)
Instructions
- Line a baking sheet with parchment paper.
- In a medium bowl, combine the Greek yogurt, diced strawberries, powdered sugar, and vanilla extract. Mix until just combined. Do not overmix.
- Drop spoonfuls of the yogurt mixture onto the prepared baking sheet, creating small clusters. Aim for about 1 tablespoon per cluster.
- Place the baking sheet in the freezer for at least 2 hours, or until the clusters are completely solid.
- In a microwave-safe bowl, combine the chocolate chips and coconut oil. Microwave in 30-second intervals, stirring well after each, until smooth.
- Remove the frozen clusters from the freezer. Dip each cluster into the melted chocolate, or drizzle the chocolate over them. Sprinkle with chopped nuts if using.
- Return the clusters to the parchment-lined sheet.
- Freeze for another 15 minutes, or until the chocolate sets. Store frozen.
Notes
- Use full-fat yogurt for the best texture when freezing.
- If you prefer a thicker chocolate coating, let the first layer set in the freezer before dipping a second time.
- These clusters are best stored in an airtight container in the freezer.
Nutrition
- Serving Size: 1 cluster
- Calories: 110
- Sugar: 10
- Sodium: 15
- Fat: 7
- Saturated Fat: 4
- Unsaturated Fat: 3
- Trans Fat: 0
- Carbohydrates: 11
- Fiber: 1
- Protein: 4
- Cholesterol: 10