

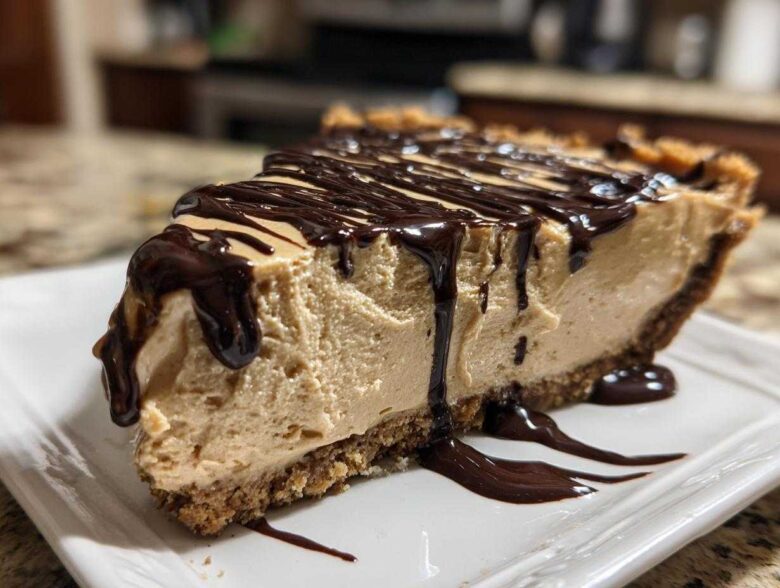
There is nothing quite like walking into a gathering and seeing that perfect, indulgent dessert waiting on the counter. Richard and I have certainly tasted our share of spectacular sweets on our travels, but sometimes, you just need something reliably foolproof and utterly decadent when hosting friends. That’s why I keep coming back to this recipe. It has become our go-to for summer cookouts and even those surprisingly busy days leading up to holidays. Forget turning the oven on when you need a quick, satisfying fix. This is my absolute best No-Bake Creamy peanut butter pie recipe, and trust me, it tastes like pure nostalgia.
Why This No Bake peanut butter pie Recipe is Your New Favorite Crowd Pleaser Dessert
When you’re hosting, the last thing you want is to be sweating over the stove while everyone else is relaxing. That’s the true beauty of this peanut butter pie wonder. It relies on the simple magic of chilling, not baking. Richard always jokes that this recipe is perfect because it allows me more time to chat with the guests—or pour another glass of iced tea!
I compiled this list of reasons why I know you’ll reach for this recipe every time you need an indulgent peanut butter dessert that travels well and always disappears first:
- No oven required! This is a lifesaver when your oven is already occupied with a roast or other holiday dishes.
- The active prep time is astonishingly fast—you’re looking at about 20 minutes of work before it goes into the fridge.
- It’s built on that classic, buttery graham cracker crust that offers the perfect sturdy base for the filling.
- It sets up beautifully, meaning you get those incredible, clean slices we all dream about. You can compare it to my Biscoff cheesecake; the structure is just as dependable!
Quick Peanut Butter Dessert Ready Fast
Seriously, twenty minutes. That’s all the time you have to dedicate to mixing and pressing before this beauty gets tucked away to chill. I’ve made this pie in the time it takes to run to the store for forgotten ice cream. If you’re scrambling to pull together some simple Thanksgiving desserts or need a make ahead dessert recipe for a potluck, this is your answer.
The Creamy Peanut Butter Pie Filling Texture
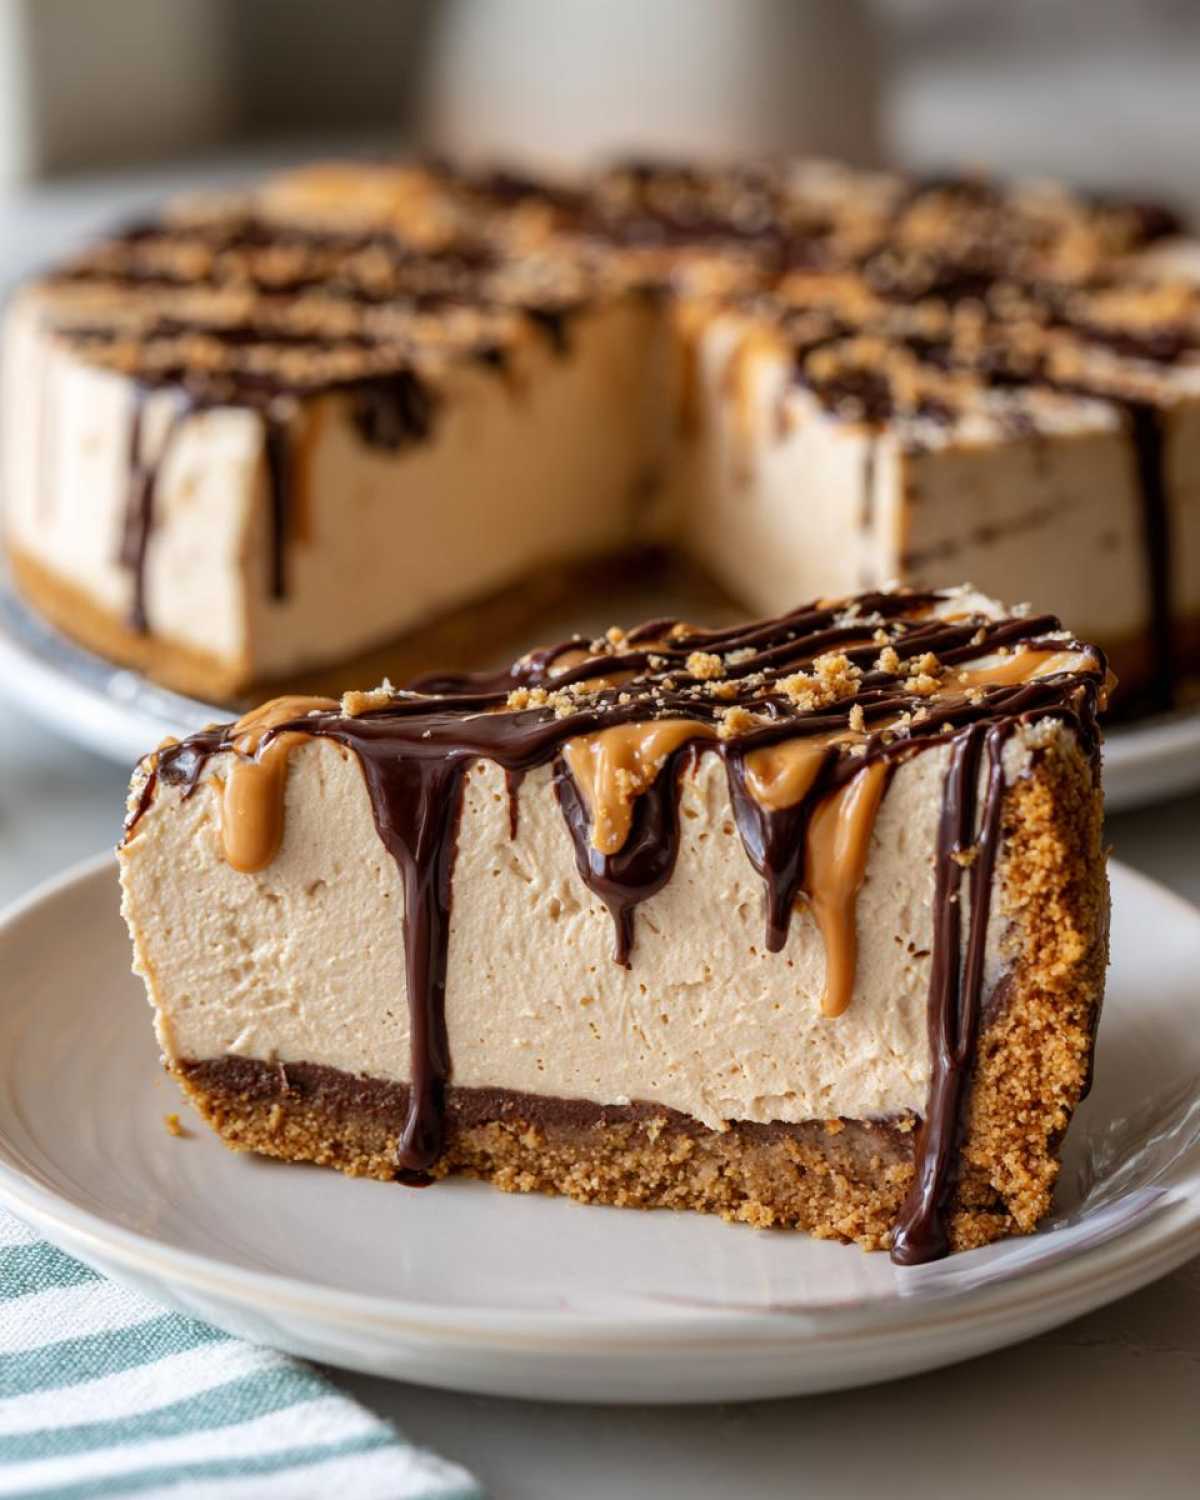
This is where the real indulgence comes in. Some no-bake recipes end up feeling gummy or stiff, but not mine. The way the softened cream cheese blends with the peanut butter and then gently meets the whipped topping creates this unbelievably light, airy cloud of flavor. It’s that iconic, dreamy consistency that defines a true Creamy Peanut Butter Pie. It just melts away, leaving that lovely salty-sweet flavor behind.
Gathering Ingredients for Your Easy peanut butter pie Recipe
Okay, the beauty of keeping this a no bake dessert means we don’t need a huge grocery haul. I’ve tried making this homemade peanut butter pie with every type of peanut butter under the sun, and keeping the ingredients simple and exactly as listed below is key to that perfect, rich taste Richard always loves. Precision here ensures we don’t end up with a sugary soup instead of a sliceable pie!
I’ve broken down what you need for the crust and the main filling so you can check your pantry easily. Don’t forget the little bits for the topping, or you might have to improvise like I once did when we were camping!
Graham Cracker Crust Pie Components
First, we need the foundation—that buttery crunch. You want to make sure your butter is melted and ready to go before you even start crushing those crackers, otherwise they dry out too fast.
-
1 1/2 cups graham cracker crumbs – You can measure this out after crushing them, or buy them pre-crushed if you need to save a minute!
-
1/2 cup unsalted butter, melted – This binds everything together perfectly.
-
1/4 cup granulated sugar – Just a touch to sweeten up the crust even before the filling goes in.
For the Rich peanut butter pie Filling
This is the heart of the pie. Remember, we are using two different amounts of peanut butter here—one for the body of the filling and a separate amount reserved just for drizzling on top near the end. Don’t mix them up!
-
1 (8 ounce) package cream cheese, softened – This is absolutely critical; it must be soft enough to beat until smooth without lumps!
-
1 cup confectioners’ sugar – Using the powdered kind instead of granulated ensures that super smooth, creamy peanut butter pie texture.
-
1 cup creamy peanut butter – Yes, you need a full cup here to get that bold, classic flavor.
-
1 teaspoon vanilla extract – Just a hint of background warmth.
-
1 (12 ounce) container frozen whipped topping, thawed – Make sure this is completely thawed but still cold when you go to fold it in!
And for my favorite part, the topping drizzle that makes it truly special: you’ll need the remaining 1/2 cup of creamy peanut butter and about 1/4 cup of milk chocolate chips. For something extra bright, I sometimes toss in a tiny sprinkle of flaky sea salt on top before the chocolate sets. It balances the sweetness wonderfully. If you’re looking for more quick ideas for dessert bases, check out how I handle cheesecake cups!
Step-by-Step Instructions for the No Bake peanut butter pie
Now for the fun part! Since this is a no oven dessert, the hands-on time flies by. Richard likes to supervise this part because he insists he can always tell when I’m rushing the mixing. Remember, the secret to perfection here is patience in two key areas: thorough mixing of the base ingredients, and long, uninterrupted chilling time. Follow these steps exactly, and you’ll have the best peanut butter pie you’ve ever tasted, ready to impress everyone at your next party.
Creating and Chilling the Graham Cracker Crust Pie
First things first, let’s build our buttery foundation! In a bowl, just toss together your graham cracker crumbs, the melted butter, and that granulated sugar. Use a fork or your hands to mix it until it looks like nice, wet sand—you should be able to squeeze a handful and have it hold its shape. Press that mixture firmly into the bottom and all the way up the sides of your 9-inch pie plate. Don’t be shy here; press it hard so it stays put! Once it’s firm, pop that entire plate into the freezer. It needs about 15 minutes in there to set up nicely while you tackle the creamy part.
Assembling the Creamy Peanut Butter Pie Filling
Grab your biggest clean bowl for this. The very first thing you’ll do is beat that softened cream cheese until it’s totally smooth—I mean absolutely no lumps, or you’ll have little chewy spots later! Once it’s silky smooth, beat in the confectioners’ sugar, the full cup of creamy peanut butter, and the vanilla extract until everything is combined. Now, take your thawed whipped topping; you’ll want to gently fold that in with a spatula, not beat it with the mixer. We need to keep all those lovely air bubbles in there to keep it light, so fold until you just don’t see any white streaks. That’s the key to a homemade peanut butter pie that is light!
Final Chill and Chocolate Topping for Your peanut butter pie
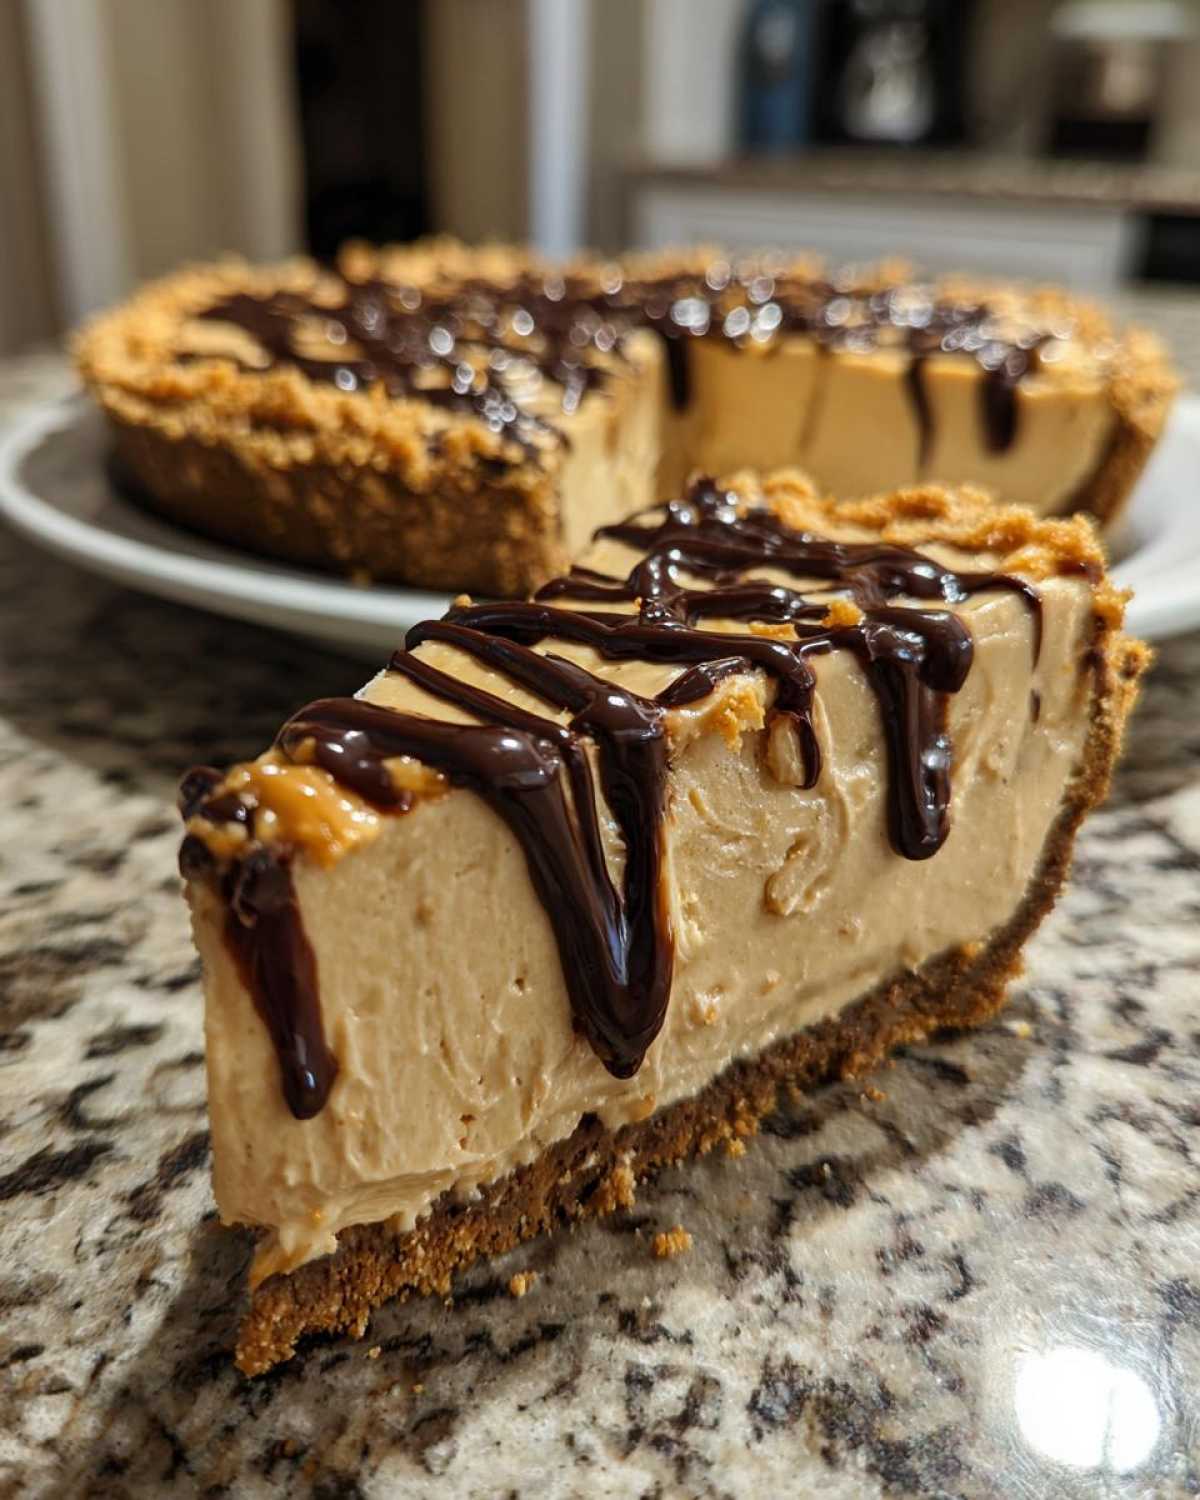
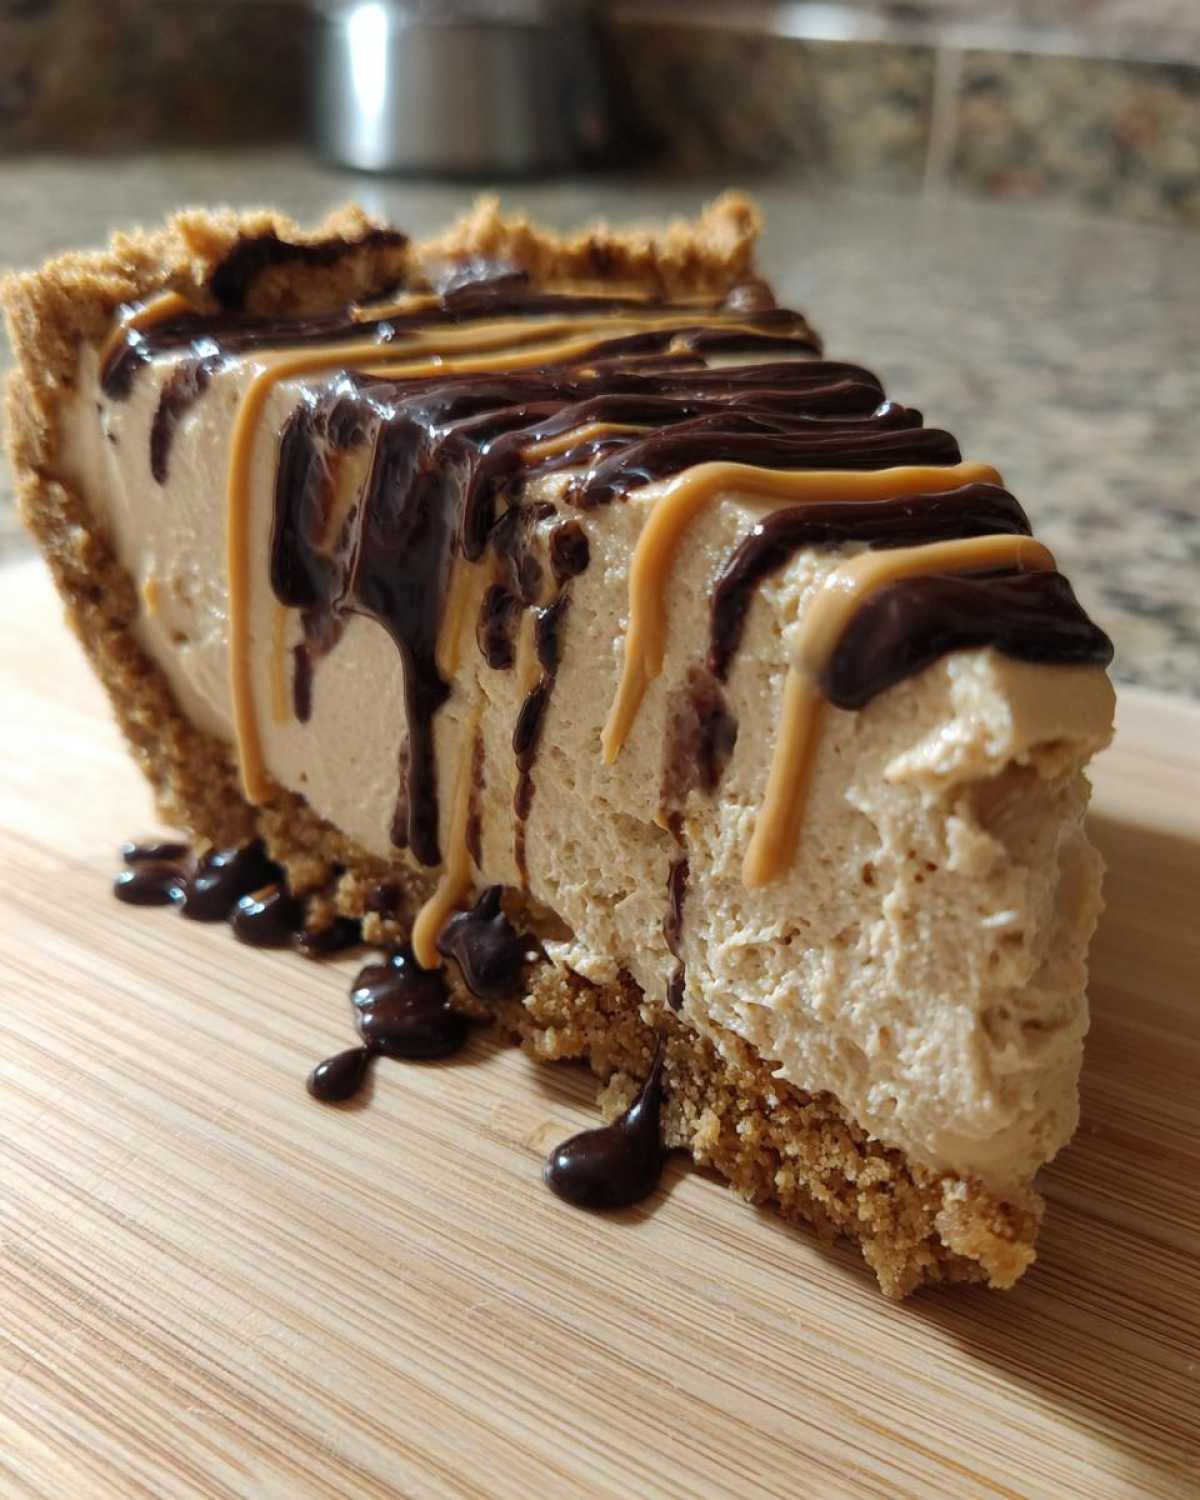
Spoon that glorious filling right into your now-chilled crust and smooth the top gently. Then comes the hard part: you need to let it rest. Cover it loosely and get it into the refrigerator for a minimum of four hours. Seriously, four hours is non-negotiable if you want a slice that holds its shape! When you’re nearly ready to serve, melt your reserved peanut butter and chocolate chips together in the microwave. Do this in short 20-second bursts, stirring well after every burst—otherwise, the peanut butter burns so fast, and believe me, burned chocolate is not fun to clean up! Drizzle that warm, luscious topping over the set pie and pop it back in the fridge for just 15 more minutes so the topping firms up a little. If you want to see another fun, no-bake treat, take a peek at my directions for the no-bake chocolate eclair dessert!
Tips for the Best Homemade peanut butter pie Success
Even though this is a super simple Easy Peanut Butter Pie Recipe, a few little tricks of the trade can make the difference between a good pie and one that gets rave reviews every single time. Richard always reminds me that even the quickest recipes need respect! When you’re making a pie that relies solely on chilling to set, the temperature of your ingredients is everything. Trust me on these points; they keep this pie from turning into a runny mess!
Ingredient Temperature Matters for Creamy Peanut Butter Pie
If you try to rush the cream cheese, you’ll end up with a filling that’s lumpy, and no amount of stirring will fix that later. Take your cream cheese out at least an hour before you plan to start mixing. It should yield just slightly to gentle pressure—not be actively melting or oily. That smoothness is what gives us that incredible rich dessert pie foundation.
The other temperature note is the whipped topping (the pre-made frozen kind works wonders here!). Make sure it’s fully thawed so it’s pourable, but keep it cold. If you fold in warm whipped topping, it basically melts right into the peanut butter mixture, and we lose all that lovely volume we worked hard to incorporate when folding. We want fluffy, not flat!
Achieving a Perfect Slice of peanut butter pie
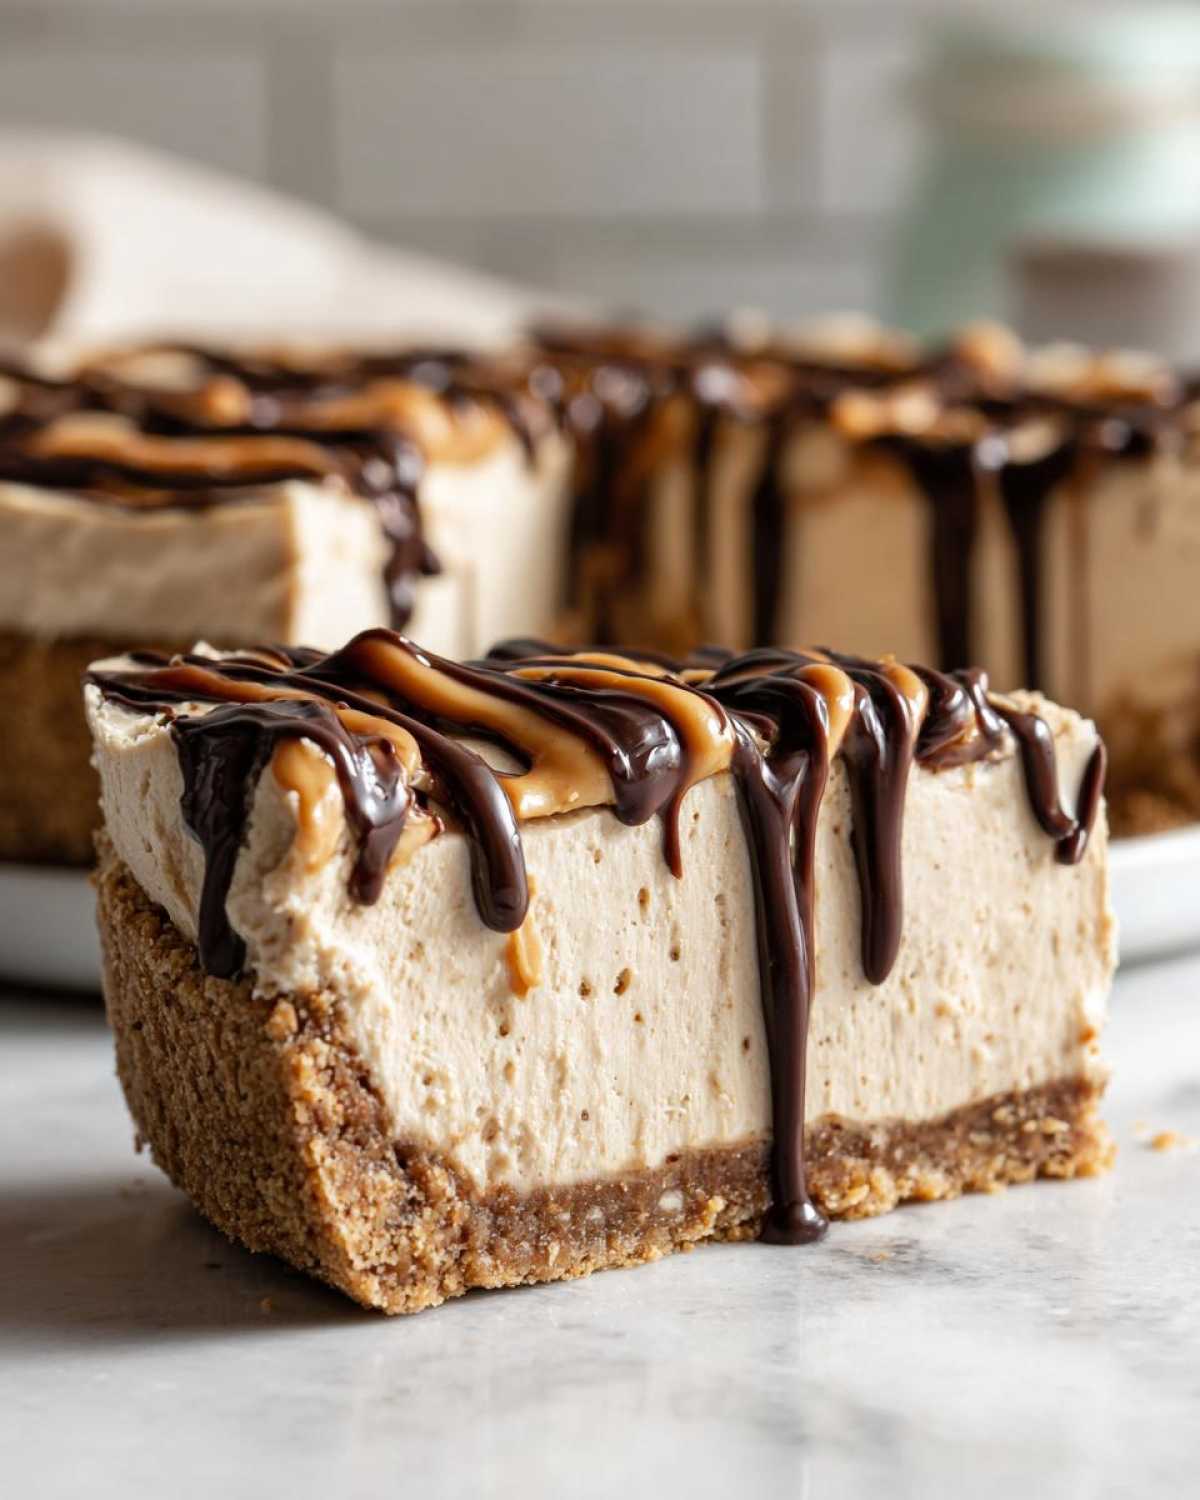
I can’t stress this enough: that four-hour minimum chill time is the backbone of this recipe! If you try to cut it sooner, the knife drags through the filling, and you get a beautiful mess on your plate instead of that sharp, impressive wedge of peanut butter dessert everyone wants. If you are making this for a big event, feel free to plan ahead. This holds up beautifully when made a day early; it just keeps setting up nicely in the cold.
Also, a small tip about that gorgeous chocolate topping: don’t pour it on piping hot! If the chocolate glaze is too hot, it will slide right off the chilled filling, melt the top layer, and turn into a thin, uneven coat. Let that melted chocolate sit on the counter for about 5 to 10 minutes after you stir it smooth. When you drizzle it, you want it warm enough to flow easily but cool enough not to sabotage your perfectly chilled No Bake Peanut Butter Pie. For another fantastic make-ahead treat, you should check out my secrets for moist chocolate chip banana bread!
Variations: Customizing Your peanut butter pie
I just love when someone takes a wonderful base recipe and adds their own little twist to it. This peanut butter pie is so versatile, and the best part is that the creamy filling holds up beautifully even if you change the shell or the topping. Richard and I always experiment when we make it for ourselves, just to keep things interesting! Thinking outside the box helps turn this into everyone’s favorite sweet and salty pie.
Switching to an Oreo Crust peanut butter pie
If you’re not a massive fan of the slight molasses flavor of graham crackers—though I love them—then swapping the base is super easy. This is one of my favorite modifications! To make an Oreo Crust peanut butter pie, you simply trade out the graham cracker crumbs for about 2 cups of finely crushed Oreo cookies. Make sure you scrape out most of the white filing they come with, or it makes the crust a little too sweet and maybe a bit soft.
Just like the graham cracker version, you mix those crushed Oreos with the melted butter and a tiny bit of sugar (though Oreos don’t need as much sweetness!) and press it firmly into the pan. When it chills, you get this wonderful dark, chocolatey counterpart to the creamy filling. It’s decadent and just changes the whole profile of the peanut butter dessert.
Peanut Butter Pie Toppings Beyond Chocolate
While the warm chocolate drizzle is my established classic, sometimes you just need something different on top, especially if you have someone who prefers less sugar. If you’re whipping up a batch for a big potluck, maybe try one of these on top:
-
Crushed Reese’s Cups: If you manage to get your hands on some, simply pulse a cup of them in a food processor until they are chunky, not dusty. Sprinkle these right over the drizzled chocolate while it’s still wet so they stick.
-
Sweet and Salty Dusting: Instead of melting any chocolate, you can simply top the finished, chilled pie with a very generous dusting of flaky sea salt and maybe some finely chopped roasted peanuts. The contrast between the salty crunch and the smooth filling is truly sophisticated!
-
Peanut Butter Whipped Cream: For a lighter topping, you can reserve a little bit of that peanut butter mixture you made for the topping and fold it into another half-cup of fresh whipped cream. This gives you a lighter, fluffier texture than the dense drizzle. You can find some neat ideas for pairing chocolate and peanut butter over at a post I did on peanut butter cups!
Storage and Make Ahead Dessert Recipes for Your peanut butter pie
One of the reasons this peanut butter pie has earned its place as a staple in our home is how wonderfully it plays into my planning. I love being prepared, especially when the holidays roll around and the menu gets longer than a novel. This is one of the best make ahead dessert recipes you could ask for, because honestly? It tastes even better the next day once everything has really had a chance to settle and meld together in the cold.
We need to be careful with storage, though, just like with any cream-based, no-bake pie. That graham cracker crust can get a little soggy if the moisture has nowhere to go, and we definitely want to protect that gorgeous chocolate drizzle from picking up any weird fridge odors!
Preparing the peanut butter pie Ahead of Time
You can absolutely prepare the entire pie, crust and filling and all, the day before you plan to serve it. I find making it the morning of a big gathering is perfect, but if you need a full 24 hours, go for it. Just make sure that filling is totally firm before you cover it up. The secret is how you wrap it.
Once the pie is fully chilled and firm—remember that four-hour minimum!—cover the entire pie plate tightly with plastic wrap. I usually use two layers just to be safe, especially if I have leftovers of something strongly scented like onions or garlic in the fridge. Now, here’s the question about the chocolate: Do you add the drizzle the day before or the day of?
I prefer to wait until about an hour before serving to add the chocolate topping. This keeps the drizzle looking its absolute best, glossy and fresh. However, if you are truly pressed for time the day of, you *can* drizzle it the night before. Just ensure no part of the plastic wrap touches the chocolate topping, or it will stick and ruin your beautiful design when you unwrap it. If you need even more make-ahead magic, you should check out my recipe for no-bake peanut butter bars—those are great for freezing!
Frequently Asked Questions About This Easy Peanut Butter Pie Recipe
Oh, I love a good question! That means you’re getting ready to bake, and that makes me so happy. When you’re working with a no-bake recipe, you always have a few extra worries about structure and ingredients, don’t you? Richard and I have definitely learned the hard way what happens when you eyeball the chilling time! Here are a few things folks often ask me about tackling this Easy Peanut Butter Pie Recipe.
Can I use crunchy peanut butter in this peanut butter pie?
You absolutely can! But I have to give you a little heads-up, because I know you’re aiming for that dreamy texture. If you use crunchy peanut butter instead of creamy, you won’t end up with the pure, velvety smooth experience of a standard Creamy Peanut Butter Pie. You’ll get little bits of peanut throughout the filling. It’s still delicious—that sweet and savory bite is nice—but it totally changes the texture from that melt-in-your-mouth quality we are aiming for here. If you want smooth, stick to creamy for the filling!
What if I don’t have graham crackers for the crust?
That’s a super common pantry situation! If you’re out of graham crackers, don’t fret, my dear. You have a couple of great substitutes handy. Like I mentioned in the variations section, you can substitute with finely crushed vanilla wafers—they’ll give you a slightly sweeter, almost buttery base. Or, if you’re feeling extra bold, use crushed Oreos for a chocolate contrast! If you choose vanilla wafers, you might actually use a tablespoon or two less of the granulated sugar in the crust mixture because the cookies are already a bit sweeter.
How long does this No Bake Peanut Butter Pie need to set?
If you are going to take just one piece of advice from me today, please let it be this: Respect the chill time! My recipe calls for a minimum of four hours in the refrigerator after you assemble. That’s the bare minimum required for the filling to become firm enough to hold its shape when sliced. For the absolute **best** slice—the cleanest wedge you could ever serve at a gathering—I always aim to let it set overnight. If you rush it, you end up shoving the knife through soup, and it’s just sad. If you need a quick fix, try my recipe for lemon parmesan pasta; that one is ready in minutes!
Estimated Nutritional Snapshot for Your Rich Dessert Pie
Now, I know sometimes when we are baking for gatherings—especially around the holidays with all those heavy meals—we think about what we are serving. Since this is such a decadent treat, I wanted to give you an idea of what you’re laying out for your guests. This is just an estimate, mind you, because Richard always says that homemade sugar and peanut butter brands can really change the numbers!
When we break this rich dessert pie down into 8 generous slices, here is what the numbers generally look like based on the ingredients listed:
-
Calories: Approximately 450 per slice
-
Sugar: Around 35 grams
-
Fat: Roughly 30 grams total
-
Protein: About 9 grams
-
Sodium: Generally comes in around 280mg
It’s certainly a treat to be enjoyed, but what a treat it is! If you’re looking for something equally satisfying but maybe a touch lighter to balance out the rest of your menu, I highly recommend checking out my directions for the creamy ranch chicken skillet. It’s savory, but just as comforting!
Share Your peanut butter pie Creations
Well, my dear friends, now you have the blueprint for what I truly believe is the Best Peanut Butter Pie recipe there is. Richard and I have made this simple, no bake peanut butter pie countless times, and it never fails to bring a smile to our faces.
But the story doesn’t end here in my kitchen! I just absolutely love seeing how you all put your own spin on our diary entries. Did you try the Oreo crust? Did you go heavy on the chocolate drizzle? Please, don’t just leave me hanging!
Take a moment after you’ve had your first glorious, creamy bite and let me know how it went down. Head down to the comment section below and give this recipe a star rating—I cherish every single review you leave. If you’re sharing pictures of your beautiful dessert wedges on social media, tag us! Seeing your gorgeous peanut butter pie creations reminds me that these memories we’re sharing are continuing on in kitchens all over the country. I can’t wait to hear all about it!
If you enjoyed this taste of home, be sure to browse through the rest of our entries over at the main Delish Diarist page. Happy baking—or rather, happy chilling!
PrintEasy No-Bake Creamy Peanut Butter Pie
You will love this simple, no-bake peanut butter pie recipe. It features a rich, creamy filling in a buttery graham cracker crust, making it a perfect crowd-pleaser dessert for any gathering.
- Prep Time: 20 min
- Cook Time: 0 min
- Total Time: 4 hr 20 min
- Yield: 8 servings
- Category: Dessert
- Method: No-Bake
- Cuisine: American
- Diet: Vegetarian
Ingredients
- 1 1/2 cups graham cracker crumbs
- 1/2 cup unsalted butter, melted
- 1/4 cup granulated sugar
- 1 (8 ounce) package cream cheese, softened
- 1 cup confectioners’ sugar
- 1 cup creamy peanut butter
- 1 teaspoon vanilla extract
- 1 (12 ounce) container frozen whipped topping, thawed
- 1/2 cup creamy peanut butter (for topping)
- 1/4 cup milk chocolate chips
Instructions
- Prepare the crust: Mix graham cracker crumbs, melted butter, and granulated sugar in a bowl until the mixture resembles wet sand. Press this mixture firmly into the bottom and up the sides of a 9-inch pie plate. Place the crust in the freezer while you prepare the filling.
- Make the filling base: In a large bowl, beat the softened cream cheese until it is smooth. Add the confectioners’ sugar, 1 cup of creamy peanut butter, and vanilla extract. Beat until everything is fully combined and creamy.
- Fold in the topping: Gently fold the thawed whipped topping into the peanut butter mixture until no streaks remain. Do not overmix.
- Assemble the pie: Spoon the creamy peanut butter filling evenly into the chilled graham cracker crust. Smooth the top with a spatula.
- Chill the pie: Cover the pie loosely with plastic wrap and refrigerate for at least 4 hours, or until the filling is firm. This chilling time is important for a clean slice.
- Prepare the topping: In a small microwave-safe bowl, combine the remaining 1/2 cup of peanut butter and the chocolate chips. Microwave in 20-second intervals, stirring well after each, until the mixture is smooth and pourable.
- Drizzle and serve: Drizzle the warm chocolate peanut butter mixture over the chilled pie. Return the pie to the refrigerator for about 15 minutes to set the topping before slicing and serving your rich dessert pie.
Notes
- For an Oreo crust peanut butter pie, substitute 2 cups of finely crushed Oreo cookies (filling removed) for the graham cracker crumbs.
- If you want a sweeter, richer topping, use a full cup of chocolate chips and a tablespoon of heavy cream to make a ganache instead of the simple drizzle.
- This is an excellent make ahead dessert recipe; you can prepare the entire pie, including the topping, one day in advance.
Nutrition
- Serving Size: 1 slice
- Calories: 450
- Sugar: 35g
- Sodium: 280mg
- Fat: 30g
- Saturated Fat: 10g
- Unsaturated Fat: 20g
- Trans Fat: 0g
- Carbohydrates: 40g
- Fiber: 2g
- Protein: 9g
- Cholesterol: 35mg