

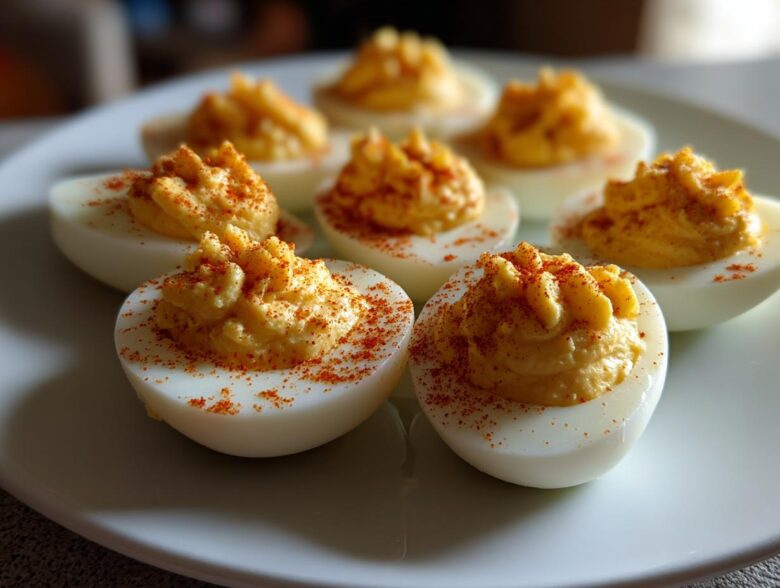
Oh my gosh, you know those moments at a party or a holiday table when the plate comes around and everyone lunges for the same thing? For me, that’s always, always the deviled eggs. They are the ultimate nostalgia trip! Seriously, nothing says ‘get the party started’ like a tray of perfectly halved, creamy, tangy eggs. I spent years fussing over them, trying to get that filling JUST right. Trust me, I’ve had batches that were too stiff, too watery, or just kind of… bland. But I finally cracked the code on the ultimate texture. This version right here delivers that incredibly dreamy, smooth mound of yolk filling you see in magazines. It’s my go-to centerpiece among all my classic appetizer recipes, and I promise, once you try this method, you’ll see why.
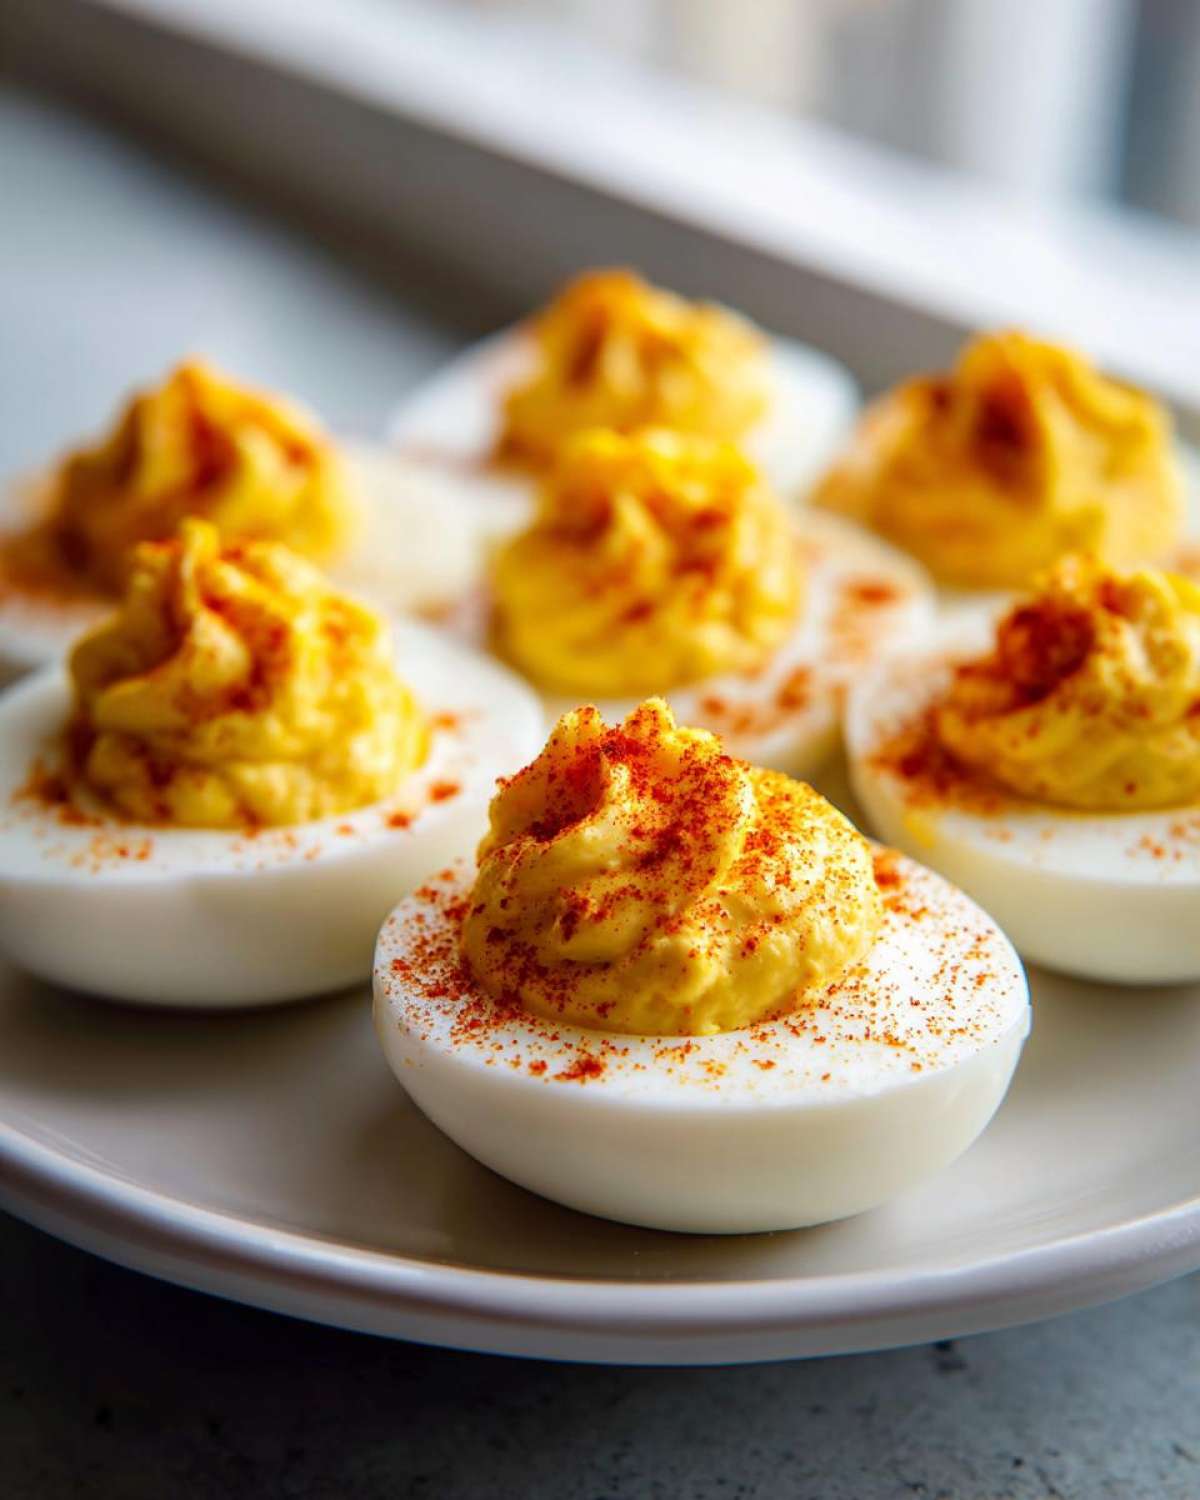
Making truly great deviled eggs comes down to two things: perfectly cooked whites and a filling that sings. That’s why I’m showing you my foolproof method for boiling them—no sad, grayish rings around the yolk allowed! We’re talking about making a fluffy, smooth filling that holds its shape beautifully. You are going to need just a few simple things to nail that classic, perfect flavor for your next gathering. Grab your apron, because we’re about to make the best appetizer ever!
Why This Recipe Guarantees the Best Homemade Deviled Eggs
When people ask me what makes this recipe stand out in the world of creamy egg recipes, I always tell them it’s the attention to detail before we even mix the filling. My goal for homemade deviled eggs is total creaminess, and you can’t get that if your whites are tough or your yolks are crumbly from being overcooked. This process focuses on results: a soft white that cradles the filling perfectly and a rich, tangy flavor that makes you go back for a second one.
Don’t worry if you’ve struggled with peeling eggs before; that’s the most common disaster! This method is super straightforward and actually guarantees a smooth result, which is half the battle when you’re striving for presentation.
Achieving Perfectly Cooked Eggs for Easy Peeling
This is my non-negotiable step for perfect deviled eggs. Forget just dropping them in boiling water! We start them in cold water, bring it rapidly to a full boil, and then—this is the crucial part—we kill the heat, cover the pan, and let them sit untouched for exactly 12 minutes. This gentle steam method cooks them through just enough so they aren’t rubbery, but not so much that the sulfur reacts and starts forming that ugly green ring around the yolk.
Once those 12 minutes are up, they need a major shock! Plunge them instantly into a big bowl of ice water—an ice bath! Let them chill completely, about 15 minutes. That rapid temperature change is what makes the egg membrane shrink away from the white, meaning peeling them is almost effortless. If you want to learn more about getting perfect egg doneness, check out my notes on egg cooking times! You want smooth yolks for a smooth filling, remember?
Ingredients Needed for Classic Deviled Eggs
The beautiful thing about these amazing snacks is that you probably have almost everything already sitting in your fridge or pantry! We are leaning into that throwback vibe with just a handful of classic components. These are truly some of the best simple ingredients appetizers you can make for any gathering, whether it’s a big family dinner or just a casual Sunday get-together. If you’re looking for more pantry mainstays, that list is perfect.
Here’s what you need to gather for 24 perfect halves:
- 12 large eggs
- 1/2 cup mayonnaise (Use the good stuff, trust me!)
- 2 tablespoons yellow mustard (Classic American yellow, not Dijon!)
- 1 tablespoon white vinegar
- 1/2 teaspoon salt
- 1/4 teaspoon black pepper
- Pinch of paprika, for garnish
Step-by-Step Instructions for Perfect Deviled Eggs
Okay, now that you have your ingredients sorted, let’s put this thing together! This recipe is fast, which is why it’s one of my top picks for your next platter of quick egg appetizers. The total work time is surprisingly short, but we do have one important waiting period at the end. Don’t cheat that final chill time; it really lets all that tangy flavor sink in and helps set those fillings perfectly before guests arrive.
Remember, the key to success is moving quickly when peeling and then moving carefully when mixing. Let’s walk through what you need to do! If you are looking for great ideas for more fast snacks, check out that link!
Cooking and Cooling the Eggs
First things first: get those twelve eggs into a nice big saucepan. Cover them with cold water—and I mean completely cover them, with about an inch or so of water over the top. Set that pan over high heat and bring the water to a full, rolling boil. The second it starts boiling hard, turn off the burner completely, cover the pan tightly with a lid, and just let them sit there for exactly 12 minutes. No peeking!
When the timer goes off, don’t mess around—get those eggs out of the hot water immediately and drop them right into that ice bath we talked about. They need to chill out for at least 15 minutes until they are fully cool to the touch. This cooling process is what guarantees you get those beautiful, clean cuts when you slice them open later and makes peeling simple. If you want to learn more about getting perfect egg doneness, check out my notes on egg cooking times!
Creating the Tangy Yolk Filling
Once they are cool and peeled, slice them all in half lengthwise. Gently scoop every speck of yolk into a medium bowl. Now, this is where we create the magic for these fantastic deviled eggs.
Use a sturdy fork to mash those yolks until they look like golden sand—no lumps allowed! If you have a hand mixer, great, use that! I aim for zero grit; just pure, fine powder. Once it’s powdery smooth, add in your mayonnaise, mustard, vinegar, salt, and pepper. Mix it all up until it is completely cohesive and you can’t see any streaks of yellow or white remaining. If you’re struggling to get it perfectly smooth, add just a tiny splash more vinegar or mayo until it whips up nicely. That’s how you get that ultimate creamy mouthfeel!
Assembling and Garnishing Your Deviled Eggs
Take your empty egg white boats and arrange them nicely on your serving platter. Now, you can totally spoon the filling back in, but honestly, if you want them to look like true crowd pleasing appetizers, grab a piping bag fitted with a large star tip. Fill that bag with the yolk mixture and pipe beautiful swirls back into the egg white cups. It makes all the difference!
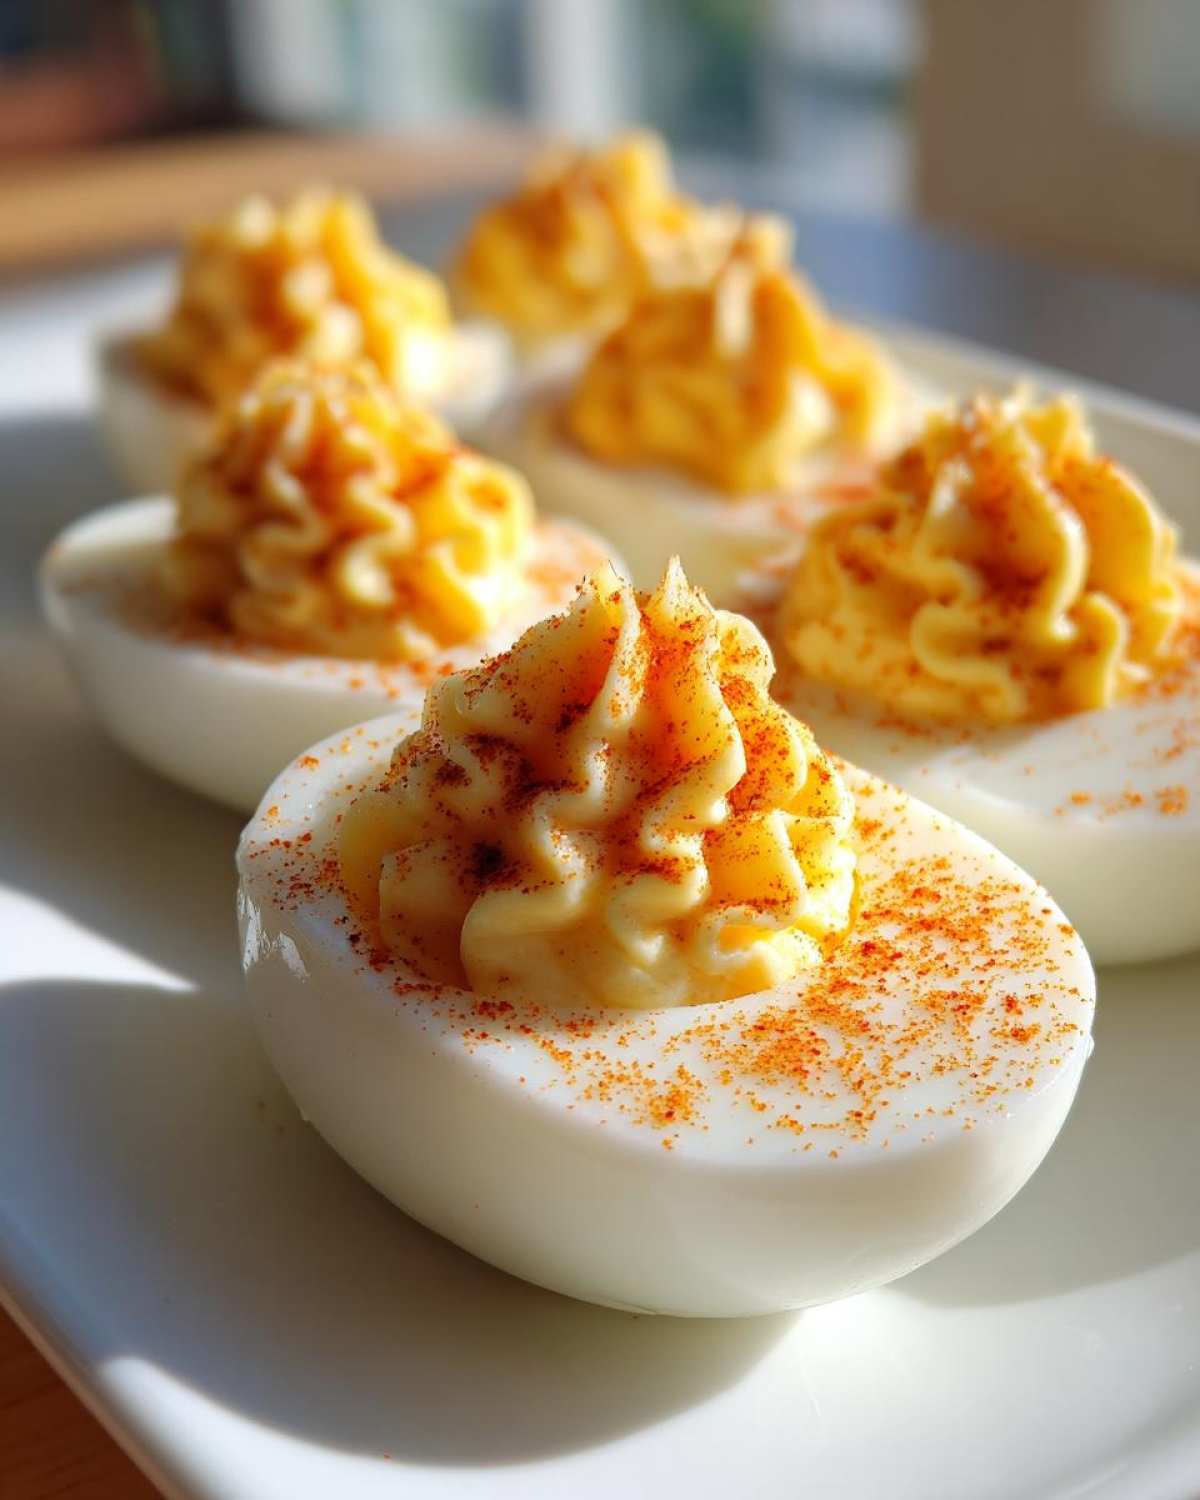
Finish every single one with the tiniest dusting of paprika right on top. It gives you that classic look. Now, here is the final step for achieving the best deviled egg flavor: cover the platter loosely with plastic wrap and pop them in the fridge for at least 30 minutes before serving. This resting time lets the acidity from the vinegar and mustard mellow out the richness of the mayo. Trust me, they taste way better when they’ve had a little time to chill out together!
Tips for Foolproof Appetizer Deviled Eggs
Look, even with the best recipe in the world, sometimes things go sideways in the kitchen, right? I’ve made enough of these to know every little trick to keep your platter looking perfect. This is my essential checklist for anyone wanting to use this recipe as their go-to foolproof appetizer guide for parties. My goal is always that filling stays creamy, doesn’t weep that weird liquid onto the plate, and tastes bright and exciting.
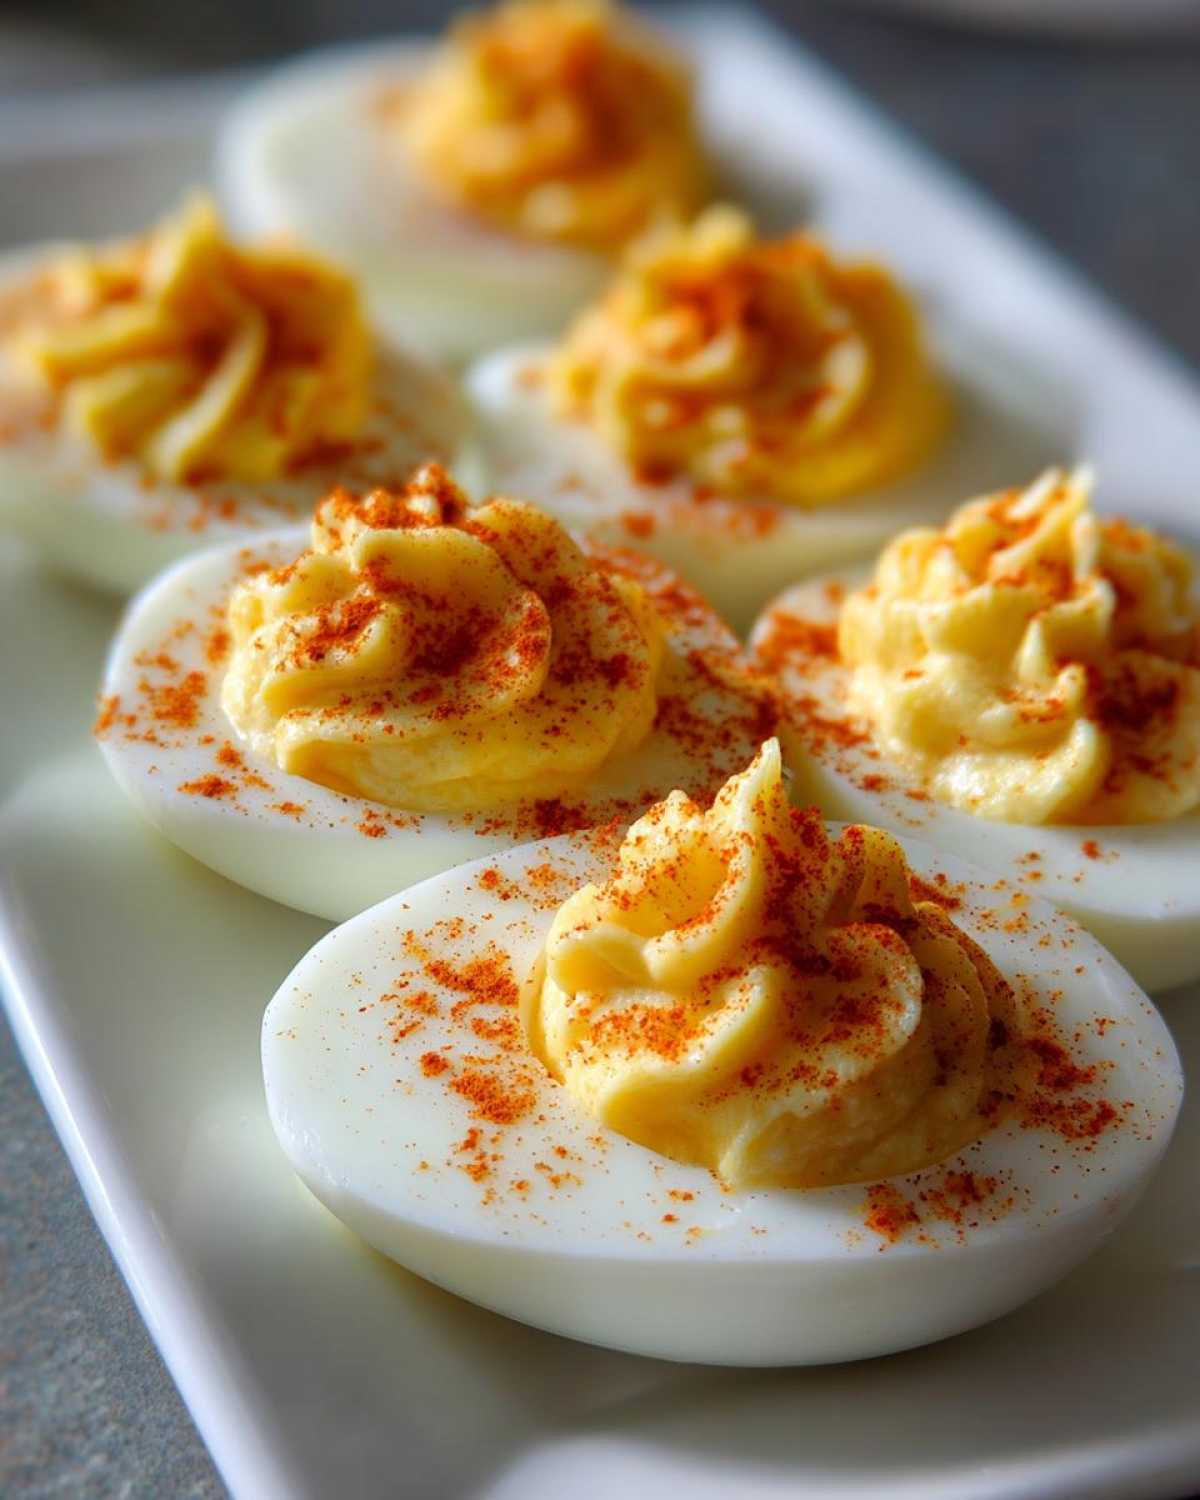
Don’t let anyone tell you that making gorgeous deviled eggs is hard. It just takes a little insider know-how, which I’m happy to share! I think the main reason people run into trouble is either over-mixing the filling or not chilling them long enough. For all my favorite tips designed to make your next event stress-free, make sure you look over my complete foolproof appetizer guide!
Ingredient Notes and Substitutions for Deviled Eggs
If you want to cut back slightly on the richness of the mayonnaise—and still keep that incredible velvety texture we worked so hard for—I highly recommend swapping out half the mayo for plain Greek yogurt. It sounds wild, but it adds this amazing, subtle tanginess without changing the consistency too much. You’ll still get that beautiful, smooth mound when piping, but it feels a little lighter!
Also, please feel free to play around with the acid level to create your absolute tangy yolk filling. Two tablespoons of vinegar is my sweet spot, but if you’re serving this to folks who love a real pucker, consider increasing it to two tablespoons and maybe adding a teaspoon of fresh lemon juice along with it. I usually taste the filling right before I swap it into the whites—if it doesn’t make me snap my fingers with delight, it needs a pinch more salt or a dash more vinegar. Never be afraid to taste as you go!
Making Deviled Eggs Ahead of Time for Parties
If you’re hosting or bringing a dish to a big potluck, timing is everything, right? Nobody wants to be frantically slicing eggs while the doorbell is ringing! The great news about these classic deviled eggs is that they are fantastic for planning ahead, which makes them one of my absolute favorite make ahead appetizers for holiday feasts or big game days. You just need to know the secret to keeping them fresh and perfect until serving time!
I usually break the process into two chunks. Day one is all about getting those eggs cooked, peeled, and chilling. Day two is assembly line time, which is way less stressful. For the complete rundown on prepping ahead for events, make sure you check out my full guide to great make ahead appetizers. This will save your sanity during busy seasons like Thanksgiving or Easter!
Here’s my specific strategy for ensuring these holiday finger foods are ready to go without sacrificing that creamy texture:
- Cook and Peel: Complete the entire boiling, shocking, peeling, and halving process the day before. Place the empty egg white halves in an airtight container lined with a slightly damp paper towel and keep them in the fridge. They stay fresh beautifully this way!
- Yolk Filling Storage: Mix up the filling just as directed, aiming for that perfectly smooth texture. Store the filling in a separate, airtight container. If you’re worried about the top drying out, press a piece of plastic wrap directly onto the surface of the filling before sealing the container lid.
- The Assembly: Wait until about 1 to 3 hours before you need to serve them to combine. Fill the whites, garnish with paprika, and then place them back in the fridge. They taste best when they’ve had at least 30 minutes to chill post-assembly, so filling them an hour or two ahead is perfect timing.
Never attempt to fill the eggs more than 24 hours in advance! The mayo and vinegar can start to break down, making the filling weep slightly or look a little watery when they sit for too long. Keeping them separate makes them the perfect make-ahead item that still tastes totally fresh!
Serving Suggestions for Your Classic Deviled Eggs
Honestly, once you nail the perfect creamy texture on these deviled eggs, they deserve center stage! But they also play so nicely with almost every other dish we bring to a potluck or serve on game day. These aren’t just stand-alone stars; they’re team players!
Since we made these to be perfect classic appetizer recipes, I always think about what else is on the table. If you’re taking them to a big spread, they pair wonderfully with something salty and something fresh. Consider setting them next to a big bowl of spicy seasoned nuts or maybe some crispy veggie sticks if you want a little crunch contrast.
For visual appeal, presentation is everything. I love loading them onto a big, rustic wooden board rather than a standard white platter. This makes the bright yellow filling and the pop of paprika really stand out. If you are using a regular platter, try lining the bottom with a layer of crisp lettuce leaves (like butter lettuce) or even some fresh parsley sprigs. It makes the whole tray look instantly more thoughtful!
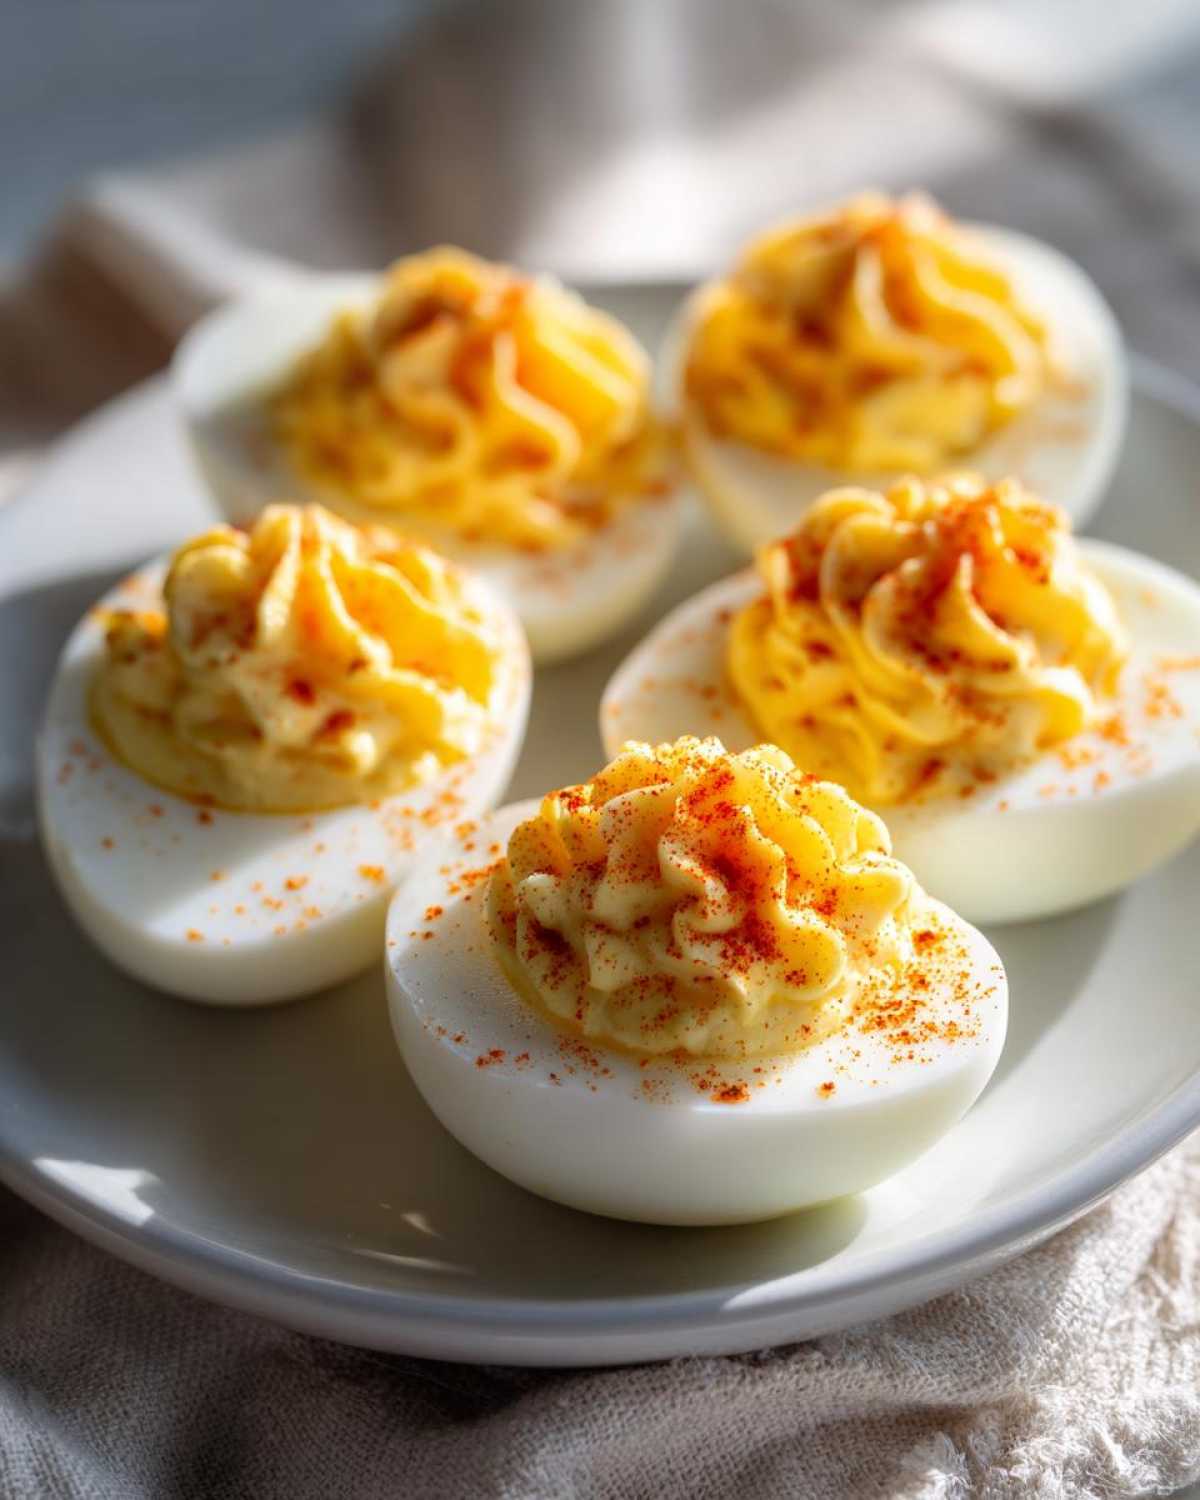
If you are looking for other fantastic crowd pleasing appetizers to put on the same spread, I have a whole list of ideas over at my guide for awesome game day food ideas. When you combine these delicious, tangy mouthfuls with a few other simple snacks, you’ve got a spread no one will ignore!
Storage and Reheating Instructions for Deviled Eggs
Because these are made with mayonnaise and cooked egg, handling them safely is super important, especially if they are sitting out at a party—which, let’s be honest, is where these delectable little easy party food ideas usually end up!
The main thing I want you to remember is that deviled eggs really don’t reheat well at all. Don’t even try it! The texture of the yolk filling gets strange, and the whites can get rubbery when you try to warm them up. So, the focus here is purely on safe storage before serving them cold or chilled.
If you’ve followed my assembly advice, you know I push for chilling them for at least 30 minutes right after you fill them. That’s the perfect holding pattern. Once they are chilled, they need to stay cold. If they are sitting out on the buffet line, try to limit that time to no more than two hours total, especially if the room is warm. If it’s really hot outside—like at a summer picnic—you need to keep them on ice or bring them out just before serving.
For storing leftovers, once they’ve been filled and garnished, transfer that platter or the container they are in to the refrigerator immediately. They keep really well tucked away in an airtight container for up to three or four days. I rarely have leftovers past day two myself because everyone loves these so much, but they are definitely safe that long! For more indispensable advice on serving crowds, take a peek at my guide to getting all your party food logistics right. These eggs are always the first thing gone!
Frequently Asked Questions About Deviled Eggs
I get so many messages asking about tweaks and troubleshooting for deviled eggs, so I figured it’s easiest just to answer the most common ones right here! Getting that perfect presentation and texture really makes these brunch recipes shine, so let’s tackle those panic points! For lots more hosting inspiration, you should check out my section on great brunch recipes.
How do I keep the yolk filling on my deviled eggs from turning green?
Ugh, that dreaded green ring! That happens when the sulfur in the egg white reacts with the iron in the yolk during overcooking. That’s exactly why my cooking method requires that immediate transfer to the ice bath after boiling and covering them. The quick cooling stops that chemical reaction dead in its tracks! Also, mixing the filling promptly after removing the yolks helps seal that bright yellow color back in. If you notice any slight grayness, it just means they cooked a smidge too long, but once you hide it under that gorgeous creamy filling, nobody will ever know the difference!
Can I use hard-boiled eggs made in the Instant Pot for deviled eggs?
You absolutely can! I know lots of people swear by their Instant Pots for hands-off cooking, and they work great for standard hard-boiled eggs. The key when using an alternate cooking method like that is consistency. Whether you’re boiling on the stove or pressure cooking, you must still shock those eggs immediately in that ice bath afterward. If they steam too long or cool down slowly, you’ll still get that sulfur reaction and peeling will be a nightmare. As long as your eggs peel easily and aren’t rubbery, they are perfect for making these tangy yolk filling beauties!
My filling looks a bit watery; what did I do wrong?
That usually points to one of two things. Either your yolks weren’t mashed dry enough before adding the mayo (meaning there was surface moisture clinging to them), or you might have over-mixed the filling after adding the liquids. When you add the mayo, mustard, and vinegar, stop mixing as soon as everything is combined. If you mix it like you’re making buttercream frosting, you incorporate too much air, and it can start to break down and get runny. For the best results amongst all your classic appetizer recipes, just mix until smooth and then get them into the fridge to set up!
Estimated Nutritional Information for Deviled Eggs
Now, I know we aren’t making these amazing deviled eggs for health reasons—they are pure party food perfection—but it’s always nice to have a general idea of what we’re dealing with, right? When I was planning my recipes for big family get-togethers, I wanted to make sure I had all the details covered, including some rough estimates for the folks asking. This recipe is packed with so much flavor from the mustard and vinegar, it feels way more indulgent than the numbers suggest!
Keep in mind that these figures are just my best guess based on standard ingredient sizes, so they are a close reference rather than a strict lab analysis. If you are planning a big spread of potluck side dishes, these are still going to be a crowd favorite that disappears in minutes!
Here is the estimated breakdown per serving (which again, is two delicious halves):
- Serving Size: 2 halves
- Calories: 90
- Fat: 8g
- Saturated Fat: 2g
- Trans Fat: 0g
- Cholesterol: 100mg
And here are the smaller numbers:
- Carbohydrates: 0.5g
- Sugar: 0.5g
- Protein: 3g
- Sodium: 120mg
See? Not bad for one of the very best simple snack recipes you can whip up! When you look at the fat content, remember that’s coming primarily from the egg yolk and the mayonnaise, which are essential for achieving that incredible, luxurious creaminess we talked about. Honestly, you can’t skimp on the fat if you want the best deviled egg flavor—that’s what carries all that tangy mustard!
If you want to check out some other amazing dishes that pair perfectly with these creamy bites, I’ve highlighted some great options over in my guide to fantastic potluck side dishes. Enjoy eating them!
PrintClassic Creamy Deviled Eggs
Make perfect, creamy deviled eggs every time with this simple recipe. This classic appetizer is ideal for parties, holidays, and gatherings.
- Prep Time: 20 min
- Cook Time: 12 min
- Total Time: 32 min
- Yield: 24 halves
- Category: Appetizer
- Method: Boiling and Mixing
- Cuisine: American
- Diet: Vegetarian
Ingredients
- 12 large eggs
- 1/2 cup mayonnaise
- 2 tablespoons yellow mustard
- 1 tablespoon white vinegar
- 1/2 teaspoon salt
- 1/4 teaspoon black pepper
- Pinch of paprika, for garnish
Instructions
- Place eggs in a large saucepan and cover with cold water. Bring the water to a rolling boil over high heat.
- Once boiling, remove the pan from the heat, cover it, and let the eggs stand for 12 minutes.
- Immediately transfer the eggs to an ice bath (a bowl of ice and water) and let them cool completely, about 15 minutes.
- Peel the cooled eggs. Slice each egg in half lengthwise.
- Gently scoop the yolks into a medium bowl. Place the empty egg white halves on a serving platter.
- Mash the yolks with a fork until fine. Add the mayonnaise, mustard, vinegar, salt, and pepper. Mix until the filling is completely smooth and creamy.
- Spoon or pipe the yolk mixture back into the egg white halves.
- Garnish the tops of the filled eggs with a light sprinkle of paprika.
- Chill for at least 30 minutes before serving for the best flavor.
Notes
- For easy peeling, crack the cooled eggs gently all over and peel them under running cool water.
- If you prefer a tangier filling, substitute half of the mayonnaise with plain Greek yogurt.
- Use a piping bag with a star tip for a professional look when filling the egg whites.
Nutrition
- Serving Size: 2 halves
- Calories: 90
- Sugar: 0.5
- Sodium: 120
- Fat: 8
- Saturated Fat: 2
- Unsaturated Fat: 6
- Trans Fat: 0
- Carbohydrates: 0.5
- Fiber: 0
- Protein: 3
- Cholesterol: 100