

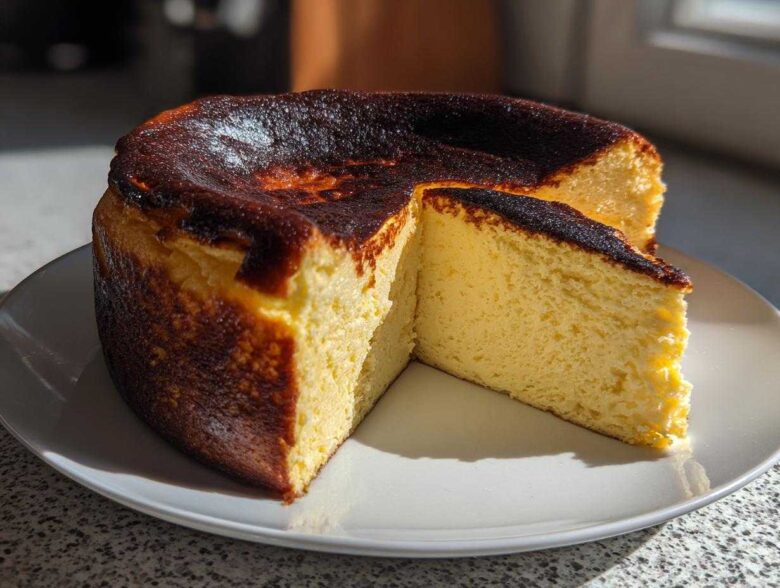
I swear to you, this basque burnt cheesecake recipe is the one that finally made me feel like I understood magic in the kitchen. Remember all those fussy cheesecakes I used to try? The ones that needed a water bath, precise oven temperatures, and ended up cracking anyway? Forget all that nonsense! You absolutely must check out the latest baking tips over at our main blog page!
This crustless Spanish style cheesecake, often called San Sebastian Cheesecake, is proof that sometimes the simplest recipes deliver the most impressive results. Seriously, the very first time I made this decadent cream cheese dessert, I thought I had ruined it because the top looked so dark, but opening the oven revealed the most beautifully rustic, caramelized top cheesecake exterior I had ever seen!
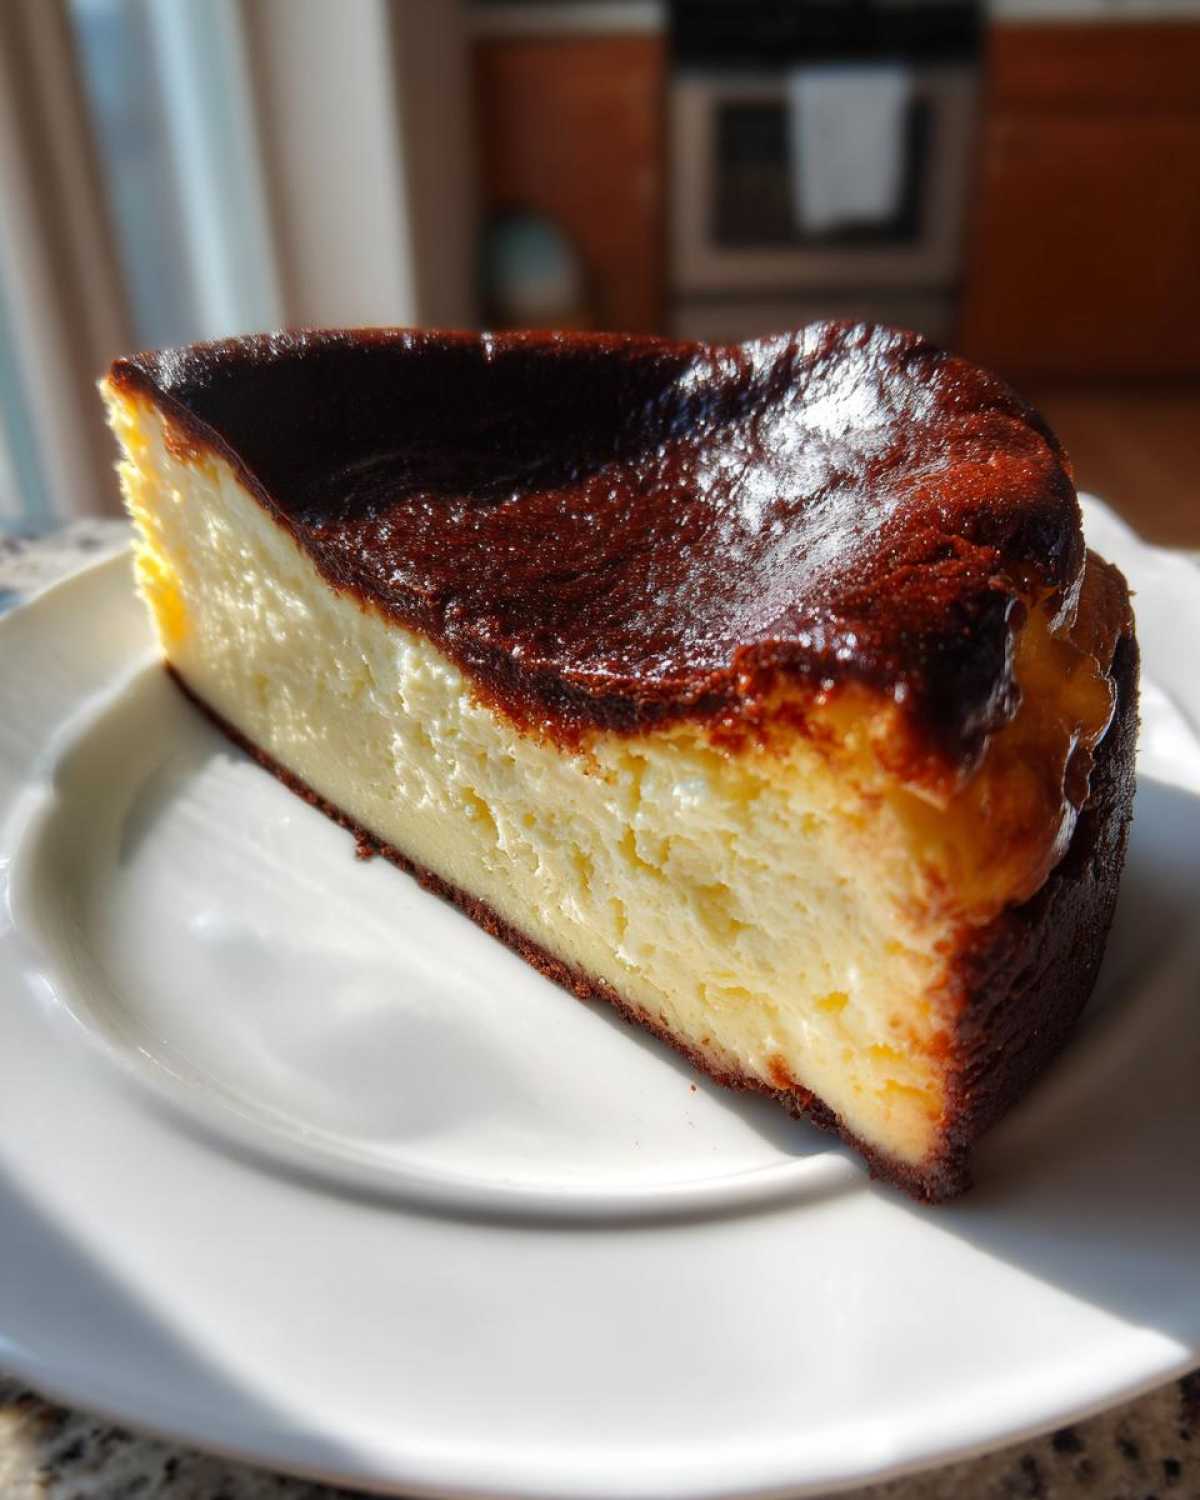
The payoff inside, though? Oh my goodness. It’s unbelievably creamy, almost mousse-like when chilled properly. It’s truly the *Best Basque Cheesecake* because it’s gorgeous, zero fuss, and tastes like something you’d pay a fortune for in a fancy bakery. Trust me on this; you need this impressive homemade dessert in your life.
Why This Easy Basque Burnt Cheesecake Recipe Works
What I love most about this recipe is that it completely skips the two most nerve-wracking parts of traditional baking. We aren’t messing with a water bath—nope! This is a true No Water Bath Cheesecake. Also, don’t even worry about a crust! That’s why this method is so fast for a Crustless Cheesecake Tutorial. You just mix, pour, and bake. It’s the simplest approach for getting a dessert that looks this gourmet.
If you want to see how some other deceptively simple desserts come together, check out my tips for making a perfect no-bake pie; clean slicing is key there, too!
Achieving the Signature Creamy Cheesecake Dessert Interior
The secret to that Creamy Cheesecake Dessert interior is twofold, really. First, we use a lot of cream—600ml, folks! Second, you absolutely must use room temperature ingredients. I mean it! Cold cream cheese clumps up immediately, and if you have lumps, you over-mix trying to smooth them out. Over-mixing equals too much air, and that causes huge cracks. We want velvety, smooth, happy cream cheese batter, so take your time letting everything warm up before you start.
The Perfect Caramelized Top Cheesecake Exterior
The high heat—we start at 200°C—is what does all the heavy lifting for the look of a perfect basque burnt cheesecake. You are deliberately pushing the sugar and milk solids on top to caramelize deeply, almost to the point of burning. If you stop baking too early because you’re scared of the dark top, you end up with a pale cake that hasn’t set right. That dark color isn’t just for show; it’s part of the flavor profile we want in this Caramelized Top Cheesecake!
Essential Ingredients for Your Basque Burnt Cheesecake
Okay, gather your crew! One of the best things about this basque burnt cheesecake is how few ingredients you actually need. Honestly, it feels like cheating, but these seven components work together in perfect harmony. Always opt for the highest quality you can find when you’re dealing with so few items; it really shows through, especially with the dairy!
We are using 900 grams of cream cheese—use the full fat stuff, don’t even think about low-fat versions or it won’t set right. You’ll need 300 grams of granulated sugar, six large eggs, 600 milliliters of heavy cream (make sure it’s true, high-fat heavy cream, around 35% if you can find the percentage listed), a teaspoon of vanilla extract, half a teaspoon of salt, and just 30 grams of all-purpose flour.
If you want a peek at another recipe where ingredient quality really pays off in texture, take a look at my moist banana bread guide! It uses simple things, but the technique matters.
Ingredient Notes and Substitution Tips for Basque Burnt Cheesecake
Let’s talk temperature first: the cream cheese absolutely has to be softened. I mean truly soft, leaving a dent easily. If it’s cold, your mixing bowl will end up full of tiny, miserable cream cheese pebbles, and we can’t have that in our Creamy Cheesecake Dessert! Those lumps just won’t blend into the required smooth batter.
The heavy cream is non-negotiable too. We need that high fat content to give us the rich, almost custard-like texture once it cools down. If you use half-and-half or milk, you’re looking at a sunken puddle instead of a dense cake! The flour is just a whisper here—it’s not there for structure like in a regular cake; it’s there to give the batter just enough body so that when it’s done, it sinks into that signature velvety middle, perfect for this basque burnt cheesecake.
How To Make Basque Burnt Cheesecake: Step-by-Step Instructions
Alright, let’s get baking! This section is where we cover exactly How To Make Basque Burnt Cheesecake using my favorite Simple Cheesecake Baking method. Pay close attention to the first step, because it’s completely different from what most people do with cake pans!
First things first: get that oven cranked up—we need it hot! Preheat to 200°C (400°F). If you’re looking for a quick, comforting meal after baking this showstopper, you should check out my creamy chicken gnocchi recipe; it’s ready in 30 minutes!
Preparation: Lining the Pan for Your Crustless Cheesecake Tutorial
Since this is a Crustless Cheesecake Tutorial, the parchment paper is our hero! You need two very large sheets of parchment paper, and you have to crisscross them in your 9-inch springform pan. Most importantly, let that paper stick up *way* high over the edges. Don’t trim it! This overhang catches the batter as it rises and helps you lift the whole thing out later. It’s the best trick for keeping this basque burnt cheesecake intact.
Mixing the Rich Velvety Dessert Batter
When mixing, remember our goal: smooth, but not fluffy! Start by beating the softened cream cheese until it’s totally slick. Then add the sugar and mix until just combined—no whipping allowed! When you add the eggs, only mix until they disappear. If you add too much air now, you destroy our velvety dream and end up with a dry cake. Once the cream, vanilla, and salt go in, mix low and slow. Finally, gently fold in that tiny bit of sifted flour with a spatula. That batter is going to look thinner than pancake mix, and that is *exactly* what we want for a truly Rich Velvety Dessert.
Baking and Achieving the San Sebastian Cheesecake Look
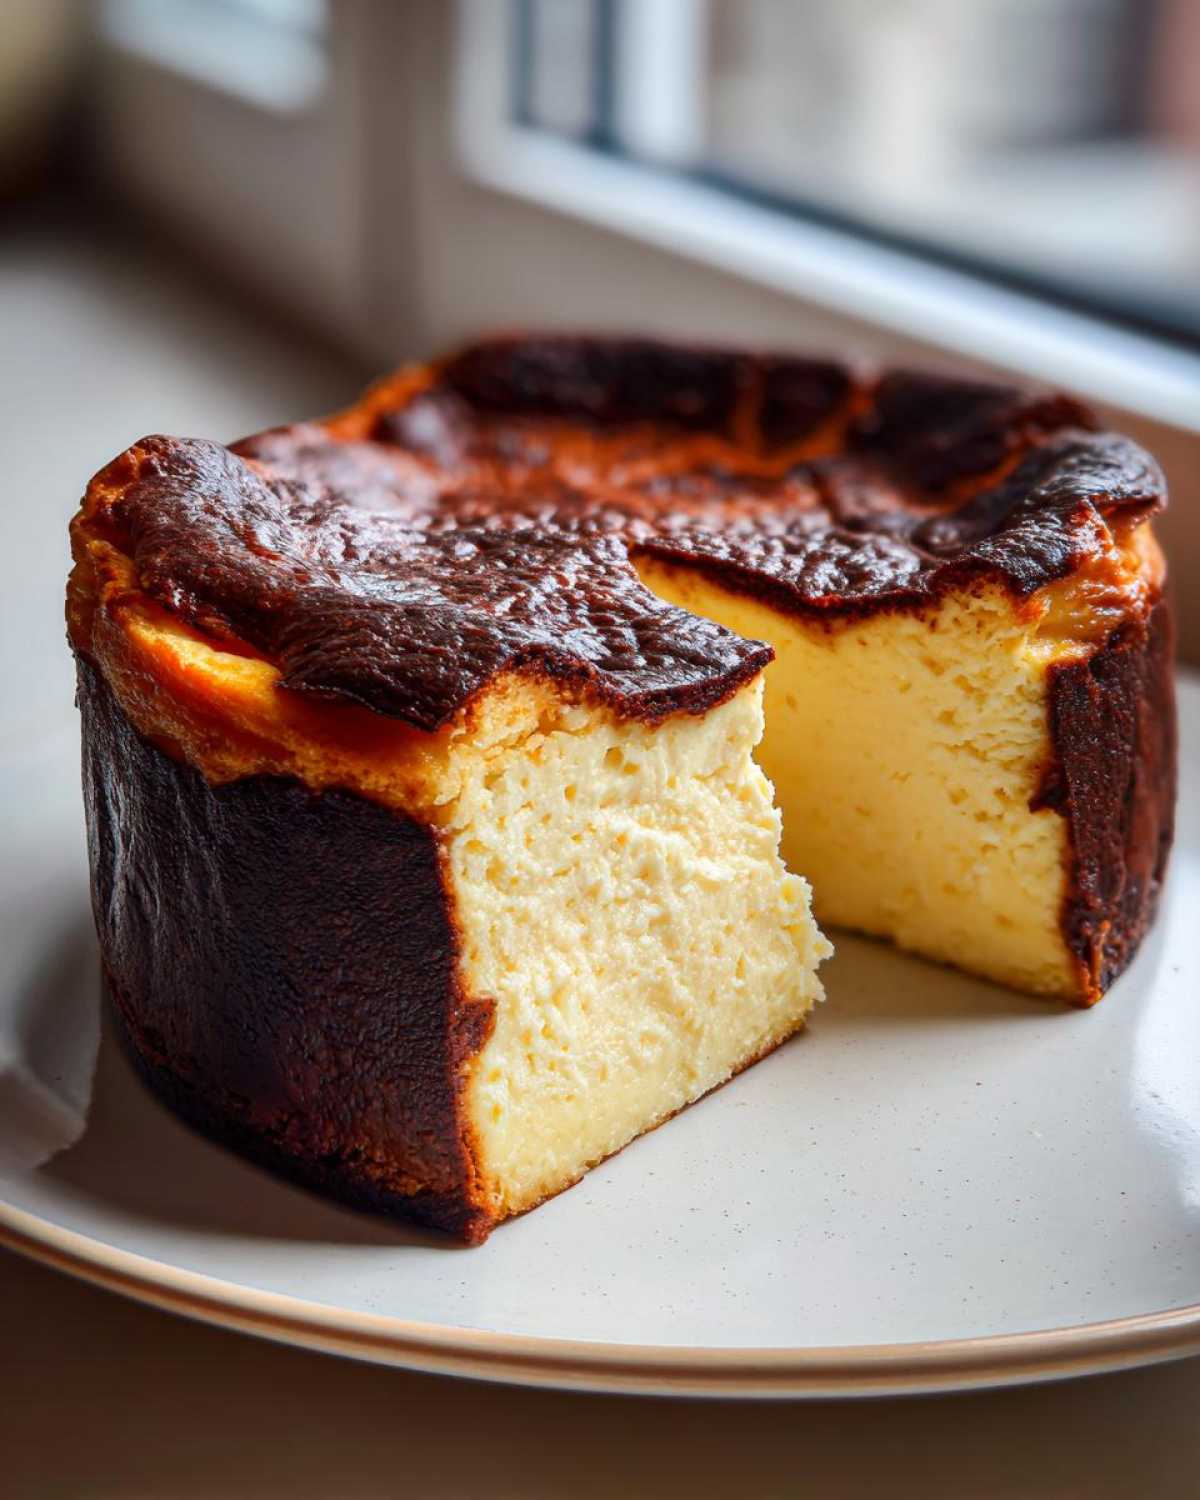
Pour that thin batter right into your parchment-lined pan. Now, pop it into that hot 200°C oven for about 50 to 60 minutes. You are aiming for the edges to look set, but the middle? The middle needs to have a significant wiggle, like jello trying to escape! If you wait until the center is firm, you’ve gone too far. That beautiful set-in-the-middle, incredibly dark top is the signature look of a true San Sebastian Cheesecake and the result of the high heat creating that Caramelized Top Cheesecake effect.
Cooling and Chilling: Secrets to the Best Basque Cheesecake
Okay, this might be the hardest part of the whole basque burnt cheesecake process, but you have to trust the science here. You simply can’t rush the cooling! When you pull that gorgeous, dark, wobbly wonder out of the oven, it looks utterly raw in the middle, right? Don’t panic! That wobble is your golden ticket to that incredible, rich, creamy texture we are aiming for.
First, leave it alone. Let it cool completely on a wire rack right there on the counter for at least three solid hours. It’s going to deflate dramatically, maybe even sink down toward the edges. This sinking is totally normal and mandatory! If it doesn’t sink, it means you overbaked it, and it’ll be dense instead of that light, almost mousse-like texture. It’s science, trust me!
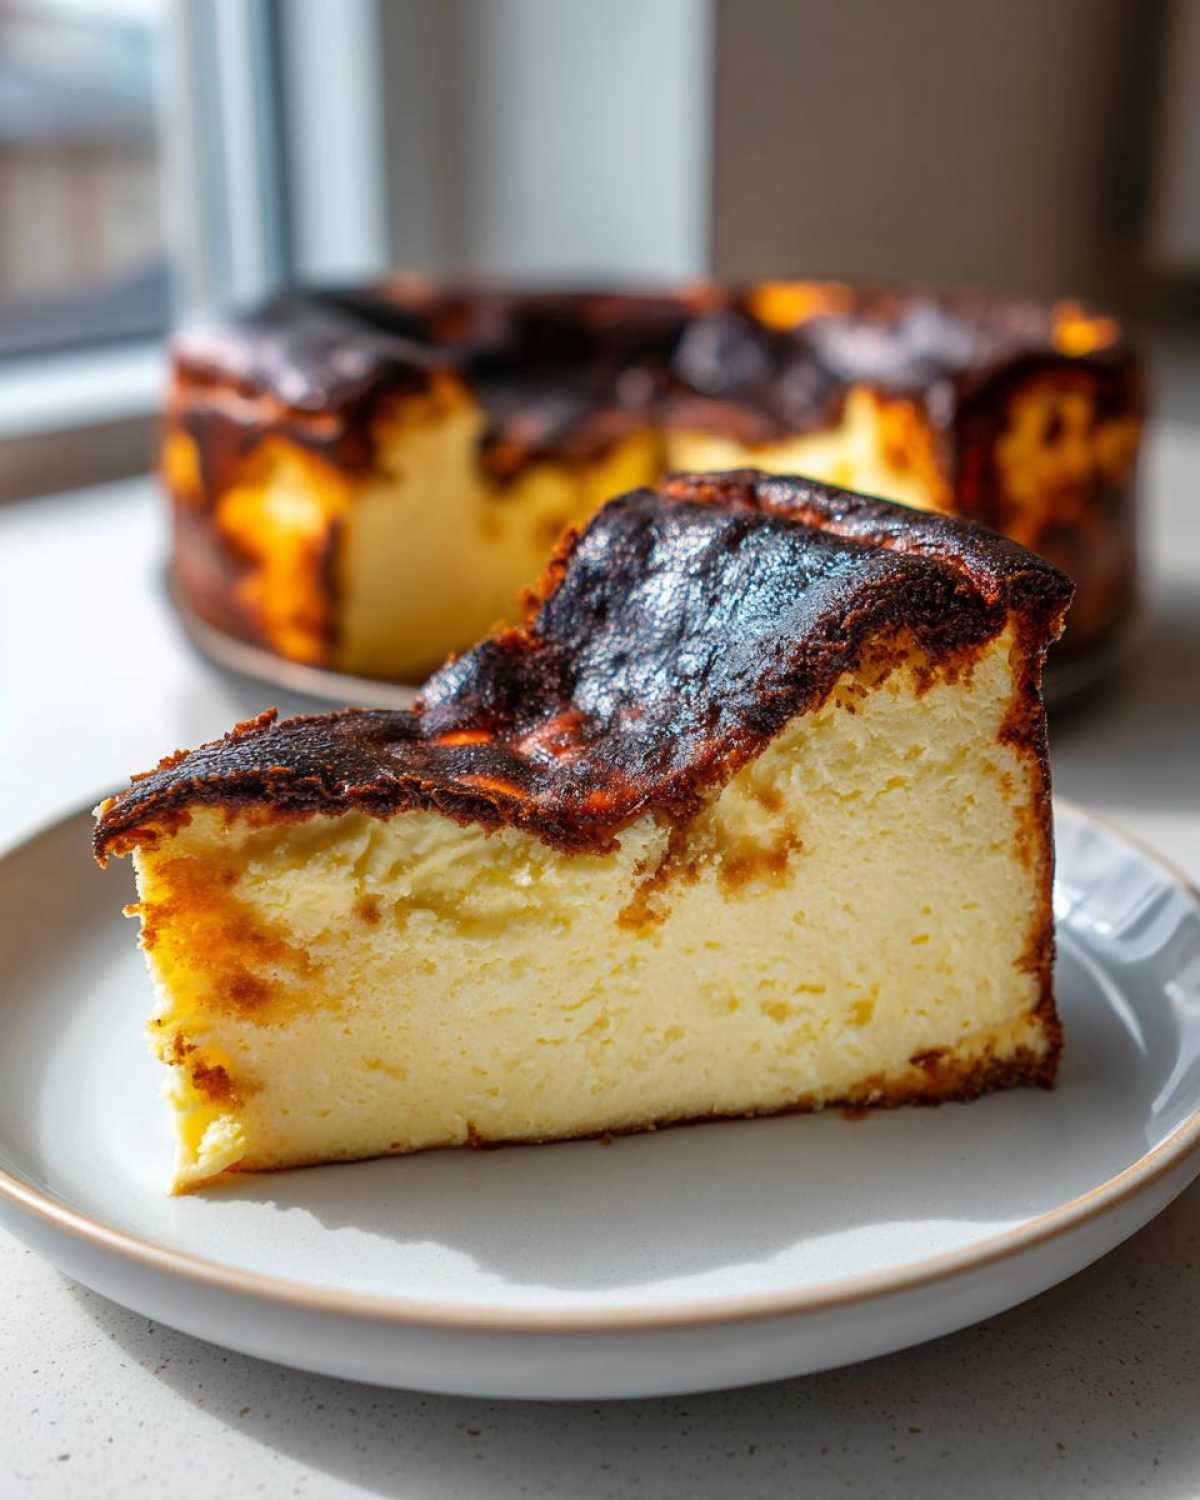
Once it’s back to room temperature—and I mean totally cool, not warm at all—then it’s time for the refrigerator. This is where the magic solidifies. You need at least six hours, but honestly, overnight is best for making the Best Basque Cheesecake. When you finally slice into it the next day, that center will have transformed from a wobble into the creamiest, smoothest slice imaginable. It’s worth the wait, I promise. You can look at my no-bake Biscoff cheesecake post to see how important chilling is in almost every cheesecake recipe!
Tips for Success with Your Basque Burnt Cheesecake Recipe
Even though this basque burnt cheesecake is incredibly forgiving, I have a few little things I learned the hard way that I want to save you from! These pointers are straight from the little scribbles I made on the margins of my original recipe card. Don’t skip the prep, or you might end up wrestling your dessert!
Tip number one, which I mentioned before but needs repeating because it’s so vital: use room temperature ingredients unless you like small lumps in your decadent batter. Cold cream cheese and cold cream fight each other, and smooth is what we’re after for that perfect velvety finish.
Second, and this is huge: Do. Not. Use. A. Water. Bath. Seriously! This *Spanish Style Cheesecake* is famous because it specifically *doesn’t* need that fussy step. The high heat on its own is what creates that rustic, dark caramelization on top. Playing around with a water bath will just mess up the textural contrast we’re going for here.
Speaking of playing around, if you don’t have a springform pan handy, you absolutely can use a loaf pan! This is my go-to when I need a smaller batch or just don’t want to wrestle with a big round cake. Just make sure you line that 9×5 inch pan really well with parchment paper, letting it drape over the sides, just like we do with the round one. You’ll probably need to add about 10 to 15 minutes to that baking time—the heat has to travel further down into the center of that Loaf Pan Cheesecake Recipe!
And please, when you pull it out, embrace the wobble! If it looks underdone in the center, you did it perfectly. That’s liquid gold waiting to turn into creamy magic in the fridge, giving you that amazing final texture for your Easy Burnt Cheesecake. If you want to check out some delicious savory baking ideas—like getting the timing right on my air fryer chicken—you can find that recipe right here!
Serving Suggestions for This Impressive Homemade Dessert
Honestly, serving this basque burnt cheesecake is almost a little insulting because it’s so perfect all on its own! It’s already rich, it’s already sweet, and that caramelized crust adds all the intense flavor we need. I always tell people, when you make something this good, you don’t try to hide it under tons of frosting or weird toppings. Keep it simple; let that creamy texture and burnt top be the star of the show.
If you want *something* extra on the plate, I keep my additions light and tart to cut through all that glorious cream cheese fat. Fresh berries are my absolute favorite go-to. A small pile of raspberries or thinly sliced strawberries adds a beautiful pop of color and a bright, fresh contrast. And you know what? Sometimes, after it’s been chilled overnight, I just give a tiny, whisper-light dusting of powdered sugar over the top. Just right before serving so it doesn’t melt!
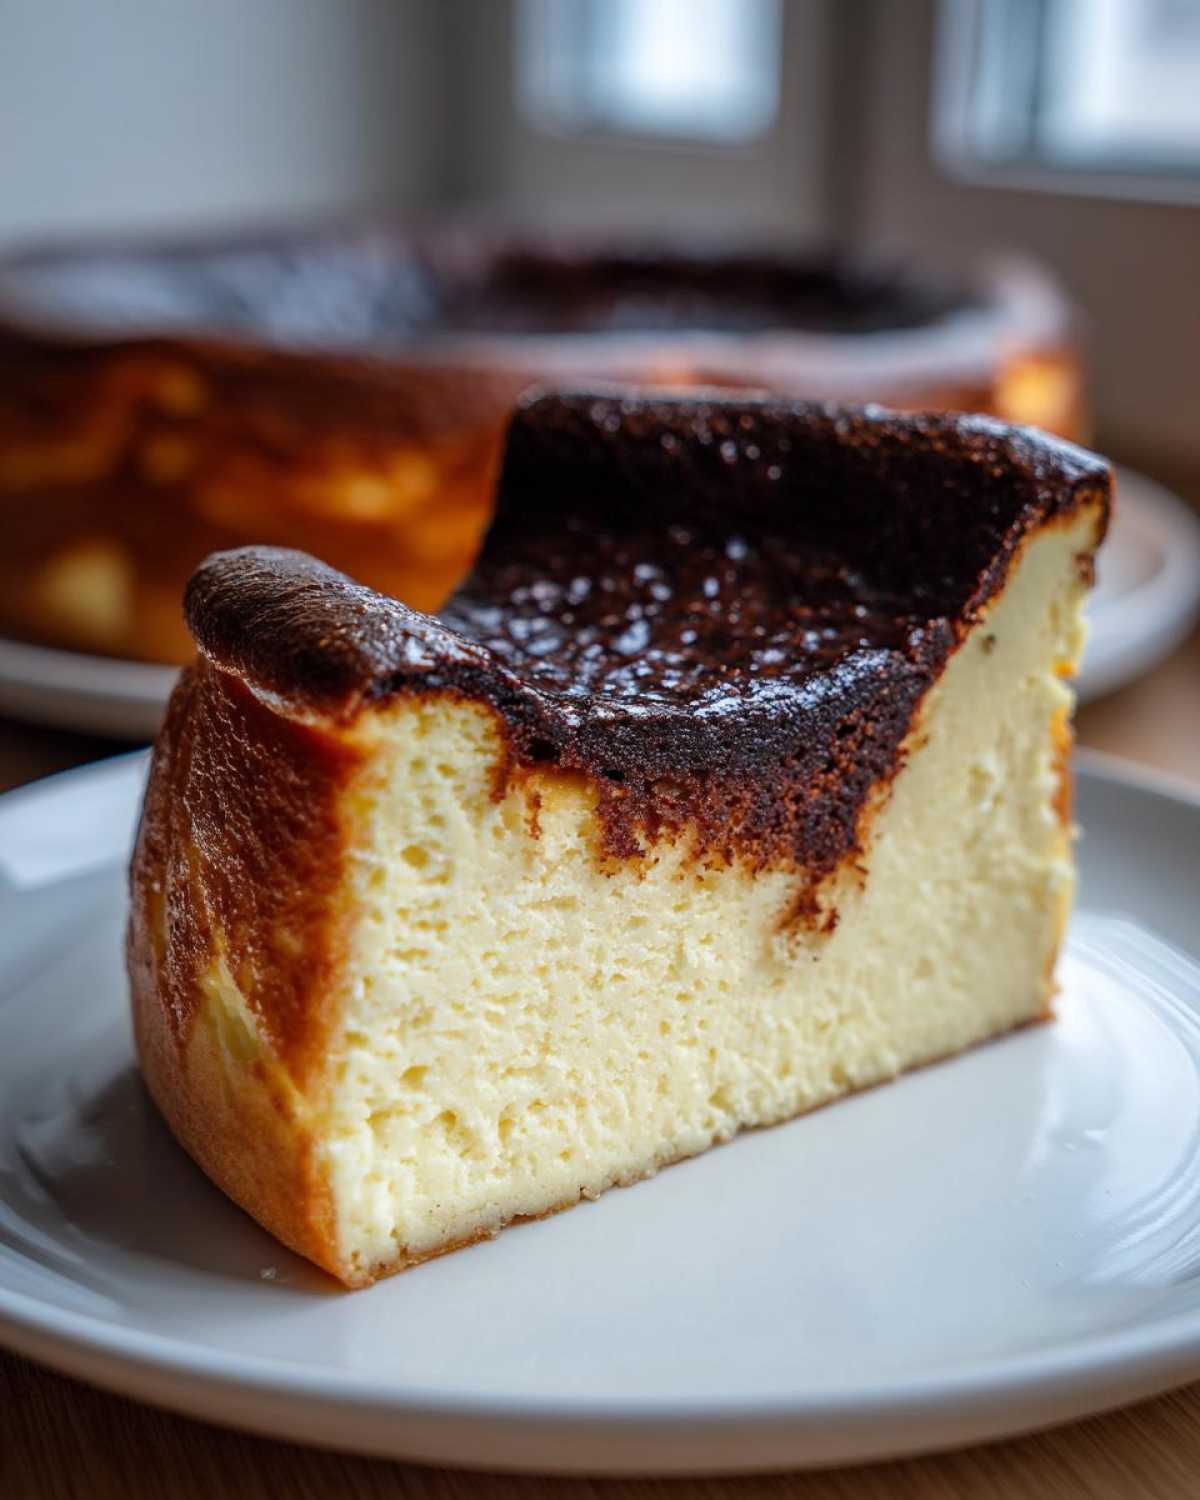
I’ve seen people try to drizzle chocolate sauce on this, and while I love chocolate like kissing my dog, it just muddies the clear, pure flavor of the San Sebastian Cheesecake. Stick to fruit or nothing. It makes for a much classier presentation, too, which is great if you’re trying to show off this Impressive Homemade Dessert!
We should talk about savory sides later, though! If you want something totally different to serve alongside your dessert, you have to try my honey butter skillet corn recipe; it’s the perfect sweet/savory side dish, find the recipe details here!
Storing Your Decadent Cream Cheese Dessert
So, you’ve navigated the baking, you’ve survived the cooling collapse, and you have this gorgeous, jiggly, decadent cream cheese dessert sitting in your fridge. Now comes one of the most important parts of making any basque burnt cheesecake: storage!
The good news is that this style of cheesecake is actually fantastic for making ahead of time. Remember how I said overnight chilling is best? That chill time is non-negotiable for setting that creamy center, but the beauty is that it keeps holding that texture for days. You can safely store your basque burnt cheesecake right in the springform pan (just cover the top loosely with plastic wrap or a cake dome) for up to four days in the refrigerator.
If you want to get really nerdy about food storage and how liquids behave in containers, you should take a look at my post on the proper liquid ratio for chia pudding; it helps understand why chilling is so crucial for setting dairy desserts!
Here is a crucial serving tip. When you pull the cheesecake out of the fridge to cut it, don’t slice into it immediately. If it’s ice-cold straight out of the box, the interior will be extremely firm—almost too dense, even though it’s set correctly. Let it sit out on the counter for about 30 to 45 minutes before you slice it.
That short tempering period—bringing it just slightly up from refrigerator temperature—is what restores that signature velvety, mousse-like texture we worked so hard to create. You’ll see it go from firm to yielding. That slight softening makes the biggest difference in how sensational this Easy Burnt Cheesecake tastes. If you let it get too warm, though, it will slump, so watch the clock and enjoy that perfect balance of firm edge and soft, deep center!
Frequently Asked Questions About Basque Burnt Cheesecake
I know you’re going to have questions, because I did when I first attempted this wonderful Spanish Style Cheesecake! It looks so different from a New York style, which always makes people nervous. But don’t worry, if you followed my steps, your result—even if it sinks a bit—will be delicious. If you are looking for something totally different but still quick, I’ve got a fantastic lemon garlic shrimp pasta recipe that’s ready ASAP!
Is it normal for my basque burnt cheesecake to sink?
Oh my goodness, yes! It is not only normal, it’s absolutely necessary if you want that signature creamy, almost under-baked interior. When the cake comes out of the oven, the center is still very loose—that’s the molten core that turns into the most magnificent texture once fully chilled. As it cools down on the counter, it loses structure fast and sinks right in the middle, sometimes by an inch or two! If your Easy Burnt Cheesecake *doesn’t* sink, that’s actually the sign that you baked it too long and you probably ended up with a firmer texture than intended. Embrace the sink!
Can I use a different size pan for this Creamy Cheesecake Dessert?
You definitely can switch pans, but you absolutely have to adjust your bake time because the batter depth changes! We based this recipe on a standard 9-inch springform, which is perfect for that specific bake time of 50 to 60 minutes. If you use a much smaller pan, like an 8-inch, the batter will be deeper, so you’ll likely need an extra 10 to 15 minutes of oven time. If you use a larger pan to make a thinner cake, you might actually cut the time down slightly. The best way to check when you change pan sizes is to look for that distinct wobble in the center, even if the timer hasn’t completely gone off yet!
Estimated Nutritional Information for This Gourmet Dessert Idea
Now, I always say that when you are eating something this gloriously rich and decadent, tracking calories is probably the absolute last thing you should be worried about! This is a celebratory dessert, people! However, because I do get asked about it—especially after my very health-conscious sister tried to figure out how to make a ‘light’ version (spoiler: we don’t do ‘light’ when it comes to basque burnt cheesecake!)—I dug up the estimates based on the huge amount of cream cheese and cream we use.
Please remember, these numbers are just guides based on standard ingredient calculations for one generous slice, so consider them your baseline for indulgence. If you are looking for great savory flavor without guilt, you absolutely have to check out my recipe for viral onion boil foil packets; it’s shockingly flavorful and requires minimal fat!
For one slice of this Gourmet Dessert Idea, here’s what we are looking at:
- Calories: Roughly 450 per slice (that’s a good, solid slice!)
- Fat: Around 35g. Yes, a good portion of that is the saturated fat needed to make this Decadent Cream Cheese Dessert so unbelievably creamy.
- Carbohydrates: About 30g, mostly from that granulated sugar.
- Protein: Surprisingly, we get about 8g of protein thanks to all that cream cheese and the six eggs!
You’ll notice the sugar content is high, but that’s necessary for both the flavor balance and for achieving that signature dark, caramelized exterior on this San Sebastian Cheesecake. Enjoy every single bite, knowing you earned it after mastering this easy baking trend!
PrintEasy Creamy Basque Burnt Cheesecake
A simple recipe for a crustless Basque Burnt Cheesecake featuring a creamy, velvety interior and a deeply caramelized top. This no-fuss dessert requires no water bath.
- Prep Time: 15 min
- Cook Time: 60 min
- Total Time: 7 hours 15 min
- Yield: 10 servings
- Category: Dessert
- Method: Baking
- Cuisine: Spanish
- Diet: Vegetarian
Ingredients
- 900g cream cheese, softened
- 300g granulated sugar
- 6 large eggs
- 600ml heavy cream (35% fat)
- 1 teaspoon vanilla extract
- 1/2 teaspoon salt
- 30g all-purpose flour
Instructions
- Preheat your oven to 200°C (400°F). Line a 9-inch springform pan with two layers of parchment paper, allowing the paper to overhang significantly on all sides. Do not trim the paper.
- In a large bowl, beat the softened cream cheese with an electric mixer until completely smooth. Scrape down the sides.
- Add the sugar and beat until just combined and creamy. Do not overmix.
- Add the eggs one at a time, mixing briefly after each addition until just incorporated.
- Pour in the heavy cream, vanilla extract, and salt. Mix on low speed until the batter is uniform.
- Sift the flour over the batter and gently fold it in using a spatula until no streaks of flour remain. The batter will be thin.
- Pour the batter into the prepared pan.
- Bake for 50 to 60 minutes. The top should be deeply browned, almost black in spots, and the edges should look set. The center should still have a significant wobble.
- Remove the cheesecake from the oven and let it cool completely on a wire rack at room temperature for at least 3 hours. The center will sink as it cools.
- Chill the cheesecake in the refrigerator for at least 6 hours, preferably overnight, before serving.
Notes
- Use room temperature ingredients for the smoothest batter.
- Do not use a water bath; this recipe relies on high heat for the crustless exterior.
- If you prefer a loaf pan, use a 9×5 inch pan lined with parchment paper. Adjust baking time slightly.
- The center will look underdone when you remove it; this creates the signature creamy texture.
Nutrition
- Serving Size: 1 slice
- Calories: 450
- Sugar: 35
- Sodium: 250
- Fat: 35
- Saturated Fat: 22
- Unsaturated Fat: 13
- Trans Fat: 0.5
- Carbohydrates: 30
- Fiber: 0
- Protein: 8
- Cholesterol: 250