

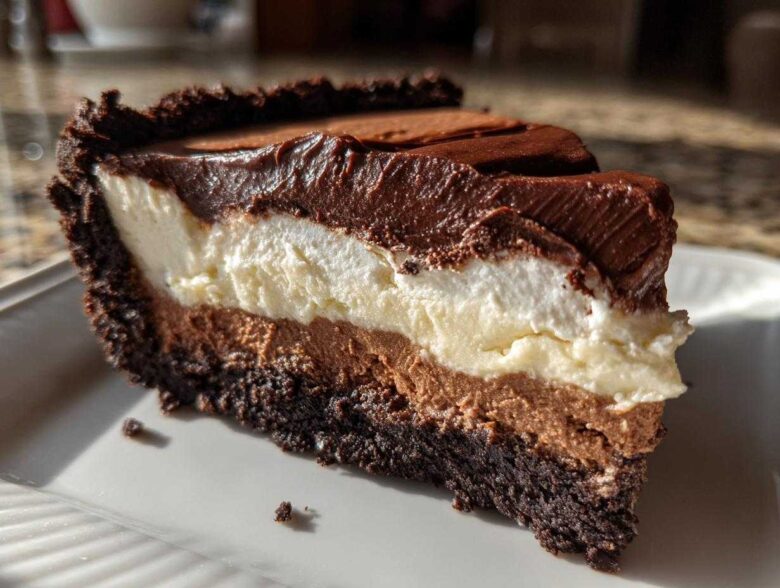
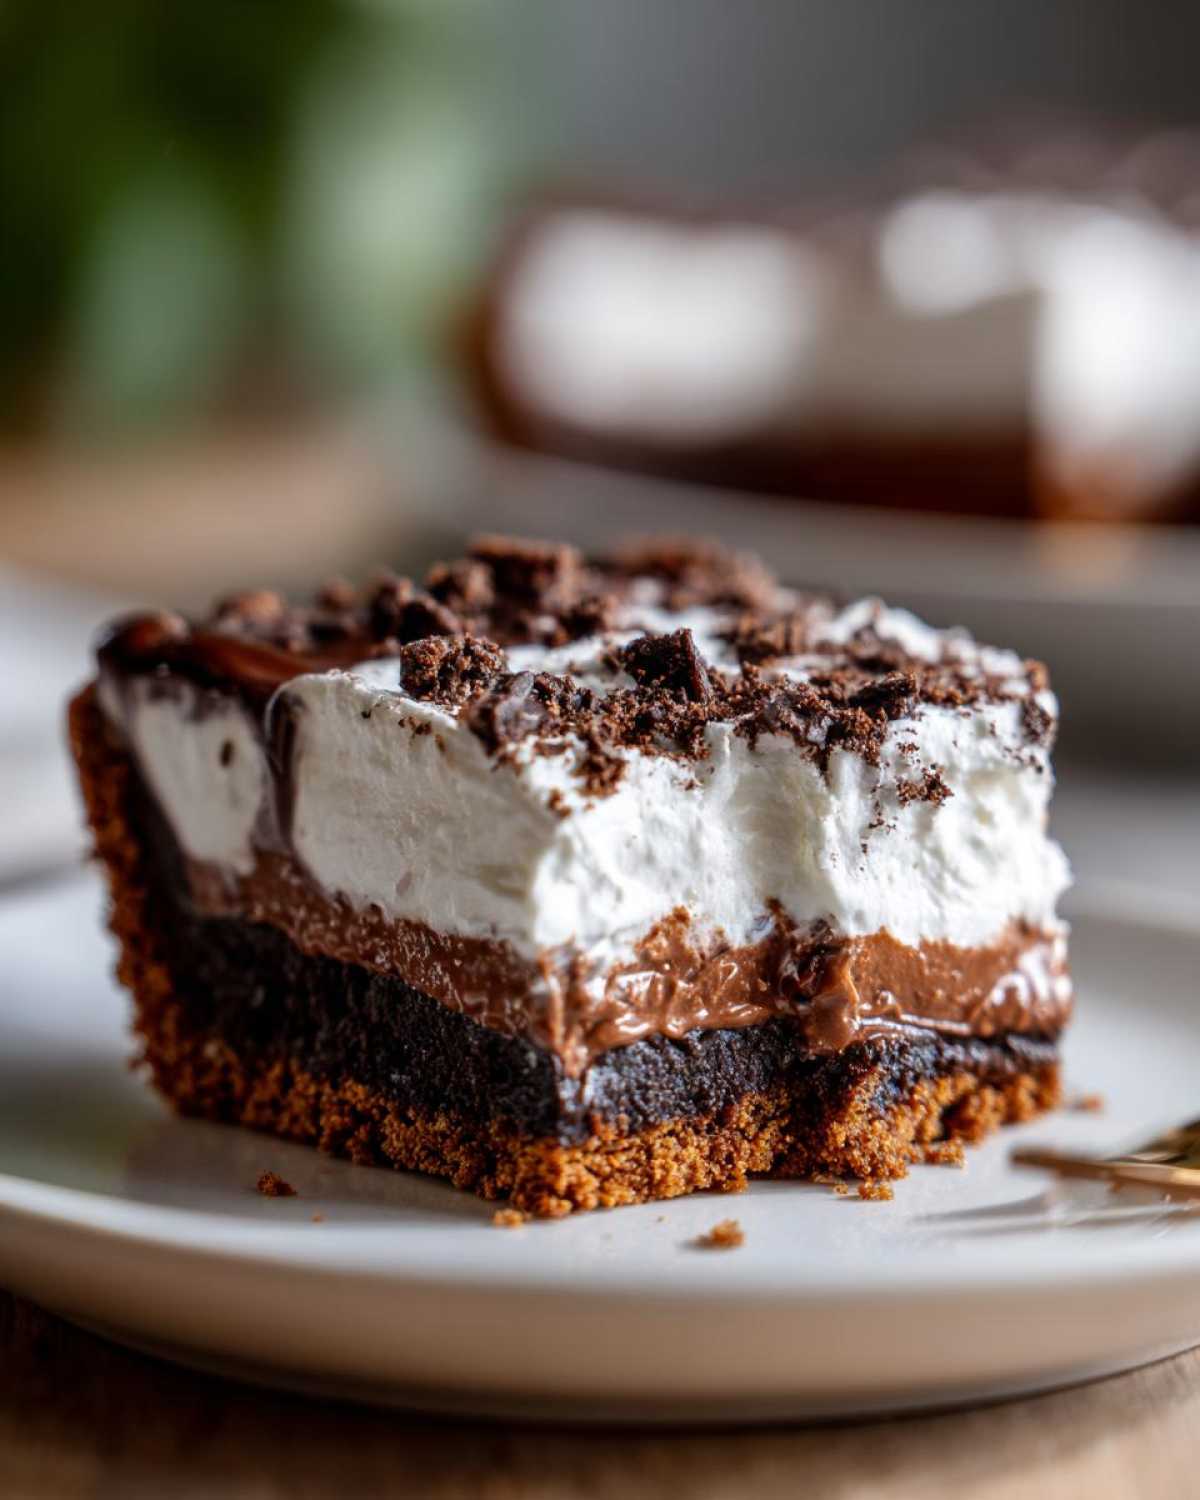
Oh my goodness, if a chocolate craving hits you hard, you can’t mess around with anything boring! When I need true, deep-down decadent chocolate therapy, I skip the oven entirely and reach for my absolute favorite recipe. We’re talking about the ultimate, rich, no-bake mississippi mud pie recipe. Seriously, this pie is a showstopper dessert because it features three distinct layers of pure joy. I love it because I can have it ready for a last-minute gathering, and it tastes even better a day later. Get ready, because this layered chocolate dessert is everything you’ve ever wanted in a chocolate lover’s dream dessert.
Why This No-Bake mississippi mud pie Recipe is the Ultimate Chocolate Indulgence
Listen, when you’re dying for a slice of Southern chocolate dessert perfection, the last thing you want is to baby an oven for an hour. That’s why this easy no bake mud pie rules them all. It’s all about maximum flavor payoff for minimum fuss!
Here’s the deal on why this recipe is my go-to for a holiday or just a Tuesday night:
- No Oven Needed: Seriously! Total freedom from preheating and checking temps.
- The Crunch Factor: That Oreo crust dessert base gives you the perfect textural contrast.
- Creamy Heaven: The combination of the tangy cream cheese layer under the rich pudding is just addictive.
- It Sets Up Beautifully: This layered chocolate dessert looks professional, even though it’s practically foolproof.
Trust me, when you serve this fudgy layered pie, people will think you spent all day slaving away. It’s the ultimate indulgence without the sweat!
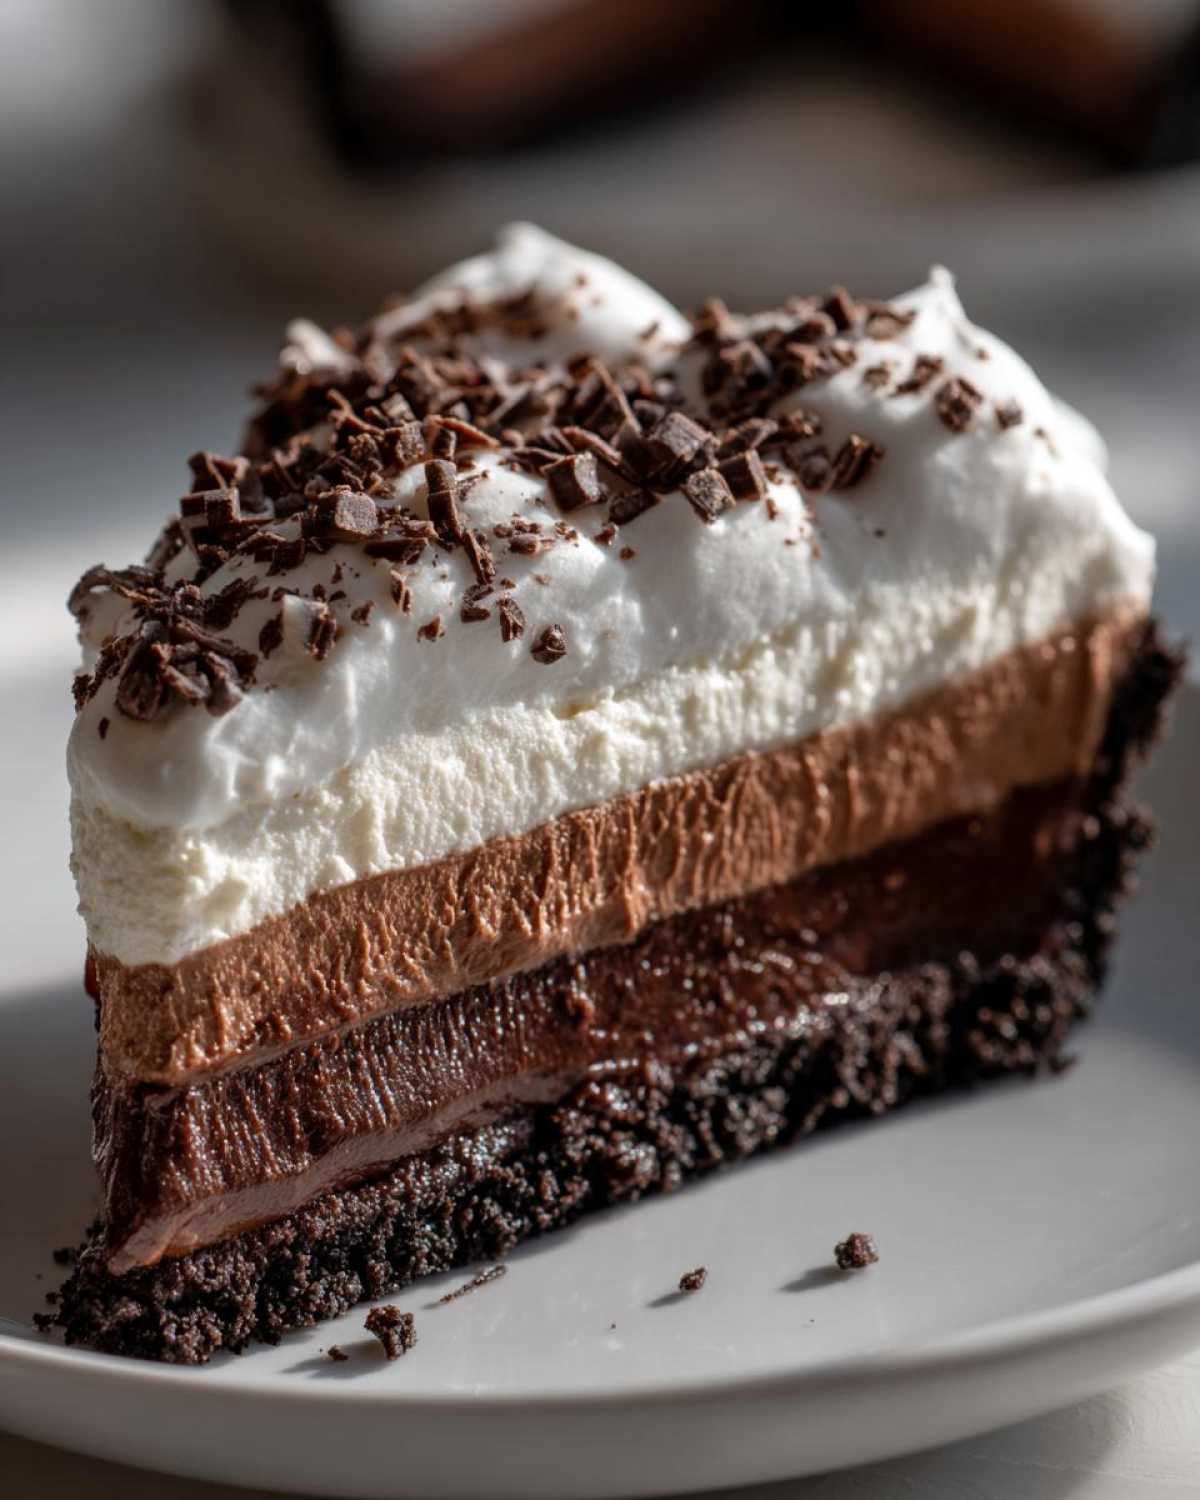
Gathering Ingredients for Your Decadent Chocolate Pie
Okay, let’s talk about the goodies you need to make this magic happen. Since this is a no-bake marvel, the quality of what goes in really matters. We are building this rich dessert recipe in layers, so I want you to grab everything before you start mixing. A good baker is an organized baker, right?
You don’t need a huge pantry list, but make sure your ingredients are ready to go. That means letting the cream cheese sit out until it’s perfectly soft, and making sure you’ve thawed out the whipped topping. Nobody wants stiff, icy whipped topping getting smashed into a smooth layer!
Here is exactly what you need to pull off the best Mississippi Mud Pie:
- For the Crust:
- 1 1/2 cups of those delicious Oreo cookie crumbs—don’t skimp on the filling, that’s where the flavor hides!
- 6 tablespoons of unsalted butter, melted until it’s just liquid gold.
- For the Cream Cheese Layer (The Tangy Delight!):
- 1 (8 ounce) package of cream cheese, softened completely, I mean smooth like velvet.
- 1 cup of powdered sugar, sifted if you’re feeling fancy, but honestly, just whisk it well!
- 1 teaspoon of vanilla extract—use the good stuff here, it makes a difference.
- Half (about 6 ounces) of your thawed whipped topping. We save the other half for the top.
- For the Creamy Chocolate Layer:
- 1 (3.9 ounce) package of instant chocolate pudding mix. Make sure it’s INSTANT, not the cook-and-serve kind—this is crucial for our set time!
- 2 cups of cold milk. It has to be cold to activate that instant pudding properly.
- The Finishing Touches:
- 1 cup of mini marshmallows. These melt just slightly into the pudding layer, creating that gooey texture we love.
That’s it! A few simple components that come together to make one seriously impressive homemade mud pie.
Step-by-Step Instructions for the Layered Chocolate Dessert
Now for the fun part! Since this is a no bake layered dessert, we need to move fairly quickly once we start assembling, but don’t rush the chilling. This homemade mud pie isn’t forgiving if you try to cheat the resting time for the layers. We’re going to build this masterpiece methodically, starting from the bottom up!
Creating the Oreo Crust Dessert Base
- Grab your 9-inch pie plate. You just mix those Oreo crumbs and the melted butter right in there until everything looks like wet sand. Seriously, just use your fingers to incorporate it all!
- Now, take that crumb mixture and press it down, down, down. You want it firm across the entire bottom and pushed up about an inch or so on the sides. That’s how we get that sturdy Oreo crust dessert base that holds everything when slicing.
- Pop it into the freezer for about 15 minutes while you whip up the first layer. That quick chill helps it firm up like concrete!
Assembling the Creamy Chocolate Filling Pie Layers
Time for the middle magic! First, get that softened cream cheese beaten until it’s just buttery smooth—no lumps allowed. Then, slowly beat in the powdered sugar and the vanilla until it looks light. Now, here’s the trick: gently fold in just half of your thawed whipped topping. Fold, fold, fold! You don’t want to deflate all that air we worked to put in there.
Spread that lovely, fluffy mixture right over your chilled crust. Next, work on your pudding. Whisk that instant chocolate pudding mix with the 2 cups of really cold milk for exactly two minutes. It thickens up super fast, so go right away and pour that creamy chocolate filling pie mixture right on top of the cream cheese layer. Smooth it out gently so you don’t disturb the bottom layer.
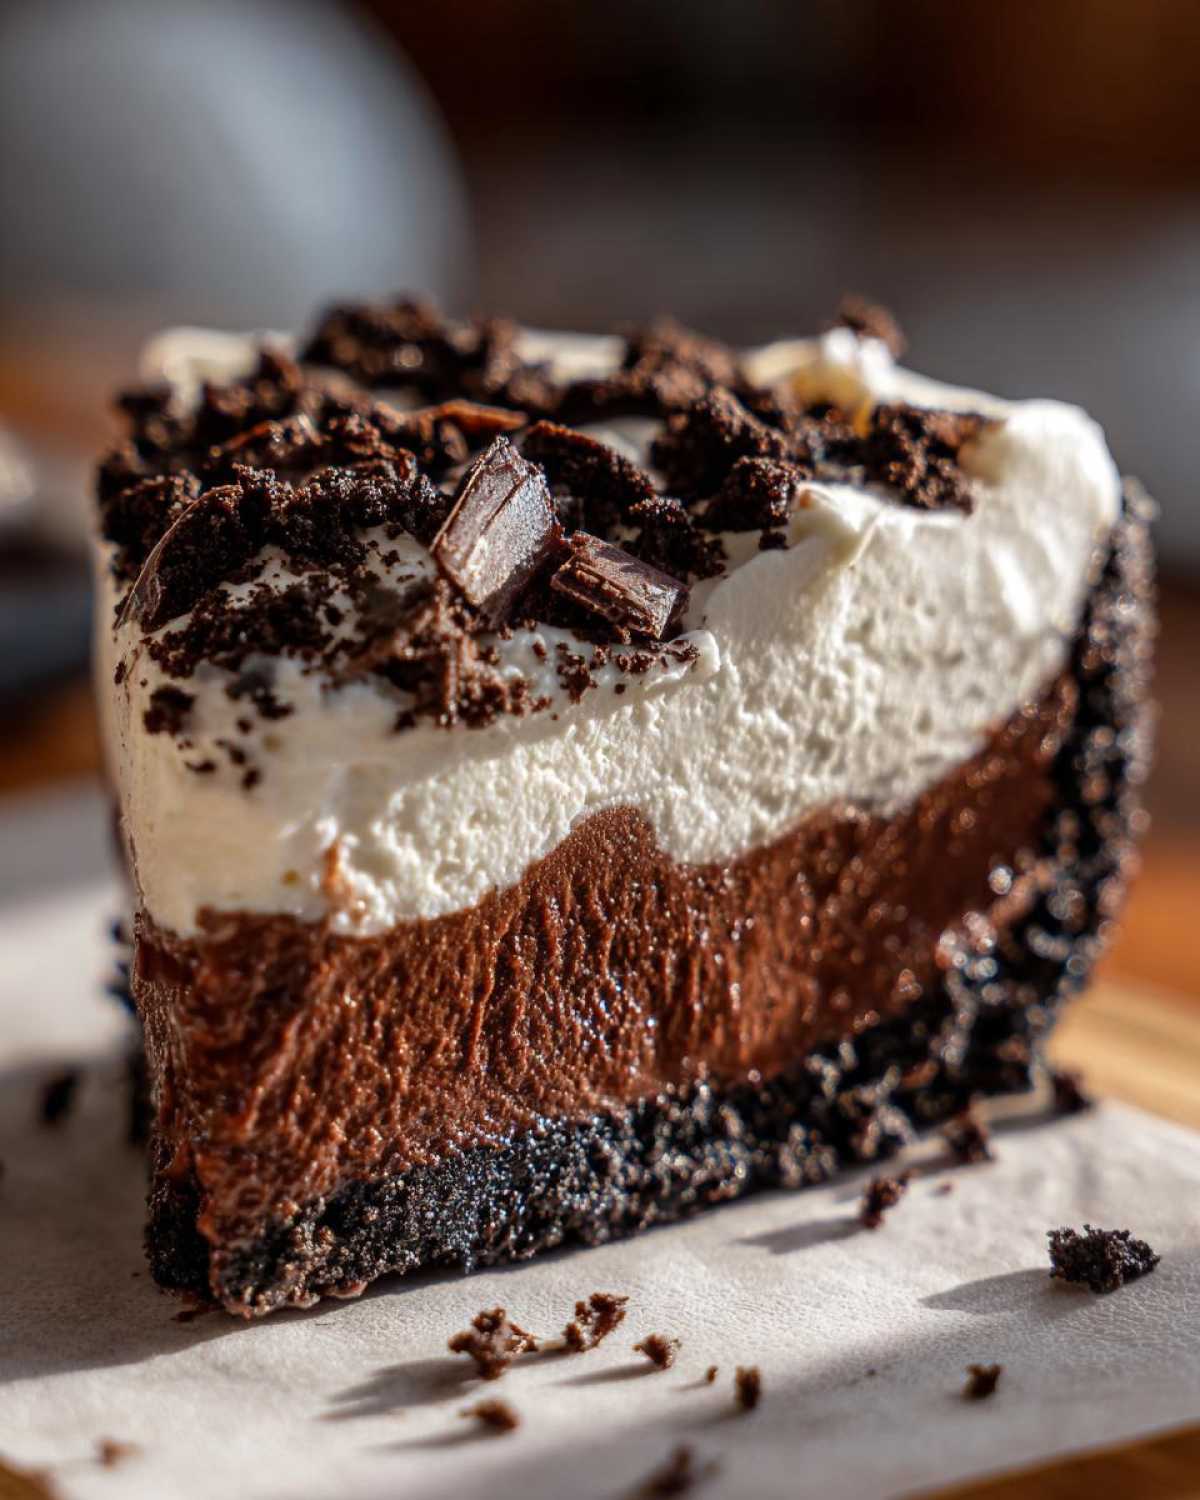
Final Touches and Chilling for the Homemade Mud Pie
This is where we add the character! Sprinkle those mini marshmallows all over the surface of the pudding layer. They look cute, and they give you that little soft surprise when you bite into it.
Finally, spread the remaining half of the thawed whipped topping over everything. Make pretty swirls with your spatula! Don’t worry about perfection; rustic looks great here. Pop the entire mississippi mud pie into the fridge immediately. You absolutely must let it chill for a minimum of 4 hours, but honestly, overnight is the secret handshake for the best Mississippi Mud Pie. That time lets those creamy layers fully set up so you get those gorgeous slices!
Tips for Success: Achieving the Best Mississippi Mud Pie
Even though this is a no-bake recipe, there are a few little tricks that just take your Mississippi Mud Pie recipe from good to absolutely legendary. You know I always want you to have the best dessert possible, so listen up! These steps help ensure that beautiful, clean slice every single time.
First off, let’s talk about that crust. The instructions mention you can bake the Oreo crumb crust for 10 minutes at 350°F if you really want it sturdy. I usually skip it because I’m impatient, but if you’re busy serving a crowd, giving it that quick bake and letting it cool really cements those crumbs in place. It’s a professional touch!
When it comes to the pudding, please, please use instant chocolate pudding mix. If you use the cook-and-serve kind, you’ll end up with a gooey mess that never sets right, even in the fridge. The ratio of cold milk to instant mix is designed specifically to thicken quickly without heat. Don’t deviate there!
Speaking of flavor depth, I highly recommend swapping out the standard instant pudding for dark chocolate if you can find it. It cuts through the sweetness of the cream cheese layer and makes this feel like a real, rich dessert recipe rather than just something sweet. It truly elevates that chocolate lover’s dream dessert experience.
One thing I learned early on when dealing with so many creamy, chilled layers is temperature control. Since nothing is baked, the coldness just sinks in, right? My expert tip is this: If your kitchen is screaming hot (like mine in July!), try chilling your pie plate *before* you put the crust in, and perhaps chill the bowl you’re mixing the pudding in. Cold surfaces make cold ingredients set up faster, which is exactly what we want for this velvety chocolate dessert.
And finally, the whipped topping! If you’re feeling extra fancy and want to skip the frozen container, go ahead and whip heavy cream to stiff peaks yourself. Just make sure you add a little powdered sugar to it as you whip. It whips up gorgeous, but you still have to be gentle when folding it into those other layers!
Ingredient Notes and Substitutions for Your Rich Dessert Recipe
Okay, now that you know the steps, let’s hover over a couple of ingredients that trip people up in this classic chocolate pie. Because this is a no-bake masterpiece, the texture hinges on how well these components melt, soften, or activate. If you mess up the prep here, your decadent chocolate pie just won’t hold its shape!
First up: Cream Cheese Softening. This is non-negotiable for the second layer. If you try to beat cold cream cheese, you’ll end up with lumps, and those lumps will never blend into your whipped topping smoothly. I usually leave mine out on the counter for at least an hour before starting, or if I’m in a major rush, I microwave it for exactly 10 seconds. Anything more, and it gets greasy! You need it malleable, not melted.
Now, let’s get serious about the pudding. Folks ask me all the time, “Can I use the Jell-O cook-and-serve chocolate pudding?” My answer is a firm “No, honey, don’t do it to yourself!” This recipe relies entirely on the magic chemistry of the instant chocolate pudding mix activating with cold milk right there in the bowl. Cook-and-serve needs heat to thicken, and without that heat, you’ll just have sweet, watery chocolate sludge spreading all over your crust. Stick to the instant powder—it’s designed perfectly for this kind of setup.
What about the crust? Most people use Oreos, which I highly recommend because you get that chocolate wafer *and* the sweet filling baked right in. But if you’re out of Oreos? You can absolutely use graham cracker crumbs for a slightly lighter, buttery base. Just make sure you still bind it with the melted butter! That’s key for any crumb crust pie to hold together. If you use graham crackers, you might need just a tablespoon or two more butter to get that perfect wet-sand consistency.
Also, a quick note on the milk for the pudding: It needs to be cold—like, refrigerator cold! If your milk is room temperature, the instant mix won’t activate quickly enough, and your pudding won’t be thick enough to support the layer above it. It’s all about temperature management in a no bake layered dessert!
Storage and Reheating Instructions for the Showstopper Dessert
Since this mississippi mud pie is built on layers of fresh cream, cream cheese, and pudding, storage is super important to keep it looking and tasting perfect. You absolutely cannot reheat this dessert—it would just melt into a sad, sweet puddle! We want those defined layers, so we treat storage seriously.
The best place for this pie is right in the back of your refrigerator. Make sure you cover it well! I usually use plastic wrap, but you have to be careful not to press the wrap directly onto the beautiful whipped topping. If I’m using a regular plate, I tent the plastic wrap loosely over the top. If you have a proper cake carrier or a pie dome, use that for the best protection.
How long does it last? Because we used fresh, dairy-based ingredients like cream cheese and whipped topping, I like to keep it covered in the fridge for up to three days, maximum. Past that, the crust can start to get a little soggy—even the sturdy Oreo crust dessert base can only handle so much moisture from that incredible filling. It tastes best within 24 hours, but honestly, if you’re making it for a party, making it the night before is ideal.
If you want to make it even further ahead than 24 hours, you need to plan on freezing it. You can freeze this pie! But here’s the catch, and why I usually save freezing for leftovers only. If you freeze the whole thing, that beautiful fluffy topping can get a little grainy or separated when it thaws. If you’re going this route, tightly wrap the whole pie in plastic wrap, then cover it with a layer of aluminum foil to prevent freezer burn. Place it in the freezer for up to two weeks.
When you decide to eat a slice, move that foil-wrapped, plastic-wrapped pie straight into the refrigerator and let it thaw slowly for about 8 hours, or overnight. Resist the urge to microwave slices to speed things up—that will ruin the integrity of the pudding and cheese layers! A slow thaw maintains the structure of this showstopper dessert much better.
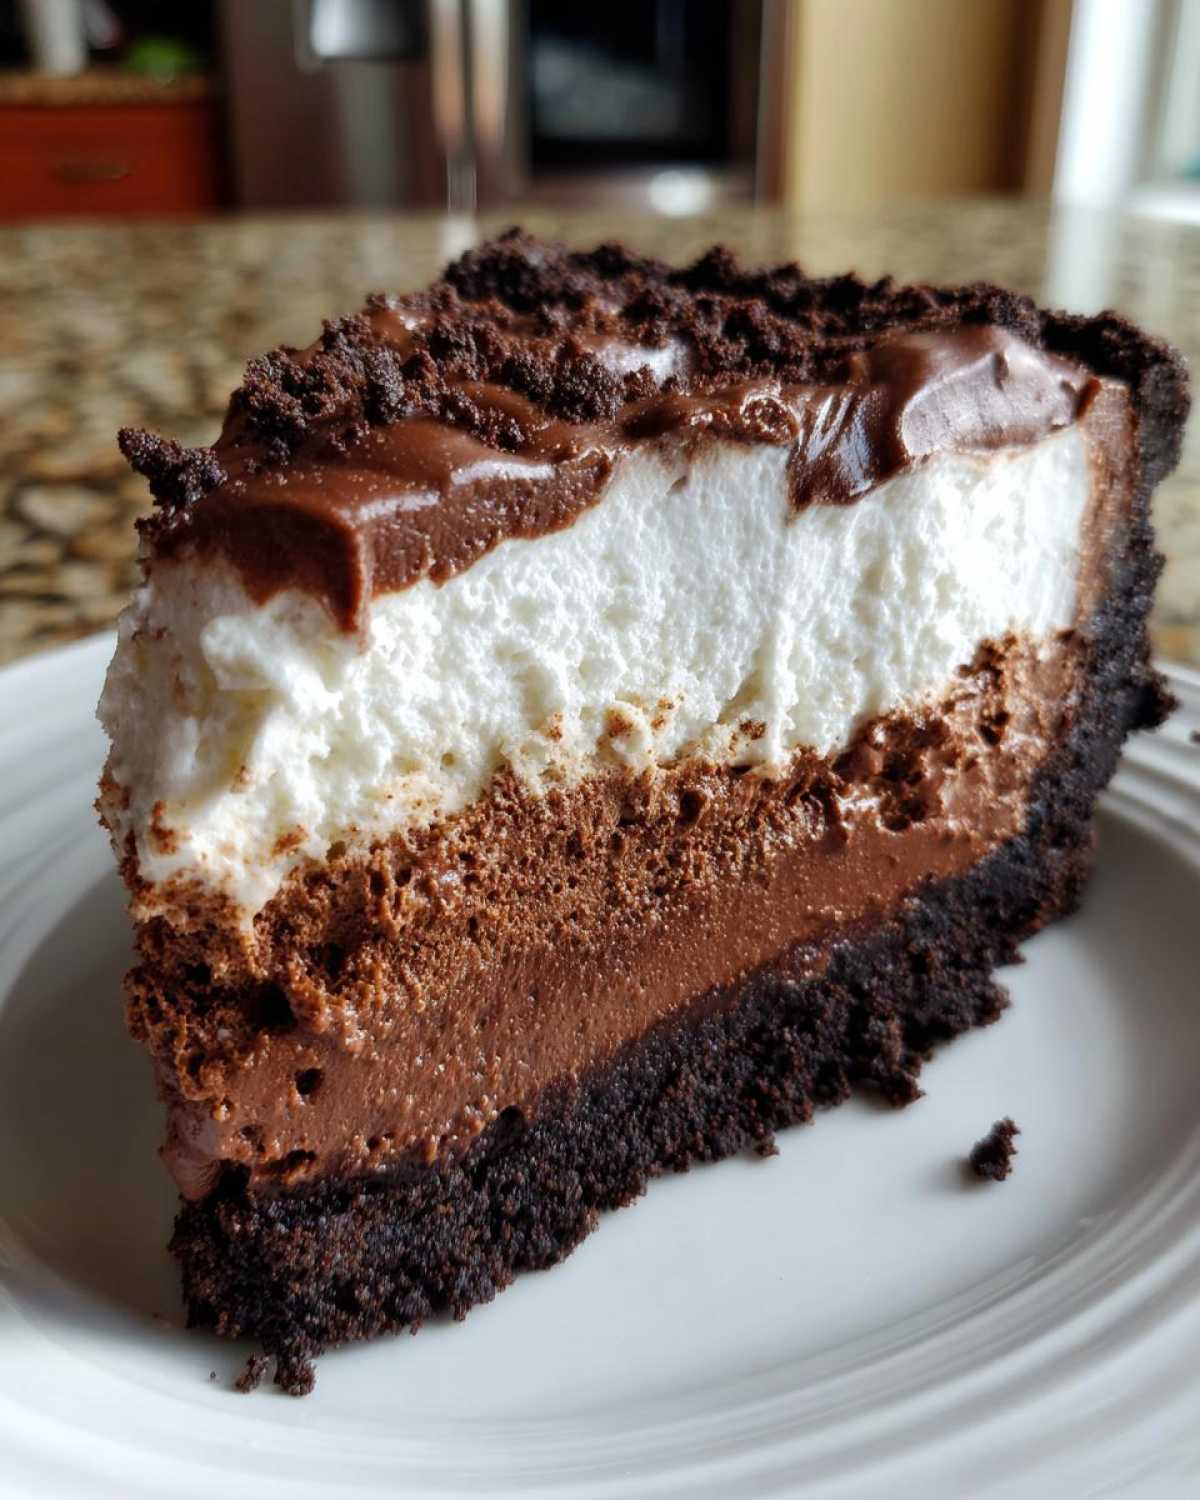
Serving Suggestions for This Southern Chocolate Dessert
Now that you’ve successfully created the most amazing Southern chocolate dessert, you need to know how to serve it up right! This mississippi mud pie is so rich and decadent that you don’t need a lot of fuss, but a few small touches can make it feel like it came straight from a fancy bakery.
The first thing I always do before slicing is let the pie sit on the counter for about 15 minutes after taking it out of the fridge. If it’s bone-chilling cold, it can be stiff, and your slices won’t look as clean. That few minutes of tempering really helps the flavors bloom and softens the creamy layers just enough.
When it comes to plating this ultimate chocolate indulgence, less is often more, because the pie itself is the star. Here are my favorite ways to dress up a slice:
- A Light Dusting of Cocoa: Before you cut into it, grab a fine-mesh sieve and lightly dust the entire surface with unsweetened cocoa powder. It looks gorgeous and adds a slightly bitter edge that balances the sweetness perfectly.
- Morning Brew Pairing: This rich dessert recipe demands a strong cup of coffee! A dark roast or an espresso alongside a slice of this fudgy layered pie is just classic. The bitterness of the coffee cuts right through that heavy creaminess.
- Fresh Fruit Contrast: Sometimes you just need a pop of color and tartness to cut the richness. A few fresh raspberries or sliced strawberries on the side—not on top, unless you want them to sink!—are fantastic. My kids love seeing bright red berries next to the dark chocolate.
- Simple Shavings: If you have a vegetable peeler, use it to shave some good dark chocolate right over the top of the whipped cream layer just before serving. It adds texture and looks way more elegant than sprinkles.
Remember, whether you serve this classic chocolate pie straight from the fridge or let it sit for a few minutes, make sure you use a really sharp, thin knife to cut your slices. Wipe the knife clean between each cut; that’s the real secret to keeping those dramatic layers looking sharp for your guests!
Frequently Asked Questions About the mississippi mud pie
I know when you’re about to make something this delicious, you probably have a few lingering little questions buzzing around. It’s a showstopper dessert, so you want it perfect! Here are the things folks ask me most often about our Mississippi Mud Pie recipe before they dive in.
Can I freeze this Easy No Bake Mud Pie?
Yes, you totally can freeze this easy no bake mud pie! I usually save freezing for leftovers, though, because you have to be careful with the texture. If you freeze the whole thing—wrapped tightly in plastic and then foil—it will hold up fine for about two weeks in the freezer. The critical thing is the thawing process. You have to move it to the refrigerator and let it thaw slowly, preferably overnight, for about 8 hours. If you try to rush it, that lovely whipped topping layer can get a little icy or separate. It works in a pinch, but the fresh-from-the-fridge texture is unbeatable!
What is the difference between this and a classic chocolate pie?
That’s a great question that gets right to the heart of what makes this a Mississippi Mud Pie! A *classic chocolate pie*—think of a French silk or a traditional custard pie—usually has one primary chocolate filling, sometimes topped with meringue or simple whipped cream. Our version, though, is a true layered chocolate dessert because of that middle layer! We separate the filling into a slightly tangy, sturdy cream cheese base, and then we top *that* with the rich chocolate pudding layer. That cream cheese layer is what gives the Mud Pie its signature density and complexity. It stops the whole thing from being just one smooth texture; it gives you that fantastic contrast!
Also, the crust really sets it apart. Nobody thinks about the crumb crust pie base when they think classic pie, but ours relies on those crushed Oreos for that deep chocolate flavor right from the start. It’s really a three-in-one experience!
Can I make this ahead of time? Absolutely! In fact, I prefer it that way. Since this rich dessert recipe needs at least four hours to set up properly, making it the day before ensures every layer is perfectly firm. It’s honestly one of the best potluck dessert ideas because you make it, hide it in the fridge, and forget about it until serving time!
Estimated Nutritional Data for One Slice
Now, let’s be real for a second. When you’re making an ultimate chocolate indulgence like this mississippi mud pie, you probably aren’t checking the label to see if it fits your macros for the week! This is a treat, plain and simple. It’s designed to be rich, creamy, and totally satisfying.
Because this rich dessert recipe relies on cream cheese, butter in the crust, and sugar throughout the layers, the numbers reflect that decadence. Don’t stress about it; just enjoy that beautiful slice!
These estimates are based on dividing the recipe into 8 generous servings, using standard store-bought ingredients for the crust and pudding mix. As always, when you start swapping out ingredients—like using regular whipped cream instead of the frozen topping—your numbers will shift a bit. But for a standard slice of this decadent chocolate pie, here is what you can generally expect:
- Serving Size: 1 slice
- Calories: 450
- Total Fat: 28g
- Saturated Fat: 15g
- Carbohydrates: 48g
- Sugar: 45g (Yep, it’s high, and that’s okay!)
- Protein: 5g
- Sodium: 320mg
See? It’s a powerhouse of flavor! This fudgy layered pie is best enjoyed with a strong cup of coffee and a big smile. You earned it!
PrintDecadent No-Bake Mississippi Mud Pie

Make this rich, multi-layered Mississippi Mud Pie featuring a crunchy Oreo crust, creamy chocolate filling, and a light whipped topping.
- Prep Time: 25 min
- Cook Time: 0 min
- Total Time: 4 hr 25 min
- Yield: 8 servings
- Category: Dessert
- Method: No-Bake
- Cuisine: Southern American
- Diet: Vegetarian
Ingredients
- 1 1/2 cups Oreo cookie crumbs
- 6 tablespoons unsalted butter, melted
- 1 (8 ounce) package cream cheese, softened
- 1 cup powdered sugar
- 1 teaspoon vanilla extract
- 1 (12 ounce) container frozen whipped topping, thawed, divided
- 1 (3.9 ounce) package instant chocolate pudding mix
- 2 cups cold milk
- 1 cup mini marshmallows
Instructions
- Combine the Oreo crumbs and melted butter. Press the mixture firmly into the bottom and up the sides of a 9-inch pie plate. Chill the crust for 15 minutes.
- In a large bowl, beat the softened cream cheese until smooth. Gradually beat in the powdered sugar and vanilla extract until fully combined.
- Gently fold in half of the thawed whipped topping into the cream cheese mixture. Spread this mixture evenly over the chilled crust.
- In a separate bowl, whisk together the instant chocolate pudding mix and cold milk for 2 minutes until thickened. Pour the pudding mixture over the cream cheese layer.
- Sprinkle the mini marshmallows evenly over the pudding layer.
- Top the pie with the remaining half of the whipped topping.
- Chill the pie for at least 4 hours, or preferably overnight, before slicing and serving.
Notes
- For a firmer crust, bake the crumb mixture at 350°F for 10 minutes, then cool completely before filling.
- You can substitute regular whipped cream for the frozen topping if you whip it yourself to stiff peaks.
- Use dark chocolate pudding for a deeper flavor profile.
Nutrition
- Serving Size: 1 slice
- Calories: 450
- Sugar: 45
- Sodium: 320
- Fat: 28
- Saturated Fat: 15
- Unsaturated Fat: 13
- Trans Fat: 0.5
- Carbohydrates: 48
- Fiber: 2
- Protein: 5
- Cholesterol: 45