

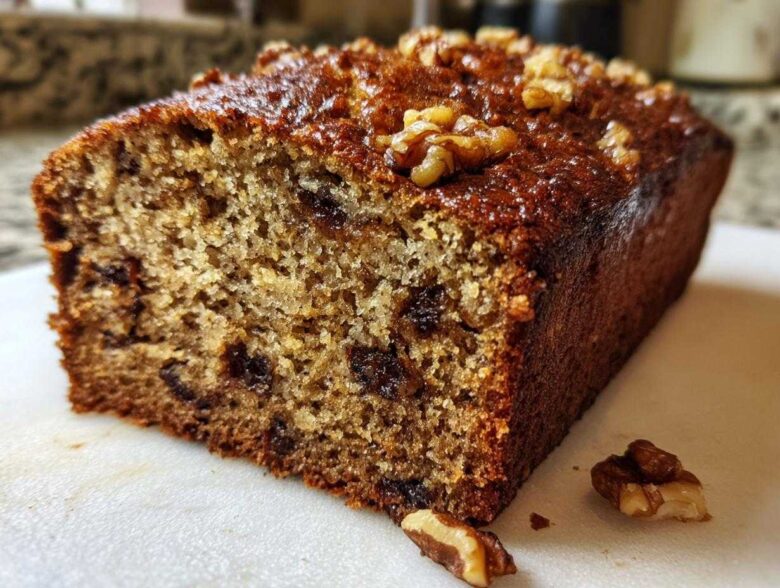
Oh, Richard and I have always believed that the best memories are made right here in the kitchen, with something warm coming out of the oven. When the weather turns crisp, my heart just pulls me toward classic comfort food baking. Nothing signals that cozy feeling quite like a loaf of rich, spiced bread sliced thick and slathered with soft butter. Today, I’m sharing what I consider the absolute best version: our Easy, Moist, Old-Fashioned Date Nut Bread. This isn’t just any quick bread, dear reader; this is the kind of bread that tastes like coming home. We’ve tweaked and treasured this recipe for decades to make sure it stays impossibly moist, and I just know it’s going to become part of your family’s favorites too. If you’re looking for that nostalgic flavor, this is it! You can see all our other adventures and recipe development over on our main recipe journal page, too.
Why This is the Best Date Nut Bread Recipe You Will Make
If you’ve ever been disappointed by a date nut bread that turned out dry or crumbly—like sawdust, heavens forbid—then you’ve come to the right place. My goal when developing this Moist Date Nut Bread was pure comfort, and that means tenderness is non-negotiable! This reliably Easy Date Loaf Recipe delivers that perfect texture every single time. Richard says it brings him right back to visiting his aunt’s farmhouse years ago.
- It’s genuinely quick; it truly is a classic quick bread in every sense of the word.
- The crumb is dense enough to hold up but soft enough to melt in your mouth.
- It captures that spot-on, old-fashioned spiced flavor we all crave.
If you want to read about another fantastic, traditional take on this loaf, check out this lovely recipe I found while researching old-fashioned date nut bread—it validates so many of the steps we take here!
Achieving Maximum Moisture in Your Date Nut Bread
Now, let’s talk about the secret weapon, the part that guarantees a tender, never-dry slice. It’s right there in the ingredients list, and gosh, don’t skip it! Before you even think about creaming butter, you need to treat your dates. You take your chopped dates and totally douse them in boiling water, stirring in that baking soda right away.
This might seem counterintuitive, soaking them, but it’s crucial! The hot water plumps them up beautifully, and the baking soda reacts with the slight natural acidity, helping them break down just enough. When you fold that sweet, mushy mixture—liquid and all!—into the batter, it infuses the whole loaf with moisture that lasts for days. That step is the reason this is the best date nut bread you’ll ever bake.
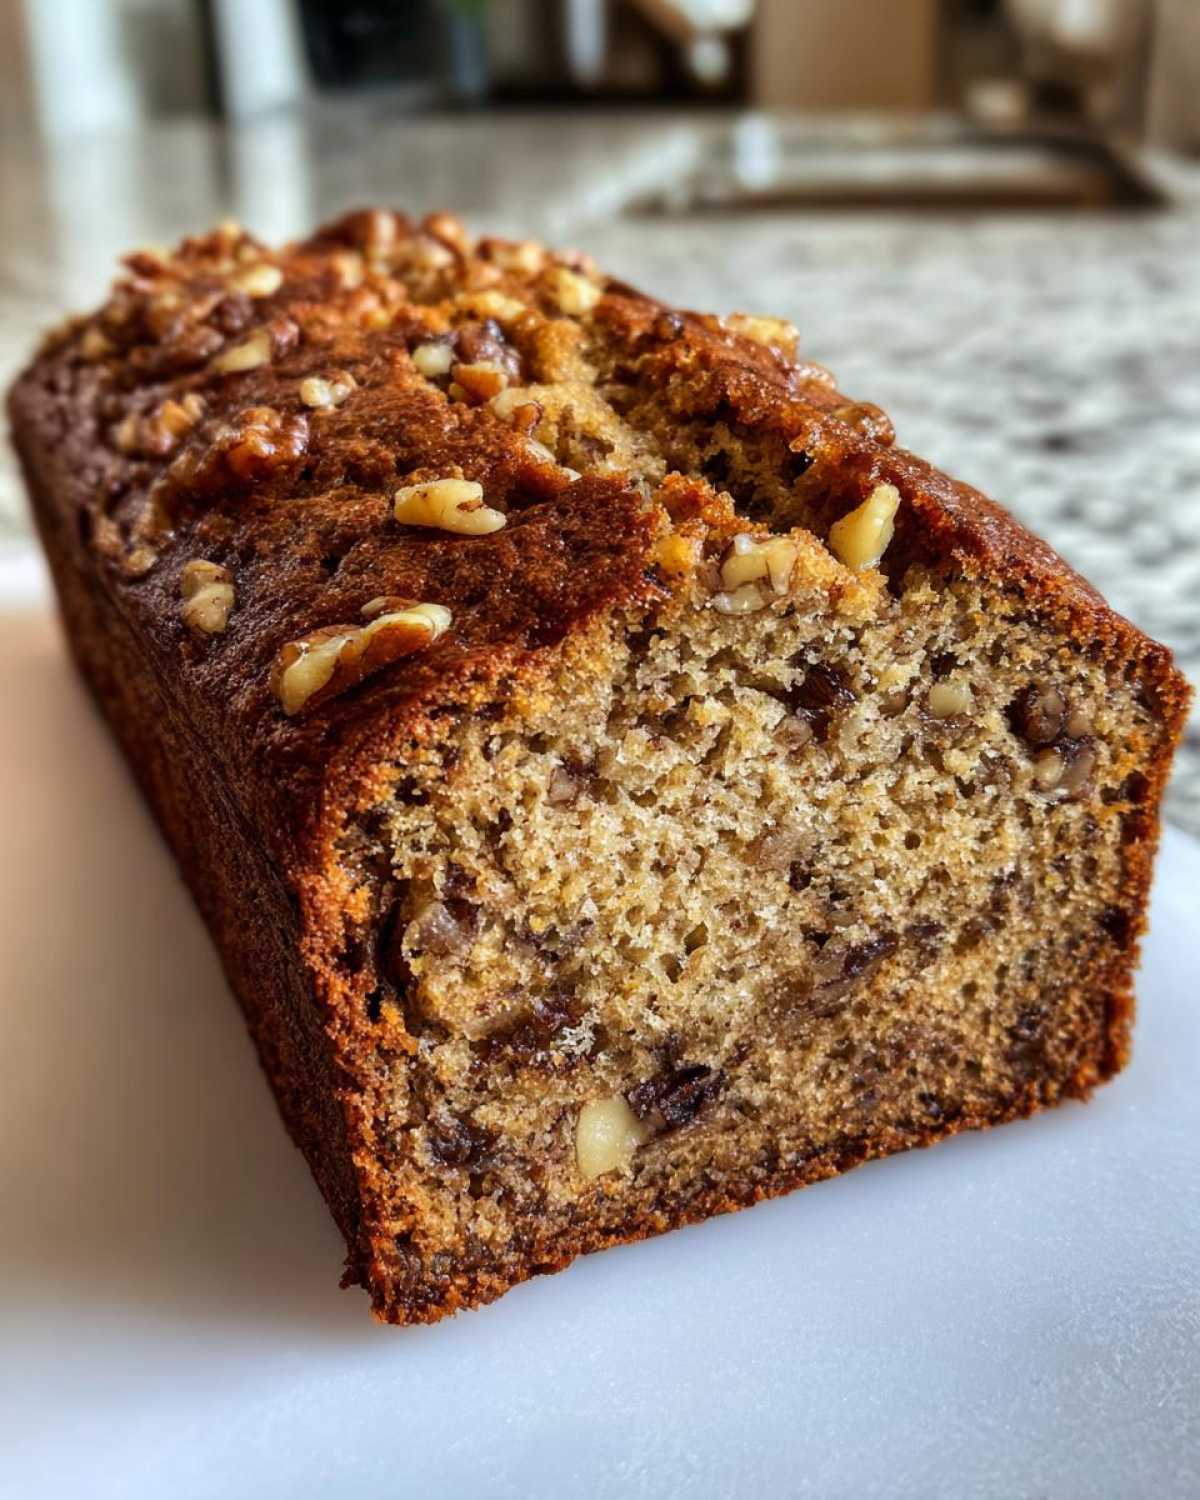
Gathering Ingredients for Your Easy Date Loaf Recipe
Getting everything ready for this Easy Date Loaf Recipe is part of the fun. Since this is an Old Fashioned Nut Bread, we stick to ingredients that give us that rich, deep, comforting flavor we expect. No fancy substitutes here, just reliable pantry staples that make such a difference in texture and taste!
You’ll need one standard loaf pan sized 9×5 inches, and remember to have your butter perfectly soft—not melted, just happy to mix! Here is what you’ll need to gather:
- 1 cup boiling water (for waking up those dates!)
- 1 cup packed pitted dates, chopped
- 1 teaspoon baking soda
- 1/2 cup (1 stick) unsalted butter, softened
- 1 cup packed light brown sugar
- 2 large eggs
- 1 teaspoon vanilla extract
- 1 3/4 cups all-purpose flour
- 1 teaspoon baking powder
- 1/2 teaspoon salt
- 1 cup chopped walnuts, plus extra for topping (don’t skimp on these crunchy bits!)
That’s really it! Simple things creating something spectacular. Make sure your walnuts are freshly toasted if you have time—it truly boosts the flavor in this lovely loaf.
Step-by-Step Instructions for Perfect Date Nut Bread
Alright, Eleanor here! Let’s get this wonderful Quick Bread Baking project started! Since this is a quick bread, we move fast once the wet and dry ingredients meet, so make sure you have everything measured out and ready to go before you start mixing the main batter. Getting organized will ensure you don’t overwork your beautiful mixture. That’s the secret to keeping it soft, you see.
First things first, get that oven up to temperature—350°F (175°C) is our sweet spot. Don’t forget to grease and flour that 9×5 inch loaf pan thoroughly. No one wants a beautiful loaf stuck to the bottom; that’s just heartbreaking! If you’re curious about other great methods for getting a perfect quick bread out of the pan, I saw a wonderful article on getting results for your date nut bread over at iamwinfred.com that emphasizes gentle handling.
Preparing the Dates for the Best Date Nut Bread
This is where the magic starts simmering, literally! Take your chopped dates and put them in a bowl. Now, you must pour that full cup of boiling water right over them. Stir in the baking soda immediately. You’ll see it fizzle a bit, and that’s good! You need to let this concoction sit there for a solid 15 minutes. Trust me; this soak is what transforms stiff dates into supple, sweet jewels that guarantee a Moist Date Nut Bread.
Mixing Wet and Dry Components for Your Quick Bread Baking
While the dates are relaxing, move on to your butter and sugar in a big bowl. Cream them together until they look “light and fluffy”—pale yellow is what we are aiming for. Beat in those two eggs, one at a time, followed by the vanilla extract. Separately, whisk your flour, baking powder, and salt until they look like one unified dry mix.
Now comes the careful part. Add the dry ingredients to the wet mixture, pouring in about a third at a time, and mix only until they almost disappear. Then, you fold in that prepared date mixture—and here is my biggest piece of advice for keeping this the Best Date Nut Bread Recipe: Fold gently! When you add the dates, you add the liquid they soaked in, too! Mix until *just* combined. If you see a few streaks of flour, stop mixing! Overmixing is how you get tough bread instead of a tender loaf. Finally, gently coax in those 1 cup of walnuts. Pour it all into your pan, top with a few more nuts if you’re feeling fancy, and bake away!
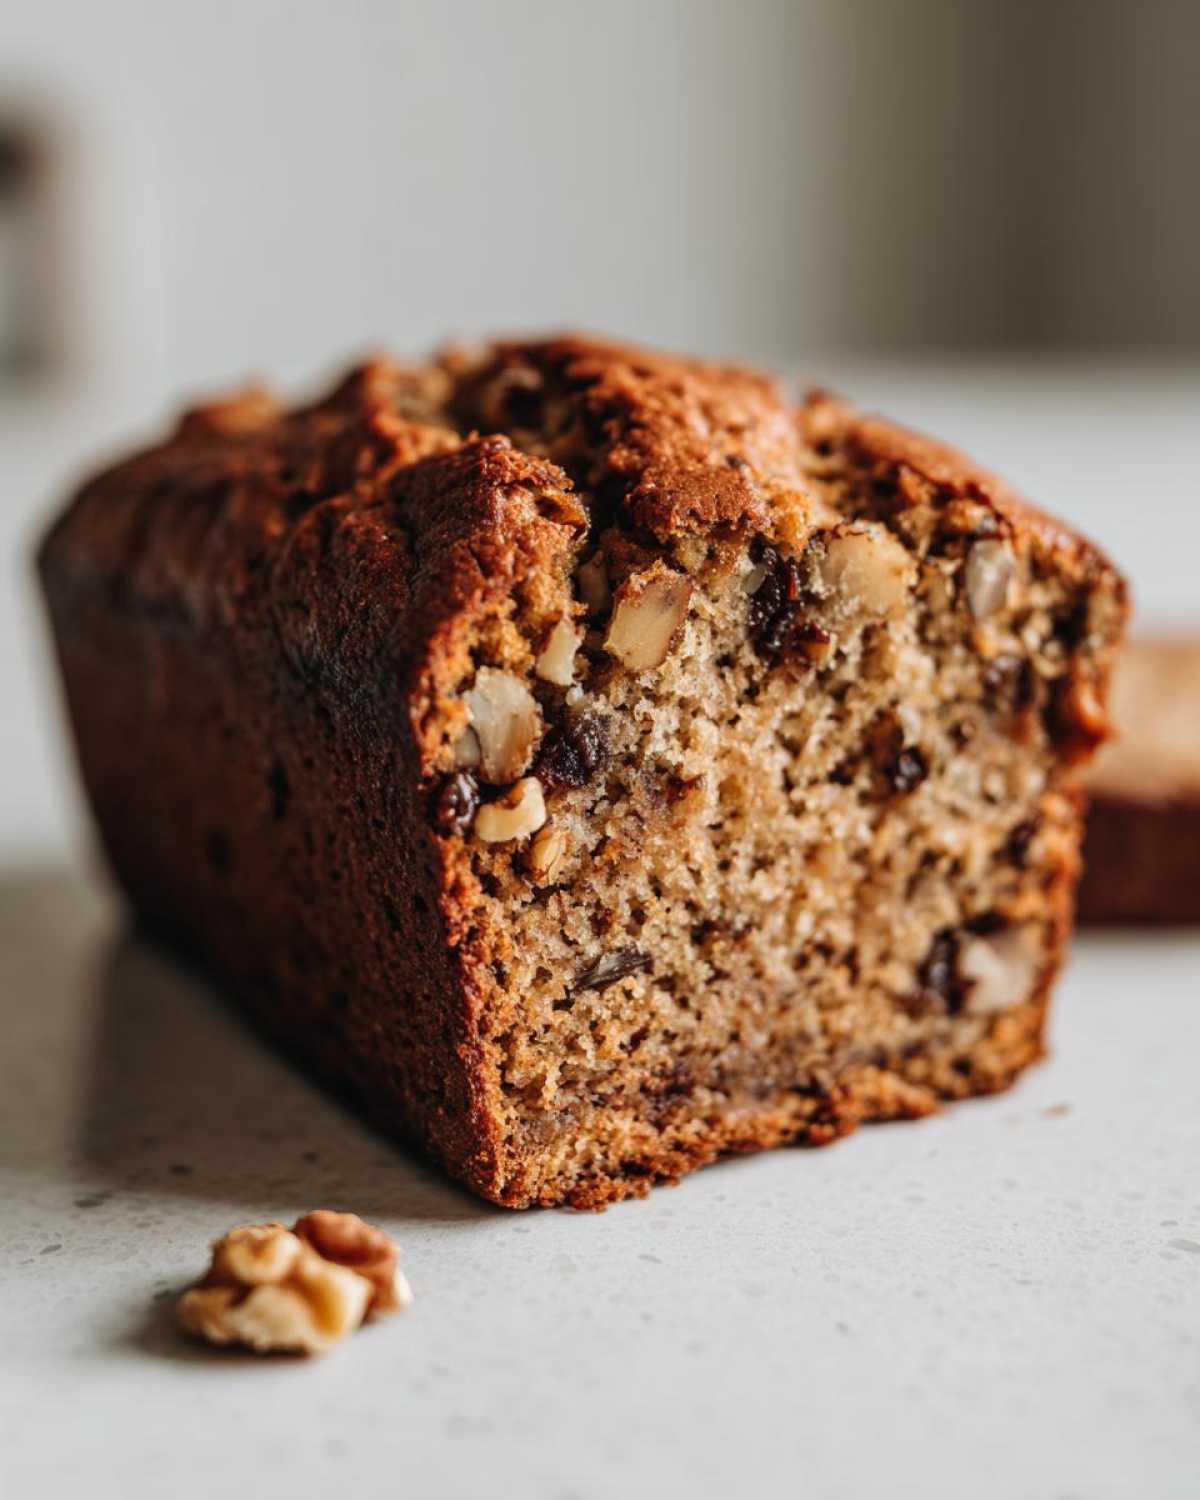
We want to keep that air we beat in, so be delicate in the final few stirs. If you want to see how others handle mixing techniques for different loaves before you try this, take a peek at my notes on banana bread—the folding principles are the same!
Tips for the Ultimate Moist Date Nut Bread
Now that you’ve followed the steps, let’s just chat about locking in that heavenly moisture. This Date Nut Bread is meant to be the definition of comfort food baking, and comfort means tender, soft crumb, not dry corners!
We already did the heavy lifting by soaking those dates, but how long you bake it and how you treat it right after it comes out dictates 90% of the final experience. Don’t rush the cooling process, even if the house smells incredible and you’re dying for a slice. Resist the urge!
Baking and Cooling Your Date and Walnut Bread
When you test for doneness—using that wooden skewer right in the center, remember—you are looking for moist crumbs sticking to it, not wet batter. If the skewer comes out bone dry, you’ve already gone a minute too long! Once you pull the pan out, set it right on your cooling rack, but leave the bread *inside* the metal pan for a good 10 minutes. This brief rest lets the structure set up perfectly.
After those 10 minutes, gently tip the loaf out onto the rack. If you cut into it straight away while it’s piping hot, the steam escapes too quickly, and you risk compacting that beautiful interior. I know it’s hard, but waiting until it’s just warm makes all the difference to the final texture of your Date and Walnut Bread. If you want more tips on getting ultra-moist baked goods, I shared a few pointers when I made my protein muffins, which face similar moisture challenges!
Variations on the Classic Date Nut Bread
While I firmly believe this Old Fashioned Nut Bread is perfect just as written—the way Richard remembers it—baking is all about making things your own! We aren’t sticking to rigid rules here; we are just recording memories, and sometimes memories need a little tweak to fit the modern pantry or a craving we suddenly get.
Based on some of the things people ask about when they are eager to try this Easy Date Loaf Recipe, I have a few simple swaps and additions that truly work beautifully:
- Healthier Flour Swap: Don’t hesitate to swap out half of your all-purpose flour for whole wheat flour. You’re still getting that tender crumb because the dates do most of the moisture heavy lifting, but you get a little extra wholesome goodness in that first slice in the morning.
- Sweetness Boost: If you happen to be low on brown sugar or just adore that deep, rich flavor maple gives everything, try substituting 1/4 cup of the brown sugar for pure maple syrup when you cream it with the butter. It adds a lovely, woodsy note that pairs wonderfully with the walnuts.
- The Banana Date Nut Bread Variation: Oh, this is a popular one! If you have overripe bananas sitting on the counter—and who doesn’t sometimes?—you can absolutely lean into that. Add about 1/2 cup of mashed, very ripe banana right in with your wet ingredients (when you add the eggs). This adds even more moisture and a subtle sweetness. If you want to dive deep into that combination, I saw a lovely recipe for a Banana Date Nut Bread Variation that shows just how great those flavors marry!
When I experiment with flavors like this, I often reference how I adjust my regular chocolate chip banana bread—it’s all about balancing the liquids! But for this date nut bread, keep that date soak liquid in regardless of any additions; that’s the key to keeping it tender!
Serving Suggestions for Your Holiday Date Loaf
If you’ve managed the difficult feat of letting this loaf cool completely—or even better, if you haven’t had to wait long and it’s still wonderfully warm—then it is time to enjoy the reward of your hard work! This Holiday Date Loaf shines brightest when it’s uncomplicated. It’s a wonderfully versatile piece of Comfort Food Baking, which is why Richard and I always make at least two—one to eat immediately, and one to share.
The simplest way to eat it, truthfully, is sliced thick while it’s still slightly warm. A generous spread of good quality, slightly softened salted butter just melts right into those nooks and crannies. It’s pure heaven, believe me. It needs absolutely nothing else!
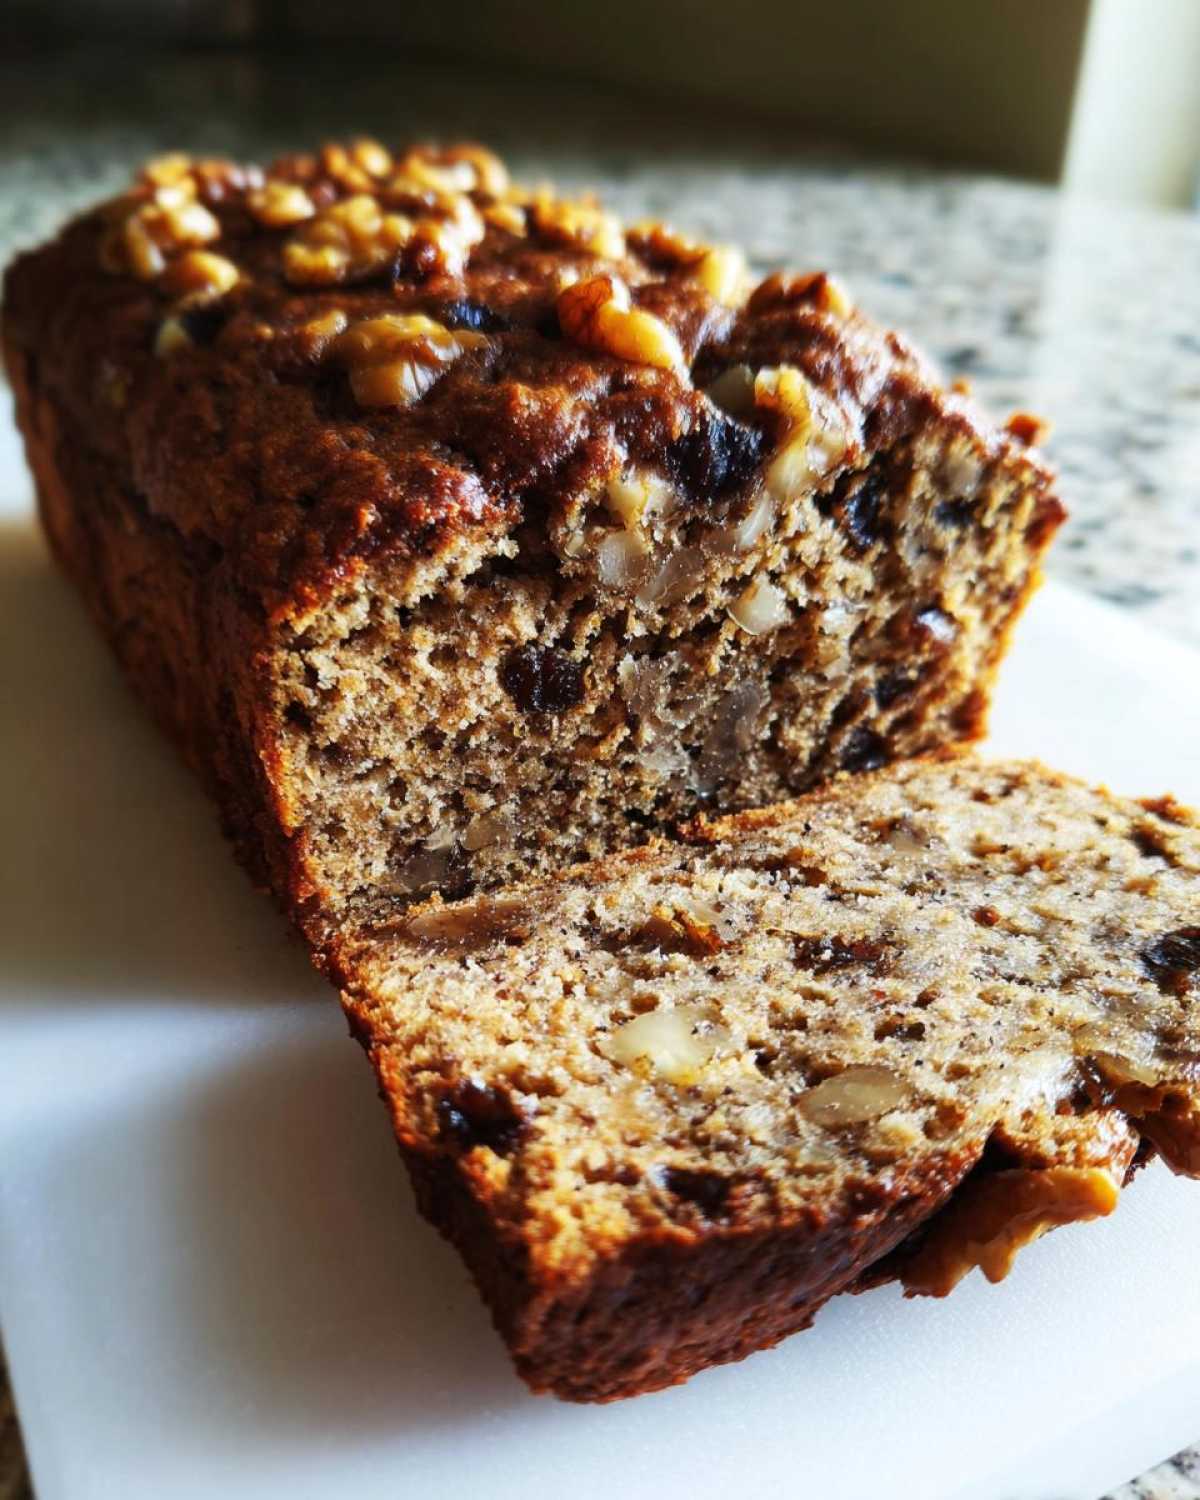
However, when we bring this loaf out during the holidays or serve it for brunch, I like to give it a little something extra special. If you happen to have a bright, citrusy glaze lying around—like the one I use on my chicken thighs, but made with lemon or orange juice instead—a very thin drizzle takes it up a notch. It’s delightful!
This bread also toasts beautifully. If you slice it the next day and pop it into the toaster until the edges are just golden, it’s the perfect sturdy base for cream cheese or even thinly sliced sharp cheddar if you like a savory-sweet bite. Sometimes Richard even eats a slice for breakfast with a strong cup of coffee and calls it a complete meal!
Storage and Freezing Tips for Homemade Quick Breads
Once you’ve managed to slice up a piece of this gorgeous loaf—and believe me, waiting until it’s fully cooled helps you get those clean slices, check out my tips on slicing delicate pies for insight on patience—you’ll want to make sure it stays perfect for later. This Wholesome Snack Bread is so rich that even folks who claim they don’t like dates end up coming back for seconds the next day!
The good news is that quick breads, especially ones as moist as this date nut bread, keep beautifully, but you do need to wrap them properly so they don’t dry out on the counter. I always worry about air getting to my baked goods; it just steals the flavor!
For short-term storage, which for us means maybe 3 or 4 days, I just use heavy-duty aluminum foil or plastic wrap—sometimes both for double protection. If you’ve sliced the loaf, wrap the entire loaf tightly, or if it’s already sliced, wrap the individual slices. It keeps beautifully on the counter tucked into a bread box or a cool, dry pantry shelf.
Now, if you’ve made one of Richard’s favorites—the double batch he always pressures me into making—and you need to keep it longer, we turn to the freezer. This bread freezes like a charm, which is wonderful for having a piece of Comfort Food Baking ready to go for an unexpected brunch guest!
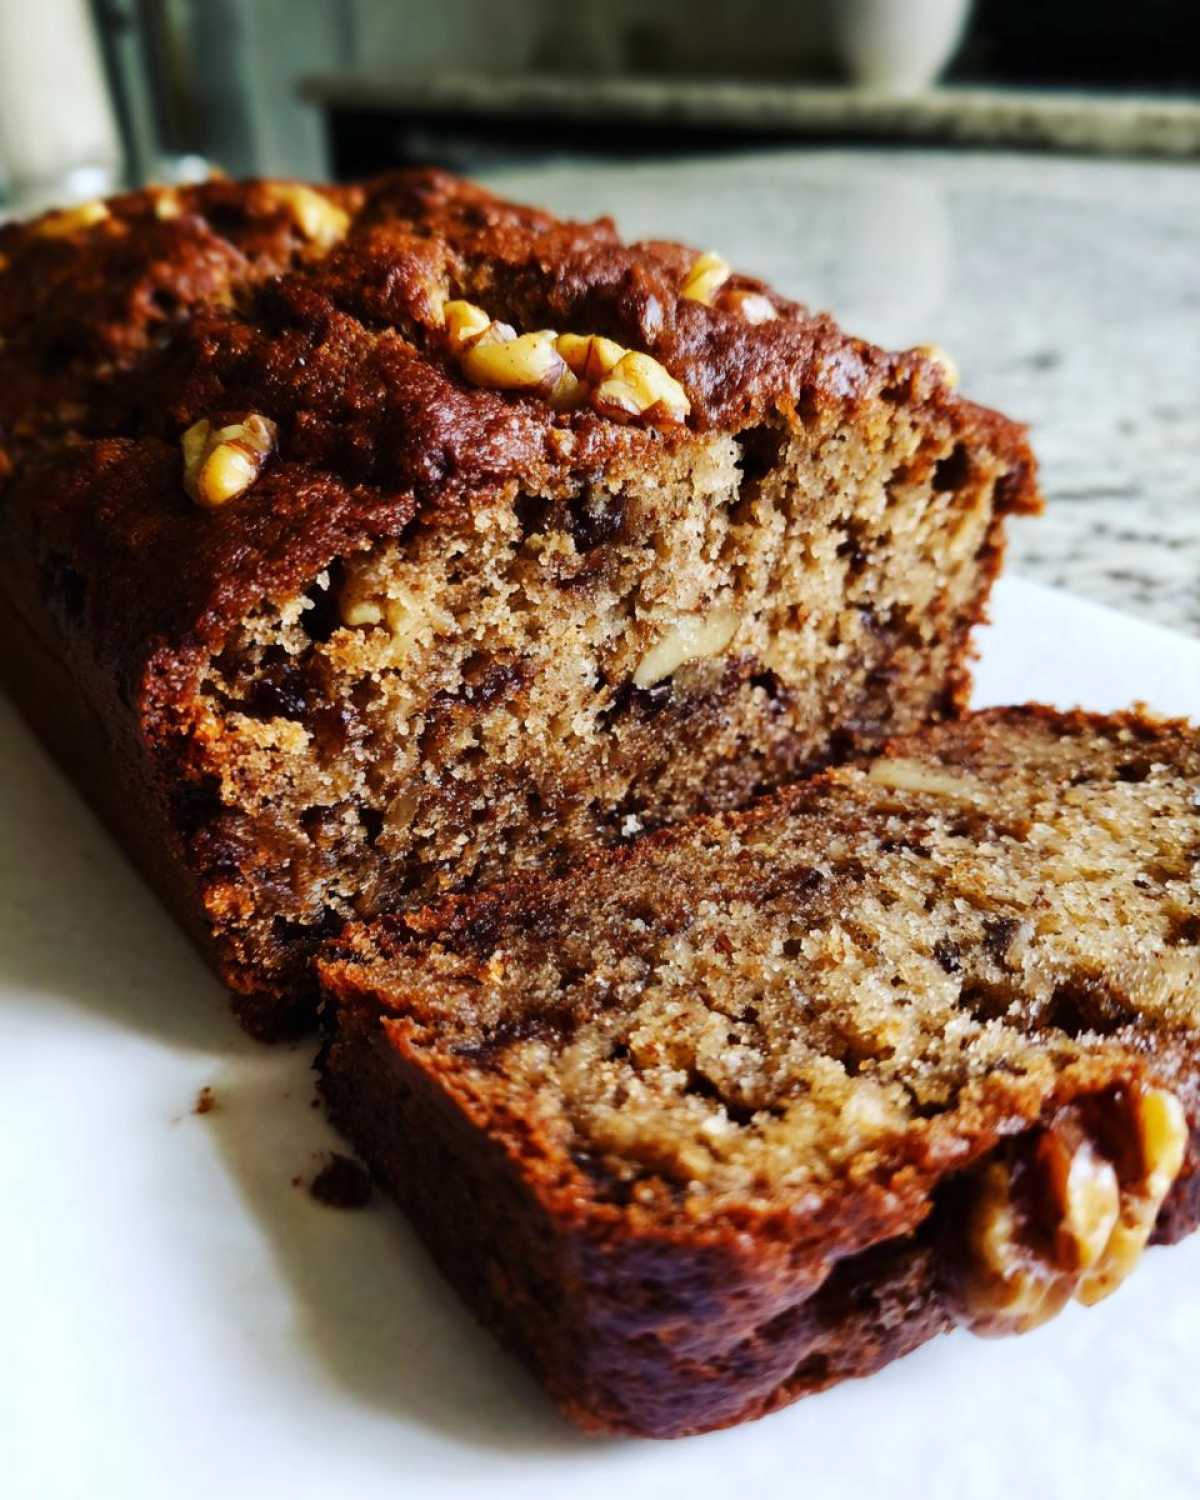
Here’s my foolproof method for freezing your Quick Bread Baking success:
- Make sure the loaf is completely, 100% cool before you wrap it. If there is any residual warmth, it will steam inside the wrap and create texture issues.
- Wrap it tightly first in plastic wrap. I mean really snug, like a mummy! Get all the air pockets out.
- Then, wrap that plastic-wrapped loaf again in a layer of heavy-duty aluminum foil. The foil protects against freezer burn.
- It will keep wonderfully like this for up to three months.
When you want a slice, just pull the loaf from the freezer while it’s still wrapped. Let it thaw on the counter for a couple of hours. It comes out tasting almost as fresh baked. If you feel like it lost a tiny bit of its perfect moisture during the thaw, just pop a slice into the toaster for 30 seconds—magic!
Frequently Asked Questions About Date Nut Bread
I always love hearing what questions pop up once you all start trying the recipes! Richard likes to collect them after I serve the first slices, saying it helps us build a better diary for next time. Since this date nut bread is such a classic, folks often have very specific questions about ingredients and keeping that wonderful texture we chased down. Here are a few I hear often!
Can I substitute the walnuts in this date nut bread recipe?
Oh, absolutely! Nuts are so personal, aren’t they? Walnuts are traditional and give that classic slightly bitter contrast to the sweet dates, but if you or a family member has an aversion or allergy, you can easily swap them out. Pecans are my next favorite choice; they have a buttery flavor that just sings with brown sugar. You could also use slivered almonds if you like a crisper texture.
Just remember, Richard loves the crunch so much that he insists on keeping them in, but if you leave them out entirely, you’ll get an even softer, more uniform loaf—one of those truly lovely, soft homemade quick breads. You might want to sprinkle a few oats or maybe some raw sugar on top instead, just to give the top crust a little texture since you won’t have the nuts.
What makes this date loaf recipe so moist?
That is the million-dollar question! And honestly, it all comes down to Step Two: preparing the dates. If you skipped that step, you’d have a completely different, drier bread. The combination of pouring that full cup of boiling water over the chopped dates and letting them soak for 15 minutes is what does the heavy lifting.
That method hydrates the dates perfectly, and when you fold that softened fruit—liquid and all—into the batter, you are incorporating extra moisture directly into the dough structure. Plus, the ratio of fats (butter) and liquids to the flour is carefully balanced to ensure a tender result. It’s the soak, not just the ingredients themselves, that locks in that incredible tenderness for your easy date loaf recipe!
For more great tips on making sure your bread stays moist, I always recommend checking out the great advice other home bakers share, like this helpful resource on retaining moisture in date nut bread.
If you want to know more about my secret weapon for not having my cakes stick, I shared all the details on my cheesecake release agent—it works wonders on quick breads, too!
Nutritional Snapshot of this Classic Quick Bread
Now, I’ll be the first to tell you that this Classic Quick Bread is made for indulgence and comfort, not necessarily for counting every little calorie! It uses brown sugar and butter because that’s how you get that unforgettable, rich taste, and these are the kinds of treats that make life worth living, right?
But for those of you keeping track—I know Richard is always curious about the breakdown—here is an approximate nutritional estimate for one slice, based on the ingredients listed. Keep in mind this is just an estimate, dear friends, and your exact serving size and ingredient brands might shift things slightly!
- Serving Size: 1 slice
- Calories: ~280
- Fat: ~13g
- Carbohydrates: ~40g
- Sugar: ~25g (Mostly from those sweet dates and brown sugar!)
- Protein: ~5g
- Fiber: ~2g
It’s a satisfying slice of Comfort Food Baking, perfect for a morning energy boost or an afternoon snack with tea. It’s not meant to be our guilt-free muffins, but goodness knows, it tastes so much better!
PrintEasy, Moist, Old-Fashioned Date Nut Bread
Bake this classic, moist date nut bread, a comforting quick bread perfect for breakfast or holiday snacking. This easy recipe brings back cherished memories.
- Prep Time: 20 min
- Cook Time: 60 min
- Total Time: 80 min
- Yield: 1 loaf (about 10 servings)
- Category: Quick Bread
- Method: Baking
- Cuisine: American
- Diet: Vegetarian
Ingredients
- 1 cup boiling water
- 1 cup packed pitted dates, chopped
- 1 teaspoon baking soda
- 1/2 cup (1 stick) unsalted butter, softened
- 1 cup packed light brown sugar
- 2 large eggs
- 1 teaspoon vanilla extract
- 1 3/4 cups all-purpose flour
- 1 teaspoon baking powder
- 1/2 teaspoon salt
- 1 cup chopped walnuts, plus extra for topping
Instructions
- Preheat your oven to 350°F (175°C). Grease and flour a 9×5 inch loaf pan.
- Place the chopped dates in a medium bowl. Pour 1 cup of boiling water over the dates and stir in the baking soda. Let this mixture stand for 15 minutes to soften the dates. This step helps keep your bread moist.
- In a large bowl, cream together the softened butter and brown sugar until light and fluffy. Beat in the eggs one at a time, then stir in the vanilla extract.
- In a separate bowl, whisk together the flour, baking powder, and salt. Gradually add the dry ingredients to the wet ingredients, mixing until just combined. Do not overmix.
- Gently fold in the date mixture (including any liquid) and the 1 cup of chopped walnuts.
- Pour the batter into the prepared loaf pan. Sprinkle the top with a few extra chopped walnuts if desired.
- Bake for 55 to 65 minutes, or until a wooden skewer inserted into the center comes out clean.
- Let the loaf cool in the pan for 10 minutes before turning it out onto a wire rack to cool completely. Slice and serve warm with butter for the best flavor.
Notes
- For an extra rich flavor, substitute half of the all-purpose flour with whole wheat flour.
- If you prefer a sweeter loaf, you can add 1/4 cup of pure maple syrup when creaming the butter and sugar.
- This homemade quick bread freezes well once completely cooled. Wrap tightly in plastic wrap and foil.
Nutrition
- Serving Size: 1 slice
- Calories: 280
- Sugar: 25
- Sodium: 180
- Fat: 13
- Saturated Fat: 5
- Unsaturated Fat: 8
- Trans Fat: 0
- Carbohydrates: 40
- Fiber: 2
- Protein: 5
- Cholesterol: 55