

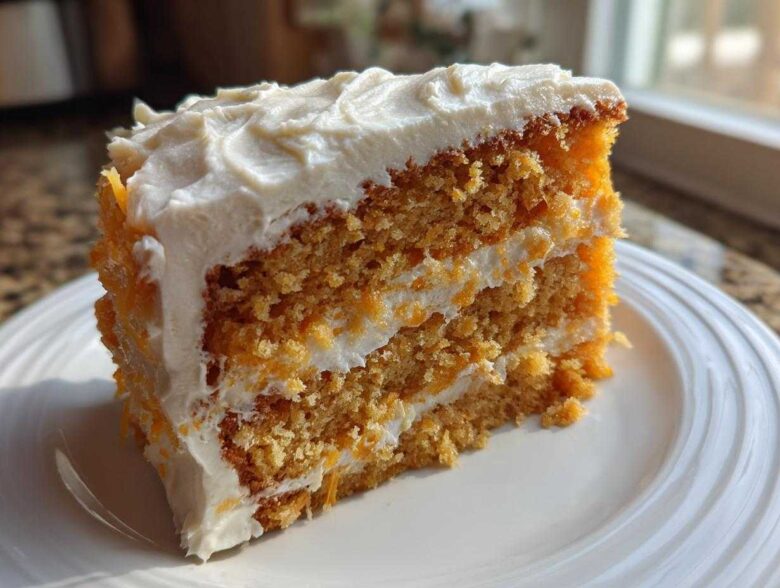
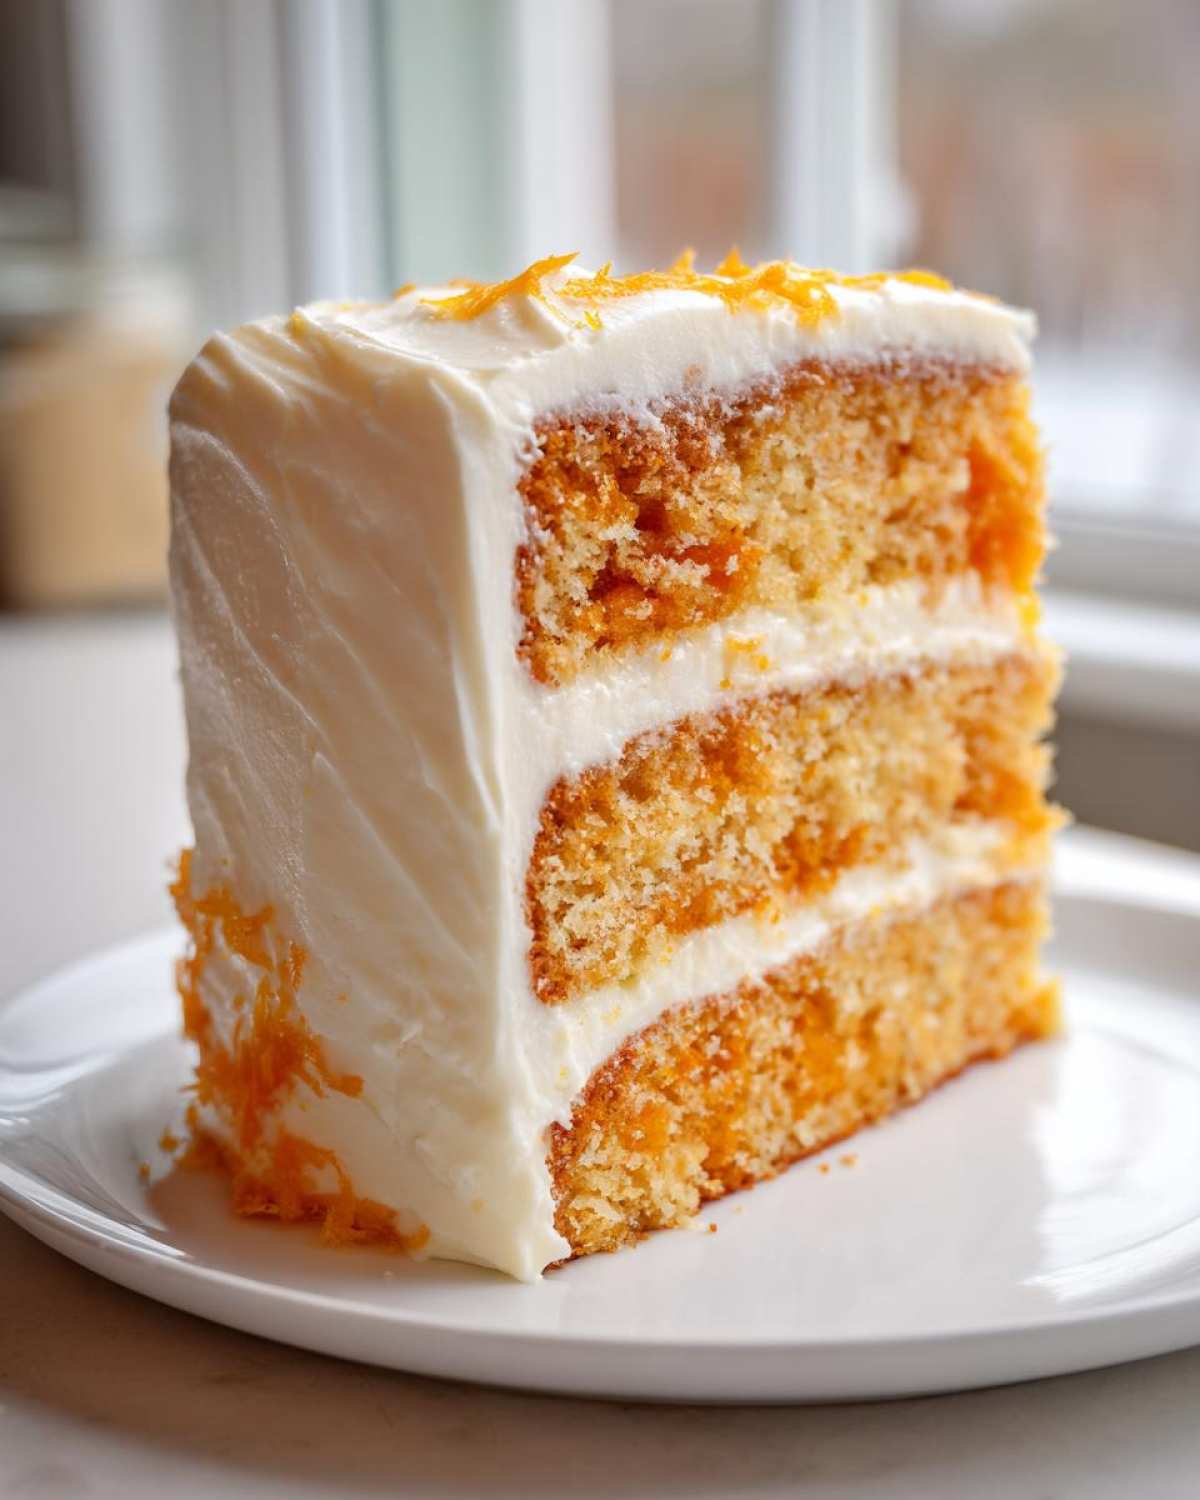
Oh my goodness, are you ready to take a trip straight back to childhood summers? Forget those sad, factory-made ice pops; we are hitting the flavor jackpot today with my Ultimate Moist Orange Creamsicle Layer Cake! The smell alone when this comes out of the oven—that bright, zesty orange mixed with sweet vanilla—will stop you in your tracks. I spent ages trying to nail that specific airy, yet saturated texture you get from the frozen treat, and I finally cracked the code!
It’s all about getting the balance exactly right between the buttermilk tang and the fresh orange juice. Trust me, this Creamsicle Cake is so unbelievably soft and vibrant; it’s going to be the star of every BBQ, spring gathering, or just Tuesday afternoon when you need a bit of sunshine. This isn’t just any cake; it’s sunshine, bottled and baked!
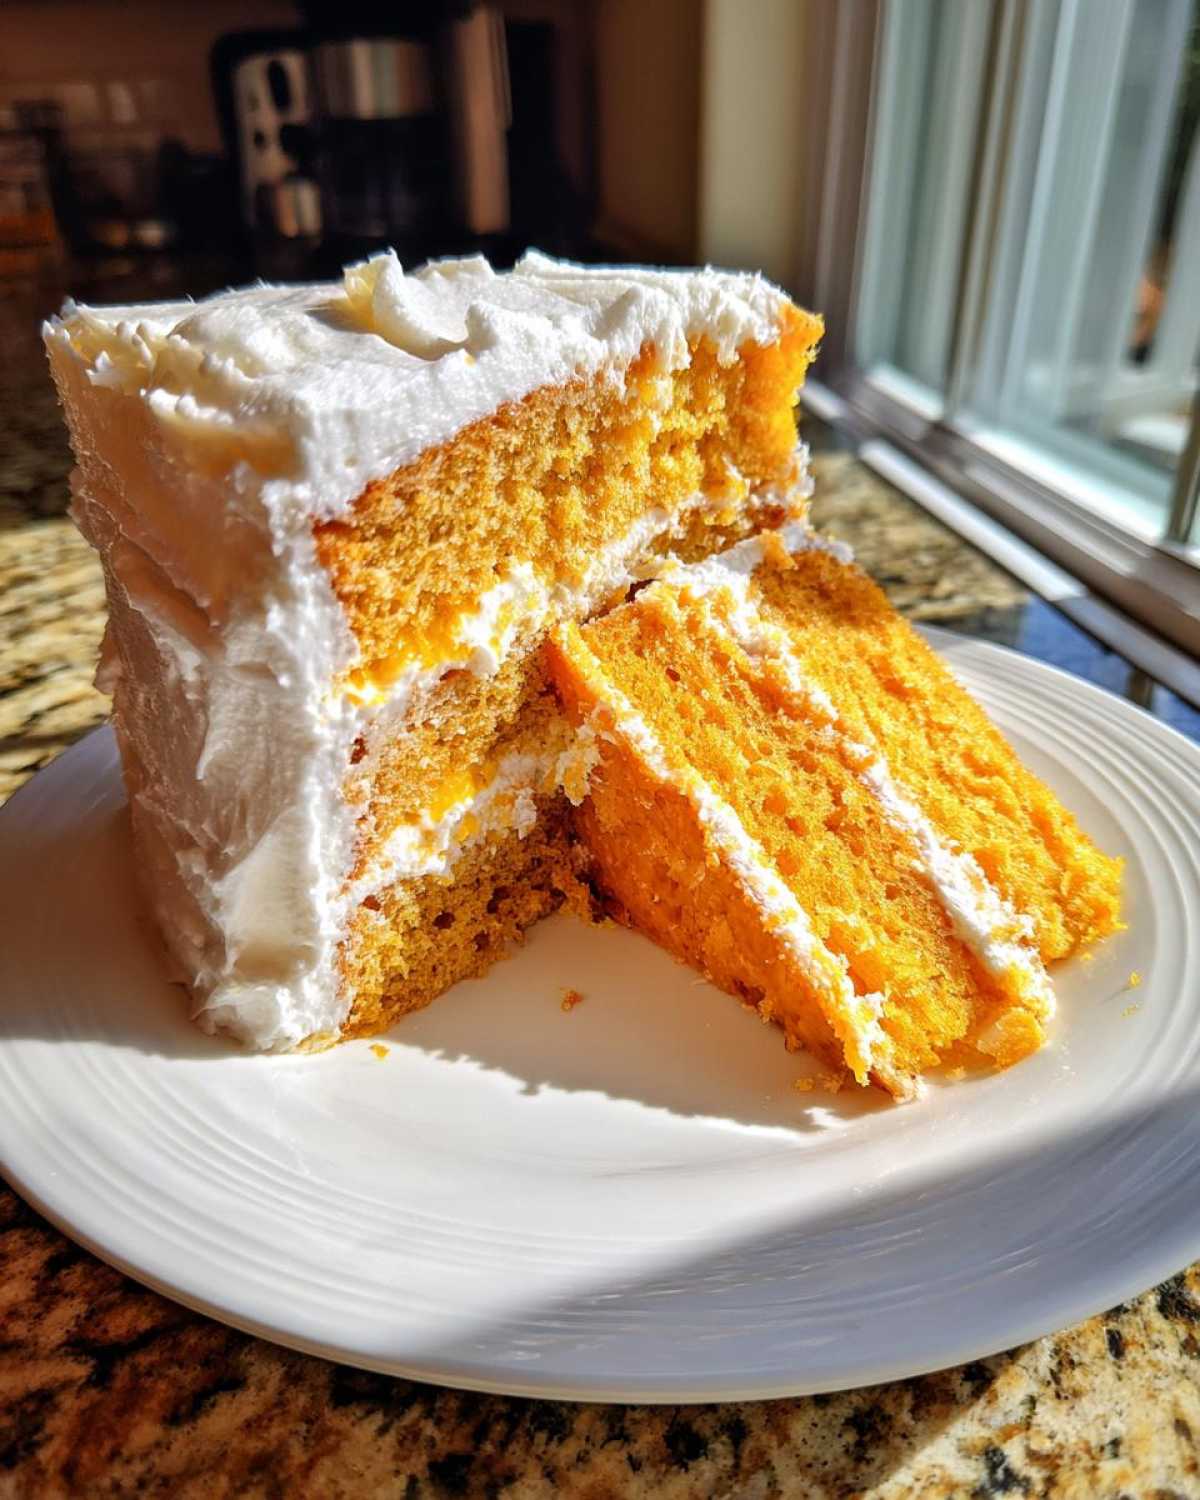
Why This Creamsicle Cake Recipe is Your New Family Favorite Cake
I promise you, once you try this, it’s going to knock every other dessert off the pedestal. It’s the perfect Nostalgic Citrus Cake for when you want something bright but still incredibly satisfying. Making a truly Moist Layer Cake Recipe can sometimes feel tricky, but not with this one.
- The texture is dreamy—seriously velvety and light, never dense or gummy.
- That unmistakable orange-vanilla swirl flavor hits perfectly; it tastes exactly like summer vacation!
- It’s surprisingly easy to whip up, making it a quick win for any occasion.
- This easily becomes a Family Favorite Cake before the crumbs are even swept up. We love it so much, I ended up linking one of my other favorite moist recipes for you here: chocolate chip banana bread!
Essential Ingredients for the Ultimate Moist Creamsicle Cake
You know how sometimes you look at a recipe and think, “Oh, I can just use bottled juice”? Nope! Not today! For this Nostalgic Citrus Cake, the quality of your citrus really dictates how much that nostalgic flavor pops. We need vibrant ingredients to make this cake sing!
When I first started playing with this idea, I wasted so many eggs trying to rush things. Seriously, make sure your butter and eggs aren’t straight out of the fridge. Room temperature helps everything emulsify beautifully, which is exactly what we need for that perfect batter consistency. If you need help getting other ingredients ready, check out my tips for moist cakes!
For the Velvety Orange Cake Layers
Remember, room temperature for the butter and eggs, people! That’s the secret to a silky smooth start before we even think about turning the mixer on high.
- 2 1/2 cups all-purpose flour
- 1 1/2 cups granulated sugar
- 1 tablespoon baking powder
- 1/2 teaspoon salt
- 1 cup unsalted butter, softened
- 4 large eggs
- 1 cup buttermilk
- 1/2 cup fresh orange juice
- 1 tablespoon orange zest
- 1 teaspoon vanilla extract
For the Fluffy Creamsicle Frosting
This frosting is where the magic happens—it’s so light and airy, it almost dissolves on your tongue. Sifting the powdered sugar isn’t optional here, sweetie; it prevents those little clumps that ruin a perfect smooth finish for your Fluffy Creamsicle Frosting.
- 8 ounces cream cheese, softened
- 1/2 cup unsalted butter, softened
- 4 cups powdered sugar, sifted
- 1/4 cup fresh orange juice
- 1 teaspoon vanilla extract
Step-by-Step Instructions for Your Creamsicle Cake
Okay, reading the ingredients list might look long, but putting this dream cake together is actually super straightforward. We’re making a classic butter cake base here, just infused with pure sunshine flavor. Remember my old baking mentor always said, “Baking is physics, but it feels like magic!” Follow these steps exactly, especially around mixing, and you’ll get that perfect tender crumb.
Preparing the Citrus Sponge Cake Batter
First things first: get your oven warming to 350°F (175°C) and grease up those two 9-inch pans. We want zero sticking drama later! In a giant bowl, just whisk your dry stuff—flour, sugar, baking powder, and salt—to break up any lumps. Then, here’s where the magic starts to happen for this incredible Citrus Sponge Cake: you add the softened butter right into the dry mix. Beat it until it looks like wet sand, a coarse crumb texture. That’s your emulsified base!
In a separate bowl, whip your wet ingredients—eggs, buttermilk, that glorious fresh orange juice, the zest for punch, and vanilla—together until they’re happy. Now, pay attention here: gradually add those wet ingredients to your crumbly butter mix. You want to mix on low speed, just until everything comes together. I mean it, stop mixing the second you see no more flour streaks! Overmixing this batter is the kiss of death for fluffiness, trust me.
Baking and Cooling the Orange Flavored Cake
Once your batter is perfectly combined, split it evenly between those two prepared pans. They go into the preheated oven for about 30 to 35 minutes. You’re looking for that golden top and the classic sign that they are done: a toothpick inserted right in the center comes out completely clean, maybe with a few moist crumbs clinging on, but absolutely no wet batter.
Patience wins here! Let the Orange Flavored Cake layers cool in their pans for about 10 minutes on a rack. After that, gently invert them onto the cooling rack completely. If you try to frost them warm, your frosting will melt into a gooey orange puddle, and we definitely don’t want that mess!
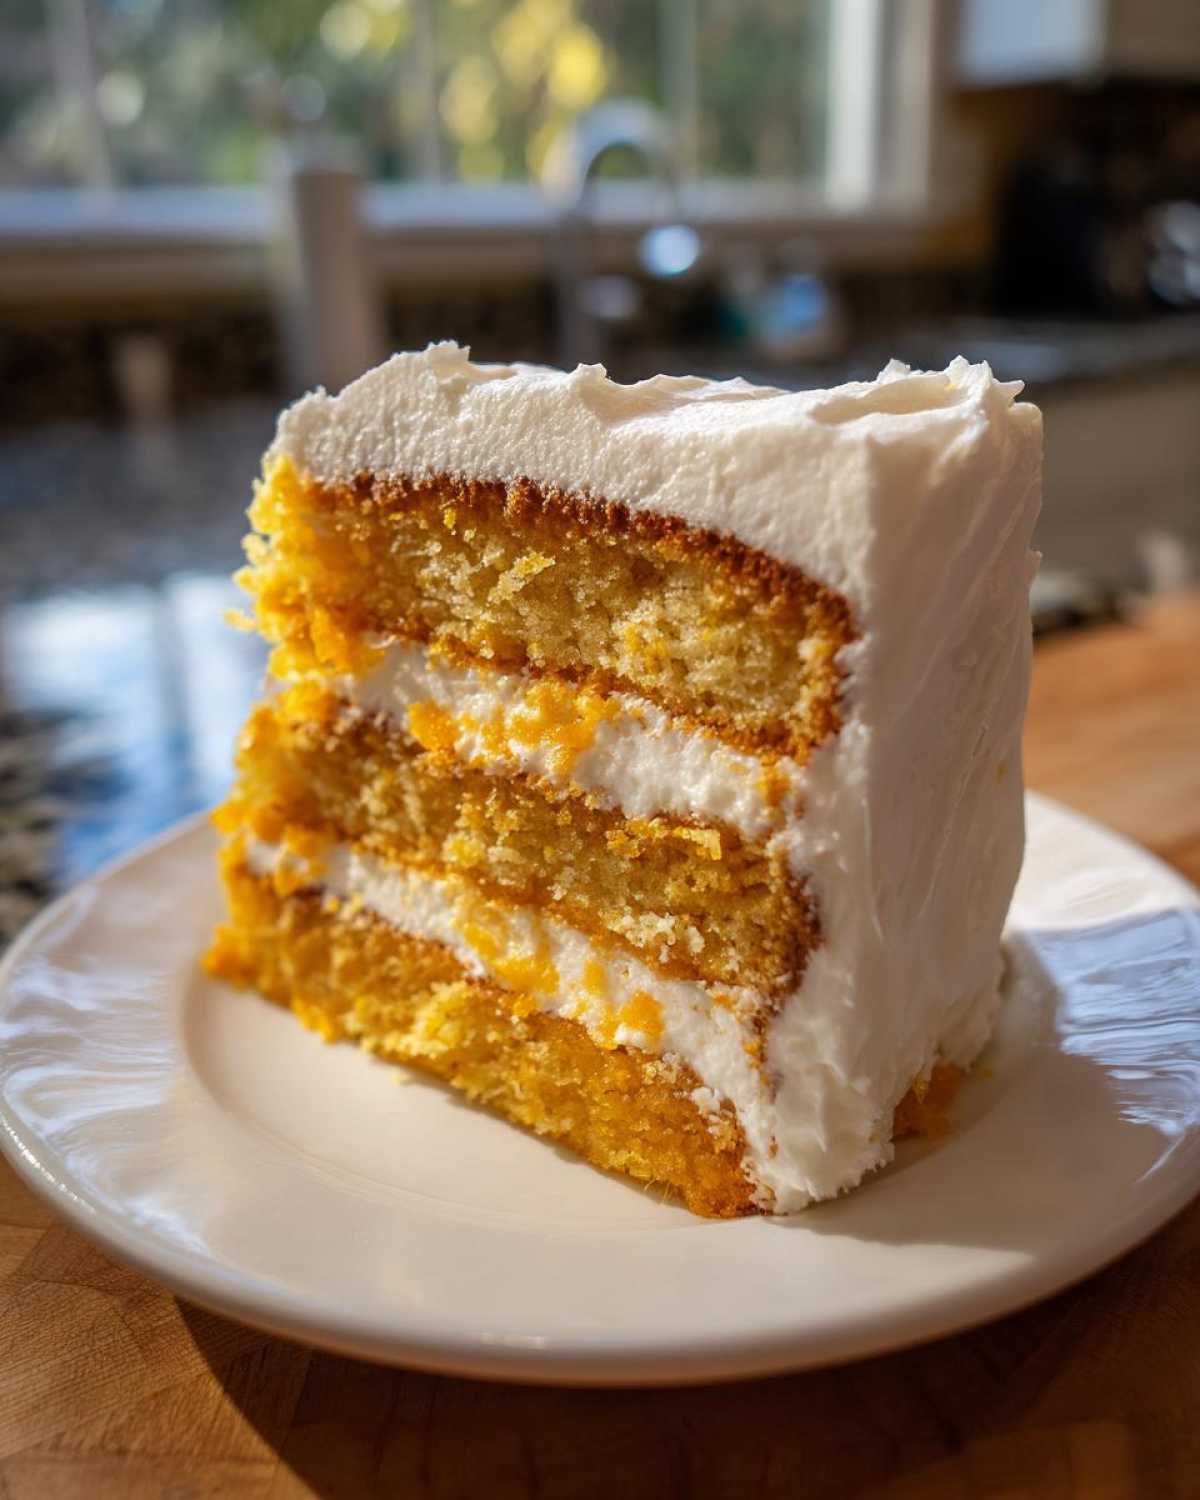
Creating the Light and Fluffy Creamsicle Frosting
While they cool, let’s build that iconic frosting. Start by beating the softened cream cheese and softened butter together until they are completely smooth and lump-free. This needs to be silky before we add sugar!
Now, slowly incorporate the powdered sugar. Alternate it with the fresh orange juice and vanilla extract. Keep beating it! You want to incorporate air until the frosting is light, pale, and truly fluffy. If you struggle with mixing things like this, I have some super helpful tips on making moist baked goods in general that might help your creaming technique!
Tips for an Expert Level Creamsicle Cake
Okay, now that you’ve mastered the basic steps for this Easy Homemade Cake, let’s talk about the little things that take it from great to absolutely show-stopping. Forget about needing a fancy bakery box; we are hitting the flavor jackpot today! The smell alone when this comes out of the oven—that bright, zesty orange mixed with sweet vanilla—will stop you in your tracks.
These small adjustments made my Orange Flavored Cake a true showstopper, ensuring you get maximum flavor and that perfect, velvety crumb every single time you make one. I promise this Creamsicle Cake will feel like an achievement!
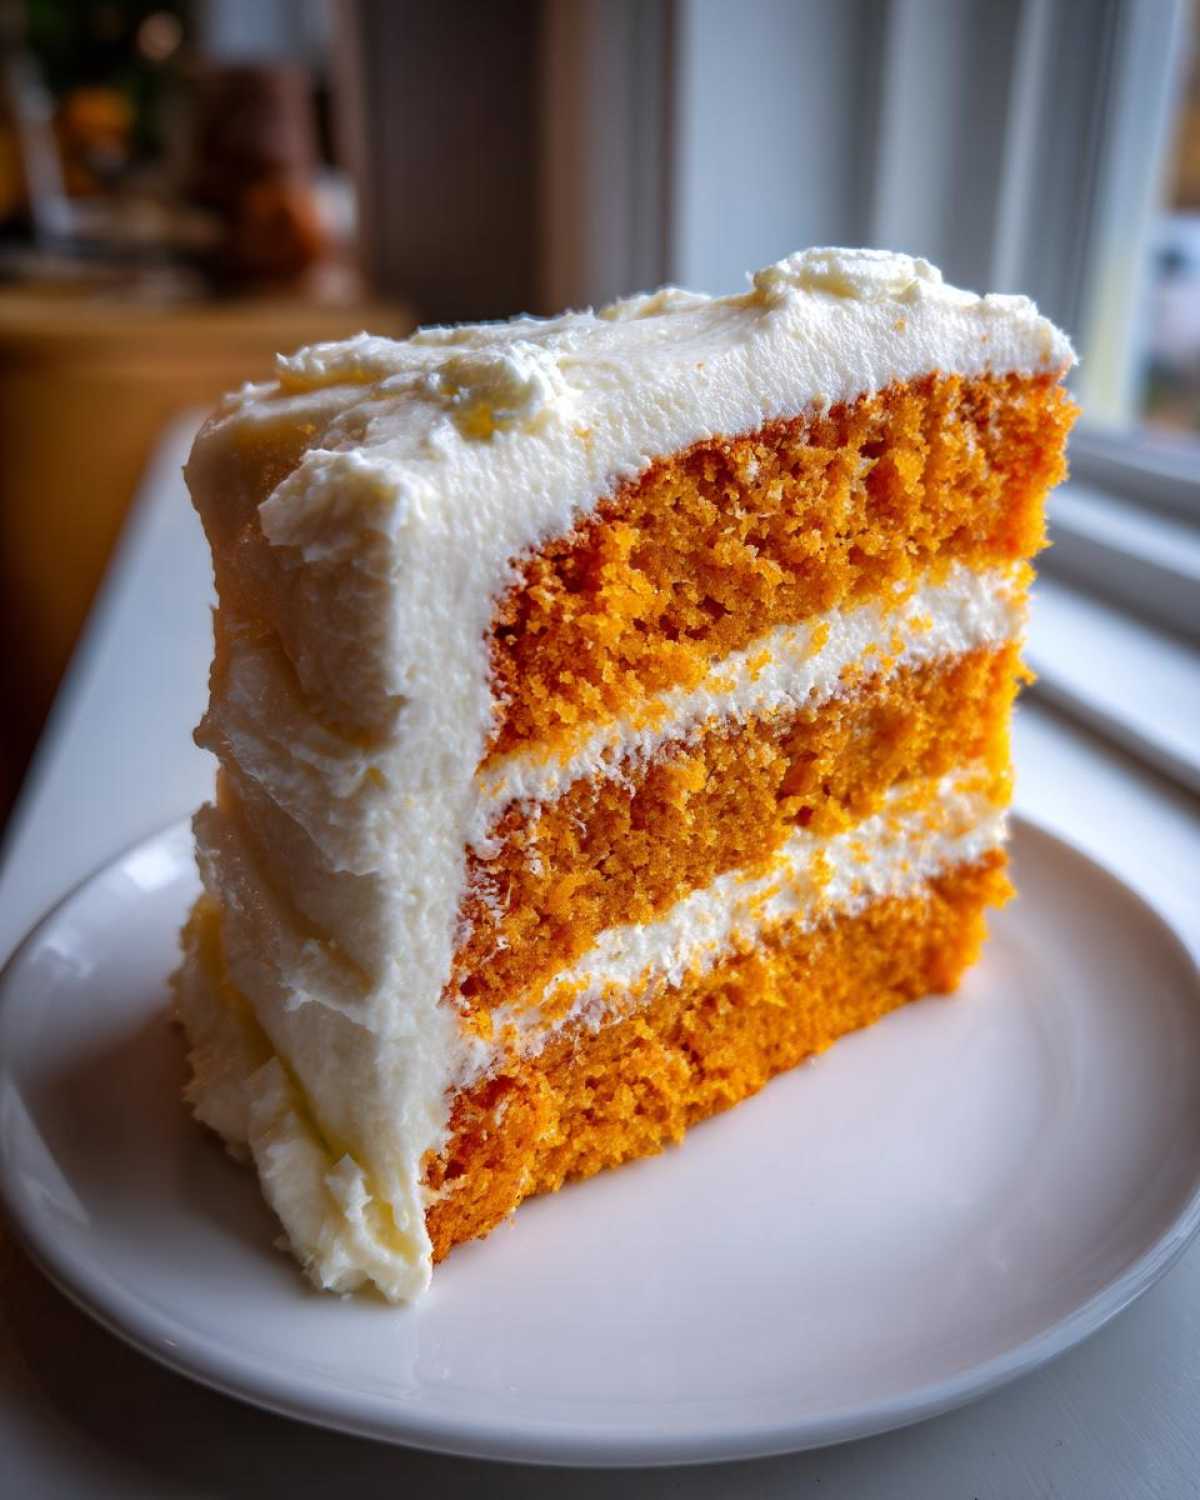
Ingredient Notes and Substitutions for Your Orange Flavored Cake
We talked about fresh juice being essential, but let me tell you why: bottled juice just doesn’t have the aromatic oils the fresh stuff does. To get the absolute most oil—and thus flavor—out of your orange zest, try zesting the orange *before* you juice it! When it’s whole, the zest is easier to peel off cleanly, and you maximize the essential oils trapped right under the skin.
Now, if your fridge is looking bare and you’re out of buttermilk, don’t panic! This is what my grandmother taught me for emergency baking. You can make your own buttermilk substitute in just five minutes! You just take 1 tablespoon of white vinegar (or lemon juice works too!) and add it to 1 cup of regular milk. Give it a quick stir and let it sit for about five minutes. It will start to look a tiny bit curdled—that’s exactly right! It gives you the necessary acidity to react with the baking powder, keeping your crumb light for this amazing Orange Zest Dessert.
Troubleshooting Common Creamsicle Cake Issues
Baking is a science, but sometimes the environment messes with us! If you finish mixing your Fluffy Creamsicle Frosting and it feels way too soft to hold its shape on the cake—maybe you used a slightly warmer cream cheese or your kitchen is just blazing hot—don’t just add more sugar! That will make it overly sweet and gritty.
The best fix is simple: just pop the frosting bowl into the refrigerator for about 15 minutes. When the fats chill down, the frosting firms right up, and you can get back to spreading it beautifully. If your cake layers sunk a little in the middle after baking, it usually means you either overmixed the batter (developing too much gluten) or you opened the oven door too early. Be patient during the baking time; those last five minutes are crucial for setting the structure! If you want more foolproof tips for making cakes from scratch, check out my guide to easy homemade cake success!
Serving Suggestions for Your Bright Orange Dessert
Now that you have this absolutely perfect, sunshine-bright Creamsicle Cake ready to go, the final hurdle is how to present this masterpiece! Since this cake is already so rich with that beautiful, sweet-tart orange and vanilla flavor, you don’t need a ton of heavy additions. We want to keep things light and complementary for our Summer Party Cake Ideas!
My first thought is always to keep the focus squarely on that fluffy frosting, but sometimes a little extra something on the side just elevates the entire experience, turning a great dessert into a showstopper. Think fresh, vibrant flavors that won’t muddy up that signature creamsicle taste.
For instance, a light scattering of candied orange zest over the top, right before serving, adds a gorgeous visual sparkle and an intense burst of pure orange flavor. If you want something creamy but lighter than the main frosting, how about a side drizzle of very light, slightly sweetened whipped cream? You can whip heavy cream until soft peaks form, dissolve just a tiny bit of vanilla sugar into it, and serve a dollop next to each slice.
I know I usually focus on baked goods, but if you’re having this as part of a big spread, sometimes a savory-sweet side is amazing. If you’re looking for something totally different to balance out the plate that still screams summer flavor, you have to check out my recipe for honey butter skillet corn—it’s a totally different vibe but just as addicting!
When it comes to beverages, stick to the theme! A sparkling water infused with just a few mint leaves or a tart raspberry lemonade cuts through the richness of the cake beautifully. Enjoy this brilliant Bright Orange Dessert—you absolutely earned it!
Storage and Reheating Instructions for Leftover Creamsicle Cake
Don’t you hate having to finish off that last slice of cake the next day when it’s been lurking in the fridge and the frosting has gotten a little stiff? We need to treat this gorgeous Creamsicle Cake right so it stays moist!
Because we used a cream cheese and butter-based frosting, refrigeration is a must, especially if it’s warm in your kitchen. Cover the entire cake loosely with plastic wrap or place the slices in an airtight container. Make sure the wrap doesn’t touch the frosting directly, or it can smudge your lovely finish. Stored correctly in the fridge, this cake tastes fantastic for a good three to four days. Honestly, it holds up beautifully!
Now, here’s my most important piece of advice: Never, ever eat a slice of refrigerated layer cake straight from the fridge. That cold temperature makes both the cake layers and the frosting hard and dry, killing that wonderful velvety texture we worked so hard to achieve! You absolutely need to let it sit out on the counter for at least 30 to 45 minutes before serving. That small amount of time allows the butter and cream cheese in the frosting to soften up again and lets the moisture redistribute back into the cake layers. It’s like magic; it instantly revives that fresh-from-the-oven tenderness!
Frequently Asked Questions About This Nostalgic Citrus Cake
I know you might have a few lingering thoughts about turning this Creamsicle Cake dream into a reality! It’s totally normal to wonder about tweaks, especially when you are aiming for that perfect Nostalgic Citrus Cake flavor. Here are some of the things I get asked the most when people are planning to bake this sunshine bomb.
Can I adapt this recipe to make an Orange Jello Poke Cake instead?
Oh, that’s a fun idea for an Orange Creamsicle Dessert twist! You absolutely can! This cake batter is sturdy enough to handle a little extra moisture. After the cake cools completely, poke holes all over the top—use a chopstick or the handle of a wooden spoon for good-sized holes. Instead of fully frosting it right away, you’d pour about a half-package worth of dissolved orange Jell-O over the top, letting it soak in for a few hours in the fridge. Then, you can frost it with a lighter whipped cream topping instead of the heavy cream cheese one we used here! If you are looking for other No Bake Creamsicle Dessert ideas, I actually have a couple of great resources for no-bake recipes like that one over here!
What if I don’t have fresh oranges? Can I use orange extract in this Orange Flavored Cake?
I totally understand; sometimes fresh fruit isn’t in the budget or the stores are out! If you must swap the fresh juice and zest, you can. But please know the flavor profile will change from a bright, tangy citrus to a much sweeter, more artificial orange flavor. For extract, I would start small—maybe 1 teaspoon—and use that vanilla extract amount for the zest replacement. Since you lose the essential oils from the zest, you might want to boost the vanilla just a touch, too. Since extract is concentrated, be careful not to add too much or you’ll go from tasting like a Creamsicle to tasting like orange candy very quickly!
Can I turn this into a Creamsicle Ice Cream Cake?
Now we are talking about next-level summer fun! Because this sponge cake is so moist, it’s a fantastic base for an Ice Cream Cake. What I would do is bake the layers, cool them completely, and then place one layer in the bottom of a springform pan. Spread a layer of softened vanilla ice cream over it, then place the second cake layer on top. Freeze the whole thing solid overnight—and I mean SOLID—before loosening the sides of the pan. The fluffy frosting we made works great as the top layer, but you need to keep the finished cake frozen until about 15 minutes before serving. For another great frozen treat inspiration, you should check out my guide to no-bake cheesecake which shares some great freezing prep advice!
How do I make sure that vibrant orange color in my Bright Orange Dessert is deep enough?
That beautiful hue comes mostly from the fresh zest and the natural color of the orange juice concentrate, but sometimes it needs a little nudge! Don’t go grabbing artificial food coloring if you can avoid it. If you want a deeper, warmer orange tint that looks gorgeous without tasting fake, try adding just one tiny drop of yellow food coloring and one tiny drop of red food coloring to your wet ingredients. Mix them in really well before adding to the dry mix. It makes all the difference in getting that perfect sunset color in your Citrus Sponge Cake!
Estimated Nutritional Data for Your Creamsicle Cake
I’m so happy you asked about the nutrition! I track these things loosely when I bake for large groups, just to keep track, though let’s be honest, you eat this cake for joy, not for greens! This information is based on the recipe detailing 12 generous slices, so your actual counts might vary depending on how thick you spread that gorgeous frosting. Remember, these figures are just an estimate for this Easy Homemade Cake!
Here is the breakdown for one slice of this incredible Creamsicle Cake:
- Serving Size: 1 slice
- Calories: 450
- Sugar: 55g
- Sodium: 250mg
- Fat: 22g
- Saturated Fat: 14g
- Unsaturated Fat: 8g
- Trans Fat: 0.5g
- Carbohydrates: 60g
- Fiber: 1g
- Protein: 5g
- Cholesterol: 110mg
Just a quick note: since we’re using real butter and cream cheese in that fluffy topping, the saturated fat content is a little higher, as expected with any quality Moist Layer Cake Recipe. But look at that flavor for just 450 calories—that’s a win in my book for an indulgent Summer Party Cake Idea! I always say, enjoy the treat, and then perhaps go for a slightly lighter salad tomorrow. Don’t stress too much over these numbers when you are baking something this special.
Share Your Sunshine Dessert Creations
Now that you have baked your own perfect, towering, vibrant Creamsicle Cake, I just cannot wait to hear all about it! Seriously, sharing food is the best part of baking, and I love seeing how my recipes look in YOUR kitchens.
Did you manage to get that frosting perfectly smooth? Did the orange flavor pop exactly like you hoped? Don’t be shy! Head down to the comments section below and leave me a rating—five stars if you loved the nostalgia, but I want to know what you thought even if you had a little hiccup! Your feedback helps me keep tweaking things to make sure the next person who tries this Easy Homemade Cake has an even better experience.
If you snap a picture of that beautiful slice or the whole cake sitting on your counter, please, please tag me on social media! Seeing your creations—whether it was a simple loaf version or a massive layer cake perfect for a party—makes my day. It connects us all, even when we are miles apart, over the shared love of a great, bright, citrusy, retro dessert. Come hang out with me and see what everyone else is making by checking out the rest of my baking adventures over at the main blog page!
PrintUltimate Moist Orange Creamsicle Layer Cake

This recipe creates a moist orange and vanilla layer cake that tastes like a classic Creamsicle treat, topped with a light, fluffy frosting.
- Prep Time: 25 min
- Cook Time: 35 min
- Total Time: 60 min
- Yield: 12 servings
- Category: Dessert
- Method: Baking
- Cuisine: American
- Diet: Vegetarian
Ingredients
- 2 1/2 cups all-purpose flour
- 1 1/2 cups granulated sugar
- 1 tablespoon baking powder
- 1/2 teaspoon salt
- 1 cup unsalted butter, softened
- 4 large eggs
- 1 cup buttermilk
- 1/2 cup fresh orange juice
- 1 tablespoon orange zest
- 1 teaspoon vanilla extract
- For the Frosting: 8 ounces cream cheese, softened
- 1/2 cup unsalted butter, softened
- 4 cups powdered sugar, sifted
- 1/4 cup fresh orange juice
- 1 teaspoon vanilla extract
Instructions
- Preheat your oven to 350°F (175°C). Grease and flour two 9-inch round cake pans.
- In a large bowl, whisk together the flour, sugar, baking powder, and salt.
- Add the softened butter to the dry ingredients and beat with an electric mixer until the mixture resembles coarse crumbs.
- In a separate bowl, whisk together the eggs, buttermilk, orange juice, orange zest, and vanilla extract.
- Gradually add the wet ingredients to the dry ingredients, mixing on low speed until just combined. Do not overmix.
- Divide the batter evenly between the prepared pans.
- Bake for 30 to 35 minutes, or until a toothpick inserted into the center comes out clean.
- Let the cakes cool in the pans for 10 minutes before inverting them onto a wire rack to cool completely.
- To make the frosting, beat the softened cream cheese and butter until smooth.
- Gradually add the powdered sugar, alternating with the orange juice and vanilla extract, beating until light and fluffy.
- Once the cakes are completely cool, frost and stack the layers.
Notes
- For extra orange flavor, use fresh orange juice instead of bottled.
- Chill the frosting for 15 minutes if you find it too soft to spread easily.
- You can substitute the buttermilk with regular milk mixed with 1 tablespoon of white vinegar, letting it sit for 5 minutes.
Nutrition
- Serving Size: 1 slice
- Calories: 450
- Sugar: 55g
- Sodium: 250mg
- Fat: 22g
- Saturated Fat: 14g
- Unsaturated Fat: 8g
- Trans Fat: 0.5g
- Carbohydrates: 60g
- Fiber: 1g
- Protein: 5g
- Cholesterol: 110mg