

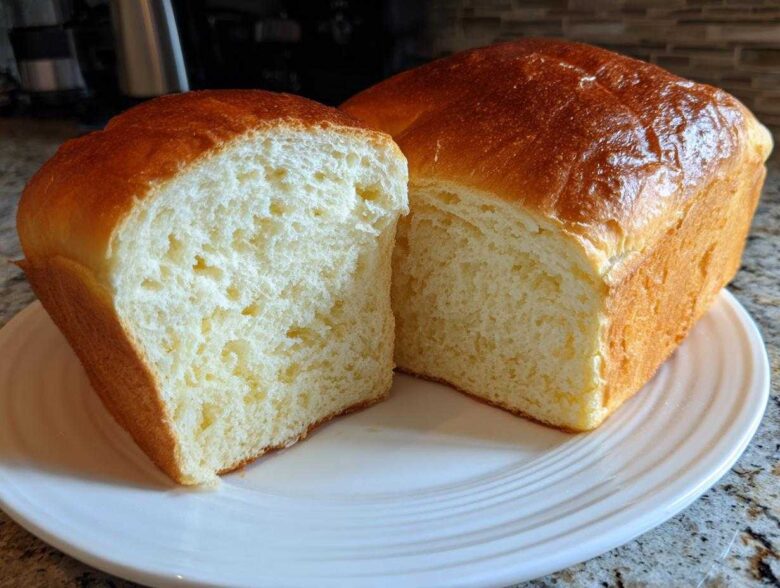
If you think that impossibly soft, pillowy bread you find at those fancy bakeries is out of reach for a home kitchen, especially if you’re just starting out with yeast, you are so wrong! I spent years chasing that elusive texture, and I finally cracked the code using one unassuming pantry staple. We are talking about the most unbelievably delicious, perfectly sweet, and guaranteed tender crumb creation: condensed milk bread.
Seriously, skip the complicated tangzhong or fancy overnight pre-ferments for now. This condensed milk bread recipe simplifies the process without sacrificing that irresistible bounce. After testing this formula about a dozen times—making sure it was sturdy enough for sandwiches but soft enough for tearing apart right out of the oven—I can promise you this is the magic key. It’s so straightforward, making it perfect for any beginner bread baking adventure! You can see more of my baking experiments over at my baking blog archives.
The secret sauce is literally in the can. That sticky sweetness transforms the dough structure into something heavenly. Get ready, because this loaf is going to make your kitchen smell incredible, and you’ll never go back to plain white bread again. Trust me on this one; this is the best loaf you’ll ever pull out of your oven.
Why This Sweetened Condensed Milk Bread Recipe Works (Soft Fluffy Bread Secrets)
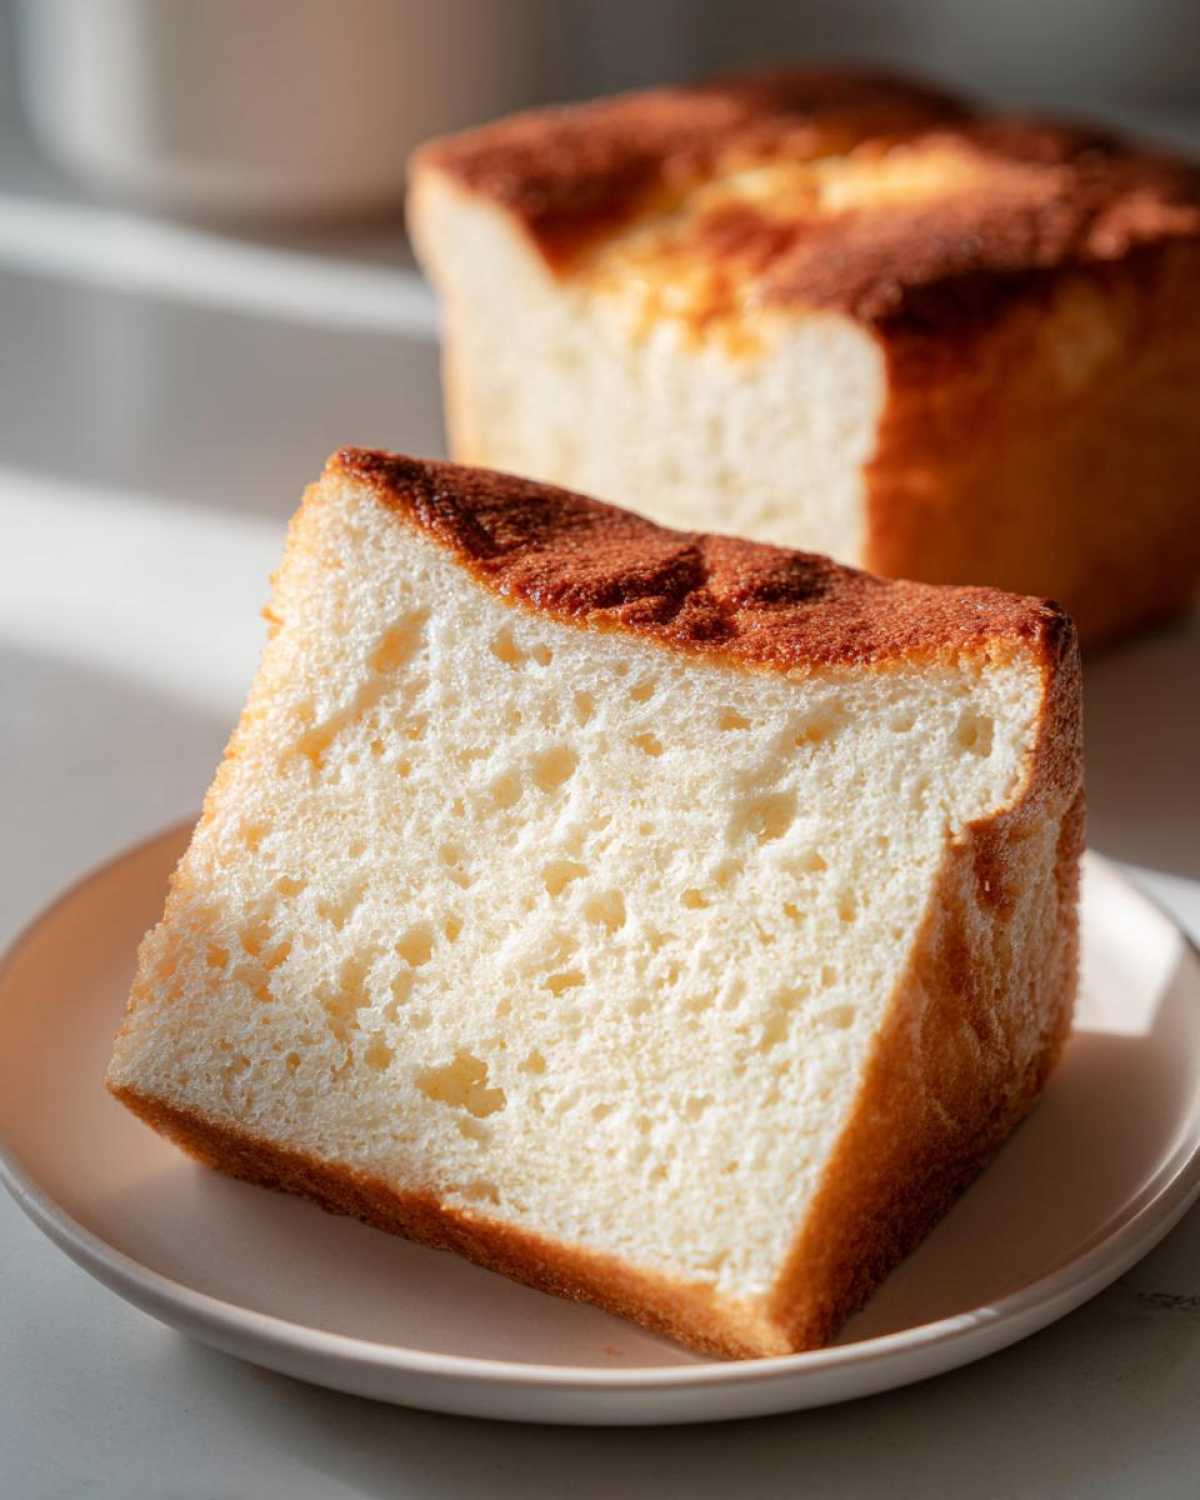
Listen, the reason this condensed milk bread tastes so much better than a standard white loaf is all about chemistry, but don’t let that scare you! Plain milk and sugar are fine, but sweetened condensed milk is basically milk solids concentrated with huge amounts of sugar and fat. When you mix that into your dough, it creates an incredibly enriched dough recipe.
Those extra fats and sugars coat the flour particles perfectly. This means two wonderful things happen: the gluten development stays smooth and manageable (no tough bread!), and the dough retains moisture like a little miracle sponge. That’s exactly why we get that unbelievably soft fluffy bread texture. It locks in softness! You won’t find that extreme dryness here, even a day later.
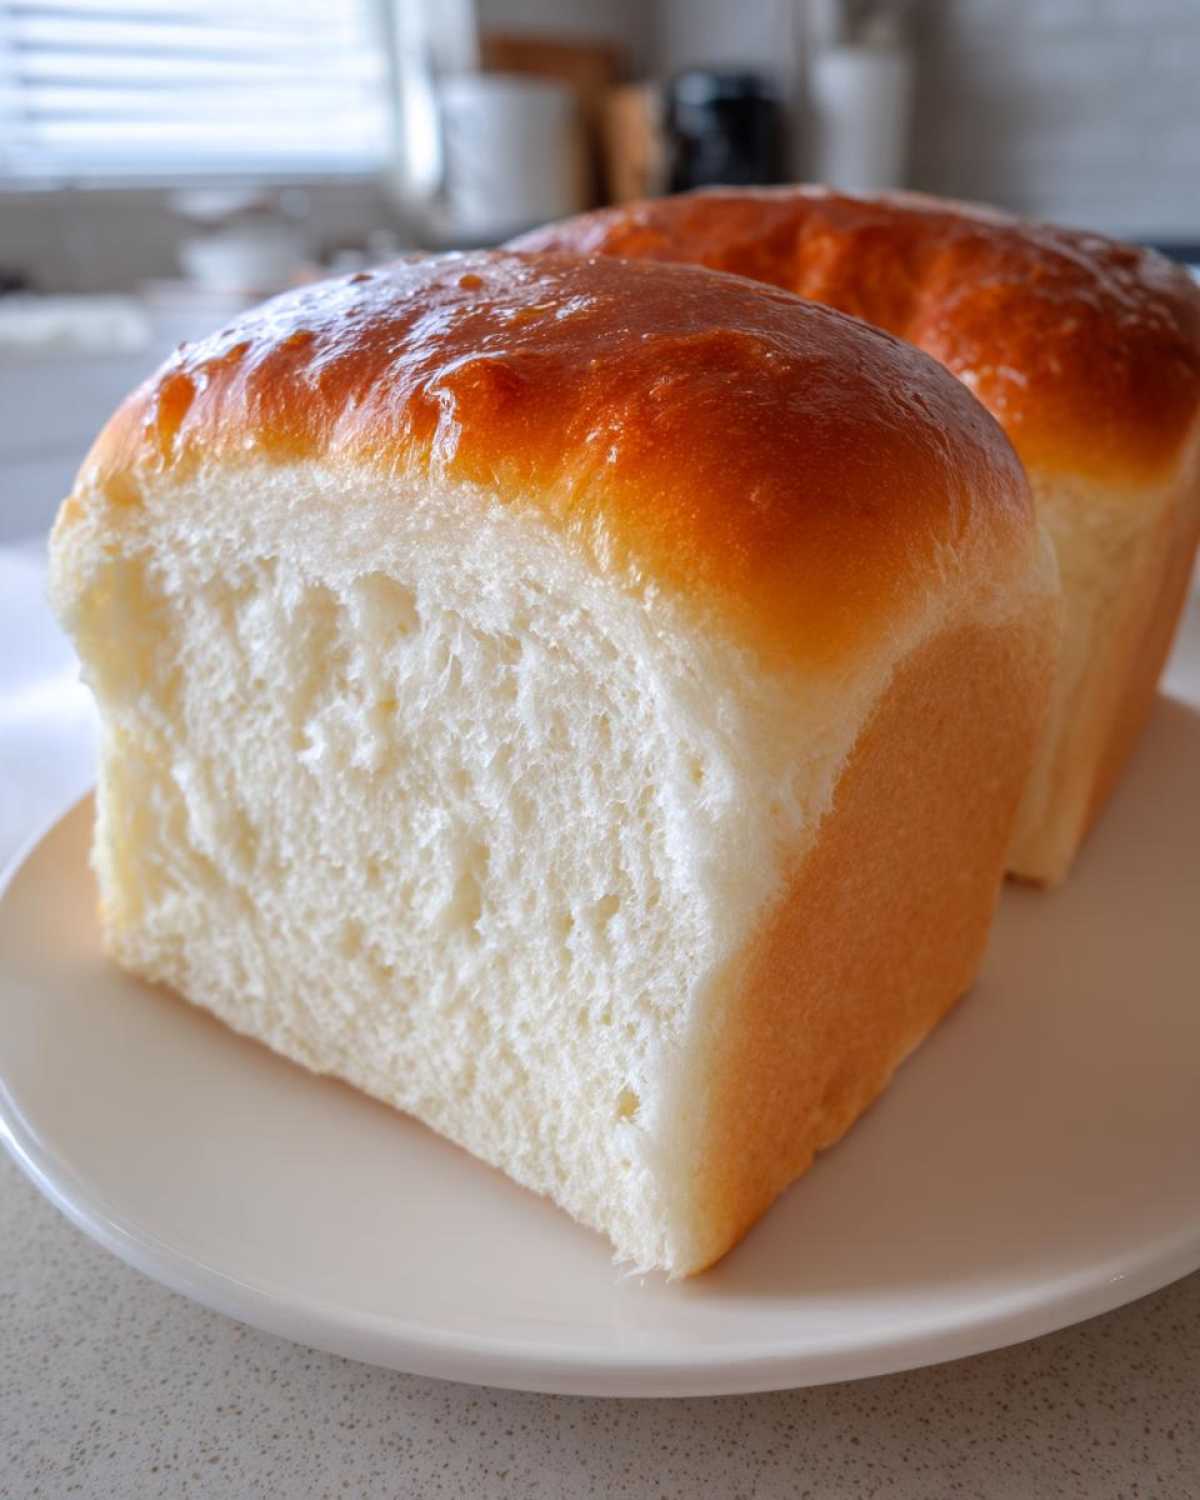
It’s a game-changer for anyone who wants that luxurious bakery feel without complex starters. If you love how moisture makes banana bread amazing, think of this as the same principle, but for yeast bread. I’ve had dry loaves before, and they are depressing, but this recipe just avoids that fate entirely! For more incredibly moist results, check out my secrets to moist chocolate chip banana bread—similar principles apply!
Achieving the Perfect Tender Crumb Baking
To really nail that signature tender crumb baking quality in this condensed milk bread, you have to treat the dough gently once it’s nearly done rising. Make sure you knead it until it’s truly smooth—like a baby’s bottom! After the shape, don’t rush the second proof. That second rise is what lets the air pockets align properly, giving you that perfect, resilient, yet soft chew.
Ingredients for Your Fluffy Condensed Milk Bread Loaf
Okay, now for the good stuff! To create this unbelievably soft loaf, you need to be precise with your amounts, but don’t sweat it—these are all basic things you probably have in the pantry already. For the liquid base, you’ll need exactly 1 cup of warm milk, and when I say warm, I mean 105 to 115 degrees Fahrenheit. Too cold, and your yeast will sulk; too hot, and you’ll kill it dead!
You’re going to use 2 1/4 teaspoons of active dry yeast, and about 1/4 cup of regular granulated sugar to kick the yeast off. The star, of course, is the 1/2 cup of sweetened condensed milk—this is essential for that signature sweetness and tenderness. Make sure you measure out 1 large egg, 1/4 cup of unsalted butter that you’ve melted down, and 1 teaspoon of salt to balance all that lovely sugar.
Finally, your structure comes from 3 1/2 cups of all-purpose flour, plus you’ll want extra flour handy for dusting the counter when we get to kneading. See? Nothing complicated, just quality components coming together just right!
Ingredient Notes and Substitutions for Condensed Milk Bread
Let’s talk substitutes, because sometimes you’re missing something. If you absolutely cannot find sweetened condensed milk, you *could* try mixing evaporated milk with sugar, but honestly, just wait! The texture of the condensed product is specifically designed to hydrate the flour perfectly for this condensed milk bread. It really throws off the balance if you try to fake it here.
Also, pay attention to that butter! It needs to be fully melted before you pour it in. If it’s too hot when you add it, it can seize up the dough later on. As for flour, while bread flour might sound like a good idea for a stronger structure, using simple all-purpose flour works best here because we want that soft, almost cake-like crumb rather than a chewy sourdough texture.
Step-by-Step Instructions for Easy Milk Bread
Okay, here’s where the magic happens! Don’t let yeast intimidate you; if you can bloom it, you can master this recipe for Easy Milk Bread. We’re going to follow the steps religiously, but I’ll sneak in my personal shortcuts where I can!
- First thing, grab your warm milk—remember that sweet spot around 105-115°F?—and sprinkle that yeast right on top. Give it a little stir and just leave it alone for five whole minutes. You want to see a nice foamy layer appear. If you don’t see foam, your milk was too hot or your yeast is old, so start over!
- Once it’s happy and foamy, whisk in the granulated sugar, that glorious condensed milk, your egg, the melted butter, and the salt. Whisk it just until everything is incorporated. Don’t overthink that whisking!
- Now for the flour. Add it in slowly, about a cup at a time, stirring as you go. Once all the flour is in, it’s going to look shaggy—kind of messy, like it doesn’t want to come together. That’s actually perfect!
- Time to get your hands dirty! Turn that shaggy mass out onto a lightly floured surface. You absolutely have to knead this dough for about 8 to 10 minutes until it’s smooth and elastic. I find that using a stand mixer for 6 minutes achieves the same elasticity as 10 minutes by hand, but hand kneading feels better for me sometimes!
- Lightly oil a large bowl—a little spray or a swipe of canola oil works—and place your dough ball inside, flipping it over once so it gets a little coating of oil all over. Cover that tightly with plastic wrap. Now, find the warmest, draft-free spot in your house and let it proof for 1 to 1.5 hours, or until it honestly looks doubled.
- Once it’s big, gently punch it down—that’s the fun part!—and shape it into a nice log. Tuck the ends under neatly and place it right into your buttered 9×5 inch loaf pan. I always slip a small piece of parchment paper underneath the loaf, just overlapping the edges, for extra insurance, because no one wants a stuck loaf.
- Cover the pan again, but loosely this time—don’t let the plastic touch the dough! Let it rise again for another 30 to 45 minutes. The visual cue here is key: you want the dough to crest about 1 inch over the rim of the pan. That ensures maximum lift. If you’re looking for similar texture notes in pastries, check out my buttermilk biscuits recipe for comparison!
- While it’s doing that second rise, go ahead and preheat your oven to 350°F (175°C). Don’t put the bread in until the oven is truly hot!
- Bake for 30 to 35 minutes. You’re looking for a gorgeous golden brown top, and the internal temperature should hit 200°F (93°C). I always use a quick-read thermometer for this; it’s my secret weapon!
- The second it comes out of the oven, get that loaf out of the hot pan immediately, or the residual heat will overcook the bottom! Let it cool completely on a wire rack before you slice into it. Seriously, wait!
First Rise and Dough Development for Condensed Milk Bread
That first rise is non-negotiable for any good yeast dough, but especially for our condensed milk bread. If your kitchen is chilly, I cheat and turn my oven on the lowest setting for just two minutes, turn it OFF, and then put the covered bowl inside. That little pocket of residual warmth is perfect for developing a truly luxurious Sweet Fluffy Bread crumb. Patience here pays off tenfold!
Shaping and Second Proofing for Bakery Style Soft Bread
When you punch the air out gently, you’re resetting the dough for its final ascent. Shape it smoothly, making sure you don’t create tons of air pockets on the surface, as that leads to tearing during baking. Getting that 1-inch crest during the second proof is vital; it guarantees that beautiful dome shape and that truly outstanding Bakery Style Soft Bread texture when it’s done baking.
Tips for Perfect Homemade Sweet Bread Every Time
Even with a foolproof recipe like this one, sometimes little things go sideways, right? I’ve been there! Here are a few things I learned the hard way that will guarantee success with your sweetened condensed milk bread recipe. These aren’t just suggestions; these are the survival tips for your first loaf!
First, if your dough feels insanely sticky halfway through kneading, don’t panic and dump in a ton of extra flour. That’s the condensed milk and melted butter fighting back, trying to keep things rich. Instead of flour, try adding a tiny drizzle more of vegetable oil to your hands and the work surface. Oil coats better than flour does here and keeps the dough pliable without stiffening the final product. I learned this while trying to make rolls one summer when the humidity was ridiculous!
Secondly, regarding that second rise—it’s easy to under-proof bread and end up with a dense brick, especially when the dough is so rich. Before you even think about preheating the oven, do the ‘poke test’ correctly! Gently dent the side of the dough with a lightly floured finger. If the indentation springs back immediately, it needs more time. If it springs back slowly, leaving a slight dent, it’s perfect. If the dent stays put and the dough deflates, you’ve gone too far. That sluggish spring-back is what we need for a tall, lovely loaf.
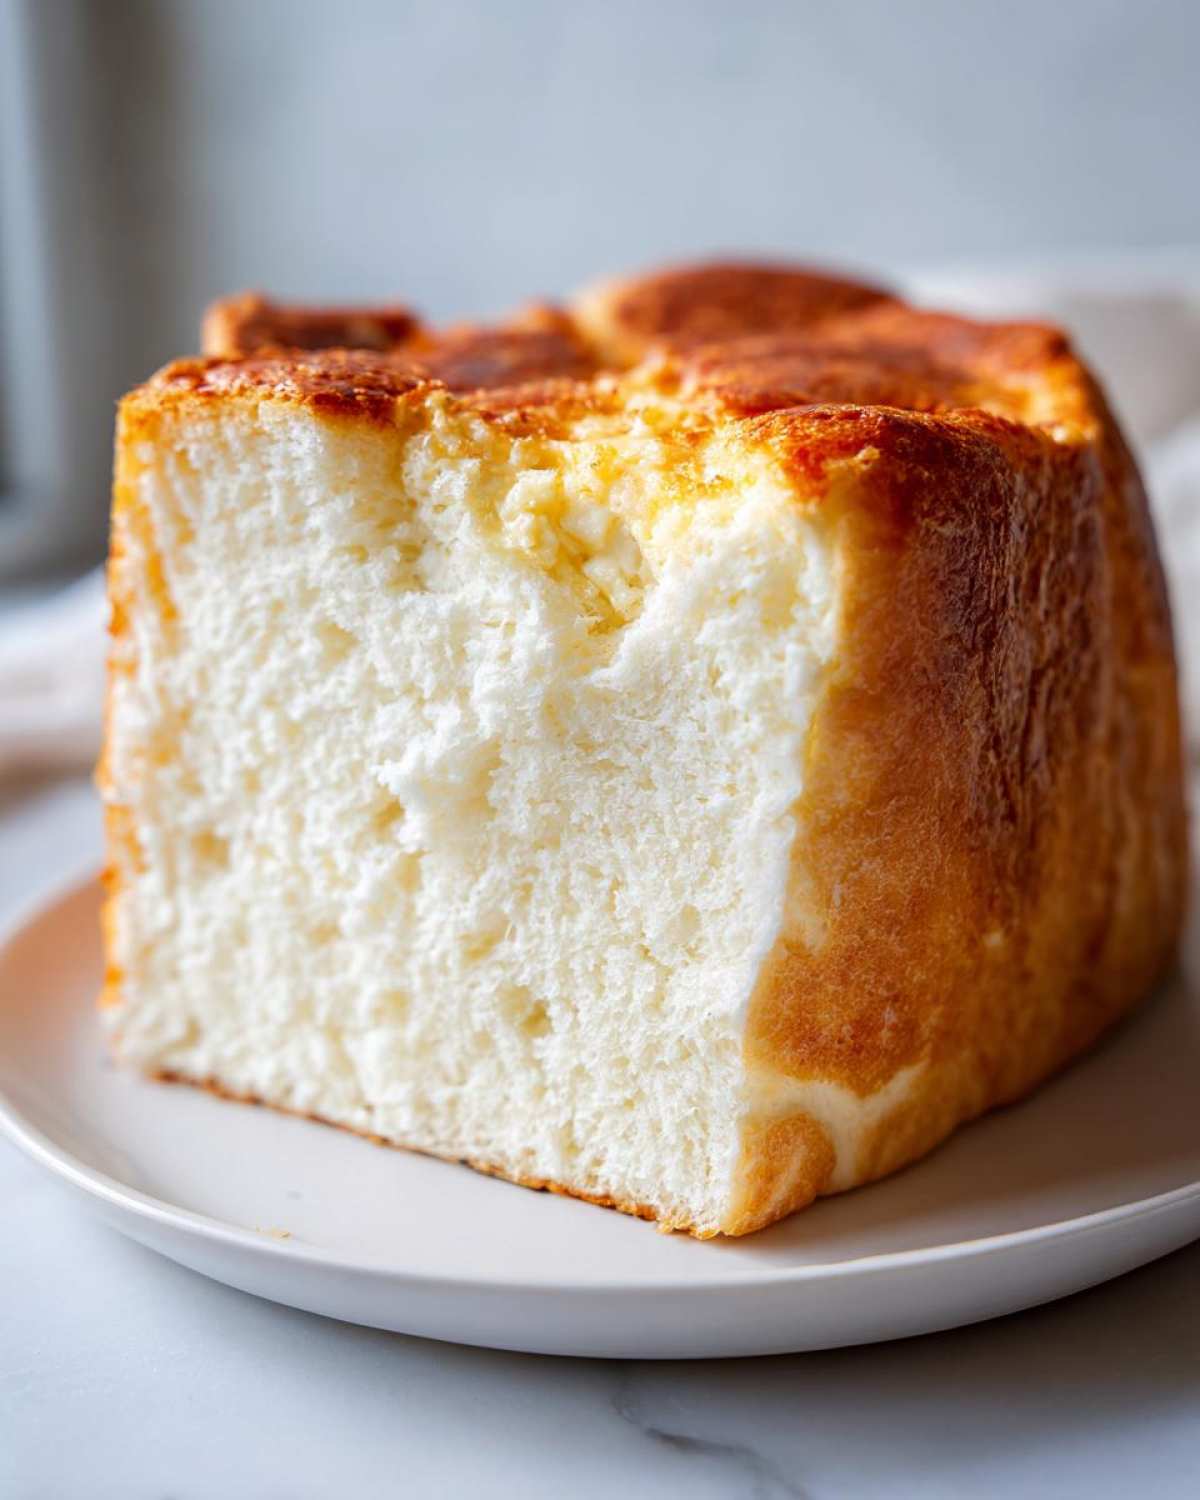
Finally, and this is a big one for presentation: if you want that gorgeous, shiny, non-sticky crust finish, skip an egg wash. Instead, right after the bread comes out of the oven—and I mean *immediately*—melt two tablespoons of butter and brush it lightly all over the hot top. That melted butter soaks in just enough to create a beautifully soft, golden top layer that stays wonderfully tender. It’s the best trick I learned for keeping any sweet breakfast loaf looking professional!
If you’re ever looking for another recipe where a small amount of fat makes a huge difference in texture, you simply have to try my easy apple crisp recipe—the crunch crust relies on similar rules about fat incorporation!
Variations: Making Condensed Milk Rolls or a Sweet Sandwich Bread
One of the best parts about getting an enriched dough recipe down pat is how versatile it is! This exact condensed milk bread dough isn’t just good for a standard pullman loaf; we can transform it into amazing treats. If you’re looking for something different, shifting from a loaf to individual rolls or a different shape for sandwiches is super simple, you just need to adjust the cook time.
Making Soft Fluffy Rolls
If you want those gorgeous, pillowy squares of goodness—you know, the ones that people fight over at potlucks—you skip the loaf pan entirely! After you punch the dough down (Step 5 in our main instructions), divide it evenly into 12 little portions. Try to make them all the same size; this is super important so they all cook evenly. Roll each piece into a smooth ball and place them close together in a greased 9×13 inch baking dish. Don’t let them touch much right now; they’ll do that during the final proof!
Because they are smaller and have more surface area exposed, they bake much faster than the loaf. Cover them for that second rise (they puff up fast!), and then bake them at the same 350°F, but for only about 20 minutes. You’re looking for a light golden color. If you love cinnamon swirls, before you roll them up into balls, look at my incredible recipe for homemade cinnamon rolls—you can adapt that sweet filling for these rolls!
Creating a Perfect Sweet Sandwich Bread Loaf
Sometimes you want a loaf shape that’s shorter and wider, perfect for making the absolute best grilled cheese or French toast. For a slightly different structure that still results in a fantastic Sweet Sandwich Bread, you can use two 9-inch round cake pans instead of one deep loaf pan. The batter divides perfectly between them.
When you switch to rounds, the baking time usually stays right around 30 minutes, but always check for that 200°F internal temperature just in case. Because the shape is lower, the edges tend to brown faster, so keep an eye on those shiny crusts! This dough is so forgiving you’ll be whipping up different shapes every weekend!
Storage and Reheating for Your Condensed Milk Bread
Listen, the biggest compliment you can give this condensed milk bread is that you have leftovers the next day, right? But unlike some other homemade loaves that turn hard on day two, this one holds up beautifully because of all that richness we packed in there. However, we want it perfect, not just ‘good enough,’ so storage matters!
When the loaf is completely cool—and I mean rock solid cool, which takes commitment—wrap it up tightly. I prefer using plastic wrap first, really sealing those edges, and then wrapping that whole thing in a layer of aluminum foil. This double wrap is your best defense against stale air trying to sneak in and dry out that beautiful tender crumb.
If you’re planning to eat the whole loaf within three days, the counter is fine. Keep it at room temperature, away from direct sunlight or heat, because the moisture content is high enough that you don’t need refrigeration, which can actually make bread go stale faster! If you know you won’t get to the last half for a week or more, it’s time to go to the freezer, my friend. Slice the bread first, which is easier to manage later.
Freezing Your Sweet Loaf
This is my go-to for when I bake a batch but know I can only eat half right away. Slice your cooled loaf into a few sections—maybe three or four chunks—and wrap each chunk individually tight in plastic wrap, pressing out all the air you can. Then, place those wrapped chunks into a large, zip-top freezer bag. It keeps beautifully frozen for up to three months this way!
Waking Up That Soft Texture Again
When it’s time to eat the frozen bread, don’t just let it thaw on the counter; you won’t get that fresh-baked spring back! The best way to reheat is to unwrap a frozen slice or portion, place it directly onto a baking sheet, and pop it into an oven that you’ve preheated to 300°F (150°C) for about 8 to 10 minutes. You’re gently steaming it back to life with residual heat.
If I’m reheating a whole loaf that I froze whole (wrapped in just foil, not plastic!), I unwrap it fully, tent it loosely with new foil, and bake it for about 15 minutes until it’s warm all the way through. If you happen to have a day-old slice begging for a new life, throwing it onto a griddle with a tiny smear of butter is the way to go, turning it into the best French toast ever. For more great uses for older bread, check out my thoughts on classic French toast!
Frequently Asked Questions About Condensed Milk Bread
It’s natural to have questions when venturing into a new baking method, especially when aiming for that perfect soft texture! This condensed milk bread is definitely forgiving, but here are some key points readers often ask about after trying this recipe for yourself.
Can I use this recipe for Quick Yeast Bread?
That’s a great question, and I totally understand wanting to shave off time! Sadly, while this uses instant yeast, which is faster than sourdough, it isn’t truly a Quick Yeast Bread. Because we have so much fat and sugar from the condensed milk, the yeast needs more time to work its magic and develop that structure. You need those full rise times to get the pillowy texture. If you’re looking for something truly fast, you might be better off with a baking soda batter, but honestly, the wait for this enriched dough is worth every minute!
Does the final bread taste too sweet?
This is my favorite question! Because we are only using 1/2 cup of the sweetened condensed milk bread recipe component in an entire loaf, the sweetness level is beautifully balanced. It’s richer and slightly sweeter than a standard white bread, making it amazing for breakfast or sweet sandwiches, but it’s not cloying. It doesn’t taste like dessert, I promise! It complements savory fillings really well, too, as you’ll see if you try making grilled cheese with it—the sugar caramelizes slightly on the outside!
How does this homemade sweet bread compare to Japanese Milk Bread?
This is where things get fun! Japanese Milk Bread (like Shokupan) often relies on a *tangzhong* starter—a cooked flour paste—to achieve its famous incredibly fine texture. Our homemade sweet bread gets close, thanks to the richness of the condensed milk doing some of the heavy lifting traditionally done by the tangzhong. So, this recipe gives you about 90% of that airy softness without the fussy starter step. If you want to explore the tangzhong method later, you might love my notes on sweet Hawaiian yeast bread, which uses a similar enriching technique!
Is this bread good for making French toast?
Oh my goodness, YES! Using this bread for French toast is one of the best ways to use a slightly older loaf. Because the crumb is already so rich and slightly dense, it holds up perfectly when dipped in custard. It fries up beautifully golden brown without falling apart into mush. If I’m planning on making French toast the next day, I usually leave the crust off entirely! You can find my full technique over at my classic French toast recipe guide.
Can I use dried milk powder instead of fresh milk?
I strongly advise against that if you want that ultimate soft bread experience. The recipe calls for fresh, warm milk because it hydrates the yeast perfectly and contributes to the overall moisture content that the condensed milk can’t alone provide. Milk powder can sometimes lead to a slightly drier or tougher crumb. Stick to fresh milk for your liquid base for the best results!
Estimated Nutritional Data for This Condensed Milk Bread
Now, I know most of us bake for love, not for counting macros, but it’s nice to have a ballpark idea of what you’re enjoying! Since we are working with an enriched dough—hello, butter and condensed milk!—it’s definitely heartier than a plain pantry staple loaf. Please keep in mind that these numbers are just estimates based on standard all-purpose flour and the ingredients listed.
I calculated these figures based on getting 12 substantial slices out of the final baked loaf. If you slice yours thinner (which I never do, because who can stop at one slice?), these numbers will look better per serving! These estimates are what I generally see when I run my recipe through standard nutrition calculators. It’s truly a satisfying homemade sweet bread!
- Serving Size: 1 slice
- Calories: 195
- Total Fat: 4g
- Saturated Fat: 2.5g
- Carbohydrates: 34g
- Sugar: 10g (That sweetness comes mostly from the condensed milk we added!)
- Protein: 5g
- Sodium: 210mg
See? Not terrible for something that tastes like it came straight from a fancy bakery! It’s a great way to treat yourself on a Saturday morning without feeling too guilty. Enjoy that slice!
Share Your Fluffy Condensed Milk Bread Creations
Now that you have the blueprint for the softest, most satisfying condensed milk bread you’ve ever dreamed of making, the real fun begins: baking it!
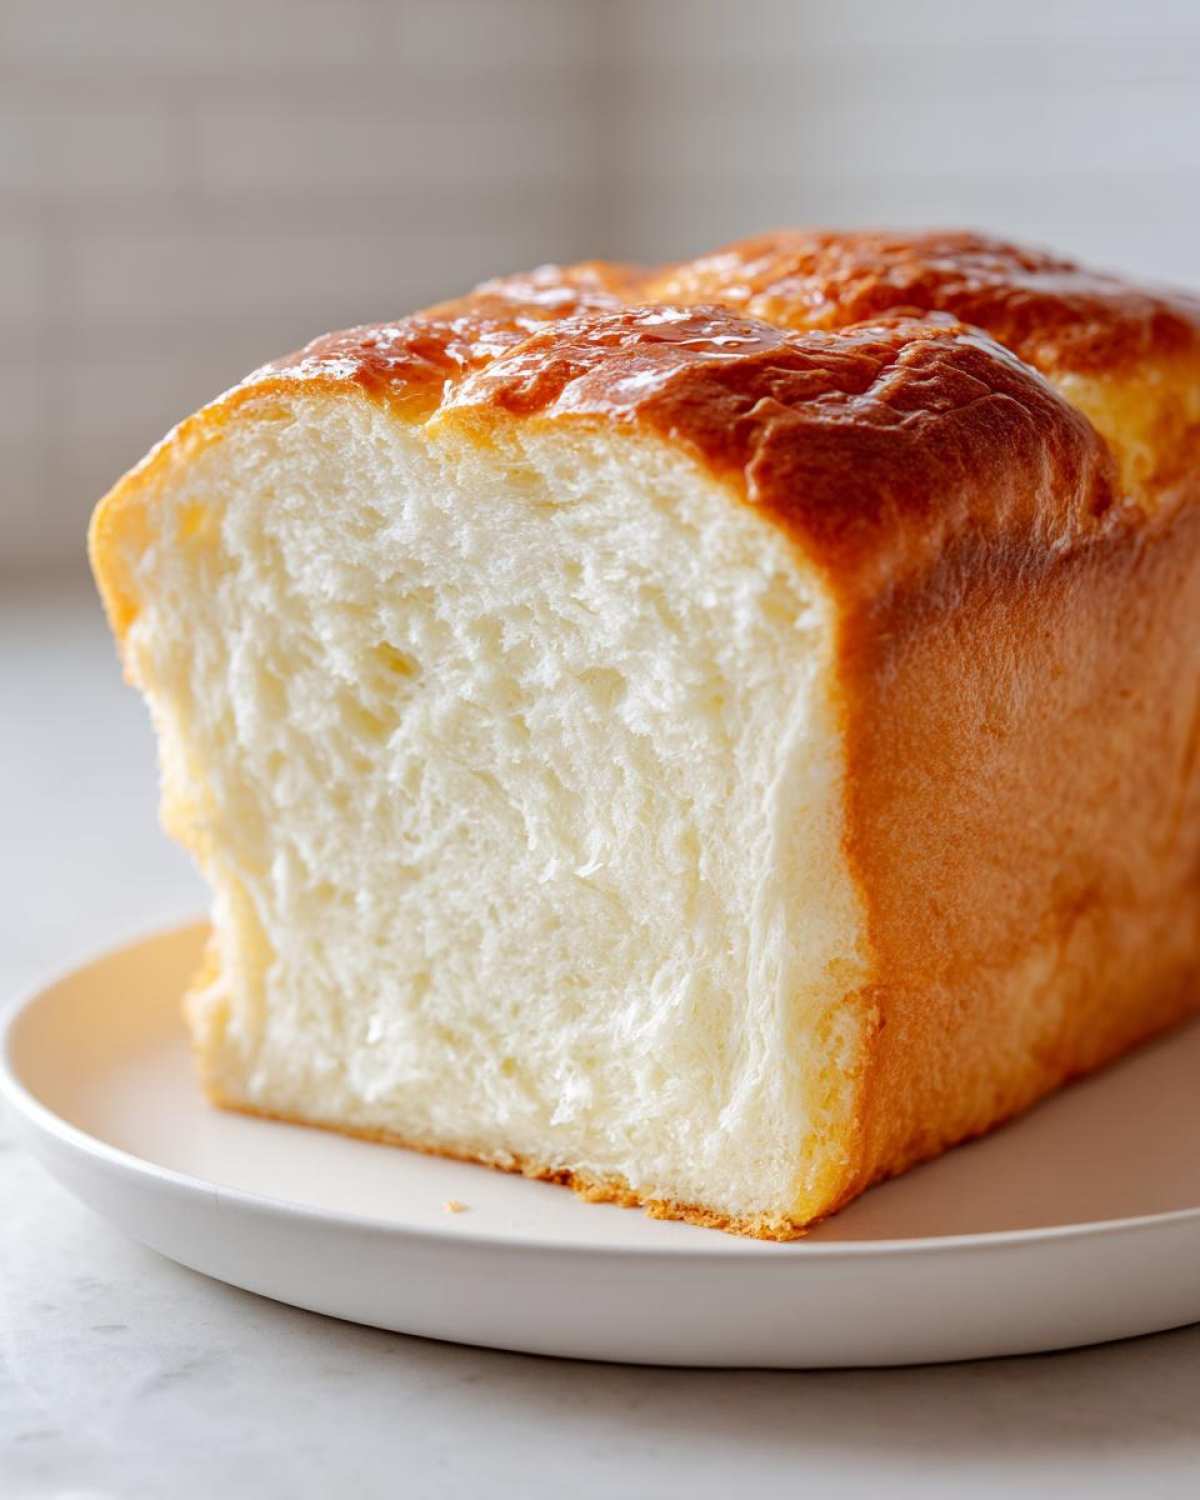
I really, truly hope you give this recipe a try this week. There is nothing quite like ripping apart a warm loaf of enriched bread made just by your own two hands. When you pull it out of that oven and you see the perfectly domed top glistening, you’ll feel like a total baking rock star. Don’t let that lovely dough sit around; get in there and mix it up!
I absolutely live to hear how things turn out in your kitchens! Did you add a little extra butter wash on top? Did you manage to resist slicing it until it was completely cool? Tell me everything! Please take a moment to leave a rating right here on the recipe—a little star count helps other folks see that this is the real deal for sweet fluffy bread.
If you had any hiccups, or if you found a new secret method I missed, please drop a comment below. Questions are always welcome, and I check in often to help out fellow bakers. You can also reach out to me directly through my contact page if you have something personal to share. Seriously, get that yeast blooming and show me what you bake soon!
PrintFluffy Sweetened Condensed Milk Bread Loaf
Make a very soft and slightly sweet loaf of bread using sweetened condensed milk for an enriched, tender crumb. This recipe is simple for beginner bakers.
- Prep Time: 20 min
- Cook Time: 35 min
- Total Time: 1 hour 50 min
- Yield: 1 loaf (12 slices)
- Category: Baking
- Method: Yeast Baking
- Cuisine: American
- Diet: Vegetarian
Ingredients
- 1 cup warm milk (about 105-115F)
- 2 1/4 teaspoons active dry yeast
- 1/4 cup granulated sugar
- 1/2 cup sweetened condensed milk
- 1 large egg
- 1/4 cup unsalted butter, melted
- 1 teaspoon salt
- 3 1/2 cups all-purpose flour, plus more for dusting
Instructions
- Combine the warm milk and yeast in a large bowl. Let it sit for 5 minutes until foamy.
- Add the granulated sugar, condensed milk, egg, melted butter, and salt to the yeast mixture. Whisk until combined.
- Gradually add the flour, one cup at a time, mixing until a shaggy dough forms.
- Turn the dough out onto a lightly floured surface. Knead for 8 to 10 minutes until the dough is smooth and elastic.
- Place the dough in a lightly oiled bowl, turning it once to coat. Cover the bowl with plastic wrap and let it rise in a warm place for 1 to 1.5 hours, or until doubled in size.
- Gently punch down the risen dough. Shape it into a loaf and place it in a greased 9×5 inch loaf pan.
- Cover the pan loosely and let the dough rise again for 30 to 45 minutes, or until it crests about 1 inch over the rim of the pan.
- Preheat your oven to 350F (175C).
- Bake for 30 to 35 minutes, or until the top is golden brown and the internal temperature reaches 200F (93C).
- Remove the bread from the pan immediately and cool completely on a wire rack before slicing.
Notes
- For an extra soft crust, brush the top of the loaf with melted butter immediately after removing it from the oven.
- If you prefer rolls, divide the dough into 12 equal pieces and bake them close together on a baking sheet for about 20 minutes.
- Ensure your milk is warm, not hot, to avoid killing the yeast.
Nutrition
- Serving Size: 1 slice
- Calories: 195
- Sugar: 10
- Sodium: 210
- Fat: 4
- Saturated Fat: 2.5
- Unsaturated Fat: 1.5
- Trans Fat: 0
- Carbohydrates: 34
- Fiber: 1
- Protein: 5
- Cholesterol: 25