

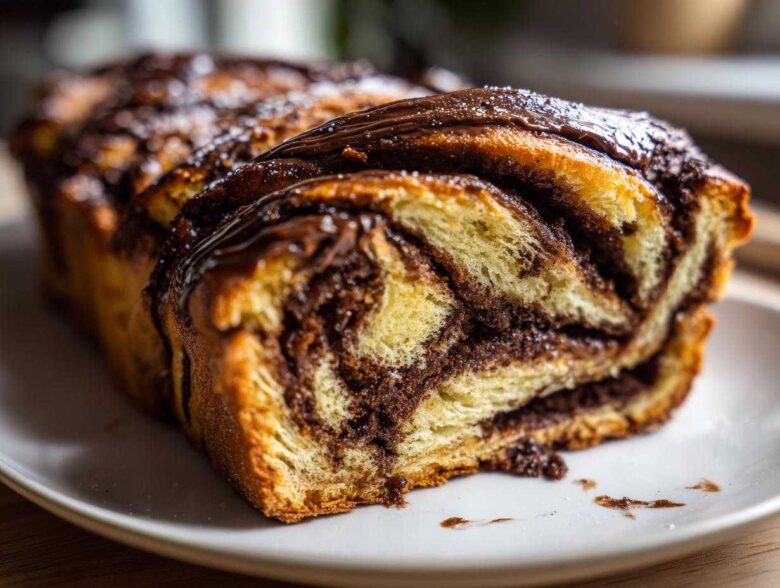
You know that moment when you bite into a truly stellar slice of something rich, fluffy, and completely swirled with dark chocolate? That’s the moment I chase every single time I bake. Forget those dry, store-bought versions; we’re making the real deal today! This recipe—The Ultimate Soft & Fluffy Chocolate Babka with Perfect Golden Swirls—is my absolute pride and joy. For years, I struggled with the brioche dough; it always felt too sticky or too heavy. But I finally cracked the code after soaking a batch, realizing the trick was the kneading time and, honestly, just letting the mixer do the hard work! Trust me, mastering this chocolate babka is totally within reach, and the result is pure magic for your next brunch or holiday morning. If you want more fantastic tips and tricks for baking right from my kitchen, check out the main blog page!
Why This Homemade Chocolate Babka Recipe Delivers Bakery Quality
I promise you, once you taste a truly excellent homemade version, you’ll never look back at the grocery store options. We’re aiming for that perfect balance that makes people ask where you bought it! This recipe takes a bit of time, sure, but the payoff is enormous.
- Incredible, defined swirls that don’t disappear during baking.
- A wonderfully moist, tender crumb that tastes buttery rich.
- A perfect balance between the rich chocolate filling and the sweet brioche.
If you loved the moisture we got in my famous banana bread recipe, you’ll see similar results here! Don’t forget to check out that moist banana bread recipe later!
Achieving the Soft and Fluffy Babka Texture
It all starts with that brioche dough. That’s the whole secret! We treat this enriched dough right by using room temperature eggs and that softened butter slowly. Skipping the chilling time on the eggs means the yeast gets a running start. When you knead this dough until it’s truly smooth, you bring in structure, but because of all that fat, the result is the dreamiest Soft and Fluffy Babka you can imagine. It’s worth every minute spent kneading.
Gathering Ingredients for the Best Chocolate Babka
Okay, grab a notepad! To get that unbelievably rich flavor and that perfect texture we’re aiming for, you can’t skimp on the components here. I’ve listed everything you need below. Remember, every single element matters when you’re dealing with enriched doughs like this brioche base.
For example, using room temperature eggs when whipping up the dough makes a huge difference in how well they emulsify with the butter. It just creates a smoother start to this entire Homemade Chocolate Babka Recipe. You can review the process over at my banana bread post if you need a reminder on bringing things to temperature!
Ingredients for the Decadent Chocolate Babka Filling
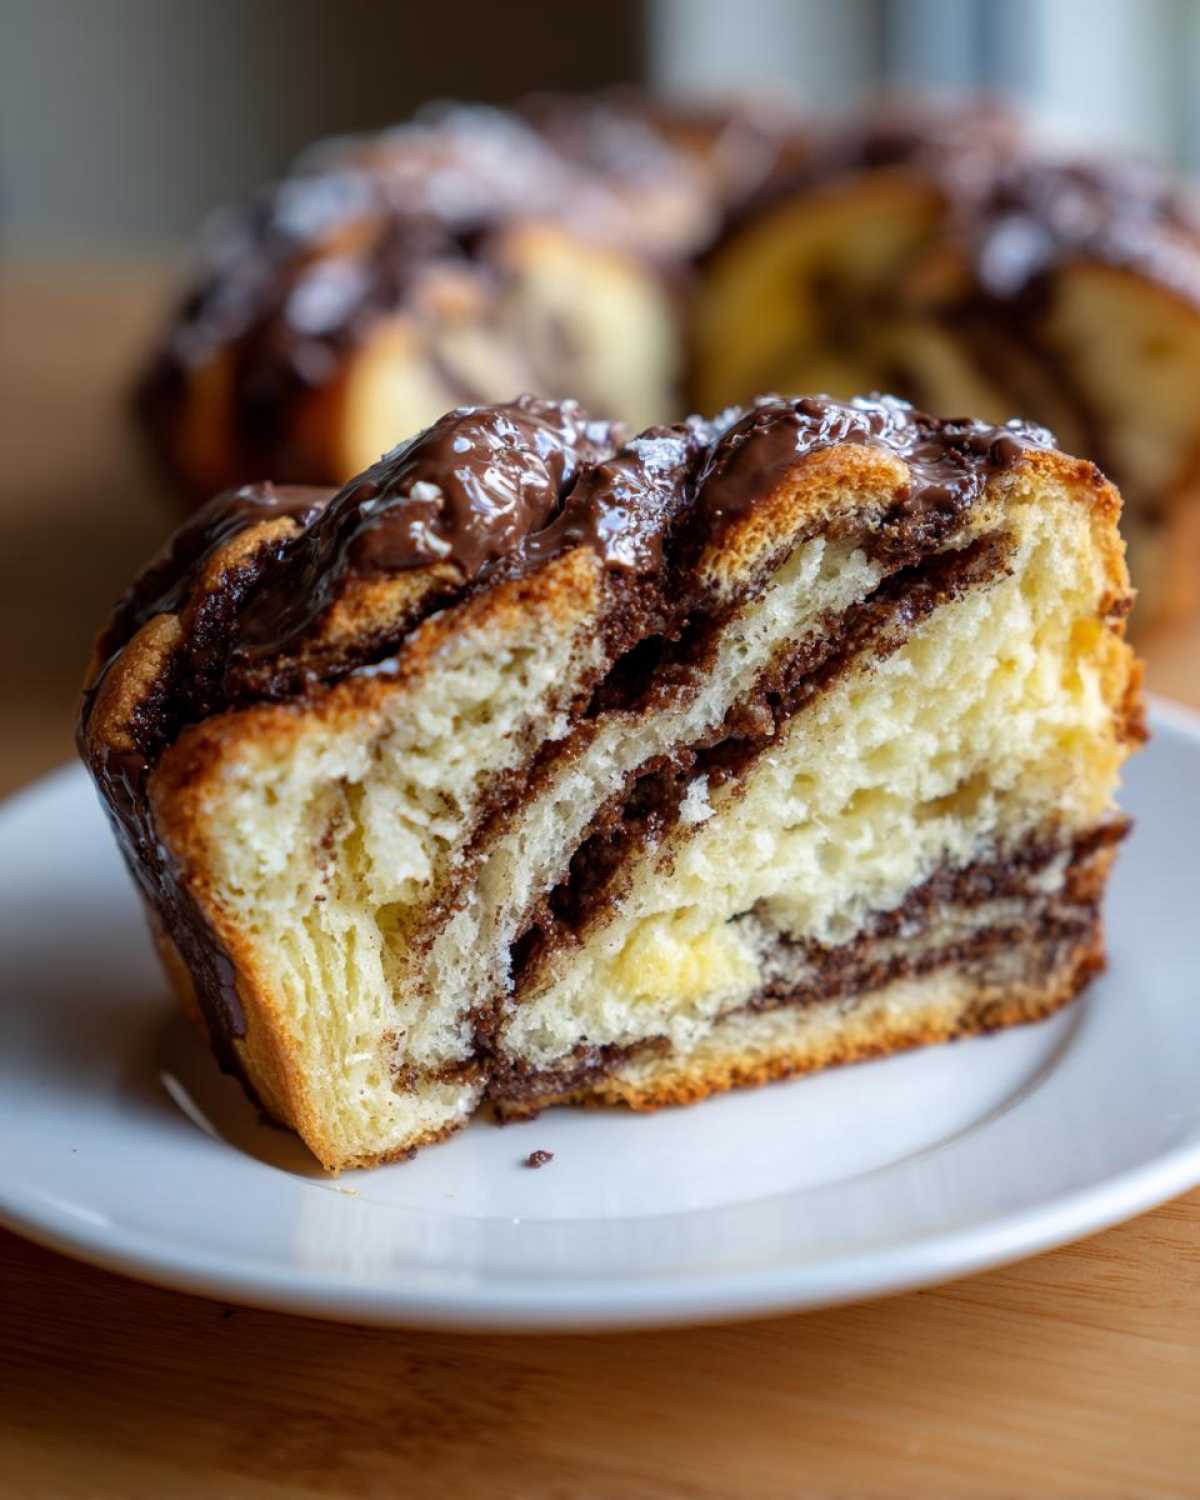
This filling is what makes the beautiful dark ribbons you see when you slice it. We use both actual chocolate and cocoa powder, which gives it that intense, layered flavor without becoming overly greasy.
- 8 ounces bittersweet chocolate, chopped
- 1/2 cup heavy cream
- 1/2 cup unsalted butter, softened
- 1/2 cup powdered sugar
- 1/4 cup cocoa powder
- 1/4 teaspoon salt
Essential Components for the Chocolate Babka Dough
You need a sturdy, rich dough to hold up to all that filling, and that’s where this brioche recipe shines. Pay close attention to the milk temperature for the yeast activation—it’s the key to starting this whole beautiful project! This section is the heart of learning How to Make Babka Dough properly.
- 1 cup whole milk, warmed to 105-115°F
- 2 1/4 teaspoons active dry yeast
- 1/2 cup granulated sugar, plus 1 tablespoon for yeast
- 4 large eggs, room temperature
- 1 teaspoon vanilla extract
- 4 cups all-purpose flour, plus more for dusting
- 1 teaspoon salt
- 1/2 cup (1 stick) unsalted butter, softened and cut into pieces
And don’t forget those last two ingredients for the syrup, which we’ll use right at the very end to make sure our babka stays glistening!
Step-by-Step Instructions for Soft and Fluffy Chocolate Babka
Look, this is where the fun starts! We’re taking humble ingredients and turning them into something that truly belongs in a fancy pastry shop. Don’t rush the mixing or the rising; those are the non-negotiable steps that promise you that incredible, tender crumb bread we all dream about. Take your time, follow the rhythm of the dough, and you’ll be shocked at what you pull out of your kitchen!
Making and Proofing the Chocolate Brioche Recipe
First up is waking up that yeast! Pour your warm milk—it needs to be cozy, not hot, around 110°F is perfect—add the little bit of sugar, and sprinkle the yeast on top. Let it get bubbly for about ten minutes; that foam tells us it’s alive and ready to work its magic on our Chocolate Brioche Recipe.
Once it’s foamy, toss in the rest of your sugar, the room-temp eggs, vanilla, flour, and salt. Start mixing until it looks shaggy. Then, the fun part: you slowly add that softened butter, piece by piece, while the mixer is running. You absolutely must let it knead on medium speed for a full 8 to 10 minutes after that butter is incorporated. When you’re done, the dough should be smooth, elastic, and pulling cleanly away from the sides of your bowl. Give it a nice rest in an oiled bowl until it’s doubled—usually about two hours.
Babka Filling Tutorial and Rolling the Dough
While the dough is taking its nap, let’s make that filling! Melt your chopped chocolate and heavy cream gently until it’s super smooth, then set it aside to cool a bit so it doesn’t melt our fat later. In a separate bowl, cream together your softened butter, powdered sugar, cocoa, and salt until it’s fluffy. Now, gently beat the cooled melted chocolate mixture into that butter mixture until everything is perfectly married. That’s your decadent Babka Filling Tutorial complete!
When the dough has doubled, punch it down gently. On a floured surface, roll it out into a big rectangle, about 12 by 18 inches. You have to be even here! Spread that lovely chocolate filling right over the surface, but leave that one-inch border on one of the long sides—this is crucial for sealing the deal later.
How to Braid Chocolate Bread for the Perfect Swirl
This is the part everyone worries about, but honestly, it’s easier than it looks! Starting from the long edge *opposite* the border you left, roll that dough up super tightly into a log. Pinch that final seam securely closed—you don’t want any filling sneaking out during the bake!
Now, grab your sharpest knife. Slice that log right down the middle lengthwise, exposing all those gorgeous layers inside. Turn the cut sides up! You take those two halves and cross them over each other, making sure the cut sides always face up towards you. It should look like a beautiful, messy twist. This twisting motion is the key to a defined Braid Chocolate Bread. Pinch the ends together lightly and carefully tuck that braided beauty into your greased loaf pan.
Baking and Glazing Your Chocolate Babka
Let your assembled babka have a quick second rise—about 30 to 45 minutes—while your oven gets ready to 350°F (175°C). Bake it for 35 to 45 minutes. You’re looking for a deep golden brown top. Here’s the pro move: the second it comes out of the oven, you need to brush it, douse it, just slather on that hot sugar syrup we made! This quick brush on sticky syrup is what guarantees that shiny, sticky, Bakery Quality Pastry crust.
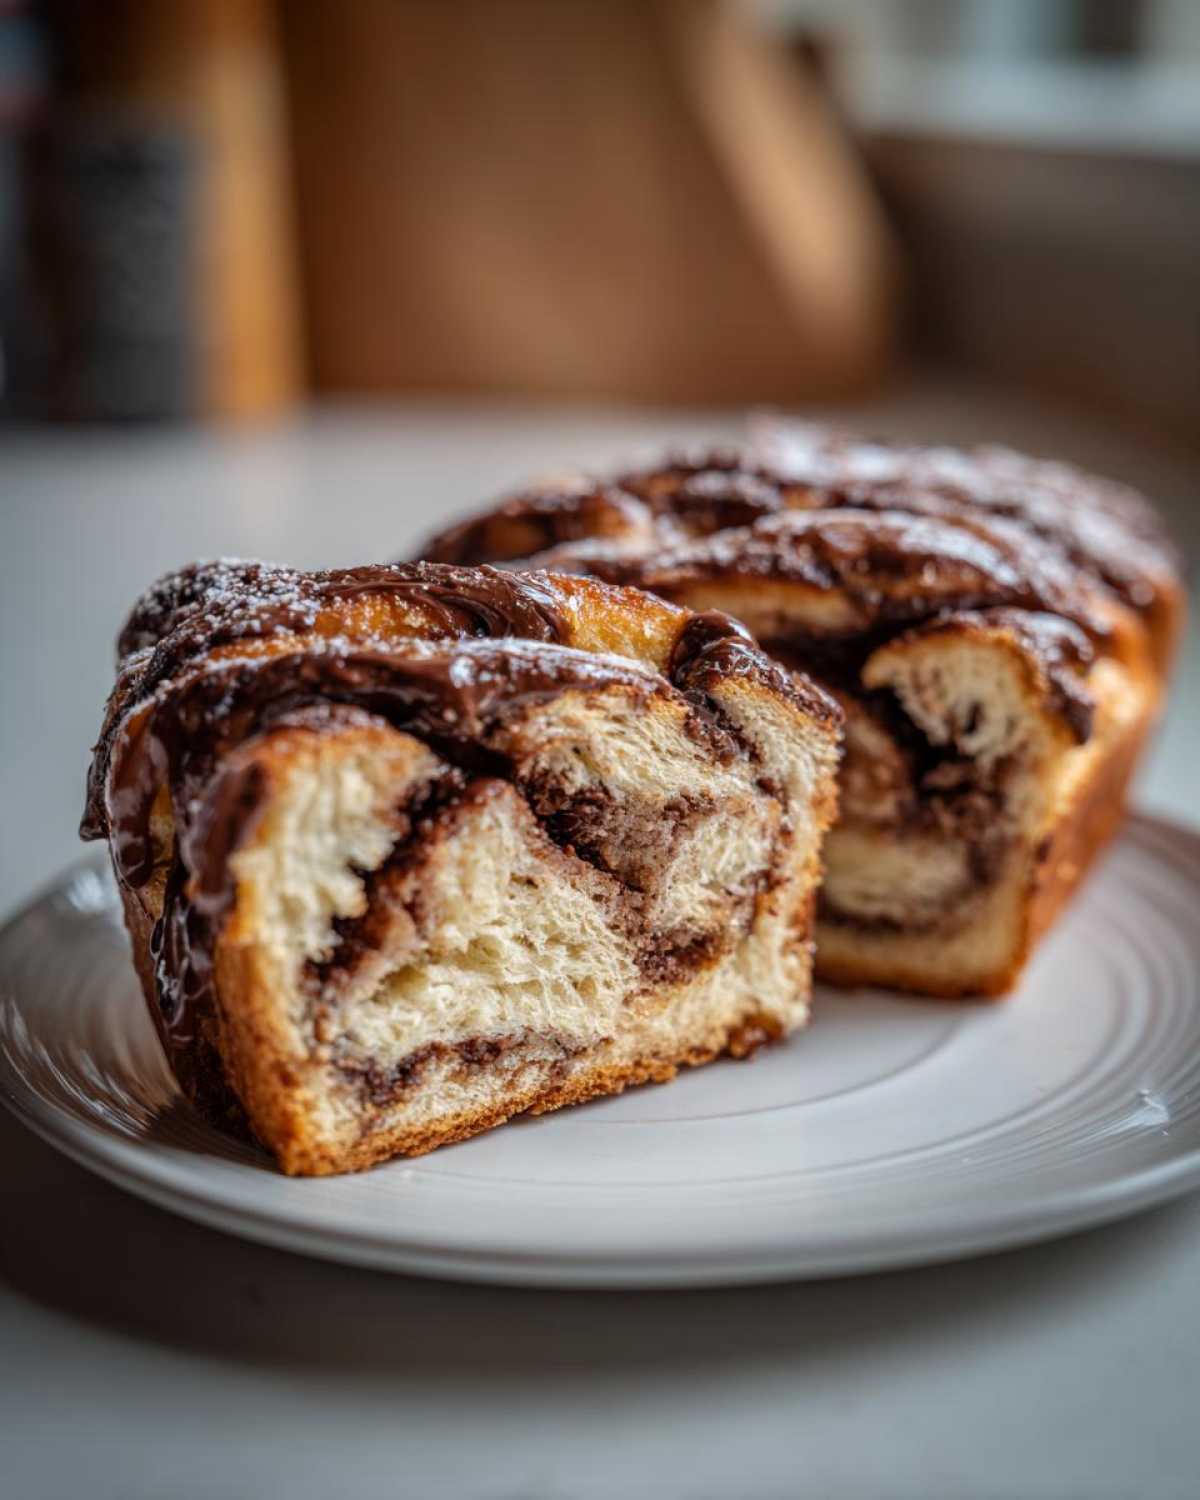
Let it cool in the pan for about 15 minutes so it sets up, then gently ease it out onto a wire rack to cool completely. Don’t forget, if you bake too long, that luscious crumb will dry out, so check it early! If you enjoyed this process, you might want to check out my tips for making great moist chocolate chip banana bread too!
Tips for Success When Making Chocolate Babka Dough
I know that yeast dough can feel intimidating, but honestly, the brioche base for this bread is fairly forgiving if you respect the temperature rules! One of the biggest mistakes people make when learning How to Make Babka Dough is using butter that’s too warm. If the butter melts into the dough mixture during the initial mix, you lose all that structure we worked for during the kneading process. Make sure it’s soft, but still holds its shape, like real cake frosting.
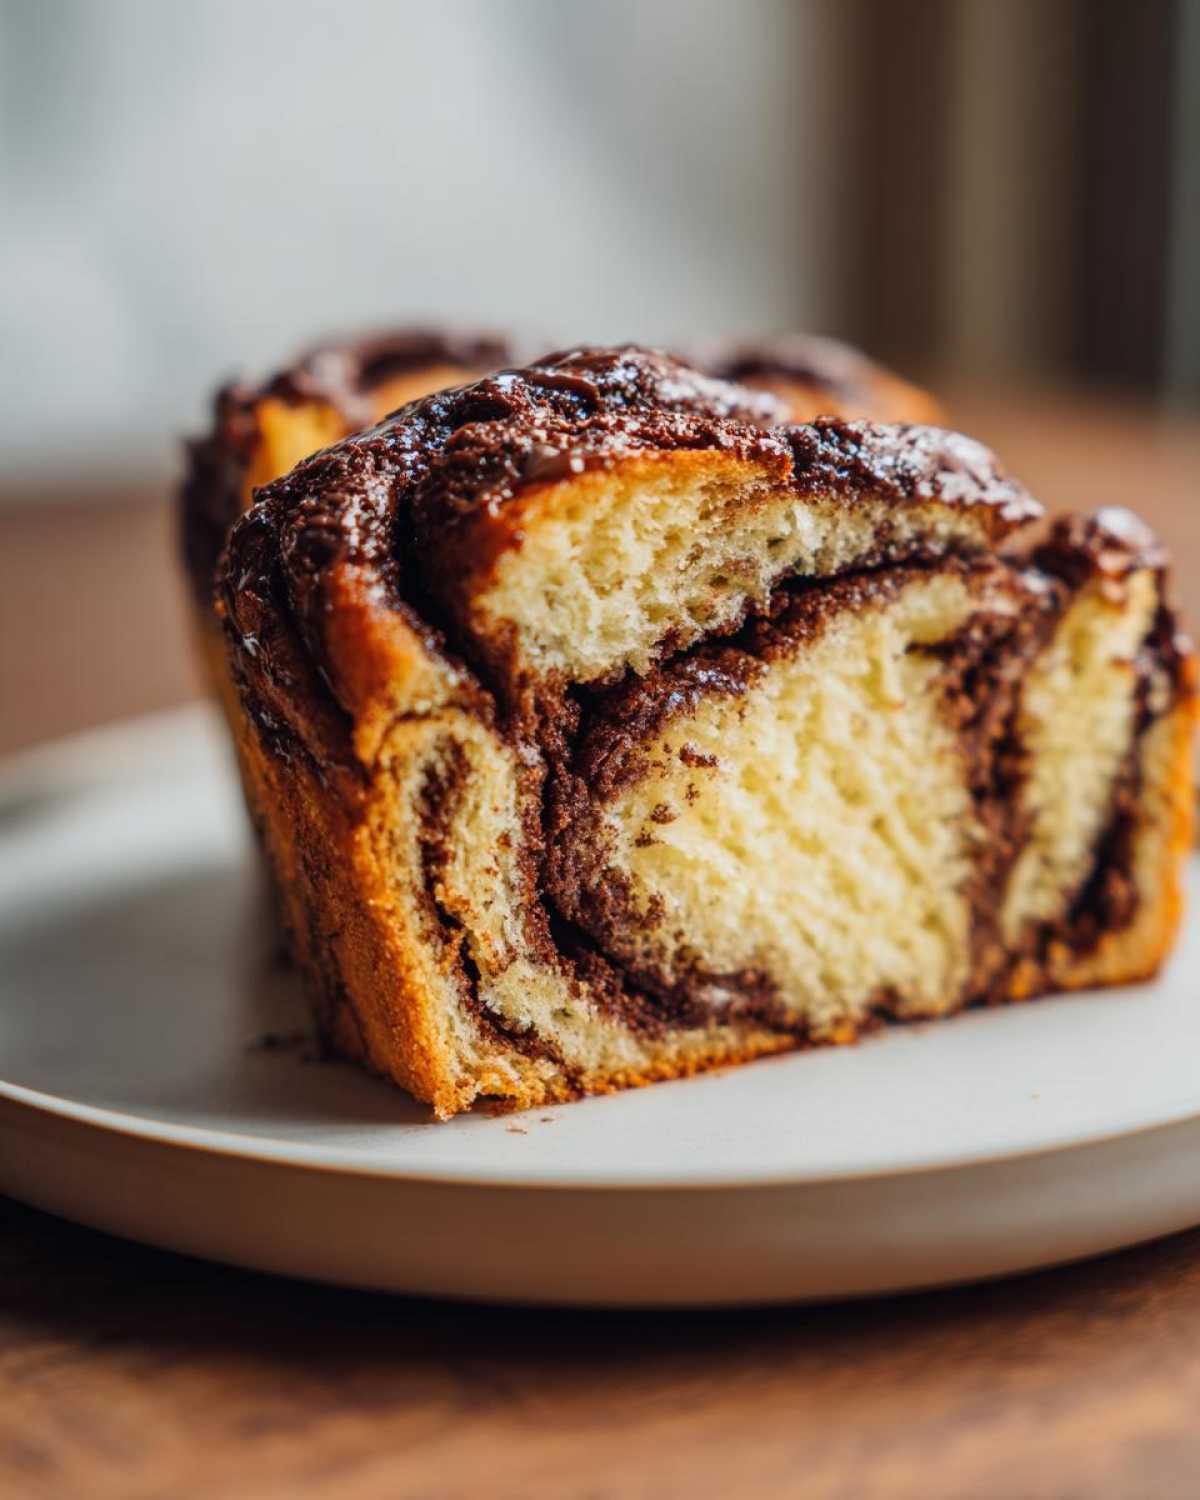
Also, don’t cheat that knead time! That 15 to 20 minutes by hand, or 8 minutes in the mixer, develops the gluten strength needed to support that heavy, gorgeous filling. If you don’t have a stand mixer, my notes suggest rolling up your sleeves and kneading hard—it’s good exercise, really! A well-kneaded dough passes the windowpane test, meaning you can stretch a small piece thin enough to see light through it without tearing. If you need a refresher on building a good crumb, take a look at the tips I shared for keeping that banana bread moist, they apply here too! You can peek at the process for my chocolate chip banana bread for comparison.
And another quick tip: if your kitchen is cold, your dough proofing will take *forever*. Pop it in the oven (turned OFF, obviously!) with a pan of hot water underneath to create a warm, humid environment. That’s my little trick for speeding up the process just a tad when winter hits.
Variations for Your Next Chocolate Babka Loaf Recipe
Once you nail the basic technique for this rich bread, you can start playing around! Don’t be afraid to tweak the filling a bit. If you want a warmer flavor profile, try whisking a teaspoon of cinnamon right into the cocoa powder before you mix it with the butter. That little addition complements the dark chocolate so nicely.
I also love folding in some toasted hazelnuts or pecans right before I roll up the log. They give a fantastic crunch against that soft brioche. These small changes let you personalize your Chocolate Loaf Recipe every time you bake one. It’s all about making it your own wonderful creation!
Storage and Reheating Instructions for Chocolate Babka
The hardest part about making this chocolate babka is waiting for it to cool before slicing, but keeping leftovers fresh is just as important! Once it’s completely cooled, wrap that masterpiece tightly in plastic wrap, and then pop it into an airtight container. Stored this way at room temperature, it stays wonderfully soft for about three days.
When you’re ready to enjoy a slice a day or two later, don’t eat it cold! You absolutely must reheat it gently. Microwave it for just 10 to 15 seconds. That little burst of warmth melts the butter in the brioche again and brings back that bakery-fresh melt-in-your-mouth quality. It’s glorious! If you need more moisture retention tips for enriched breads, check out the advice I gave for my chocolate chip banana bread.
Serving Suggestions for This Decadent Chocolate Swirl Bread
Honestly, this bread is pretty perfect all on its own, needing no fuss whatsoever as a gorgeous finish to any meal. But if you want to elevate it, think simple accompaniments!
For a brunch treat, a smear of good quality salted butter is divine, or serve it alongside a strong cup of coffee or espresso. If you’re serving this Decadent Chocolate Swirl Bread for dessert, a small scoop of good vanilla bean ice cream melts right into those cracks and it’s heaven.
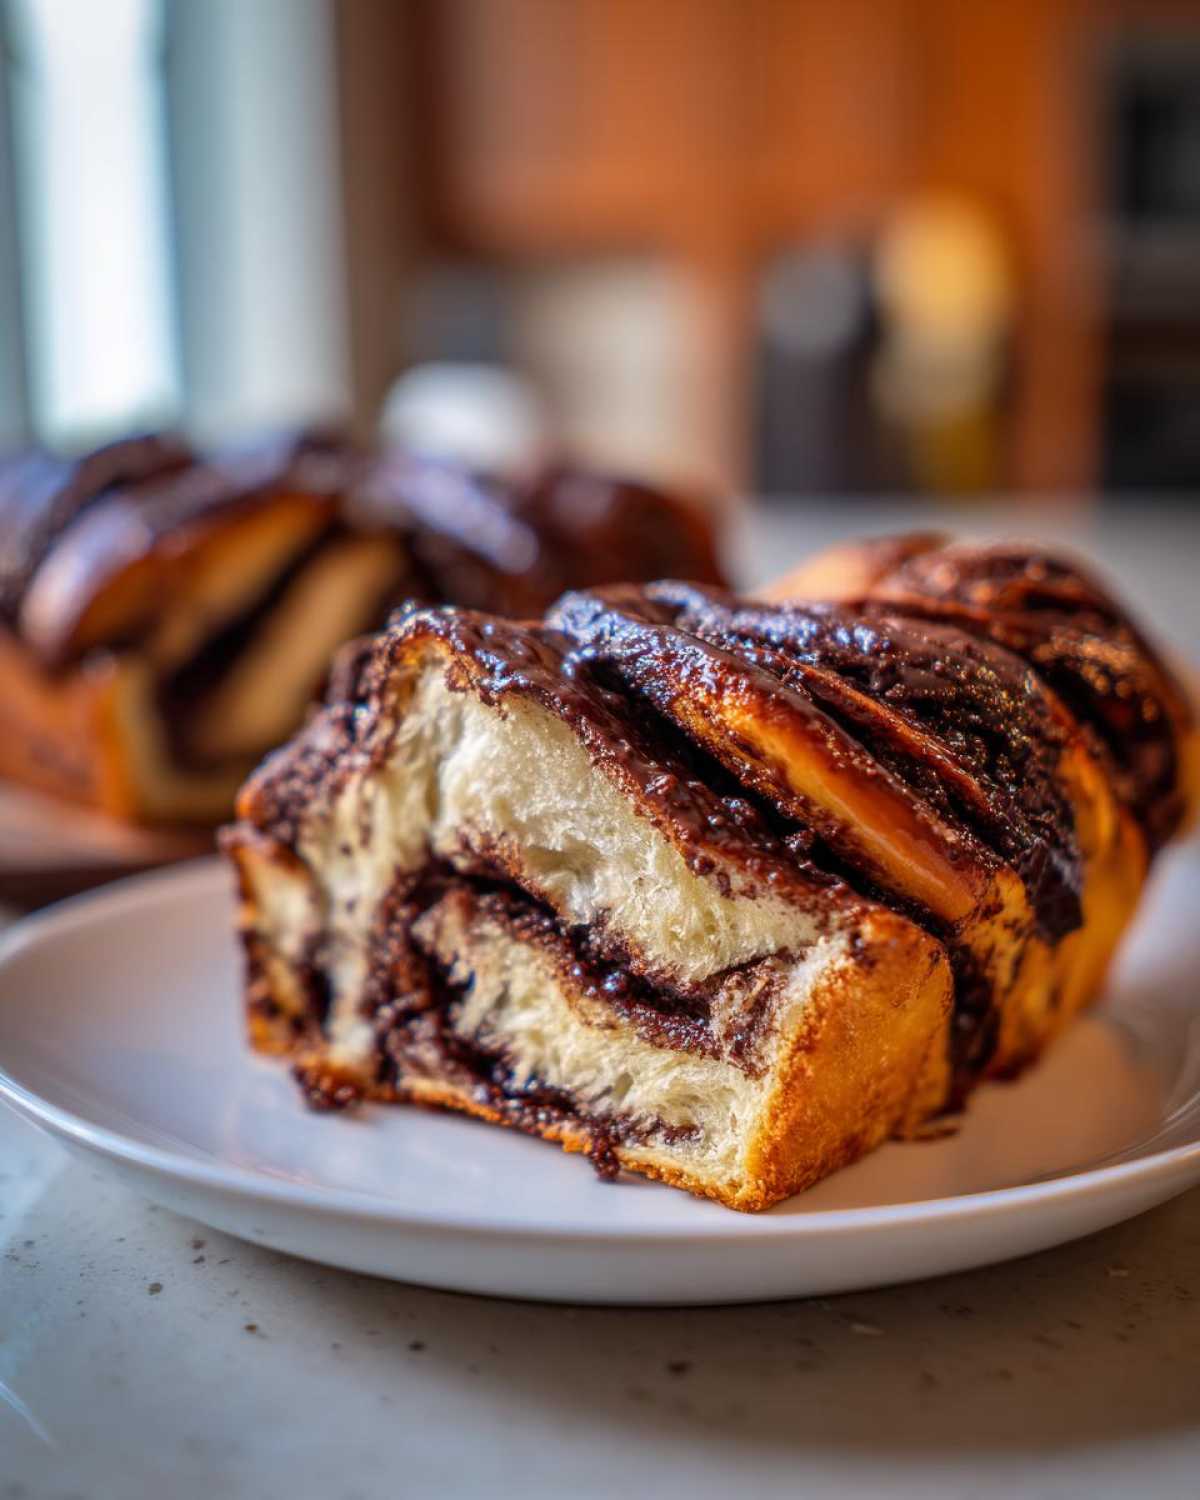
It’s wonderful when still slightly warm. For more ideas on pairing baked goods, check out the serving tips I gave over on my banana bread post!
Frequently Asked Questions About Making Chocolate Babka
I get so many questions about this recipe because people want that perfect loaf, and honestly, I get it! Dealing with yeast is one thing, but getting that beautiful, defined swirl without tearing the dough when you braid it—that takes practice. I’ve pulled together the most common queries so you feel totally confident while working on your Homemade Chocolate Babka Recipe.
Can I make the chocolate babka dough ahead of time?
Oh, yes, you absolutely can! This is one of my favorite tricks for a big weekend bake. This rich brioche is actually better if you give it a cold nap. After you finish kneading the dough (Step 3 in the instructions), just cover it tightly and pop it in the fridge for anywhere from 12 to 24 hours. The slow, cold fermentation really deepens the flavor of the dough, making it taste even more complex—like you worked on it for days! When you pull it out, let it sit on the counter for about an hour until it feels workable, and then proceed with rolling out the filling. It makes the process feel much less rushed!
What is the secret to achieving a perfect chocolate swirl in my chocolate babka?
The secret is twofold, and it boils down to how soft your ingredients are! First, the filling has to be spreadable like thick frosting, not runny. That’s why we use softened butter mixed with the chocolate/cocoa. If your filling is too warm or liquidy when you spread it, it just bleeds into the dough instead of staying in layers. Second, you have to roll that dough *tightly* when you form it into a log. A nice, firm roll ensures those layers are packed next to each other, so when you slice it down the middle for the twist, you get those gorgeous ribbons!
Can I skip the sugar syrup wash at the end?
Listen, if you skip the sugar syrup, you skip the shine! You’re aiming for that beautiful, glossy look that screams Bakery Quality Pastry, right? The syrup soak is what locks in moisture immediately after baking and gives it that classic, slightly sticky crust. If you absolutely must skip it, you can at least brush the top with heavily melted butter, but trust me, that simple syrup bath is worth the extra two minutes. It prevents the top from drying out prematurely, making your bread taste fresh longer. If you need more moisture retention tips for enriched breads, feel free to check out my other thoughts over on my Nutella pie guide—some principles overlap!
What kind of chocolate should I use in the filling?
I insist on bittersweet chocolate, usually around 60% to 70% cacao. This recipe has quite a bit of sugar already in the dough and the syrup, so using milk chocolate will make the whole thing taste too sweet and muddy the flavor. The bittersweet quality of high-percentage dark chocolate cuts through that sweetness perfectly and gives you that deep, intense color you want for a stunning Decadent Chocolate Swirl Bread.
How do I know when the yeast bread is finished baking?
The visual cue is easy: deep golden brown on top. But for true certainty with a thick loaf like this, I always pull out the thermometer. Yeast bread recipes are best when they hit an internal temperature between 195°F and 205°F when checked near the center. If you don’t have a thermometer, the classic toothpick test needs to work, but look for moist crumbs clinging to the toothpick, not wet batter. Overbaking is the fastest way to destroy this beautiful, Tender Crumb Bread!
Nutritional Estimates for This Homemade Chocolate Babka Recipe
Now, let’s talk numbers for a second. I know many of you are curious about what goes into that glorious slice of Homemade Chocolate Babka Recipe, especially since this is an enriched, butter-heavy brioche bread. I always bake this for special gatherings, so I focus more on the sheer joy it brings, but here’s what you can generally expect per serving.
Please keep in mind these are just estimates! The final count will change depending on the exact brand of heavy cream, the percentage of cacao in your chocolate, and how generous you are when you slice it (because who really measures that first piece, right?). These figures are based on 12 servings on average.
- Serving Size: 1 slice
- Calories: 450
- Fat: 28g (with 17g saturated)
- Carbohydrates: 45g
- Sugar: 35g
- Protein: 7g
This is certainly a brunch indulgence, not an everyday bread! But honestly, that’s the beauty of a truly rich pastry like this one. Enjoy it guilt-free; you absolutely earned it after wrestling that dough into that perfect braid!
Share Your Ultimate Soft & Fluffy Chocolate Babka Results
Phew! You did it! Congratulations, you’ve officially conquered the gorgeous, rich, and unbelievably satisfying chocolate babka. I am so excited for you to cut into that loaf and see those perfect golden swirls staring back at you.
Now, I absolutely need to know how it turned out! Did the braiding give you trouble, or did you nail it on the first try? Don’t be shy—jump down into the comments below and give me a star rating. If you snapped a picture of your finished loaf, I would love to see it! You can always reach out via the contact page if you have any lingering questions about that brioche dough.
Baking should always be fun, and sharing the results makes it even better. Go grab a big slice with your morning coffee—you deserve it!
PrintThe Ultimate Soft & Fluffy Chocolate Babka with Perfect Golden Swirls
Follow these steps to create a bakery-quality chocolate babka featuring a soft brioche dough, rich chocolate filling, and a beautiful, defined swirl.
- Prep Time: 45 min
- Cook Time: 45 min
- Total Time: 3 hr 15 min
- Yield: 1 loaf (10-12 servings)
- Category: Dessert
- Method: Baking
- Cuisine: Eastern European
- Diet: Vegetarian
Ingredients
- 1 cup whole milk, warmed to 105-115°F
- 2 1/4 teaspoons active dry yeast
- 1/2 cup granulated sugar, plus 1 tablespoon for yeast
- 4 large eggs, room temperature
- 1 teaspoon vanilla extract
- 4 cups all-purpose flour, plus more for dusting
- 1 teaspoon salt
- 1/2 cup (1 stick) unsalted butter, softened and cut into pieces
- 8 ounces bittersweet chocolate, chopped
- 1/2 cup heavy cream
- 1/2 cup unsalted butter, softened
- 1/2 cup powdered sugar
- 1/4 cup cocoa powder
- 1/4 teaspoon salt
- 1/2 cup granulated sugar for syrup
- 1/2 cup water for syrup
Instructions
- Activate the yeast: In a large bowl, combine the warm milk, 1 tablespoon of sugar, and yeast. Let stand for 5-10 minutes until foamy.
- Make the dough: Add the remaining sugar, eggs, vanilla, flour, and salt to the yeast mixture. Mix with a stand mixer until a shaggy dough forms.
- Knead in butter: Gradually add the softened butter, one piece at a time, mixing until fully incorporated. Continue kneading on medium speed for 8-10 minutes until the dough is smooth and elastic.
- First rise: Place the dough in a lightly oiled bowl, cover, and let rise in a warm place for 1.5 to 2 hours, or until doubled in size.
- Prepare the filling: Melt the chopped chocolate and heavy cream together over a double boiler or in the microwave in short bursts, stirring until smooth. Let cool slightly. In a separate bowl, cream together the 1/2 cup softened butter, powdered sugar, cocoa powder, and salt until smooth. Beat the cooled melted chocolate mixture into the butter mixture until fully combined.
- Roll and spread: Punch down the risen dough. On a lightly floured surface, roll the dough into a large rectangle, about 12×18 inches. Spread the chocolate filling evenly over the dough, leaving a 1-inch border on one long edge.
- Roll the dough: Starting from the long edge opposite the border, tightly roll the dough into a log. Pinch the seam closed.
- Braid the log: Using a sharp knife, slice the log lengthwise down the center, exposing the layers. Turn the cut sides up. Cross the two halves over each other, keeping the cut sides facing up, creating a twist or braid pattern. Pinch the ends together.
- Bake: Carefully transfer the braided dough to a greased 9×5 inch loaf pan. Cover and let rise for 30-45 minutes. Preheat your oven to 350°F (175°C). Bake for 35-45 minutes, or until golden brown and cooked through.
- Make the syrup: While the babka bakes, combine the 1/2 cup sugar and 1/2 cup water in a small saucepan. Bring to a boil and simmer for 1 minute. Remove from heat.
- Glaze: Immediately upon removing the babka from the oven, brush the hot sugar syrup generously over the entire top surface. Let the babka cool in the pan for 15 minutes before transferring it to a wire rack to cool completely.
Notes
- For the softest crumb, ensure your butter and eggs are at room temperature before starting the dough.
- If you do not have a stand mixer, you can knead the dough by hand for about 15-20 minutes until it passes the windowpane test.
- Do not overbake the babka; the internal temperature should register around 200°F when done.
Nutrition
- Serving Size: 1 slice
- Calories: 450
- Sugar: 35
- Sodium: 180
- Fat: 28
- Saturated Fat: 17
- Unsaturated Fat: 11
- Trans Fat: 0.5
- Carbohydrates: 45
- Fiber: 2
- Protein: 7
- Cholesterol: 90