


Oh my gosh, are you having one of those days where only a giant, piping-hot cloud of melted cheese wrapped in something impossibly crunchy will fix it? I totally get it. I used to drive halfway across the state just to get decent *Fried Cheese Curds* from those tiny roadside stands. I swear, they guarded their recipes with their lives! But you know what I figured out after *way* too many failed batches that resulted in sad, greasy puddles instead of cheese? The secret isn’t in some fancy gourmet curd; it’s all about the coating and controlling that oil temperature.
Trust me, I spent an entire weekend covered in flour trying to get that textural magic right—that perfect, audible *crunch* that gives way to volcanic, gooey cheese without burning your tongue off. I finally cracked the code for making restaurant-quality fried cheese curds right here in my kitchen. Forget those frozen bags; this simple three-step dredging process using panko is an absolute game-changer. You are going to be the hero of the next game day, trust me on this.
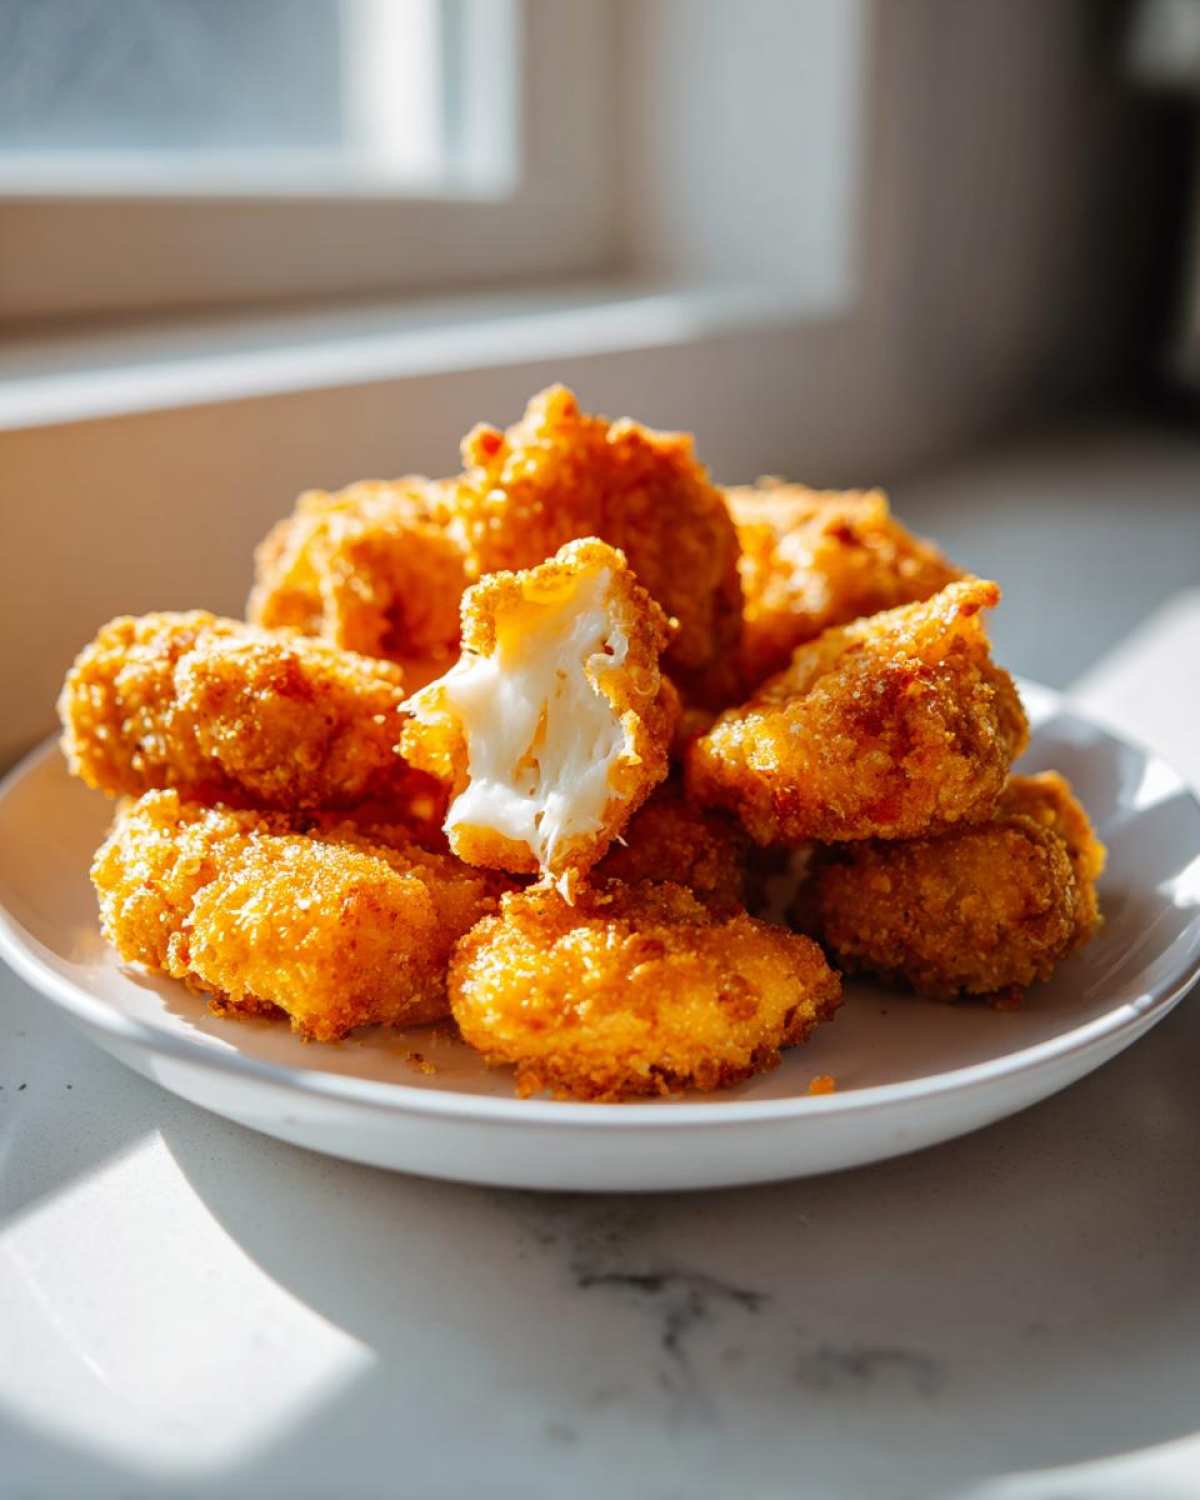
Why You Need This Homemade Fried Cheese Curds Recipe
Look, I love ordering appetizers out, but sometimes you just crave that perfect, satisfying crunch immediately, and waiting for takeout just won’t cut it! This recipe changes the game for all your appetizer nights. You absolutely need this, and here’s why:
- Perfect Texture Every Time: We manage to get that super crispy exterior while keeping the cheese inside perfectly melted and gooey—no more hard, uncooperative cheese!
- Restaurant Style at Home: You’re using simple pantry items to create something that genuinely tastes better than what the local pub serves. It’s honestly shocking how good these fried cheese curds turn out.
- Speed: Prep is super fast, and once the oil is hot, those curds only need about 90 seconds of attention. They are ready before you can even decide which dip to use!
Ingredients for Perfect Fried Cheese Curds
Gathering your ingredients is the easy part, but organization is everything here! When you’re working with hot oil, you want everything lined up so you can move fast. We’re using a classic three-part dredging station for maximum crunch. Don’t try to skip the chilling step later—that’s truly how we keep that cheese locked in!
Here is exactly what you need pulled out and ready to go:
- 1 pound fresh cheese curds (Seriously, fresh is better for the melt!)
- 1 cup all-purpose flour
- 1 teaspoon salt
- 1/2 teaspoon black pepper
- 1/2 teaspoon garlic powder
- 2 large eggs
- 1 tablespoon milk
- 1 1/2 cups panko breadcrumbs (Panko for the win, always!)
- Vegetable oil, for frying (You’ll need about 2 inches depth in your pot.)
Expert Tips for Crispy Fried Cheese Curds Coating Ideas
Okay, this three-step dredge is non-negotiable if you want true, restaurant-style fried cheese curds. It seems like a lot of dishes, I know, but trust me when I say organization prevents disaster when the oil is hot! First, your dry dredge—that flour mixed with garlic powder and seasoning gets the base layer down. Shake off the excess really well; we don’t want clumpy coating!
Next, that quick dip into the egg and milk wash. This is the glue! Make sure every surface is wet. Then, hit those curds hard with the Panko breadcrumbs. Panko is your secret weapon here—it’s coarser than regular breadcrumbs, which means serious crunch factor. Really press that Panko onto the wet surface. If you want a little kick, now is the time to mix about a teaspoon of cayenne pepper into that initial flour mix. It adds a lovely hidden warmth to these cheesy bites!
The Importance of Chilling Coated Fried Cheese Curds
This step is where I used to mess up constantly. If you drop warm, freshly breaded curds into hot oil, the coating instantly tries to slide off, or worse, the heat shocks the cheese and it explodes! We want this adhesion to last. So, once you’ve coated a small batch, immediately place them on parchment paper and stick them in the freezer for at least fifteen minutes. This sets the coating beautifully. Seriously, freezing them guarantees that your **fried cheese curds** stay perfectly encased until they hit the fryer.
How to Deep Fry Cheese Curds for Gooey Melted Cheese Curds
This is the moment of truth! If you’ve chilled those curds properly, you are moments away from the best **Fried Cheese Curds** you’ve ever made at home. The absolute most important thing here is oil temperature. Get your vegetable oil heated up in a heavy pot—you need about two inches deep—and you must hit 375 degrees F (190 C). If it’s too cool, the coating soaks up oil and gets greasy. If it’s too hot, the outside burns before the inside can melt.
Use a thermometer! I know, I know, we all want to skip that step, but trust me on this one. Fry them in *small* batches so the oil temperature doesn’t crash. They cook lightning fast—seriously, only 1 to 2 minutes total. Watch for that beautiful golden brown, pull them out with a slotted spoon, and let them drain on paper towels on a wire rack. You want that glorious, short window where the crust is crisp and the inside is pure, molten joy. If you want to see my trick for keeping the oil temperature stable, check out my full guide on how to deep fry cheese curds!
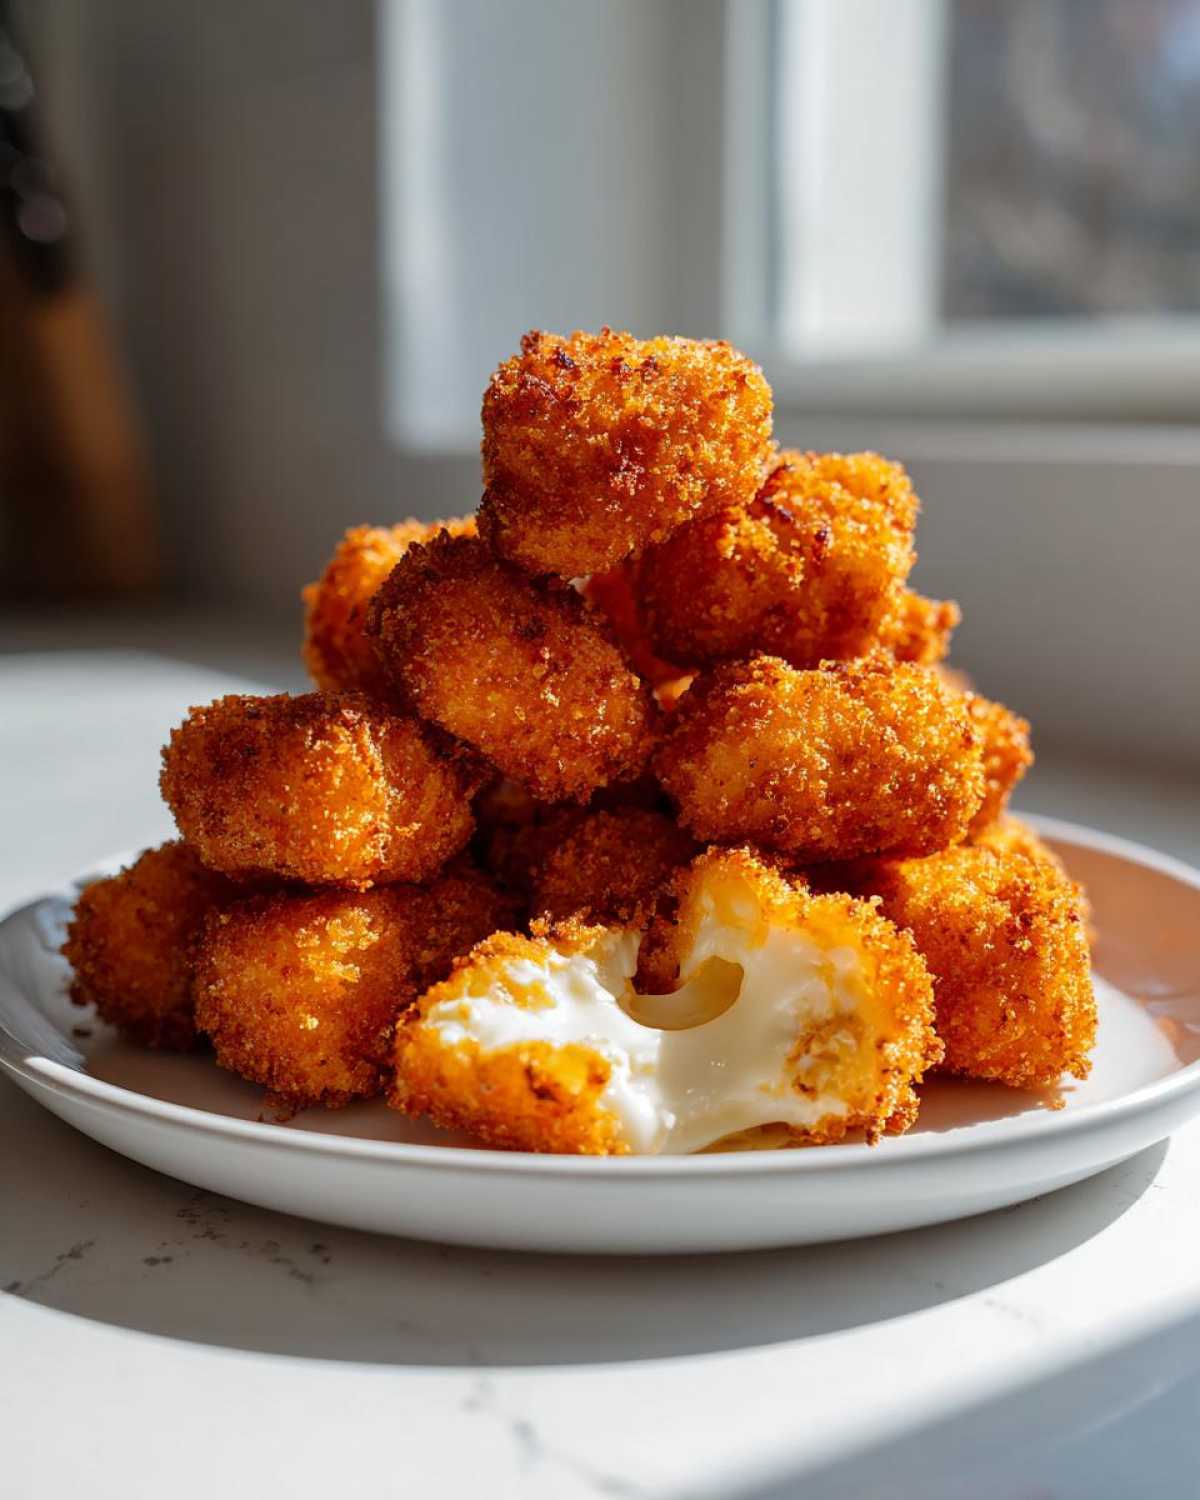
Alternative Method: Crispy Air Fryer Cheese Curds
If you’re trying to keep the oil mess down, the air fryer is actually fantastic for these! Once you have your curds prepped and coated, you don’t need the freezing step, but you must give them a little spritz of cooking spray—this helps the Panko brown up nicely. Set your air fryer to 380 degrees F. You’ll toss them gently halfway through, and they take about 8 to 10 minutes in total. They won’t be *quite* as deeply browned as deep-fried, but you still get super **crispy air fryer cheese curds**!
Serving Suggestions: Best Cheese Curd Dipping Sauces
Honestly, those perfectly **golden brown cheese curds recipe** bites are amazing all on their own, but they really shine when dunked into something cool and tangy. I always make at least two different sauces because everyone in my family fights over which one is the best!
You absolutely cannot go wrong with creamy homemade ranch. It’s the classic pairing for a reason. I use buttermilk and a ton of fresh dill and chives in mine; it just cools down that hot cheese bite perfectly and gives you that classic Midwestern snack vibe.
For something a little different, try serving them alongside a bright, slightly sweet honey mustard. If you want a slightly more robust pairing, a classic, thick marinara sauce served warm is fantastic—it almost feels like you’re having mozzarella sticks, but better! If you’re looking for my absolute go-to sauce that goes with literally anything fried, you have to try my recipe for homemade dip; it elevates even the simplest appetizer.
Storage and Reheating Instructions for Fried Cheese Curds
Now, I know these **Fried Cheese Curds** are best eaten the second they come out of the oil—trust me, I rarely have leftovers! But if you manage to save a few for snacking later (maybe you put them out for a party and people got full too fast), you need to know how to bring that crunch back. Do NOT, I repeat, DO NOT try to microwave them. They will turn into sad, rubbery little sponges, and we simply cannot have that.
If you have leftovers, the best method for storage is an airtight container stuffed with a paper towel on the bottom to soak up any residual moisture. Keep them in the fridge for up to two days, max. Any longer than that, and the crust starts getting overly soft.
For reheating, you need dry heat to crisp that Panko coating back up. The oven or an air fryer is your best friend here. Set your oven to about 375 degrees F, spread the curds on a baking sheet (use a wire rack if you can!), and bake them for about 5 to 7 minutes. If you’re using the air fryer, hit them at 360 degrees F for just about 4 minutes. They heat up fast, and you get that satisfying, fresh-fried crunch all over again!
Troubleshooting Common Fried Cheese Curds Issues
Even when you follow a great recipe like this one, sometimes things go a little sideways in the kitchen, and that’s okay! Dealing with temperamental frying oil is part of the learning process. Don’t panic if your **Fried Cheese Curds** aren’t picture-perfect the first time; knowing *why* it happened is half the battle.
The most common catastrophe is cheese leakage. If you pull those curds out and half the cheese is missing, leaking out into the oil like a dairy volcano, you probably had one of two issues. Either your oil temperature was too low—say, below 360 degrees F—meaning the coating didn’t set immediately to create a seal, or you skipped that crucial chilling step we talked about. The quick, hard heat shock from properly chilled curds is what locks everything down tight! Test that oil with a tiny piece of bread before dropping the whole batch in; if it sizzles aggressively right away, you’re good to go.
The other major fail is a soggy crust, and that usually comes down to overcrowding. If you dump too many cheese curds in at once, the oil temperature plummets instantly. The curds then just sit there soaking up oil instead of frying quickly. Only fry a single layer, and make sure you give them space to breathe in that hot oil bath. You’re looking for quick, rapid cooking!
Frequently Asked Questions About Making Fried Cheese Curds
I know sometimes the details get fuzzy once you start cooking, so here are some quick answers to the questions I always get asked when I make my **Fried Cheese Curds** for parties. It’s all about setting yourself up for success!
What’s the absolute best type of cheese curd to use for deep frying?
It’s a toss-up, but I always try to grab fresh, unbreaded curds if I can find them at a good dairy counter. Fresh curds just melt so much better—they seem to hold their shape but get wonderfully gooey inside. If you can only find pre-packaged ones, that’s totally fine, but make sure they are actual “curds” and not just cubed low-moisture mozzarella. Pre-packaged ones sometimes need that freezing step even more to hang onto their coating!
Can I use coconut oil or olive oil instead of vegetable oil for frying these?
You definitely shouldn’t use olive oil! It has a low smoke point, which means it will start burning and smoking way before your oil gets hot enough to properly fry the coating. Coconut oil works, but it imparts a distinct flavor, which might clash with the cheesy goodness. For the cleanest, most neutral flavor that lets the cheese shine, stick to something high-heat like canola, peanut, or plain old vegetable oil. We want that authentic, mild taste for our **game day appetizers**!
If I don’t want to fry, how do I get those amazing crispy results?
We already chatted about the air fryer, which is a big winner because it uses way less oil, but if you are making a huge batch for a party and need to do them all at once, the oven is your backup! You can spread the coated curds on a sheet pan (use a wire rack if you have one!) and bake them at 400 degrees F until golden—usually about 12 to 15 minutes. Keep in mind they won’t be quite as aggressively crunchy as the deep-fried ones, but they are still miles better than the frozen stuff. Speaking of parties, if you need other ideas for your spread, you have to check out my recipe for Buffalo Chicken Dip!
Can I make the coating mixture ahead of time?
The dry flour mix? Yes, absolutely! You can mix up the flour, salt, pepper, and garlic powder weeks ahead of time and keep it in an airtight jar. That’s an awesome time-saver. The wet egg wash and the Panko with the curds stuck to it? No, you really need to do those steps right before you chill them. The Panko needs to stick immediately after the egg wash before it starts getting soggy.
Estimated Nutritional Information for Fried Cheese Curds
Now, if you’re digging into a massive bowl of **perfectly fried cheese bites**, you probably aren’t worried too much about the tiny numbers, but I like to be upfront about what’s in this delicious mess! Since these are deep-fried, the fat content is naturally higher. Please remember that these values are only estimates based on the ingredients listed in the recipe, and they will vary wildly depending on exactly what kind of cheese you buy and how much oil they absorb.
- Serving Size: 1/4 of recipe
- Calories: 450
- Fat: 30g
- Saturated Fat: 15g
- Carbohydrates: 25g
- Protein: 20g
- Sodium: 650mg
This is definitely a treat, not an every-day thing, but balanced out with a massive green salad later, it’s totally worth every single cheesy, crunchy moment!
PrintCrispy Homemade Fried Cheese Curds

Follow these steps to make perfectly crispy, gooey fried cheese curds at home using a simple dredging and deep-frying method.
- Prep Time: 15 min
- Cook Time: 10 min
- Total Time: 25 min
- Yield: 4 servings
- Category: Appetizer
- Method: Deep Frying
- Cuisine: American
- Diet: Vegetarian
Ingredients
- 1 pound fresh cheese curds
- 1 cup all-purpose flour
- 1 teaspoon salt
- 1/2 teaspoon black pepper
- 1/2 teaspoon garlic powder
- 2 large eggs
- 1 tablespoon milk
- 1 1/2 cups panko breadcrumbs
- Vegetable oil, for frying
Instructions
- Combine the flour, salt, pepper, and garlic powder in a shallow dish. This is your dry dredge.
- In a second shallow dish, whisk together the eggs and milk. This is your egg wash.
- Place the panko breadcrumbs in a third shallow dish.
- Working in small batches, dredge the cheese curds first in the flour mixture, shaking off excess.
- Dip the floured curds into the egg wash, allowing excess to drip off.
- Roll the wet curds thoroughly in the panko breadcrumbs, pressing lightly to adhere. Place coated curds on a baking sheet lined with parchment paper.
- Chill the coated curds in the freezer for at least 15 minutes to help the coating set.
- Heat about 2 inches of vegetable oil in a deep, heavy-bottomed pot or deep fryer to 375 degrees Fahrenheit (190 degrees Celsius). Use a thermometer to monitor the temperature.
- Carefully lower a small batch of chilled curds into the hot oil. Do not overcrowd the pot.
- Fry for 1 to 2 minutes, turning occasionally, until the coating is golden brown and crispy. The cheese inside should be melted.
- Remove the curds with a slotted spoon and place them on a wire rack lined with paper towels to drain excess oil.
- Serve immediately with your favorite dipping sauce.
Notes
- For an air fryer method, spray coated curds lightly with cooking spray and cook at 380 degrees Fahrenheit for 8 to 10 minutes, shaking halfway through.
- Use fresh, high-quality cheese curds for the best melt.
- If you prefer a spicier coating, add 1 teaspoon of cayenne pepper to the flour mixture.
Nutrition
- Serving Size: 1/4 of recipe
- Calories: 450
- Sugar: 3
- Sodium: 650
- Fat: 30
- Saturated Fat: 15
- Unsaturated Fat: 10
- Trans Fat: 0
- Carbohydrates: 25
- Fiber: 1
- Protein: 20
- Cholesterol: 75