

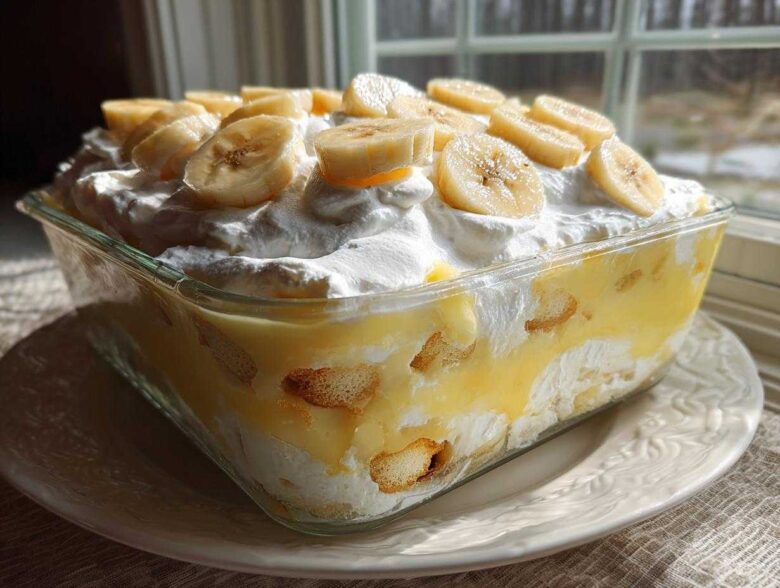
Oh, when that craving hits for something truly comforting, nothing beats that pillowy, creamy goodness that screams childhood summers, right? Forget those sad little boxes of instant powder; we’re talking about the real deal. Today, I’m finally sharing what I call THE BANANA PUDDING. Trust me, this isn’t just *a* recipe; this is the culmination of years of tinkering—blending Grandma’s old-school methods with a few tricks I picked up to make sure every layer sings.
This layered masterpiece is perfectly balanced between the rich, homemade vanilla custard and those sweet wafers that magically dissolve into cakey perfection. If you want that authentic, melt-in-your-mouth Southern Style Banana Pudding experience, you absolutely have to try this version. If you’re looking for the blueprint for the absolute Banana Pudding that folks actually ask for at every barbecue, well, you’ve found it here!
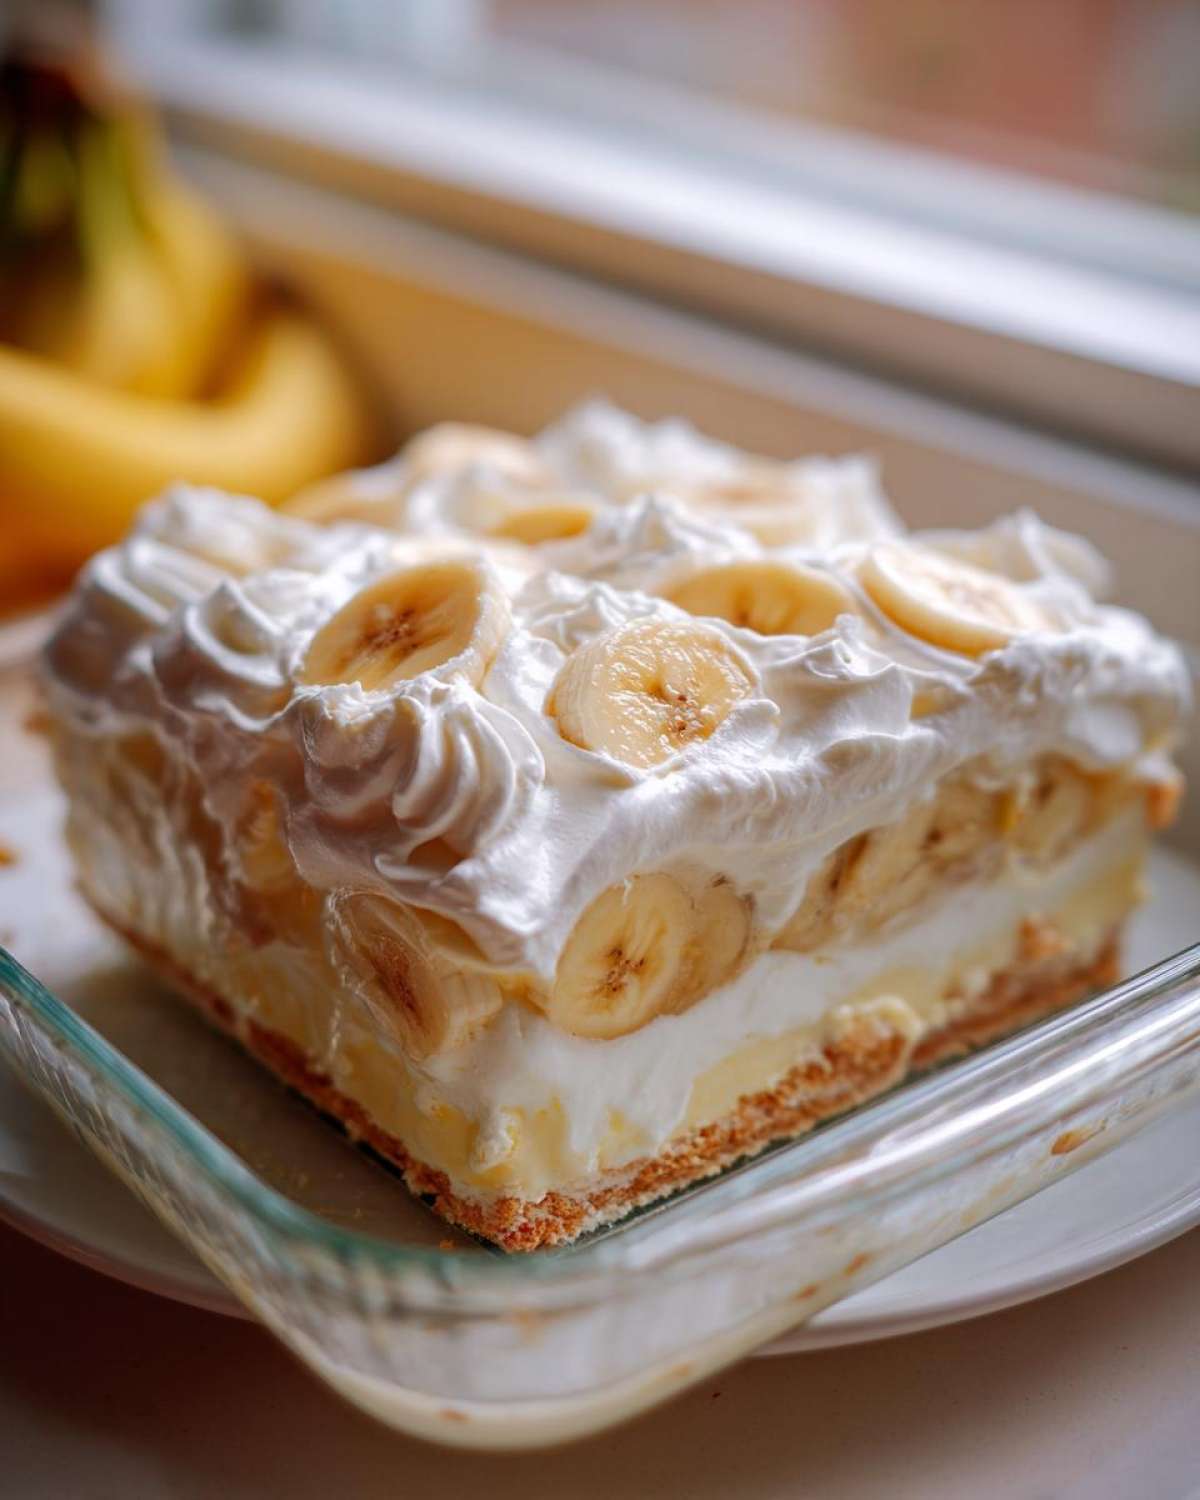
Why This THE BANANA PUDDING Recipe Stands Out (Best Banana Pudding Recipe)
We all know there are shortcuts out there, but those instant mixes just don’t deliver that deep, comforting vanilla flavor we chase. This recipe is famous because it demands a homemade custard base, and folks, it’s worth every minute! It’s what separates a good dessert from the dessert. If you are looking for the Best Banana Pudding Recipe out there, this is it.
When you chill this, something magical happens. It’s not about crunch; it’s about soft absorption!
Key Flavor and Texture Components
- Custard Depth: Using real egg yolks and whole milk gives the pudding that velvety mouthfeel that shortcuts can’t touch.
- The Wafer Secret: We aren’t aiming for crunchy cookies; we want those vanilla wafers to soak up the rich vanilla custard and become practically cake-like.
- Perfect Balance: Layering keeps the bananas slightly separated from the heavy cream topping until you dig in, which keeps everything fresh tasting.
Ingredients for THE BANANA PUDDING
Okay, let’s talk about what you need! Because we’re going old school with that homemade custard, the ingredient list looks a little more involved than grabbing a box, but I promise you, it’s worth keeping these things on hand. Remember, these ratios are precisely what makes this a fantastic Dessert Recipes with Bananas classic. Everything needs to be ready to go before assembly starts!
- 1 cup granulated sugar
- 1/4 cup cornstarch
- 1/4 teaspoon salt
- 1 1/2 cups whole milk
- 2 large egg yolks, lightly beaten
- 2 tablespoons unsalted butter
- 1 teaspoon vanilla extract
- 4 large ripe bananas, sliced
- 1 box (11 ounces) vanilla wafer cookies
- 2 cups heavy cream
- 1/4 cup powdered sugar
Step-by-Step Guide to Making THE BANANA PUDDING
Getting this right relies on a couple of key moments where you can’t wander off—mainly when you’re cooking that custard. Don’t worry, if you stick to the heat control, this is super straightforward. We start with the custard, which is the heart of this Layered Banana Dessert. Once that’s done, everything else is just assembly, which is always the fun part!
Crafting the Creamy Vanilla Custard Base
First up, grab a saucepan and whisk together your sugar, cornstarch, and salt. You are making a dry base here! Now, slowly start splashing in the milk while you whisk like crazy until it looks perfectly smooth. Put it over medium heat and just keep stirring, stirring, stirring! When it finally gets thick and starts bubbling, let it boil for just one minute while constantly stirring—that minute cooks out the starchiness. Pull it off the heat right away.
Now, this next bit is CRITICAL: tempering the eggs. Take those two rich egg yolks in a separate bowl. You need to trick them into getting used to the heat! Whisk in about half a cup of that hot milk mixture super fast into the yolks. If you pour too fast, you get scrambled eggs, not custard! Once they are whisked together, pour that tempered yolk mixture right back into the main pot. Put it back on low heat for just two more minutes, stirring constantly, until it gets even thicker. Don’t let it boil again, or you’ll ruin the texture. Stir in the butter and vanilla until it melts smooth. The most important secret? Cover the surface of the warm custard directly with plastic wrap, pressing the plastic right onto the surface of the pudding. No skin allowed!
Whipping the Topping and Final Assembly of THE BANANA PUDDING
While that custard cools down to room temperature (it needs about an hour), whip that heavy cream with your powdered sugar until you get stiff peaks. You want that topping light and airy to contrast that heavy custard!
Assembly time! I use a large glass trifle dish so everyone can see those beautiful stripes. Start with a layer of those vanilla wafers, making sure to cover the bottom well. Next, lay down a nice layer of your sliced, ripe bananas—don’t be shy! Then, scoop about a third of that lovely cooled custard right over the top. Repeat that pattern two more times: wafers, bananas, custard. You should end up with a layer of custard on top of your last banana layer. Finally, spread that glorious whipped cream right over everything. For the ultimate THE BANANA PUDDING experience, cover it loosely and let it chill, chill, chill for at least four hours before anyone even thinks about dipping a spoon in!
Tips for the Ultimate Southern Style Banana Pudding
You really can elevate this dessert from good to unforgettable just by paying attention to a couple of details right before you layer everything up. If you use bananas that are already starting to get brown spots, they caramelize just a bit better against the vanilla custard. Remember my note about using half-and-half? If you’re feeling extra indulgent and want a richer base for your Creamy Banana Dessert, try substituting some of that whole milk with half-and-half—it makes the custard incredibly luxurious, almost like a crème anglaise!
Also, please slice those bananas right before you start stacking! They brown so fast once cut, and nobody wants brown bananas in their perfect slice of Southern Style Banana Pudding. Keep that plastic wrap tight on your custard while it cools, or that skin will ruin the smooth texture we worked so hard for.
Variations on THE BANANA PUDDING
I know sometimes life is crazy and you need dessert ASAP, which is why people talk about a No Bake Banana Pudding version using instant mix. And hey, if you’re in a real pinch, that works okay! But if you want that deep, authentic, soul-soothing comfort of THE BANANA PUDDING, stick to the custard. Once you taste the difference homemade makes, you won’t go back, trust me!
However, we can still tweak things slightly without compromising the structural integrity of this masterpiece. Since we used whipped cream this time, let’s talk about the alternative topping that really takes this back to the deepest South for some folks.
Using Meringue Topping Instead of Whipped Cream
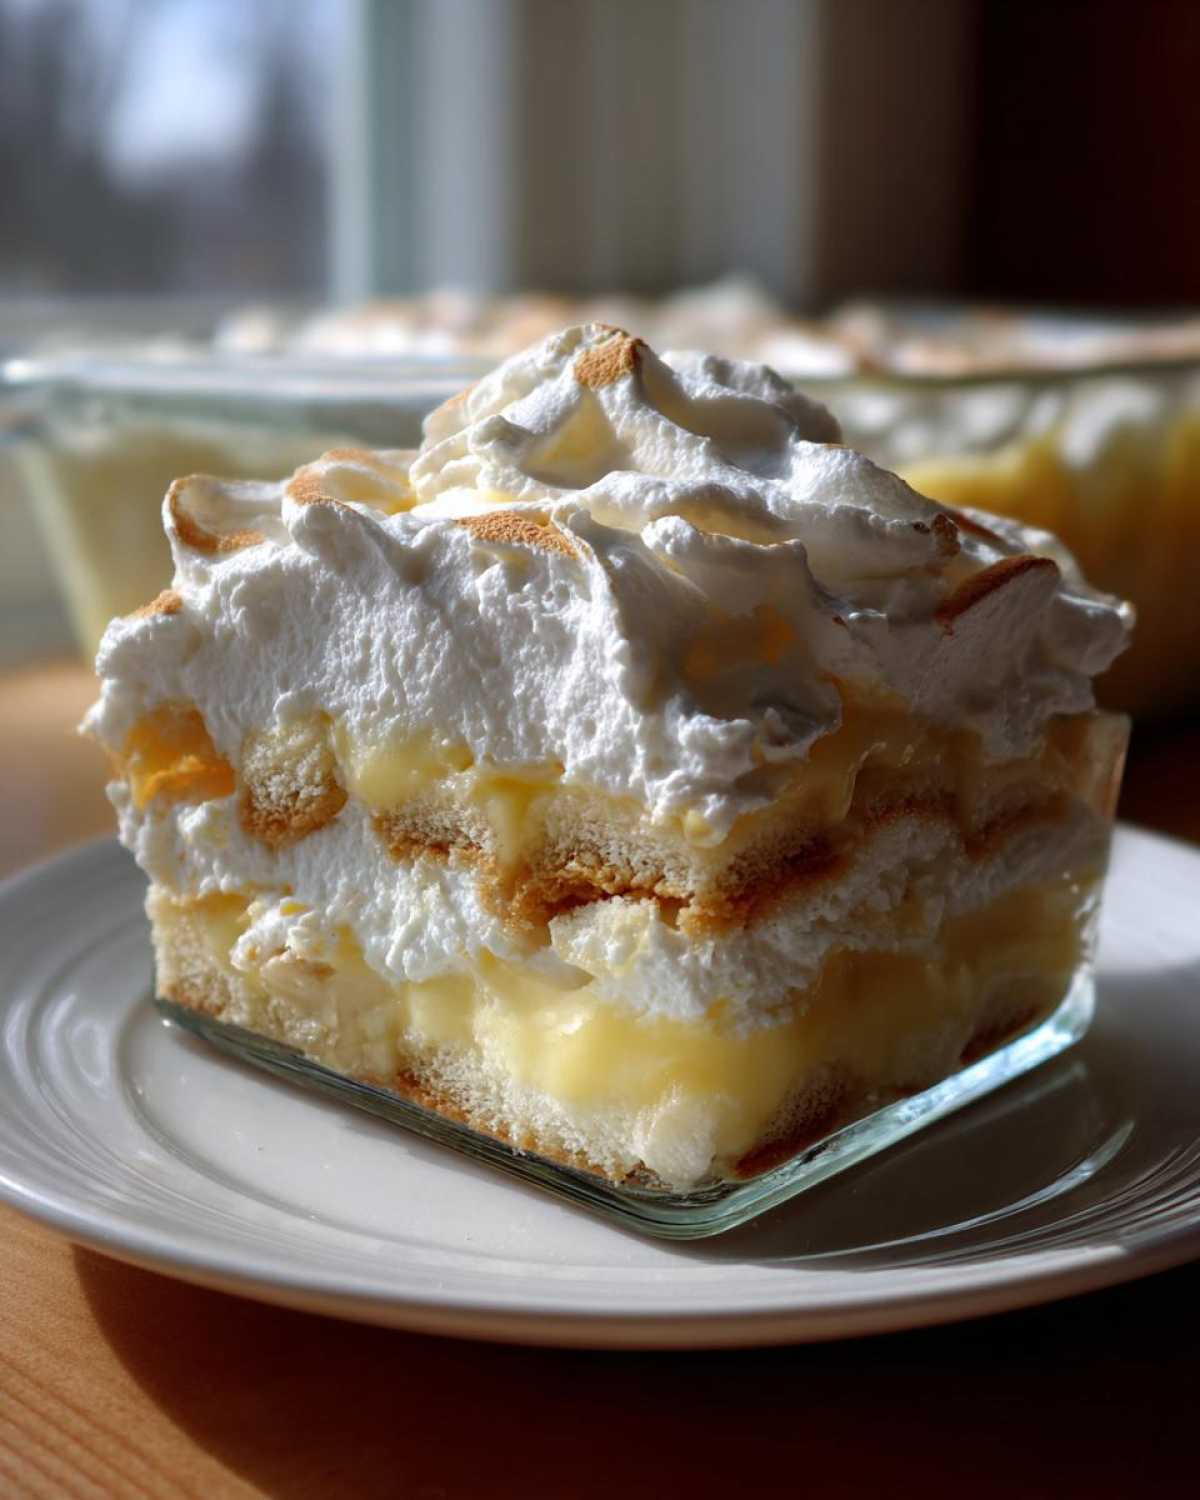
If you prefer that slightly toasted, marshmallow-like hug on top, ditch the heavy cream entirely and make a meringue! You’ll use your leftover egg whites from another project, or just separate them before you start the custard. Beat those whites stiff with a little extra sugar until they hold sharp peaks.
The difference here is simple: after you assemble your layers of wafer, banana, and custard, spread that meringue right on top, covering the edges all the way down to the bowl if you can. Then, you bake it fast—just long enough to brown those tips beautifully. It’s a totally different experience! It’s less creamy on top, more custardy all the way through, and you get that lovely browned sugar flavor layering over the vanilla. It’s wonderful, but remember, if you go the meringue route, you usually eat it the same day since the baked meringue doesn’t keep as well as the cool whipped cream.
Serving Suggestions and Make Ahead Banana Pudding Timing
Here’s the hardest part of making THE BANANA PUDDING, and it requires zero stirring: patience! You absolutely must give this dessert time to chill out. If you try scooping into it after only an hour, the wafers will be hard and the flavors won’t have married yet. We need at least four hours, but honestly, if you can let this $\text{Make Ahead Banana Pudding}$ chill overnight, the wafers will turn into buttery, soft cake layers. That’s perfection!
This always disappears first at potlucks because it’s a total crowd-pleaser and travels well. Just keep it cold, and watch everyone go back for seconds!
Storage and Reheating Instructions
Okay, so you’ve made this amazing, creamy dream, and maybe you have leftovers—which is rare in my house, but I’ll assume you’re more disciplined than I am! Storing this dessert is all about protecting those beautiful layers. Since we used real heavy cream whipped stiff on top, you need to cover it tightly, but don’t press plastic wrap onto the whipped cream, or it will flatten and weep.
I always use a piece of foil tented over the top, then I chill it in the coldest part of the fridge. It stays absolutely gorgeous for about two days, but honestly, the texture starts changing subtly after about 36 hours. The wafers, while soft, can start getting a little too soggy, and the bananas will inevitably start getting darker, even in the cold.
And here’s the important bit: We do not reheat this! This is a cold, refreshing dessert. If you try to warm up this Layered Banana Dessert, you end up with soupy milk, melted cream, and mushy bananas. Keep it cold, keep it covered, and scoop it straight from the fridge. That’s the ticket!
Frequently Asked Questions About THE BANANA PUDDING
I get so many questions after people try this! It’s because making homemade custard adds a few steps, and folks always want to make sure they get that perfect texture for their Layered Banana Dessert. Don’t you worry, I’ve got the answers you need right here!
How long does THE BANANA PUDDING need to chill before serving?
This is non-negotiable, folks! You need a minimum of four hours of chilling time, but honestly, if you can let it sit overnight, you’ll be so much happier. That time lets the vanilla wafers actually soak up that gorgeous, Creamy Banana Dessert custard and turn into that cake-like layer we all dream about. If you cut it too soon, you just have a bowl of pudding with crunchy cookies, and that’s not what we’re making here!
Can I use instant pudding instead of making the custard for this Easy Homemade Banana Pudding?
Yes, you technically can, which would make it an Easy Homemade Banana Pudding shortcut, I guess. But listen to me: you lose so much depth! The flavor won’t be as rich, and frankly, the texture isn’t as smooth. The homemade custard, especially after tempering those yolks, gives you that beautiful, dense silkiness that defines this classic. If you use instant, you get a pudding; if you use this recipe, you get an heirloom!
Why do my bananas turn dark even when they are covered by the custard?
That’s the million-dollar question for any banana dessert! The acid in the bananas reacts with the air, but sometimes the custard isn’t thick enough to fully block it out. My best trick is to toss the banana slices lightly in a tiny splash of lemon juice or even a splash of the milk *before* layering them. It’s an extra step, but it keeps your layers looking bright and beautiful when serving your Comfort Food Pudding Ideas.
Can I make the custard ahead of time?
Absolutely! In fact, I encourage it. Once you finish cooking the custard (Step 4 in the instructions), cover that plastic wrap directly on the surface and pop it in the fridge. I usually make the custard the day before. Just give it a quick whisk when you pull it out—it firms up quite a bit when cold—then proceed with whipping your cream and assembling the layers. That makes the actual construction of your Old Fashioned Banana Pudding a breeze!
Nutritional Snapshot of THE BANANA PUDDING
Now, I know when you’re making comfort food like this, you aren’t usually reaching for a calculator, but I always like to give everyone a heads-up on what’s in their bowl. Because we use whole milk and rich heavy cream for that unbelievably creamy texture, this isn’t exactly a diet snack, but hey, it’s worth every single bite! This is definitely a treat for special occasions or when you just need a big hug in dessert form.
Keep in mind these numbers are just solid estimates based on the standard ingredients we used, so if you swap in low-fat milk or use less sugar, your totals will change. But for this magnificent, classic Simple Banana Dessert Idea, these are our baseline stats per serving:
- Serving Size: 1 serving
- Calories: 380
- Sugar: 45g (Mostly coming from the custard base and ripeness of bananas!)
- Fat: 18g
- Protein: 5g
- Carbohydrates: 55g
It’s got a bit of sugar, sure, but that’s the joy of a rich dessert like THE BANANA PUDDING! Enjoy every spoonful!
PrintClassic Southern Homemade Banana Pudding
A recipe for traditional, layered banana pudding featuring creamy homemade vanilla custard and soft vanilla wafers.
- Prep Time: 25 min
- Cook Time: 15 min
- Total Time: 4 hours 40 min
- Yield: 8 servings
- Category: Dessert
- Method: Chilling
- Cuisine: American
- Diet: Vegetarian
Ingredients
- 1 cup granulated sugar
- 1/4 cup cornstarch
- 1/4 teaspoon salt
- 1 1/2 cups whole milk
- 2 large egg yolks, lightly beaten
- 2 tablespoons unsalted butter
- 1 teaspoon vanilla extract
- 4 large ripe bananas, sliced
- 1 box (11 ounces) vanilla wafer cookies
- 2 cups heavy cream
- 1/4 cup powdered sugar
Instructions
- Make the custard: In a medium saucepan, whisk together the granulated sugar, cornstarch, and salt. Gradually whisk in the milk until smooth.
- Cook the custard: Place the saucepan over medium heat. Cook, stirring constantly, until the mixture thickens significantly and comes to a boil. Boil for one minute, stirring constantly. Remove from heat.
- Temper the egg yolks: In a small bowl, whisk the egg yolks. Slowly pour about half a cup of the hot milk mixture into the yolks while whisking rapidly. Pour the tempered yolk mixture back into the saucepan.
- Finish the custard: Return the saucepan to medium-low heat. Cook for 2 minutes, stirring constantly, until the pudding thickens further. Do not boil again. Remove from heat. Stir in the butter and vanilla extract until smooth. Cover the surface of the custard directly with plastic wrap to prevent a skin from forming. Let cool to room temperature, about 1 hour.
- Whip the cream: In a large bowl, beat the heavy cream and powdered sugar with an electric mixer until stiff peaks form.
- Assemble the pudding: In a large glass bowl or individual serving dishes, create layers starting with a layer of vanilla wafers. Top the wafers with a layer of sliced bananas. Spoon about one-third of the cooled custard over the bananas. Repeat the layers twice more: wafers, bananas, custard.
- Top and chill: Spread the whipped cream evenly over the top layer. Cover the dish loosely with plastic wrap. Refrigerate for at least 4 hours, or preferably overnight, to allow the wafers to soften.
Notes
- For a richer flavor, you can substitute half of the whole milk with half-and-half.
- If you prefer a meringue topping, skip the whipped cream and top the pudding with baked meringue instead.
- Slice the bananas just before assembling to minimize browning.
Nutrition
- Serving Size: 1 serving
- Calories: 380
- Sugar: 45g
- Sodium: 180mg
- Fat: 18g
- Saturated Fat: 10g
- Unsaturated Fat: 8g
- Trans Fat: 0g
- Carbohydrates: 55g
- Fiber: 2g
- Protein: 5g
- Cholesterol: 75mg