

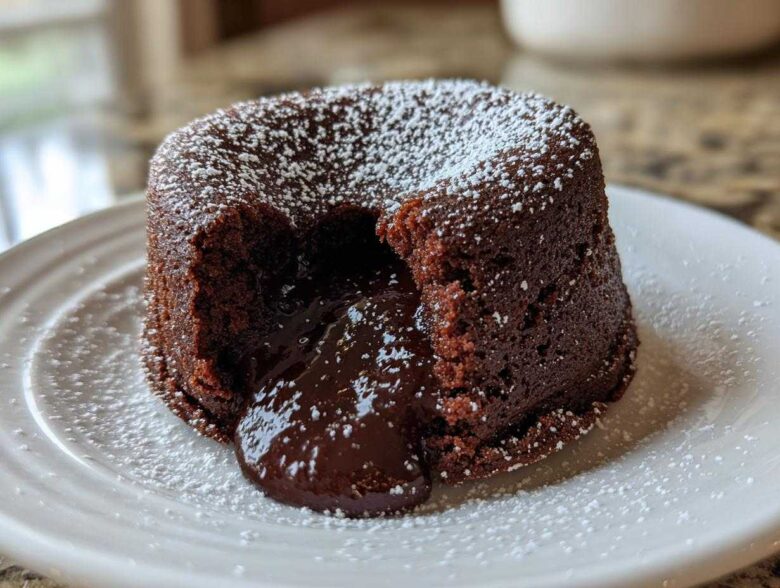
Oh, listen to me, if you’ve ever dreamed of making a truly show-stopping, rich chocolate dessert without spending half your evening in the kitchen, I have found the answer! We’re talking individual chocolate cakes that promise that glorious, warm, oozy center. Yes, the legendary lava cake. I know, I know, people mess this up all the time. I sure did! I probably ruined six batches trying to nail that perfect ratio of baked edge to liquid core. But trust me when I say, after years of testing, I finally have the foolproof recipe. This isn’t just a quick dessert; it’s guaranteed gooey chocolate heaven, ready before you can even decide what movie to watch. This method is the one!
Why This Easy Chocolate Lava Cake Recipe Works Every Time
This isn’t just another rich chocolate indulgence; it’s built for speed and guaranteed success. I want you to feel like a pastry chef, even if you only have ten minutes to prep. My secret method cuts down the fuss without sacrificing that beautiful, decadent texture. Seriously, this recipe is my secret weapon for last-minute date nights!
- The ingredients list is short and uses things you probably already have on hand. No hunting down fancy stabilizers here!
- It bakes individually, so everyone gets a perfect, personal cake—no messy slicing required.
- It’s fast! I mean genuinely fast. You can go from pantry to plate in under 30 minutes. Check out how this compares to my famous chocolate chip cookies recipe; these little babies are quicker!
Quick Dessert Ideas: Ready in Under 30 Minutes
If you are looking for quick dessert ideas, stop scrolling right now. The total time listed is just 24 minutes, and that accounts for preheating the oven. The actual hands-on time is honestly closer to 10 minutes of mixing. That means you can decide you want a gooey chocolate dessert at 8 PM and be eating it by 8:25 PM. How amazing is that?
The Secret to a Perfect Molten Center Cake
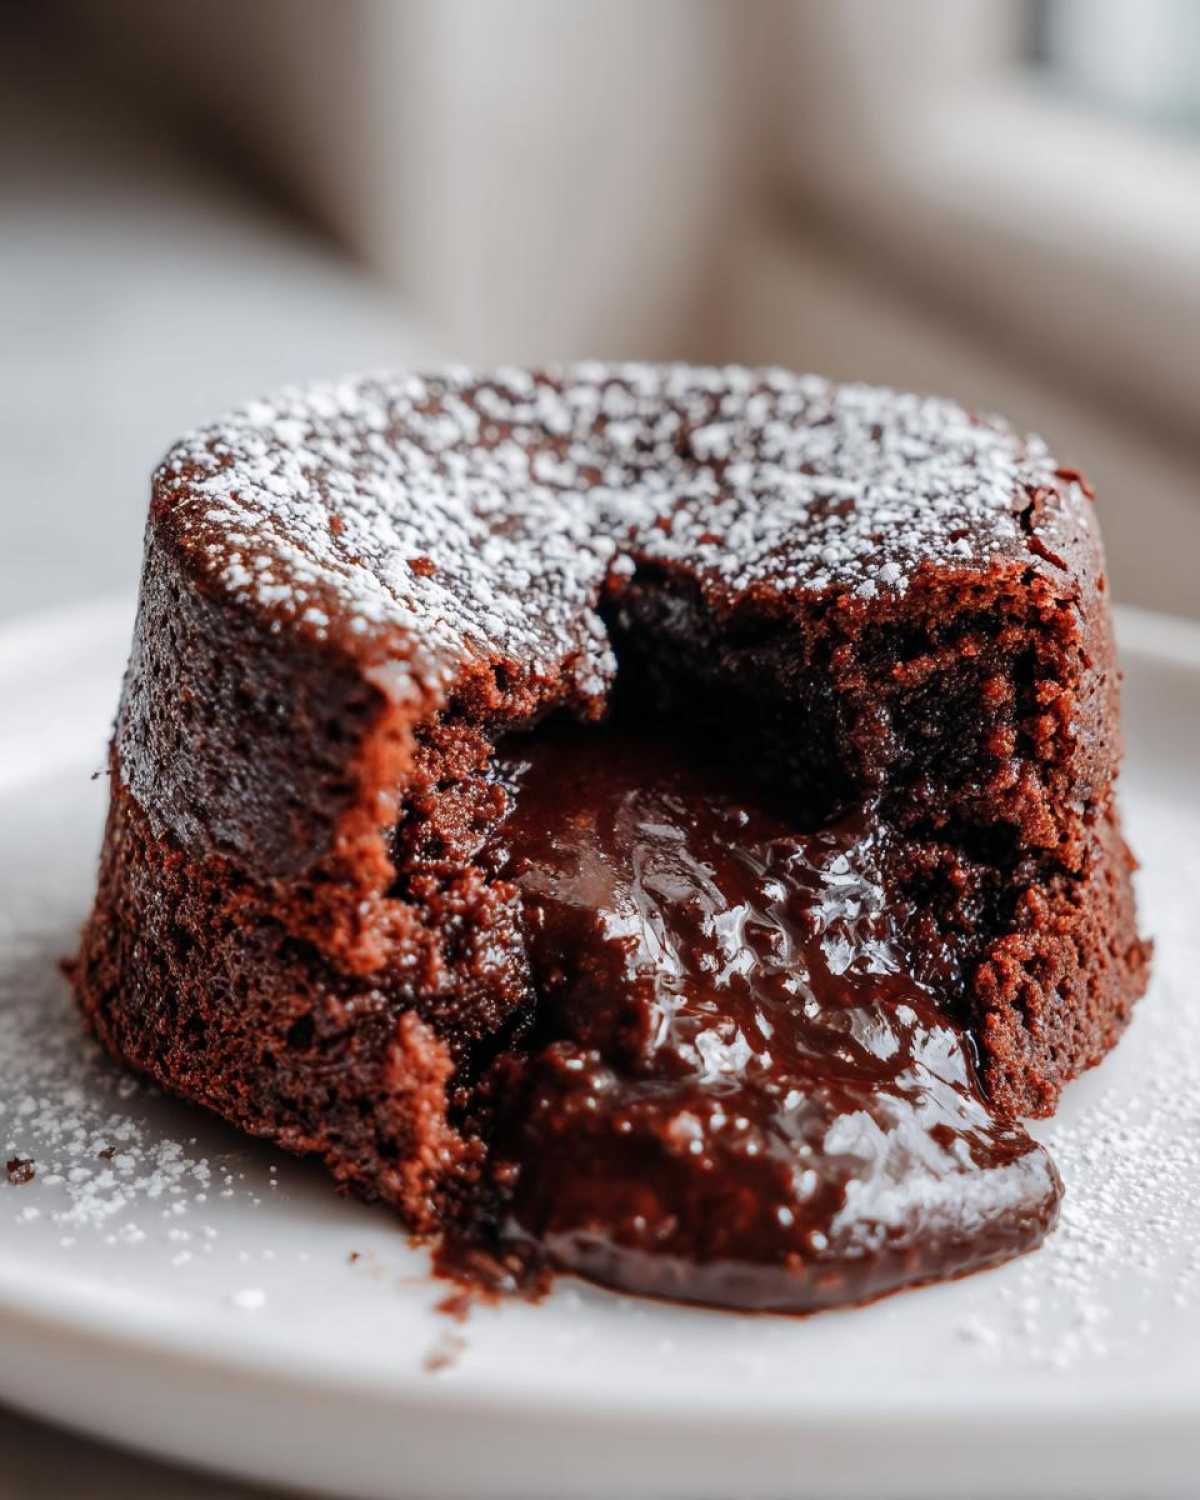
So, what’s the true secret to a perfect molten center cake? It comes down to two things: the chocolate-to-butter ratio and timing. We use a healthy amount of both chocolate and butter, which doesn’t fully cook through on the edges. More importantly, we use two whole eggs plus two extra egg yolks. Those extra yolks add richness and stability to the liquid part, making sure the center stays beautifully runny, that classic lava flow we are after in our lava cake.
Ingredients for Your Foolproof Chocolate Lava Cake
Okay, time to gather supplies! If you follow the ingredient list exactly, you absolutely will get that perfect bakery style chocolate cake at home. We aren’t using a ton of components here, which is part of why this is so fantastic for a weeknight treat. Remember, the quality of your chocolate really matters here since it’s the star of our decadent chocolate dessert!
You’ll need about 4 ounces of high-quality bittersweet chocolate, chopped up into smaller pieces so it melts nicely. Then, 4 ounces of unsalted butter—and please, use real butter, no skipping that step! For the structure, we need two large whole eggs plus two extra large egg yolks. Don’t skip those extra yolks; they are key to that gooey factor! Then grab about a quarter cup of regular granulated sugar, just one tablespoon of all-purpose flour for stability, and a tiny pinch of salt to wake up all that chocolate flavor.
And for the ramekins themselves: make sure you have butter and some cocoa powder ready. That cocoa powder dusting is what prevents sticking and gives the outside of your individual chocolate cakes that lovely dark finish. It’s much better than flour for a chocolate cake!
Ingredient Notes and Substitutions for Your Lava Cake
Let’s talk substitutions, because sometimes we need flexibility. For the chocolate itself, you can go as high as 70% cocoa content if you like things less sweet, but I really find 55% to 60% bittersweet hits the sweet spot for most folks. If you want to try that amazing Nutella variation, you can swap out just 2 tablespoons of the chopped bittersweet chocolate with 2 generous tablespoons of Nutella. Mix that in right when you incorporate the primary melted chocolate mixture, and boom, instant flavor boost!
A quick note on the flour: that single tablespoon is vital. It’s just enough to hold the structure around the edges so it doesn’t collapse into a puddle, but definitely not enough to make it taste like a regular cake. Resist the urge to add more flour—we want that beautiful liquid center!
How to Prepare Your Individual Chocolate Cakes
Alright, this is where the magic really happens! Getting the technique right on these individual chocolate cakes is non-negotiable if you want that gorgeous molten lava flow without sticking to the dish. Don’t worry, it’s straightforward, but you have to be mindful of the order of operations. We move fast here, but precision is everything for this rich chocolate indulgence.
Preparing Ramekins for Easy Release of the Lava Cake
Do not skip this part, seriously. You want that gorgeous bakery style chocolate cake at home look, right? That means the cake needs to slide right out onto your dessert plate looking perfect. Grab those ramekins—mine are 6-ounce size—and get ready to grease them up like you mean it! First, work softened butter all over the inside surface. Get into every nook and cranny! Don’t be shy with the butter, this is your insurance policy against doom.
Next up, ditching the regular flour coating. For chocolate cakes, we always use cocoa powder for that dusty, dark finish. Put a spoonful of cocoa powder into the buttered ramekin, swirl it around until the entire inside is coated, and then flip it over and tap out every bit of extra powder onto your counter. This cocoa coating is what keeps the cake from sticking and gives it that professional, rich look.
Baking Times for the Perfect Gooey Chocolate Dessert
Your oven needs to be screaming hot! We’re hitting 425 degrees Fahrenheit. Remember, the high heat sets the outside fast while the inside stays liquid. Once you pour your batter into those prepared homes, pop them onto a baking sheet—this helps them bake evenly across the bottom. They only need 12 to 14 minutes, depending on your oven. Trust me, checking at 12 minutes is safer than waiting for 14!
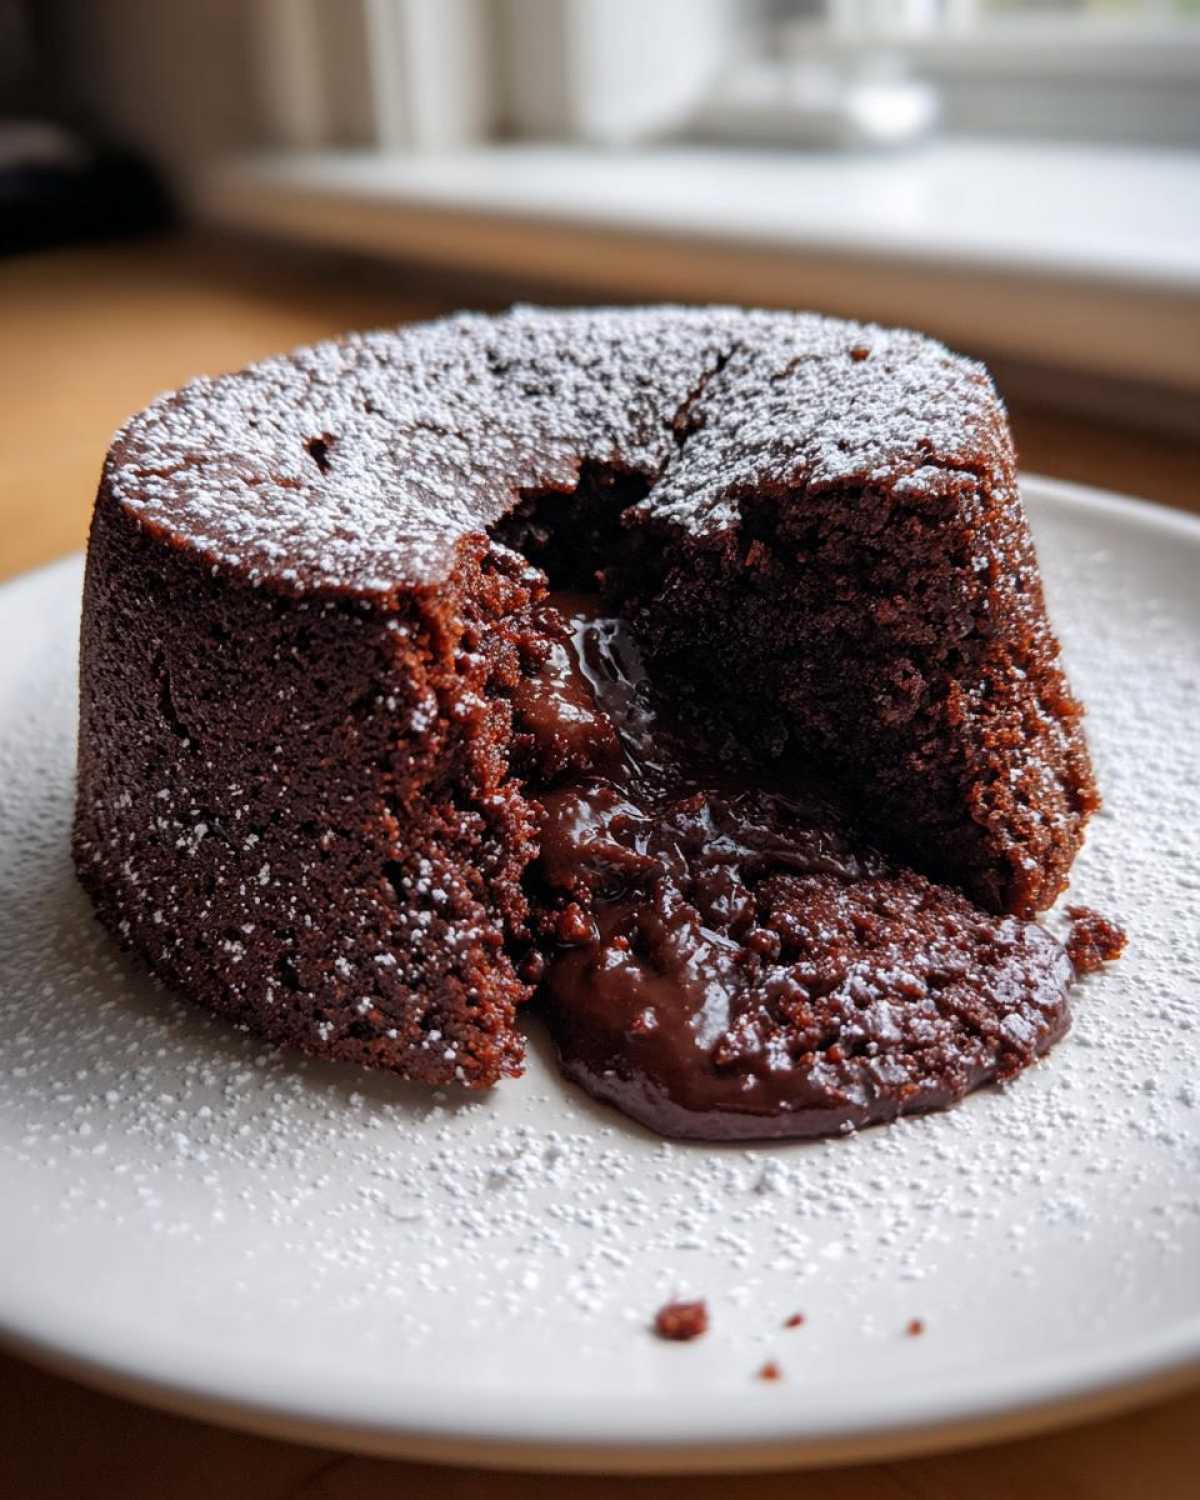
You need to look for the visual cues. The edges of the lava cake should look firm and completely set. If you gently wiggle the ramekin, the whole thing shouldn’t jiggle dramatically. However, the absolute center—give it a gentle poke if you’re brave—should still look a little soft and damp. That slight softness is the guarantee for your perfect gooey chocolate dessert! If you bake them too long—say, past 15 minutes—you end up with a lovely warm chocolate cake, but sadly, no lava. If you’re trying out that Nutella variation, stick to the 12-minute check time, as the added fat might need slightly less heat exposure.
Serving Suggestions for Your Warm Chocolate Cake Recipe
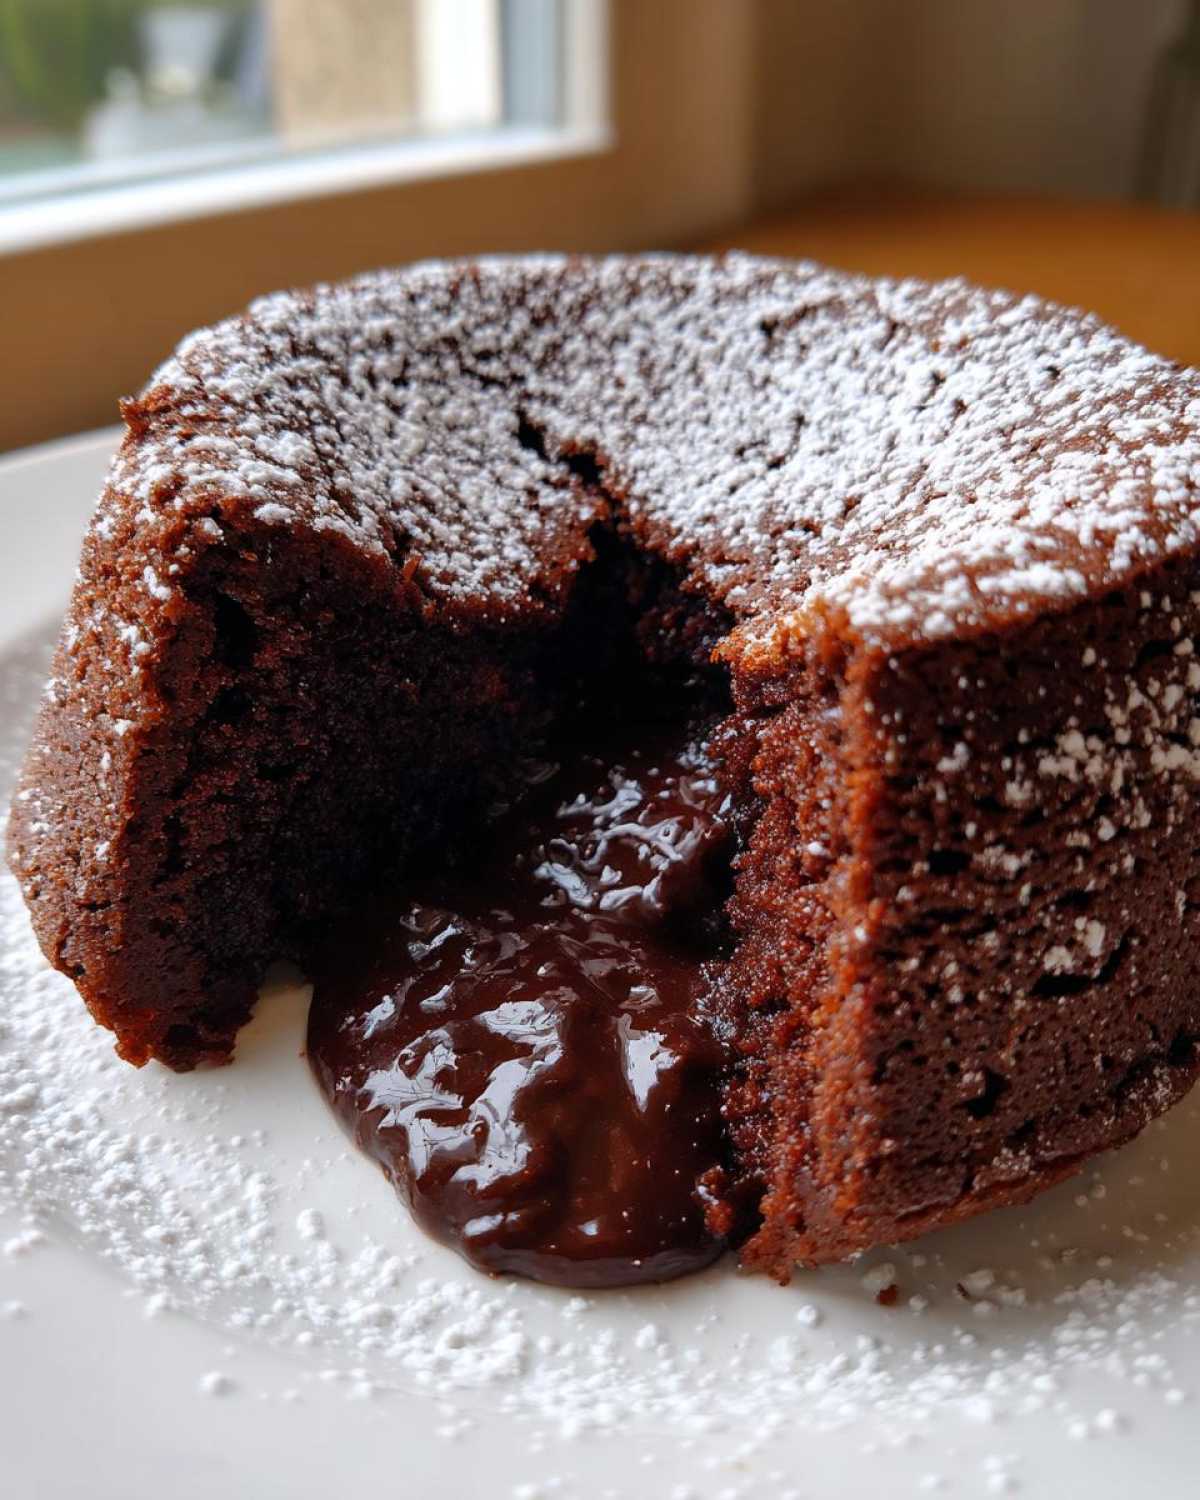
Now that you’ve mastered the most amazing, foolproof lava cake, we have to talk about presentation! Since this is truly a showstopper dessert recipe, you can’t just eyeball the plating. You only get one chance to serve that first warm chocolate cake recreation, and you want it to look just as decadent as it tastes.
The absolute classic, and my go-to for a reason, is a very light dusting of powdered sugar right over the top. We’re talking barely anything—just enough to give the dark chocolate a little contrast. Sometimes, if I’m feeling fancy for a date night, I’ll use a small sieve to make sure the dust is perfectly even. It looks so elegant!
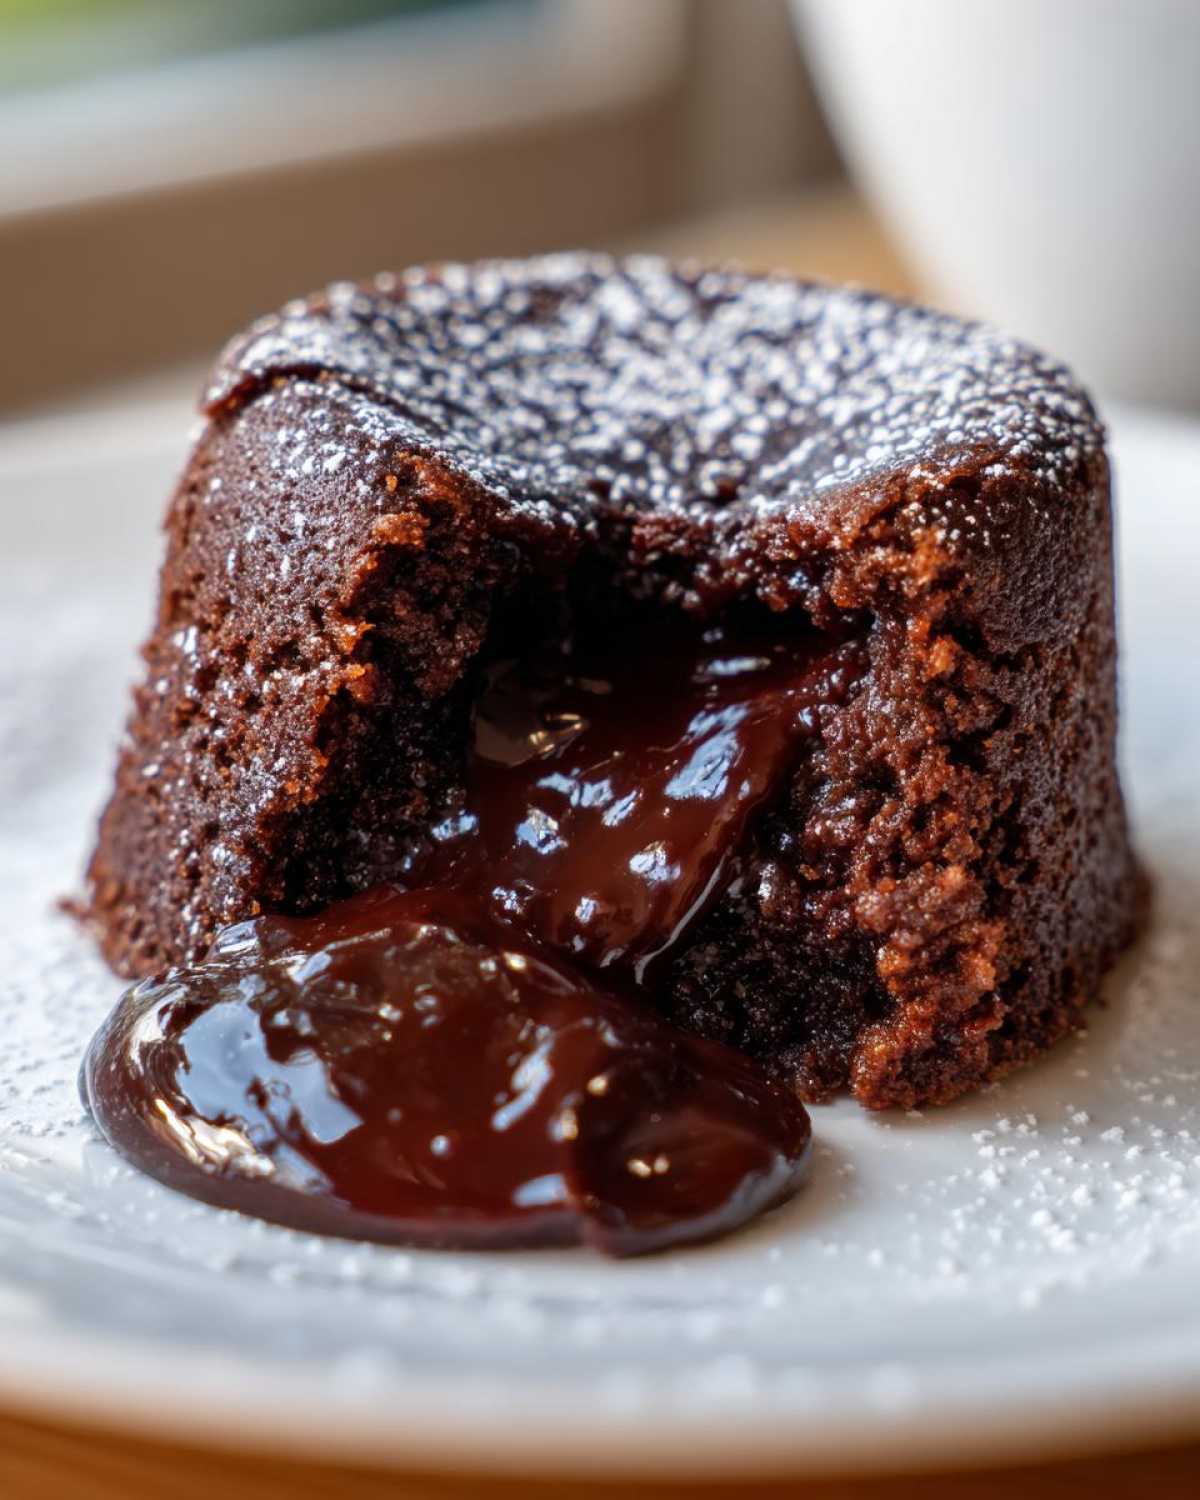
But if you want to serve it alongside something cold—and oh boy, you should—vanilla bean ice cream is non-negotiable. The contrast between the scalding hot, rich chocolate and the cold, creamy vanilla is what dreams are made of. It allows the cold cream to slowly melt into the escaping lava center. If ice cream seems like too much effort, even plain whipped cream works wonders.
For a little color pop, fresh fruit is your friend. Think raspberries or sliced strawberries. They cut through the intense richness beautifully. Or, if you’re leaning into that chocolate-banana vibe, serving it with a side of a slightly firmer, room-temperature banana bread—like my moist banana bread recipe, perhaps—makes for a really robust dessert platter. Whatever you choose, serve immediately! That molten center waits for no one!
Storage and Reheating Instructions for Leftover Lava Cake
Okay, look. If you have leftover lava cake, that’s a noble problem to have! Once these cool down, that glorious runny center often firms up a bit, turning it more into a wonderfully rich, fudgy chocolate cup. That’s fine, though! It’s still a decadent chocolate dessert, and we can totally bring back some of that warmth and flow.
If you have any whole cakes left over—and I mean, who has leftovers of a gooey chocolate dessert this good?—you need to handle them gently. First thing: never leave them out on the counter if they aren’t going to be eaten within a few hours. Chocolate and dairy (from the butter and eggs) don’t like sitting out warm.
Wrap each individual cake tightly. I like to use a small piece of plastic wrap, making sure it’s snug, and then I tuck that into a small airtight container or a zip-top bag. This locks in the remaining moisture. They should keep happily in the refrigerator for about 3 days tops. After that, the texture starts to change too much, and you’re better off just making a fresh batch!
Gently Reheating to Restore the Molten Flow
Reheating is the only way to get back to that warm chocolate cake recipe experience. The microwave is your best friend here, but you have to be cautious. Microwaving too aggressively will just turn the cake edges rubbery before the center even thaws!
Zap it in short bursts. I aim for 15 to 20 seconds on about 50% power if my microwave lets me adjust that. If not, 10 seconds at full power, test it, and then continue in 5-second intervals. You want the cake to be warm all the way through, and you should see that center soften again. If you’re reheating a cake that has completely firmed up, sometimes 25 seconds is needed, but keep a close eye on it!
If all else fails, popping it in a toaster oven at a very low temperature (around 300°F) for about 7 minutes works too, as it distributes the heat more gently than a microwave. Just watch the edges so they don’t dry out and turn hard!
Troubleshooting Common Issues with Homemade Lava Cakes
Even with the most foolproof recipe in the world, sometimes things go sideways, right? Don’t panic! If your decadent chocolate dessert falls flat, it usually points to one or two very specific culprits, and fixing them is easy once you know what to look for. I’ve been there, staring sadly at a cooled, fully baked little cake when I was expecting a chocolate eruption. Let’s run through the usual suspects so your next batch of lava cake comes out perfect.
The good news is that even if the center doesn’t flow perfectly, you still have a really rich little slice of chocolate cake. But we want that flow! If you’ve ever had your cake stick stubbornly to the sides, or if it came out looking more like a muffin top than a perfect little cylinder, I have the fixes right here. I’ve even got tips for when you try to adapt these for things like my creamy chicken recipes—kidding! Sort of.
Oh No, My Lava Cake Didn’t Flow! (It’s Fully Baked)
This is the saddest moment for any baker attempting this recipe. If you cut into your cake and find it solid, that means it just baked too long. It’s that simple, and honestly, the difference between molten and cakey can be as little as 45 seconds in a hot oven! Oven temperatures really vary, so if you hit 14 minutes and it looked done, but it wasn’t flowing later, next time pull it out at 12 minutes and 30 seconds, maybe even 12 minutes flat.
You might also be using too small of a ramekin. If your container is holding less volume, the heat penetrates faster, and the cooking time shortens considerably. Always measure your batter volume if you change dish sizes! Another thing to check: were your eggs cold? Cold eggs mean the batter takes longer to heat up, potentially leading to slightly uneven baking or, conversely, if your oven runs cool, it might need that extra minute, confusing the timing.
My Homemade Lava Cakes Stuck to the Ramekin!
If you inverted your cake and it decided to stay in the ramekin, blame the prep work! This is where the cocoa powder dusting step I talked about earlier saves your bacon. If you used butter but skipped the cocoa dust, the cake batter sticks right to the fatty surface when it sets, and when you try to flip it, the outside tears right off.
When this happens, you need to reinforce your greasing technique. When you’re buttering, really press the softened butter into the corners and the sides. Don’t just smear it around. Then, when you dust with cocoa, you should hear the excess tapping sound hollow when you shake it out—that means you used just the right amount. If you see any shiny spots inside after dusting, hit it with a touch more cocoa powder. This non-stick barrier is the best insurance policy you have for presenting a beautiful, whole, individual chocolate cake.
Frequently Asked Questions About Making Lava Cake
I know you probably have a few lingering questions, because when you’re trying to achieve that perfect, gooey chocolate dessert, you want to be sure! Baking this kind of rich chocolate indulgence sometimes feels like brain surgery, but I promise, it’s just about knowing a few little tricks. Here are the things folks ask me most often about this recipe.
Can I make this ahead of time and store the batter?
Yes, absolutely, and this really helps if you’re planning a dinner party! You can mix the batter right up until the final step of pouring it into the ramekins. Cover those prepared ramekins tightly—and I mean tight!—with plastic wrap and pop them right into the fridge. They can chill there happily for up to 24 hours. Just remember, if the batter is cold when it goes into the oven, you might need to add 1 to 2 extra minutes to the total baking time to ensure the edges set properly. It’s essential for a successful homemade lava cake!
Can I substitute bittersweet chocolate with milk chocolate?
Honestly, I try not to. The backbone of this recipe is the deep, rich flavor contrast between the dark chocolate (we used 4 ounces of bittersweet) and the sweetness of the sugar. Milk chocolate has much more sugar and less cocoa solids, which throws off the structure significantly. If you use milk chocolate, the cake will likely become too sweet, and the molten part might not set up correctly because there’s less cocoa mass holding everything in place. For the best results for this date night dessert, stick to semi-sweet or bittersweet!
Is it possible to make a Nutella Lava Cake Recipe version?
Oh, you bet! I touched on this in the substitutions section, but it’s worth repeating because it’s that good. If you want to lean into that hazelnut flavor, swap out 2 tablespoons of the chopped bittersweet chocolate for 2 tablespoons of creamy Nutella. Mix the Nutella in right when you are adding the melted chocolate mixture to the eggs. It adds a beautiful layer of complexity and makes it taste incredibly decadent instantly.
Can I bake this chocolate lava cake recipe in an Air Fryer?
That’s a fantastic question, especially now that everyone has an air fryer! Yes, technically you can, but you have to be *super* careful. Because they cook so quickly and intensely, air fryers can really mess up the timing, easily leading to fully cooked cakes instead of molten ones. If you try it, use smaller ramekins—maybe 4-ounce ones—and start checking them around 8 or 9 minutes at roughly 375°F. You’ll need to experiment a bit to find your specific machine’s sweet spot, but it is possible for a quick dessert! You might find some great tips over on my post about getting perfect air fryer chocolate croissants when you think about timing variations.
Estimated Nutritional Data for This Rich Chocolate Indulgence
Nobody is making this lava cake recipe because they are trying to cut calories, let’s be real! This is pure, unapologetic decadence, and it’s meant to be enjoyed as a special treat on a date night or after a holiday celebration. The numbers I have here are based on the ingredients listed—the 4 ounces of bittersweet chocolate, the butter, the eggs, and the sugar—calculated for one serving from the four-cake batch.
Think of this breakdown as a general guideline before you dive into this delicious warm chocolate cake recipe, because if you use a higher percentage chocolate or add an extra dollop of whipped cream on top, the numbers will obviously change. But for the base recipe, here’s what you’re looking at for one individual chocolate cake:
- Calories: About 380 per cake. That’s a solid number for a rich chocolate indulgence that tastes like it came from a fancy French restaurant!
- Fat: Around 26 grams. Most of this is coming from that lovely butter and the cocoa butter in the chocolate. Good, satisfying fat! This includes about 15 grams of saturated fat.
- Carbohydrates: We’re clocking in at about 28 grams, with 25 of those grams being straight sugar. That ensures that beautiful sweetness balances the rich dark cocoa flavor. Only 2 grams of fiber here, by the way.
- Protein: You get about 7 grams of protein, mostly thanks to those eggs we use.
- Cholesterol: It sits around 170 mg, which is standard when you use multiple egg yolks in dessert preparation.
See? It’s robust, it’s rich, and it’s worth every single calorie. If you want to look at the science behind balancing protein and carbs in other recipes, I wrote a whole deep dive on protein chia pudding ratios, but for this one, just focus on savoring that molten middle!
Share Your Decadent Chocolate Dessert Experience
So, there you have it! My absolute foolproof method for making the most decadent chocolate dessert known to man. I really hope you give this simple lava cake recipe a try the next time you need something rich and indulgent without the fuss. It’s the perfect way to end a romantic date night or just treat yourself after a long week!
I’m honestly so eager to hear how it went for you! Did the center flow perfectly? Did you dust it with sugar, or did you go all out with fresh raspberries? If you followed these steps, I am hoping you ended up with a five-star dessert experience. Please, please let me know in the comments below!
If you loved this recipe, give it a big five-star rating right there on the page—it really helps other folks find the best way to bake a perfect, warm chocolate cake at home. And hey, if you’re feeling adventurous and want to pair this with something savory, check out my instructions for getting that viral lemon parmesan pasta sauce just right; it’s a great way to balance out all that glorious chocolate!
Happy baking, and enjoy every single molten bite!
PrintFoolproof Chocolate Lava Cake
Make rich, individual chocolate cakes with a guaranteed gooey, molten center. This recipe is quick and simple for any home cook.
- Prep Time: 10 min
- Cook Time: 14 min
- Total Time: 24 min
- Yield: 4 servings
- Category: Dessert
- Method: Baking
- Cuisine: American
- Diet: Vegetarian
Ingredients
- 4 ounces bittersweet chocolate, chopped
- 4 ounces unsalted butter
- 2 large eggs
- 2 large egg yolks
- 1/4 cup granulated sugar
- 1 tablespoon all-purpose flour
- Pinch of salt
- Butter and cocoa powder for ramekins
Instructions
- Preheat your oven to 425 degrees Fahrenheit. Butter four 6-ounce ramekins thoroughly. Dust the inside of each buttered ramekin with cocoa powder, tapping out any excess.
- Place the chopped chocolate and butter in a heatproof bowl set over a saucepan of simmering water (or microwave in short bursts). Stir until completely melted and smooth. Remove from heat and let cool slightly.
- In a separate medium bowl, whisk together the eggs, egg yolks, and sugar until the mixture is pale and slightly thickened, about 1 minute.
- Gently whisk the melted chocolate mixture into the egg mixture until just combined.
- Whisk in the flour and salt until no streaks remain. Do not overmix.
- Divide the batter evenly among the prepared ramekins.
- Place the ramekins on a baking sheet. Bake for 12 to 14 minutes. The edges should look set, but the center should still look soft.
- Let the cakes cool in the ramekins for 1 minute. Carefully run a thin knife around the edge of each cake. Invert each cake onto a serving plate. Serve immediately.
Notes
- For a Nutella variation, substitute 2 tablespoons of the chopped chocolate with 2 tablespoons of Nutella, mixing it in with the melted chocolate and butter.
- If you want a slightly firmer cake edge, bake for an extra minute.
- Dust with powdered sugar or serve with fresh raspberries for presentation.
Nutrition
- Serving Size: 1 cake
- Calories: 380
- Sugar: 25
- Sodium: 110
- Fat: 26
- Saturated Fat: 15
- Unsaturated Fat: 11
- Trans Fat: 0
- Carbohydrates: 28
- Fiber: 2
- Protein: 7
- Cholesterol: 170