

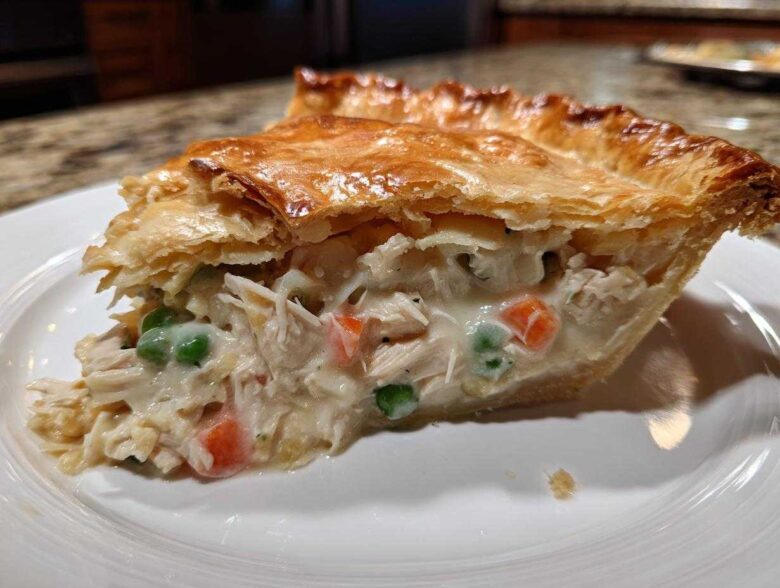
Okay, listen up, because when the weather turns chilly, nothing, and I mean NOTHING, beats coming home to the smell of a bubbling, golden-brown chicken pot pie. Forget those sad, frozen versions you see at the store—we are doing this the *right* way. This is my ultimate, from-scratch chicken pot pie recipe, and trust me, it’s the one you’ll want taped inside your cupboard forever. The magic here is the contrast: a thick, utterly creamy filling packed with tender chicken and veggies nestled under a crust that shatters when you cut it. I spent years trying to get that bottom crust not to get soggy, but I finally nailed the technique! You can see more about why this recipe means so much on my dedicated landing page.
When you bake this up, the steam alone is going to make you feel instantly cozy. It’s classic American comfort food at its absolute peak, and I can’t wait for you to try it. If you’re looking for the perfect way to serve up a hearty, savory dish the whole family will ask for again and again, you’ve landed in the right spot. Grab your biggest pie dish; we’re heading straight into the ultimate comfort meal!
Why This is the Best Chicken Pot Pie Recipe (Ultimate Comfort Meal)
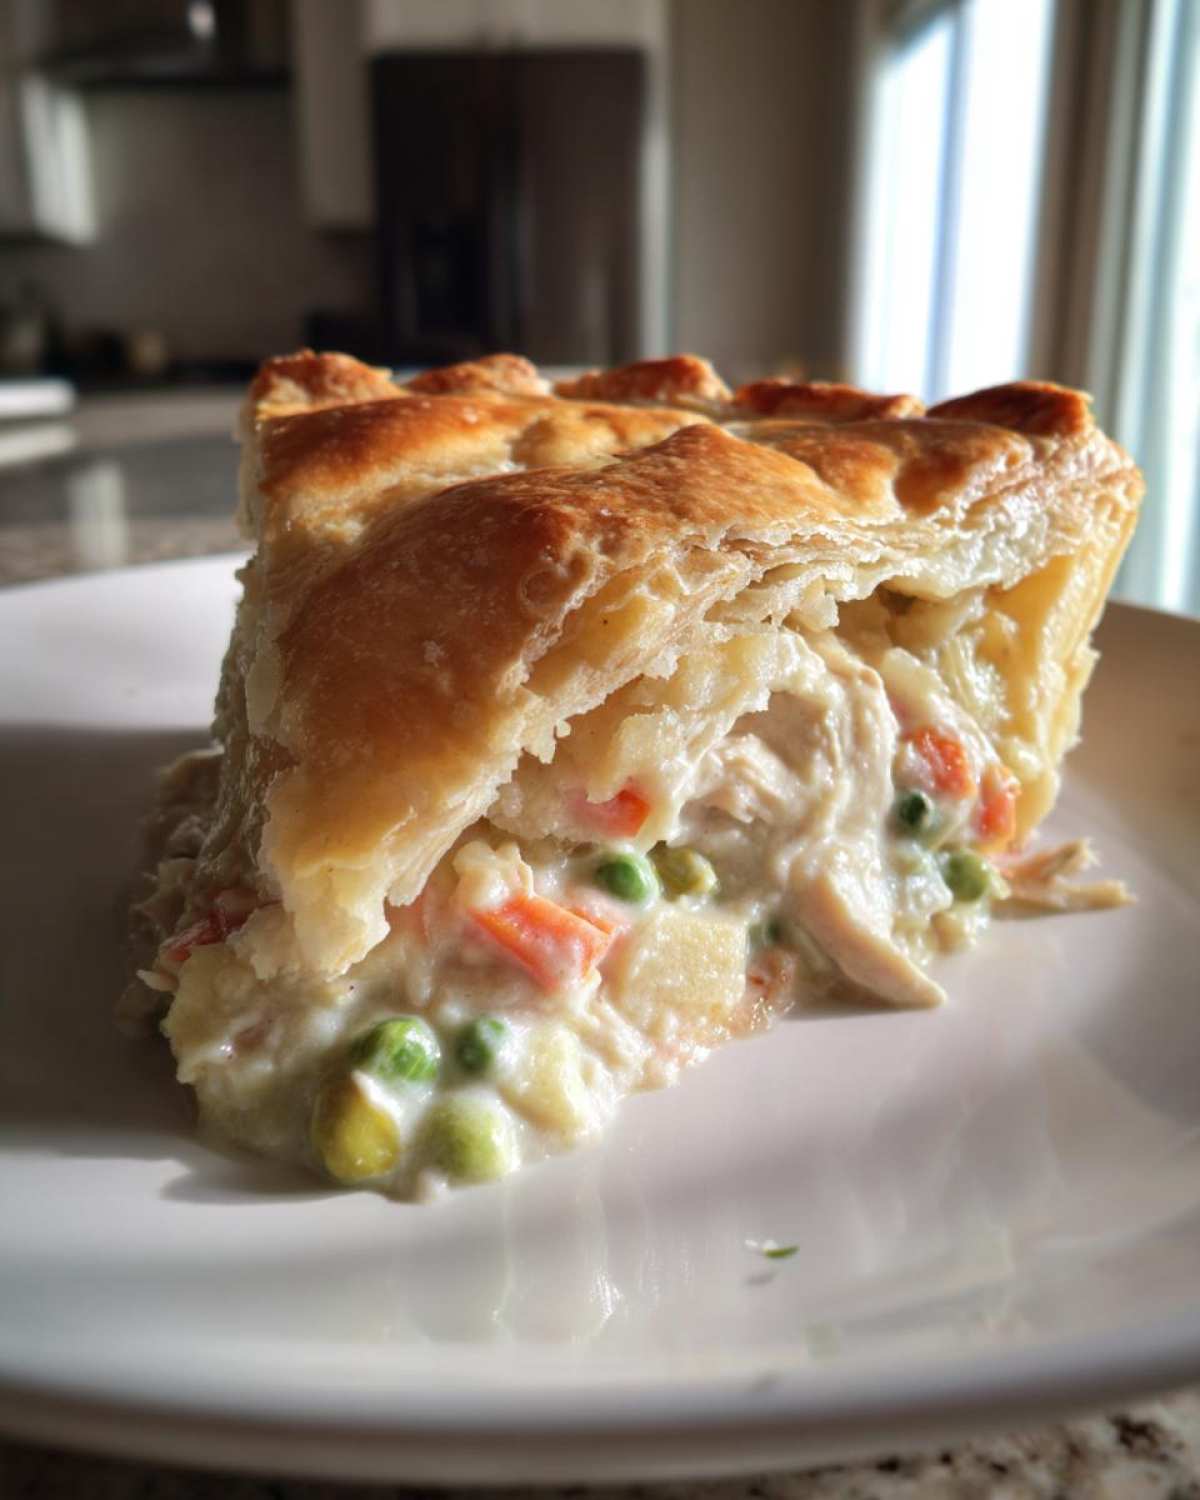
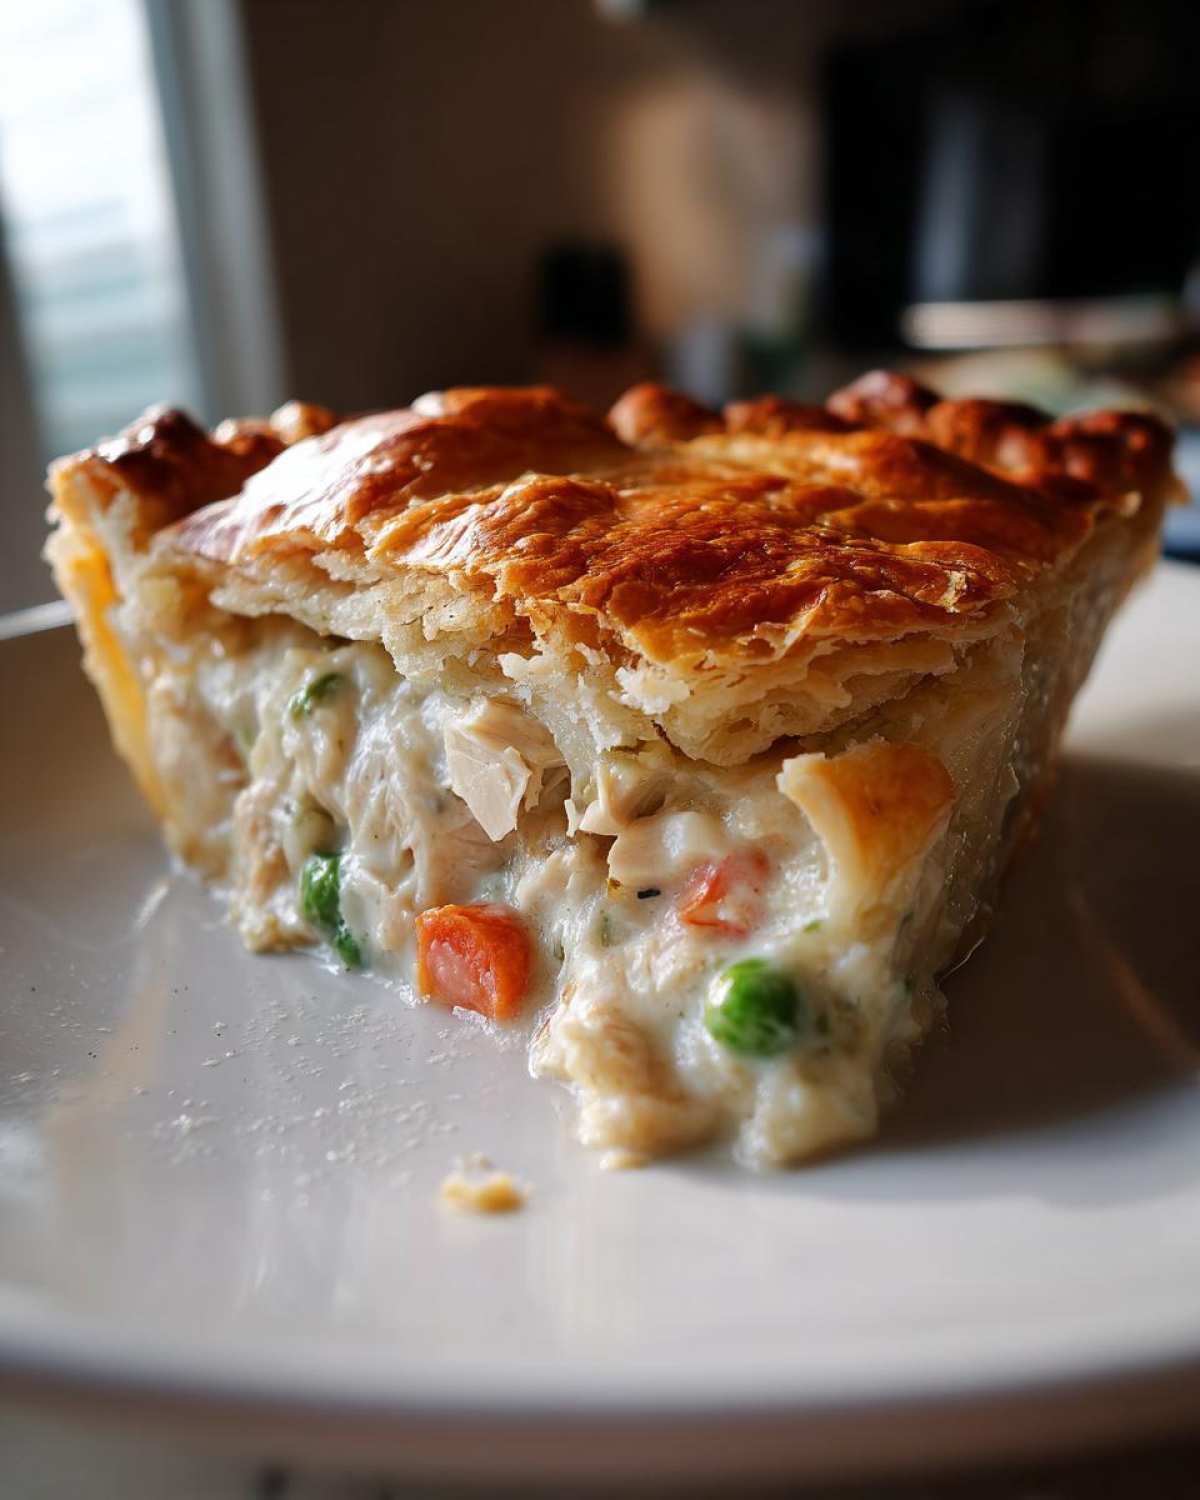
I’ve tried every shortcut out there, from those scary condensed soups to letting store-bought pastry do all the hard work. Honestly? It’s just not the same. What makes this the Best Chicken Pot Pie Recipe is that marriage of textures. You’ve got that deeply savory, thick gravy—so creamy it practically coats your spoon—loaded with tender carrots and chicken.
But the real star is the crust! When you commit to that double layer of flaky, homemade pastry, it totally earns its place as the Ultimate Comfort Meal. The top is golden and crackles perfectly, while the bottom shell manages to hold all that beautiful, bubbly filling without getting completely soggy. It’s the satisfying crunch versus the soft filling that keeps me coming back to this version every single time.
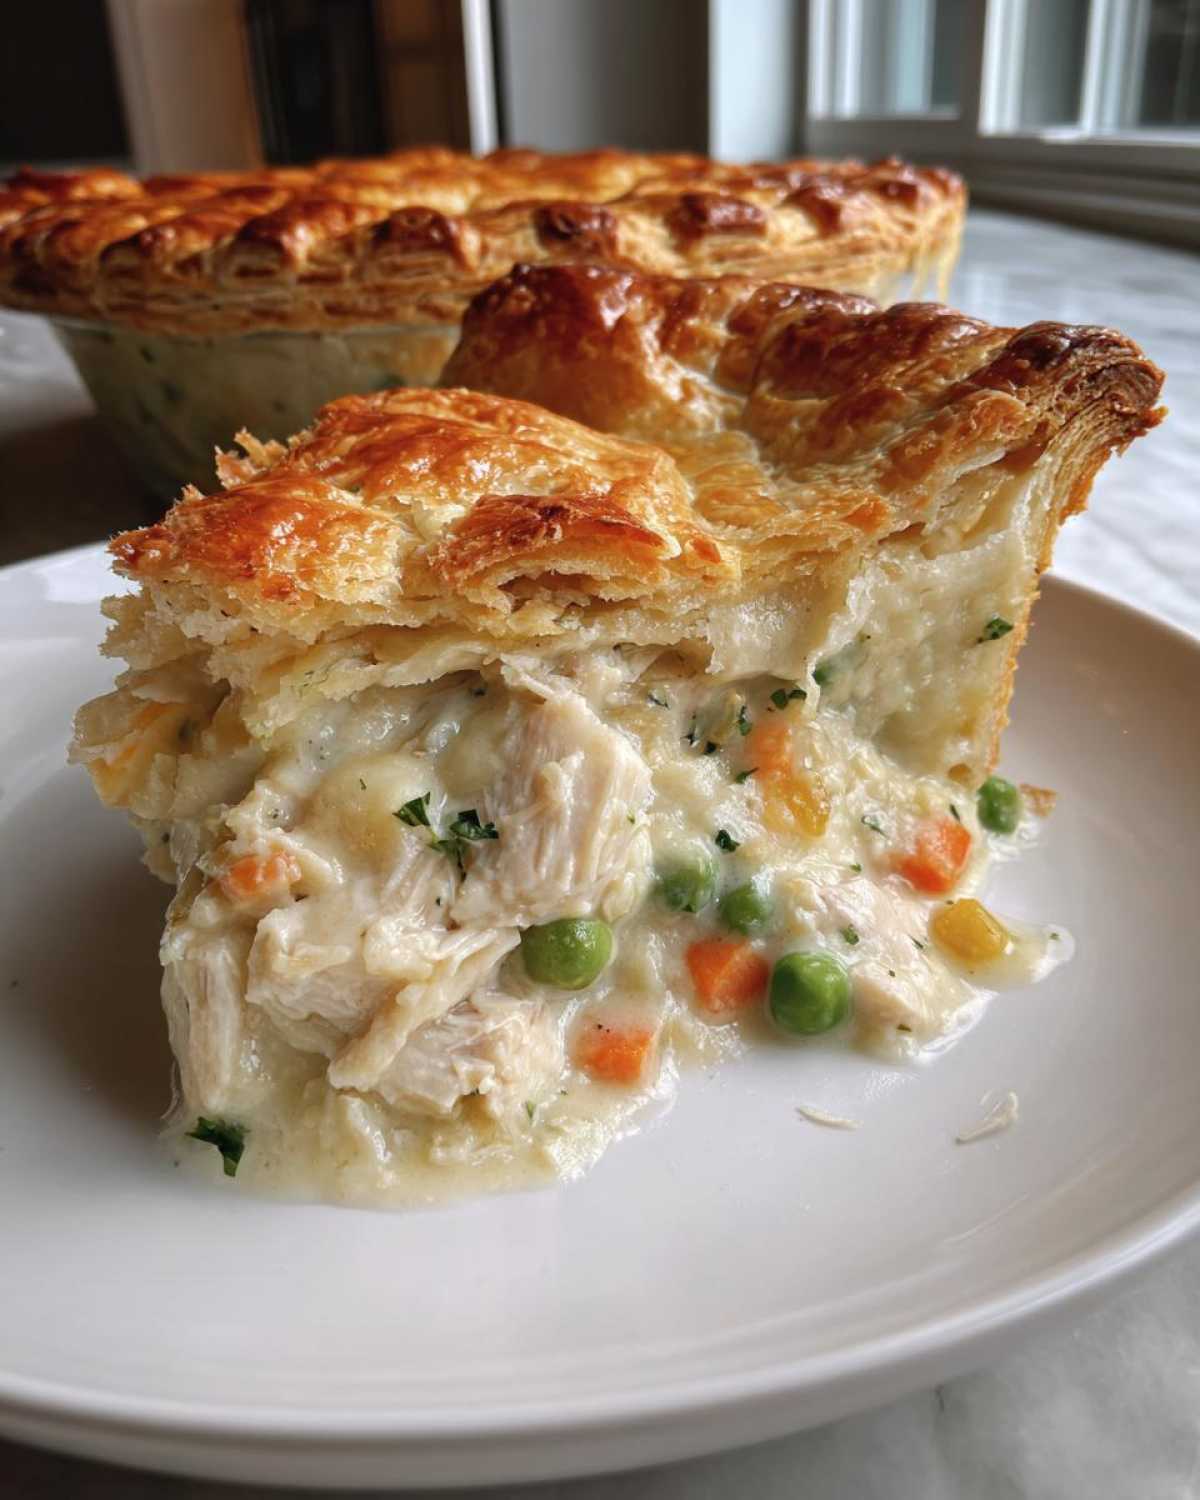
It just tastes like someone cared, you know? If you’re looking for other soul-warming dishes, check out my ideas for a creamy chicken gnocchi when you need dinner fast!
Ingredients for the Classic Chicken Pot Pie Recipe
When gathering your components for this chicken pot pie recipe, remember that quality really shines through, especially with the butter—it’s what makes that crust sing! This list covers everything you need for the full, comforting double-crust experience. Don’t sweat the chicken too much; I always keep some cooked chicken on hand for these moments, although roasting your own is divine!
- 2 pie crusts (one for the bottom, one for the top—make them homemade or store-bought if you’re in a rush, but homemade is heavenly!)
- 2 tablespoons unsalted butter (this is for the roux base, so make it good!)
- 1 medium yellow onion, chopped small
- 2 carrots, peeled and diced
- 2 celery stalks, diced
- 1/2 cup all-purpose flour
- 1 teaspoon salt
- 1/2 teaspoon black pepper
- 1/4 teaspoon dried thyme
- 1 3/4 cups rich chicken broth
- 1/2 cup heavy cream
- 2 cups cooked, shredded chicken (using rotisserie chicken is my little secret for a quick win here)
- 1 cup frozen peas
- 1 cup frozen corn
- 1 large egg, beaten (this is for the beautiful egg wash on top)
How To Make Chicken Pot Pie: Step-by-Step Instructions
Alright, this is where the magic truly happens, and it’s all about building that incredible, thick sauce that coats every vegetable. Don’t rush the beginning steps; that tender base is what separates a good chicken pot pie recipe from an absolutely unforgettable one. It’s a classic process, but doing it right makes all the difference in achieving that perfect, scoopable texture.
We’re starting low and slow, making sure we build flavor right from the saucepan. Once you’ve got your filling ready, assembly is quick, but we need to focus on sealing it up tight before it hits the heat! I’ve got you covered with my foolproof baking guide right here: From Scratch Pot Pie Baking Guide.
Preparing the Base and Creamy Chicken Pot Pie Filling
First things first: Preheat your oven to 425 degrees Fahrenheit and get that bottom crust settled into your 9-inch pie dish. Trim those edges nicely—we want a tidy house for that gorgeous filling!
Next, melt your two tablespoons of butter in a good big saucepan over medium heat. Now we build our flavor foundation! Toss in your onion, carrots, and celery. Let them sweat it out until they start getting soft, which takes about five to seven minutes. Take your time here; you want them tender, not crunchy. Oops! Don’t forget to whisk in the flour, salt, pepper, and thyme right onto those cooked veggies. This is crucial! You have to cook that flour for a full minute while stirring constantly—that’s how you cook out that raw flour taste and create a proper roux. It’ll look like thick paste!
Now, listen closely for the creamiest filling: whisk in that chicken broth slowly, a little splash at a time, until it’s perfectly smooth. Keep whisking until it starts to simmer and thickens up, usually about three minutes. Remove the pan right off the heat before stirring in the heavy cream, your two cups of shredded cooked chicken, and those frozen peas and corn. You take it off the heat *before* adding the cream, because boiling cream can sometimes get weird. Give it one final stir—this is your perfect best pot pie gravy!
Assembling and Baking Your Homemade Chicken Pot Pie
Time to combine! Pour all that warm, lovely filling right into the crust you prepared earlier. Then, carefully drape that second pie crust over the top like a cozy blanket. Now, get serious about sealing it—crimp those edges together firmly, making sure the top and bottom crusts are fully stuck. If you skip this, your filling will escape!
You absolutely must cut several vents in the top layer so the steam has somewhere to go. If steam has nowhere to escape, it’ll just push the crust up or tear it open randomly. Brush that top crust with the beaten egg wash—it gives you that gorgeous, deep golden sheen we all want to see. For best results and to fight that dreaded soggy bottom, try placing the pie dish on the lowest rack of your oven for the first 20 minutes of baking.
Bake it hot for 35 to 45 minutes, or until that crust is totally golden brown and you can see the filling bubbling up hot through those steam slits. Once it’s out, let it rest for a good 15 minutes on a cooling rack. Seriously, don’t slice right away! That rest period lets the filling firm up so you get those beautiful, messy slices you see on my photos—check out how I get my homemade chicken pot pie looking perfect every time!
Tips for the Perfect Flaky Pie Crust Recipe
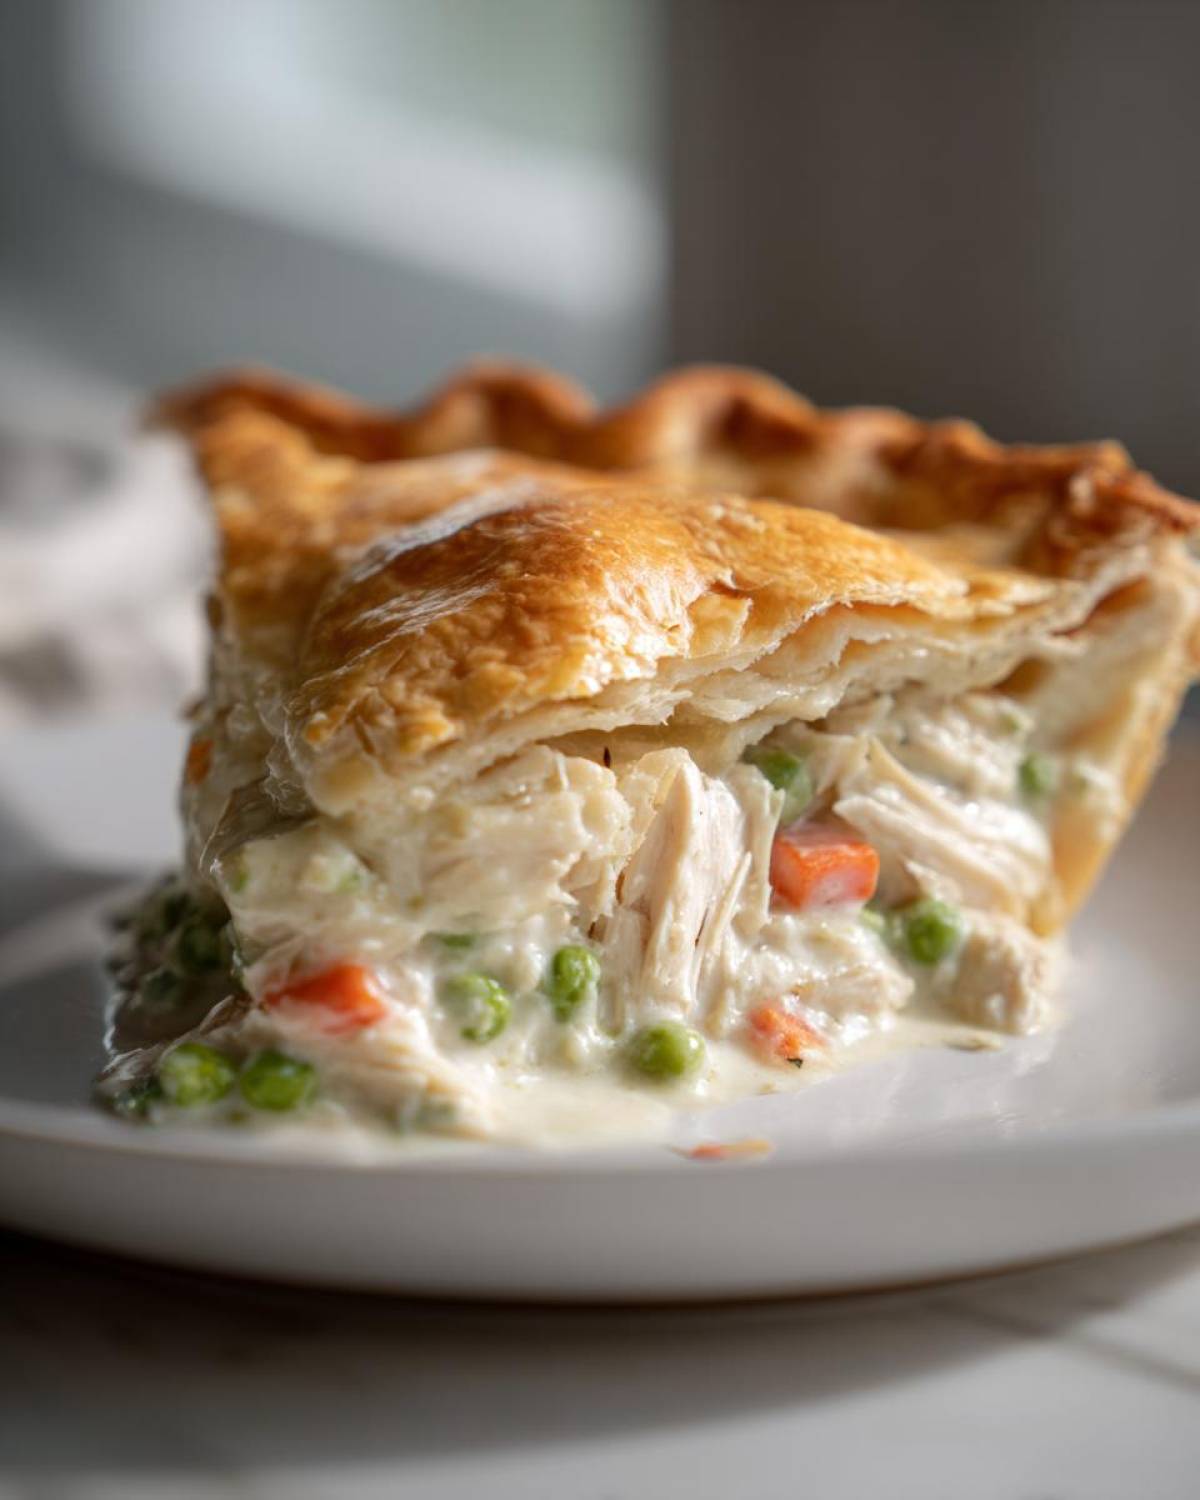
I know, I know, making two crusts from scratch for this chicken pot pie recipe seems like overkill, but trust me, this is where you win big! The secret to that incredible, shattering texture isn’t just the ingredients—it’s how you treat the dough. If you want that picture-perfect flaky pie crust recipe, remember two things: keep everything COLD and work as little as possible. If the butter melts into the flour before it hits the oven, you end up with a tough, cracker-like shell, and nobody wants that disaster!
When rolling out the dough, use light pressure; you’re just trying to connect the pieces, not mash them. That’s why chilling the dough between rolls is non-negotiable. If you notice it getting warm or sticky while you’re trimming or crimping, put the whole pie *back* in the fridge for 15 minutes! It feels tedious, but this patience pays off enormously when you pull that golden beauty out. For more on handling tricky doughs, check out my dedicated flaky pie crust guide!
Variations: Quick Chicken Dinner and Biscuit Topping Options
Look, even though I preach about the perfection of the scratch double crust, I am a mom, and sometimes life moves faster than my whisk! I totally get it when you need a Quick Chicken Dinner on the table mid-week. So, let’s talk about the cheats that still deliver amazing comfort.
If you’re skipping the homemade pastry, you have two fantastic routes. Route one is using store-bought puff pastry just for the top crust instead of the full double crust. Puff pastry bakes up incredibly light and flaky, and it saves you a mountain of time. Just lay it right over the filling, brush with that egg wash, and you’re good to go! You can see my thoughts on making things easier but still delicious over at my piece about using crescent rolls in a bake—it’s that same easy-bake philosophy.
Route two takes us completely away from pie crust and into the world of the ultimate casserole: the Chicken Pot Pie Casserole. Instead of a rolled crust, you top the filling with fluffy biscuits! These absorb some of the gravy and bake up soft and golden brown on top. It’s less traditional, maybe, but I promise it’s so satisfying. If you go this route, you’re looking for a great Pot Pie with Biscuit Topping experience.
And obviously, the biggest time-saver in this chicken pot pie recipe? The chicken! Don’t spend time poaching chicken breasts when you can shred a store-bought rotisserie bird—it’s already seasoned and perfectly tender. Just toss 3 cups of that shredded meat right into the filling when you add the frozen veg. Instant dinner hero!
Storage and Reheating Instructions for Your Chicken Pot Pie Recipe
Now that you’ve managed to create this masterpiece—the creamiest filling and flakiest crust—you definitely don’t want to waste a single bite! Storing and reheating this classic take on the chicken pot pie recipe is super easy, but there’s a right way and a wrong way if you want that crust to stay crisp.
Let the whole pie cool down completely on the rack first. Don’t cover it while it’s hot, or you’ll steam that gorgeous top crust! Once it’s cool, you can cover it tightly with plastic wrap or foil and stick it in the fridge. It stays perfectly wonderful for about three to four days. If you’re making soup out of the leftovers, I have a wonderful slow cooker chicken pot pie soup version you might like!
If you’re planning for a future cozy night, this freezes like a dream. My favorite method is freezing it *before* it goes into the oven. Assemble the whole thing—crust, filling, the works—then wrap that cold pie tightly in plastic wrap and then aluminum foil. It freezes solid for about three months. You just need to thaw it overnight in the fridge before baking it according to the regular directions, adding maybe 10 extra minutes to the bake time since it starts cold.
When it comes to reheating leftovers, please, I beg you, skip the microwave! The microwave turns that perfect crust rubbery and sad. The best way to bring it back to life is to pop a slice (or the whole leftover pie) into a 350-degree oven. Bake it until the filling is bubbling again and the crust edges look freshly browned—usually about 20 minutes for a slice. That gentle, dry heat re-crisps everything beautifully!
Frequently Asked Questions About This Chicken Pot Pie Recipe
I get so many wonderful messages once people bake this! It seems like everyone has a couple of questions before they dive into making the perfect chicken pot pie recipe. I tried to boil down the most common ones I see below. Don’t worry if you need to tweak things—that’s what cooking is all about!
Can I use puff pastry instead of a double crust for this chicken pot pie recipe?
Oh, absolutely! If you want that super light, airy top layer, swapping the second pastry crust for puff pastry is a fantastic idea. The finished product will look different—more golden and puffy—but it tastes great. Since puff pastry is thinner and relies on steam pockets, you might find it cooks just a hair faster than the traditional dough. Keep an eye on it around the 30-minute mark! You can read all about that specific swap on my Puff Pastry Chicken Pot Pie page.
How do I ensure my filling is thick enough for a perfect chicken pot pie recipe?
This is the key to that amazing, hearty texture, right? It all comes down to the roux you make with the butter and flour *before* you add any liquid. You have to cook that paste for at least a full minute before whisking in the broth. Then, once the broth is in, you need to bring that sauce to a real simmer and let it bubble gently for a couple of minutes until it coats the back of your spoon thickly. If you pull it off the heat too soon, it will seem watery, but it will thin out even more once you stir in the cold cream and frozen veggies. If you’re looking for extra tips on making that sauce gorgeous, check out the guide to creamy pot pie filling!
What kind of chicken works best for this classic recipe?
Honestly, for a standard weeknight bake, I default to a store-bought rotisserie chicken because it’s already cooked and seasoned beautifully! You’ll need about two cups, shredded. If you have time to poach chicken breasts or use leftover Sunday roast chicken, those work wonders too. The most important thing isn’t what kind of chicken it is, but that it’s already cooked through before it goes into the filling, since the bake time is mostly just heating the filling and browning the crust. For the best approach to using that pre-cooked bird, check out my guide on Pot Pie Using Rotisserie Chicken.
Can I make the filling ahead of time?
Yes, you totally can! The filling is fantastic to make a day ahead. Once you complete steps 1 through 5 (making the sauce, adding the chicken and veggies, and removing it from the heat), just let it cool completely, cover it, and pop it right in the fridge. When you’re ready to bake the next day, just pour the chilled mixture into your bottom crust, top it, egg wash it, and bake! You might need to add an extra five minutes to your baking time since the filling starts out cold.
Estimated Nutritional Data for This Chicken Pot Pie Recipe
When you’re digging into a hearty slice of this ultimate comfort food dinner, sometimes you want a general idea of what you’re eating, even if it’s pure indulgence! Keep in mind that since this is a from-scratch recipe, the exact nutritional values can shift slightly depending on the brands of butter or cream you use, and exactly how much crust ends up on your plate versus how much filling you get.
These numbers are calculated based on splitting the recipe into 8 generous servings using the ingredients listed above. This is a rich meal, so it packs a bit of everything nourishing needed for a satisfying dinner! As always with my recipes, consider these approximate values.
- Serving Size: 1 slice
- Calories: 450
- Fat: 28g
- Saturated Fat: 12g
- Carbohydrates: 28g
- Sugar: 4g
- Protein: 22g
- Sodium: 650mg
See? That protein count is fantastic to power you through a chilly evening. Just remember, this is meant to be a satisfying, complete meal, so pair it with a simple side salad if you’re trying to keep closer tabs on sodium or fat intake!
Share Your Family Favorite Chicken Recipe Experience
And there you have it! That’s how I bring the ultimate comfort food to my table using this classic chicken pot pie recipe. I am so proud of how this turned out, and I sincerely hope that the smell of that bubbling gravy and the sound of that crisp crust cracking has already filled your house!
This dish has quickly become a staple in my home, and I just love watching my family settle in for a big, cozy slice. Now that you’ve tried it, I really want to hear what you thought! Did the crust turn out flaky? Was the filling everything you dreamed of? Don’t keep those delicious results to yourself!
Please hop down to the comments below and let me know how your bake went. And if you took a picture of your masterpiece—maybe one where the steam is perfectly captured coming off the top—please share it with me! I love seeing how this becomes your own personal Family Favorite Chicken Recipe. Happy baking, everyone!
PrintClassic Chicken Pot Pie with Flaky Double Crust

A recipe for a traditional, creamy chicken pot pie featuring a homemade, flaky double crust. This recipe focuses on rich flavor and texture.
- Prep Time: 25 min
- Cook Time: 45 min
- Total Time: 70 min
- Yield: 8 servings
- Category: Dinner
- Method: Baking
- Cuisine: American
- Diet: Low Lactose
Ingredients
- 2 pie crusts (one for bottom, one for top)
- 2 tablespoons unsalted butter
- 1 medium yellow onion, chopped
- 2 carrots, peeled and diced
- 2 celery stalks, diced
- 1/2 cup all-purpose flour
- 1 teaspoon salt
- 1/2 teaspoon black pepper
- 1/4 teaspoon dried thyme
- 1 3/4 cups chicken broth
- 1/2 cup heavy cream
- 2 cups cooked, shredded chicken (rotisserie chicken works well)
- 1 cup frozen peas
- 1 cup frozen corn
- 1 large egg, beaten (for egg wash)
Instructions
- Preheat your oven to 425 degrees Fahrenheit. Place one pie crust into a 9-inch pie dish. Trim the edges.
- Melt the butter in a large saucepan over medium heat. Add the onion, carrots, and celery. Cook until vegetables soften, about 5 to 7 minutes.
- Whisk in the flour, salt, pepper, and thyme. Cook for 1 minute, stirring constantly.
- Gradually whisk in the chicken broth until smooth. Bring the mixture to a simmer, stirring until the sauce thickens, about 3 minutes.
- Stir in the heavy cream, cooked chicken, peas, and corn. Remove the filling from the heat.
- Pour the filling into the prepared bottom pie crust.
- Place the second pie crust over the filling. Crimp the edges to seal the top and bottom crusts together. Cut several slits in the top crust to allow steam to escape.
- Brush the top crust lightly with the beaten egg wash.
- Bake for 35 to 45 minutes, or until the crust is golden brown and the filling is bubbling hot.
- Let the pie cool on a wire rack for at least 15 minutes before slicing and serving.
Notes
- For a quicker version, substitute the homemade crust with one package of store-bought puff pastry for the top crust and use 3 cups of store-bought rotisserie chicken.
- To prevent a soggy bottom crust, place the pie dish on the lowest rack in the oven for the first 20 minutes of baking.
- If the crust starts browning too quickly, loosely cover the edges with aluminum foil during the last 15 minutes of baking.
Nutrition
- Serving Size: 1 slice
- Calories: 450
- Sugar: 4
- Sodium: 650
- Fat: 28
- Saturated Fat: 12
- Unsaturated Fat: 10
- Trans Fat: 0.5
- Carbohydrates: 28
- Fiber: 3
- Protein: 22
- Cholesterol: 85