

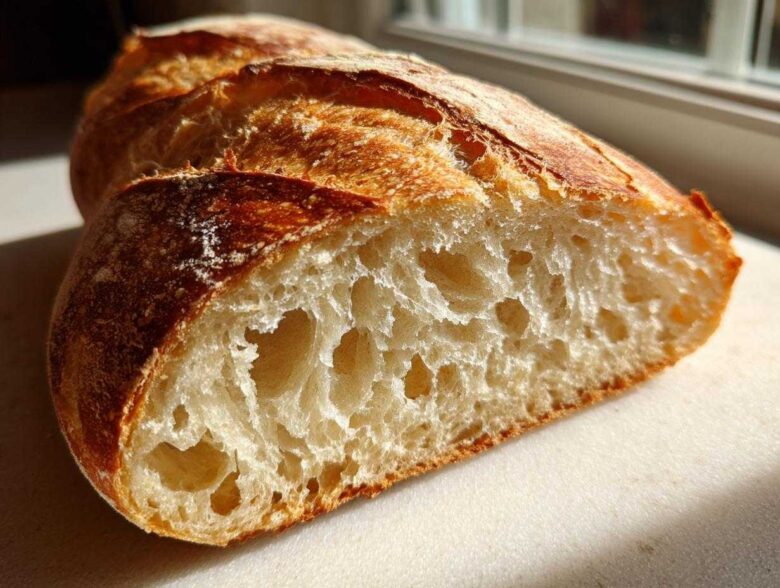
Oh, friends, there is truly nothing in this world that beats the smell of fresh bread baking, is there? Richard can smell it from the garden! I remember wandering the side streets of Lyon years ago, searching for the perfect loaf, and I tried so hard to capture that memory right here in our kitchen. Well, I think I finally nailed it with this Easy Homemade Soft and Crusty French Bread! This recipe walks you through getting that amazing crusty exterior while keeping the interior light and fluffy—yes, you can have both! You won’t believe how simple it is to create authentic french bread that’s ready in under two hours. It’s become my go-to for feeling like I’ve been transported right back to that little Parisian boulangerie.
Why This Easy French Bread Recipe is Your New Favorite
When I first started baking bread after coming home for good, I thought I had to choose: crusty or soft. Never both! But Richard kept reminding me about that incredible loaf we had near Normandy—it had the perfect shatter but melted in your mouth. This recipe finally delivers that dual personality! It ticks every box we were looking for when creating the best homemade bread.
- It truly gives you that desired soft, fluffy crumb inside.
- It produces a deeply golden, crackly crust that sings when you slice it.
- The process is surprisingly straightforward for beginners.
Achieving Bakery Style Bread Texture
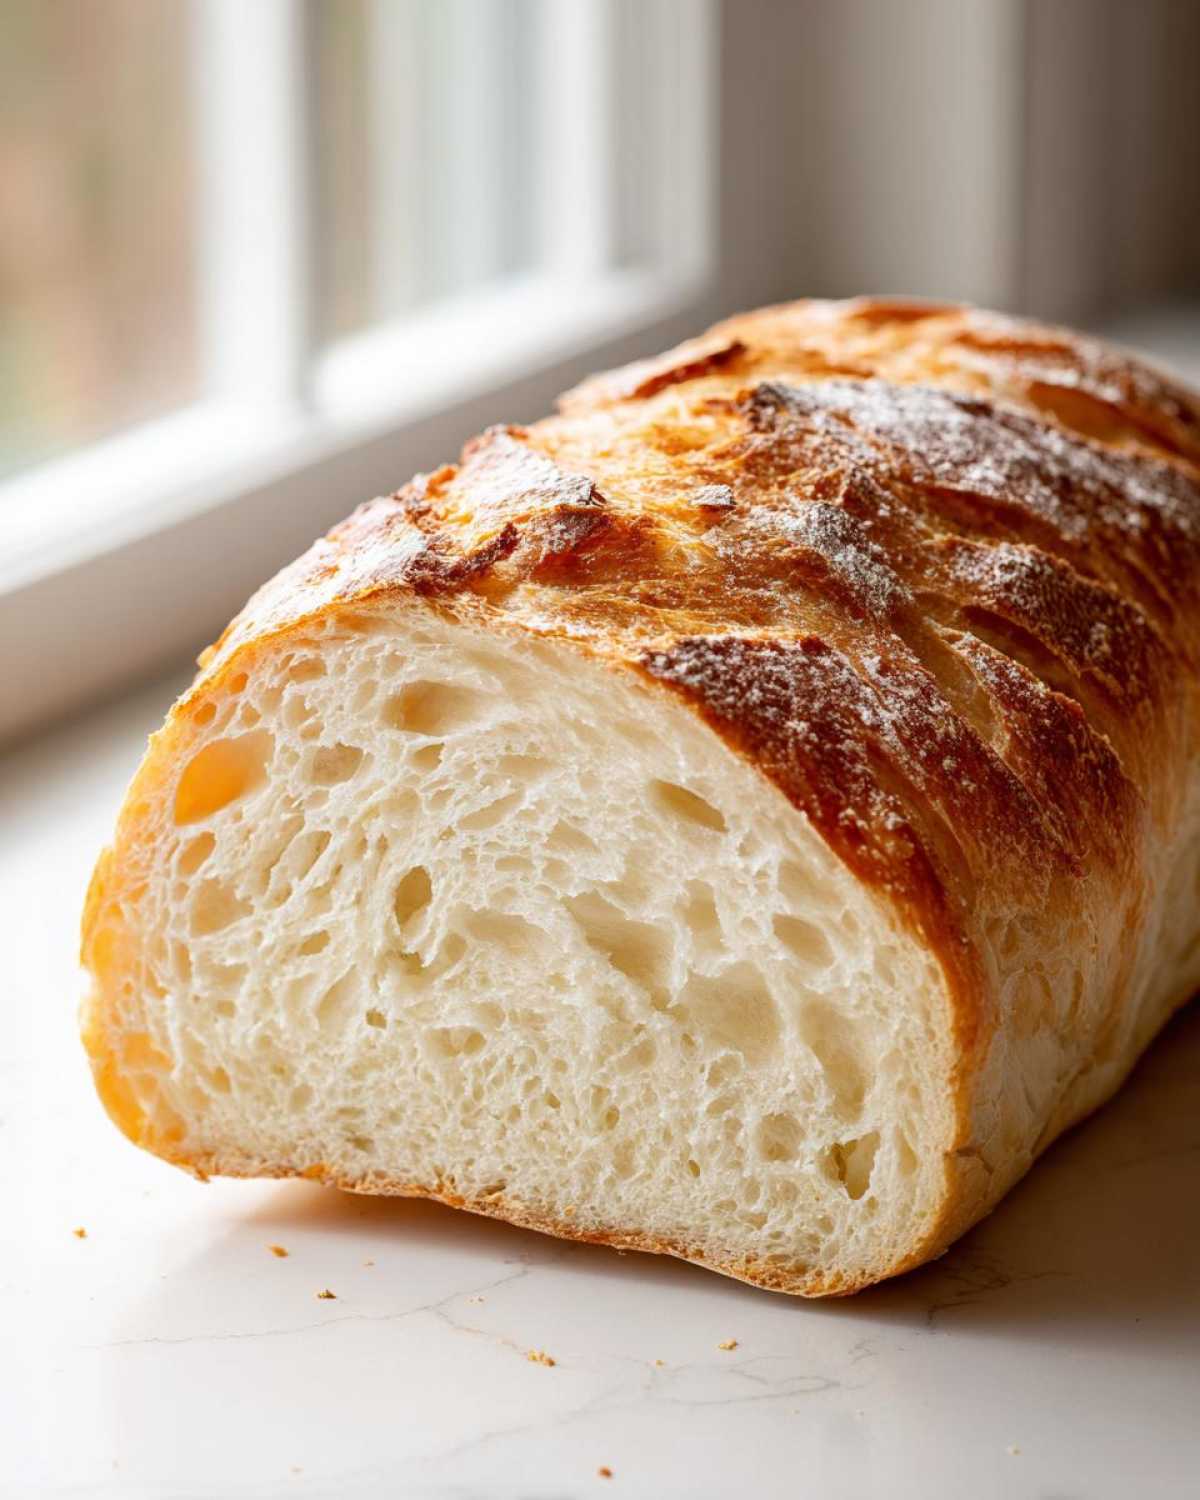
The secret to that authentic bakery style bread crunch isn’t just the oven temperature, though that certainly helps! It’s all about steam. We use a little trick involving a pan of hot water on the bottom rack while baking; that burst of moisture keeps the surface pliable just long enough for the crust to set beautifully hard, not tough. Trust me, once you try this steam method linked to that perfect crust, you’ll never skip it!
Quick French Bread Recipe Timeline
I know, I promised you amazing results, but baking bread can sometimes take all day. That’s why I love this version; it’s truly a Quick French Bread Recipe alternative. While the total time is about two hours, your actual hands-on work is maybe 20 minutes total! We keep the rises warm and efficient, meaning you get that wonderful aroma filling your kitchen much faster than those old, slow, overnight doughs. It’s perfect for a weekend project or even a dedicated weeknight feast!
Ingredients for Your Homemade French Bread Recipe
Baking is about precision, especially when dealing with yeast, but that doesn’t mean it has to feel fussy! Richard always reminds me that half the success is making sure your starting materials are ready to go. This recipe makes two glorious loaves, which is just the right amount for a big family dinner or for making fantastic leftover sandwiches the next day.
Here’s what you’ll need to gather:
- 3 cups All-Purpose Flour
- 1 teaspoon Salt
- 1 packet (2 1/4 teaspoons) Active Dry Yeast
- 1 1/4 cups Warm Water (It has to be the right temperature, darling!)
- 1 tablespoon Sugar
- 1 large Egg White, lightly beaten (We use this for that lovely golden sheen on top)
Yeast Activation Requirements
This is a non-negotiable step, folks! If your yeast doesn’t wake up, nothing else matters. You must use water that feels pleasantly warm, not hot—we’re looking for a temperature between 105–115°F. If it’s too cool, the yeast just sleeps. If it’s too hot, well, you’ve just made expensive hot water!
Mix that warm water with the sugar and yeast. Don’t stir it too vigorously; just a gentle swirl. Now, set it aside for about 5 to 10 minutes. When you come back, if it’s looking foamy and bubbly on top, you’re golden! It means those little organisms are alive and ready to help your dough rise beautifully. If it just sits there sadly, toss it and start over with fresh yeast; it’s never worth skimping on the yeast activation!
Step-by-Step Instructions for Soft French Bread at Home
Now that we have our happy, bubbly yeast mixture, we can put everything together! Baking this french bread is all about going through the stages calmly. Don’t rush the dough; it really does know when you’re hurrying it, I swear! We’ll start bringing the dry stuff in and then let the dough do most of the heavy lifting for us during the rising times.
First, toss your flour and salt right into the bowl with the yeast mixture. Use a sturdy wooden spoon to bring it all together until you have what looks like a shaggy, messy ball of dough. Don’t panic if it looks sticky right now.
Kneading and First Rise for Fluffy Loaf Recipe
Turn that shaggy mess out onto a surface that’s been lightly dusted with flour. Now comes the work, but it’s good work! Knead this dough for about 5 to 7 minutes. You are looking for a real change here—the stickiness should disappear, and the dough should feel wonderfully smooth and elastic under your hands, like little satin pillowcases. That’s the structure building for your Fluffy Loaf Recipe!
Once it’s smooth, lightly oil a separate, clean bowl. Tuck your dough ball inside, making sure it gets a little coating of oil so it doesn’t dry out! Cover it up nice and tight with plastic wrap or a clean tea towel. Now, find the warmest, draft-free spot in your kitchen, and leave it alone for 60 to 90 minutes. This first rise is where all the flavor develops, so be patient!
Shaping and Baking Your French Bread
When the dough has doubled, give it a gentle punch down—it’s oddly satisfying! Divide that big pillow evenly into two pieces. Now, gently roll and stretch each piece into a long loaf shape, aiming for about 12 inches long. Place these shaped loaves onto a baking sheet lined with parchment paper—this detail makes transferring them so much easier later on.
Cover them again and let them have their second rest, this time just for 30 minutes. Crucially, use this time to get your oven seriously hot: 400°F (200°C). Preheat that oven and remember to get that shallow pan of water on the bottom rack! Right before they go in, brush the tops lightly with that beaten egg white for color, and quickly slice each loaf about three times diagonally using a very sharp knife. Then, bake them for 25 to 30 minutes until that crust is gorgeous and golden. You can find some other great baking adventures here if you want more practice before the next batch!
Tips for Baking Homemade Bread Success
Baking bread is an art, but it’s one that is completely accessible, especially when you’re learning the ropes of beginner bread baking. Richard often says that if you follow the timing, the bread will forgive your little mistakes. When I first started making this recipe, I had a few mishaps, mostly around getting that crust right, but once I learned these little secrets, the results were consistently wonderful. These little pointers really elevate your loaves from just “bread” to something truly special.
Creating Steam for the Best Crusty Exterior Bread
Remember I mentioned the steam trick? It sounds almost theatrical, but it’s how the professionals do it! Why do we need steam for that perfect Crusty Exterior Bread? Well, when the dough first hits that hot oven, it needs a moment to fully expand, or ‘spring,’ before the crust sets. Steam keeps the surface of the dough moist during those crucial first few minutes. This allows the loaf to puff up its maximum amount before drying out into that beautiful, shatter-prone shell. It stops the crust from setting too early and becoming dense or dull-looking. Just put a metal broiler pan on the lowest rack while the oven preheats, and when you slide the bread in, quickly pour a cup of boiling water into that hot pan beneath it. Be careful, it steams up instantly!
Adjusting the Wash for Soft French Bread at Home
This is where you get to customize your loaf! The egg white wash specified in the instructions is fantastic because it gives you a beautiful, glossy sheen paired with a decidedly crunchy crust. It’s my preferred way, especially if I’m serving the bread immediately. You can find some other great baking homemade bread tips over on my dedicated advice page!
However, if your heart is set on the recipe for Soft French Bread at Home, or perhaps you really dislike egg white, you have a wonderful alternative. Skip the egg white wash completely! Instead, just before the loaves go into the oven, give the tops a good, quick misting with plain water from a spray bottle. This prevents the crust from fully hardening the same way the egg wash does. It results in a softer, chewier exterior, which is lovely if you know you’ll be making thick sandwiches out of the loaf the next day.
Serving Suggestions for Dinner Side Bread
Oh, the joy of pulling a hot loaf of this bread out of the oven! It can be tempting to just tear chunks off while standing over the cooling rack, I know! But honestly, this bread is so versatile; it moves way beyond just being a delicious starter for dinner. It elevates every single thing it touches.
If we’re having a big, saucy meal—maybe a rich beef stew or even something lighter like my famous lemon garlic shrimp—you absolutely need this on hand. It’s the perfect Dinner Side Bread for soaking up every last bit of sauce on the plate. We always call that wiping our plate clean with bread “fare la scarpetta” in Italian; it’s a sign of respect for what you’re eating!
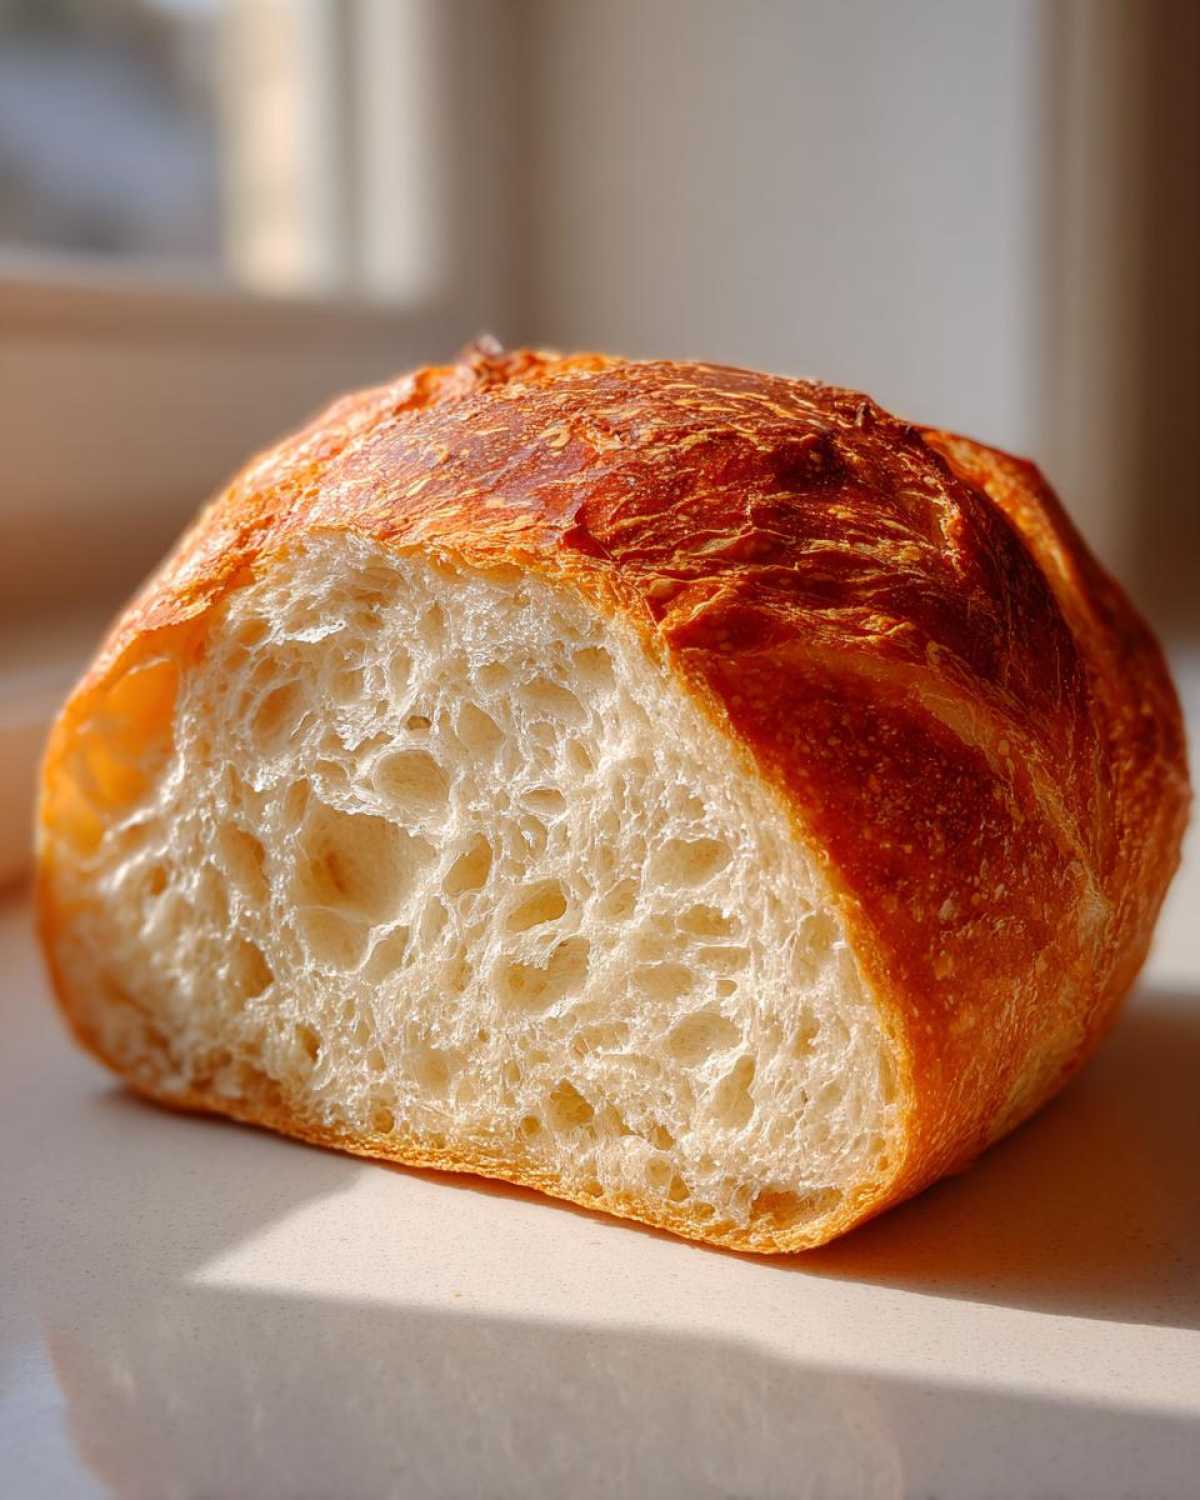
But don’t stop there! Since this recipe makes two beautiful loaves, we usually have one for the table and one dedicated to leftovers. This bread makes the most incredible sandwiches. Forget flimsy white bread; these loaves have enough structure to handle hearty fillings. Pile it high with cold cuts, fresh tomato, and maybe some sharp provolone, and you instantly have gourmet Bread for Sandwiches.
I also love slicing it thin, lightly toasting it, and topping it with garlic butter and cheese for the best homemade garlic bread imaginable. Or, if you’re looking for a lighter pairing, this bread is divine alongside a big bowl of soup. For a recipe that pairs perfectly with hearty soups and pasta dishes, check out Richard’s Lemon Garlic Shrimp Pasta recipe; the bread cuts right through that brightness beautifully!
Storage and Reheating Instructions for Your French Bread
We work so hard to get that perfect crust and tender crumb, so we certainly don’t want the bread going stale overnight! Luckily, homemade yeast breads tend to keep their flavor longer than store-bought versions, but you do need to be careful about storage.
Once the loaf is completely cool—and I mean totally cool, not even a whisper of warmth remaining—you should wrap it. I just use tin foil or a good reusable bag; plastic wrap can make the crust go soft too quickly. Stored on the counter, this french bread is usually at its best for about two days.
But let’s be honest, day three is when it starts looking a little sad and chewy, right? Don’t throw it out! This is where the magic of reheating comes in, and it’s my favorite part because we get to bring that glorious crust back to life!
If you want that crunch back—that sound that makes you feel like you’re eating it right out of the oven—take the loaf (or the section you plan to eat) and wrap it loosely in foil. Pop it into a 350°F oven for about 8 to 10 minutes. The foil protects the soft interior while the heat warms the bread all the way through, and BAM! That crust is back to being wonderfully crisp. It’s like time travel for carbs, honestly!
If the bread is already a day old and you just want soft slices for toast or dipping into soup, a quick blast in the toaster works just fine. But for true French loaf glory, foil and oven heat is the only way to go!
Frequently Asked Questions About Making French Bread
I always get questions when people successfully bake this for the first time—it’s exciting! Baking is often just a matter of understanding why we do what we do, right? Richard and I gathered some of the most common things people ask me when diving into making french bread from scratch. Hopefully, these quick answers help clear everything up so you can get baking!
Can I make this Easy French Bread faster than the recipe states?
Oh, I wish you could! I know those pins touting a One Hour Bread Recipe are tempting, especially when life is busy. But honestly, dear baker, the secret ingredient here is time, even in this relatively quick version. Those rise times—that full 60 to 90 minutes for the first rise—aren’t waiting around time; they are flavor-building time!
If you try to rush the yeast by putting the dough somewhere too hot, you might just kill the yeast, and then you’re starting over. If you rush the rise, the structure won’t develop properly, and you’ll end up with dense, yeasty-tasting bread instead of that beautiful, complex flavor. Stick to the timing; it’s worth the extra twenty minutes of patience!
What is the secret to a Tender Crumb Bread?
Every time I hear from someone who achieved a perfect Tender Crumb Bread, I get so happy! It actually comes down to two main things we talked about, and they both involve building structure without overworking the dough itself.
The first is the kneading. You must knead until it’s truly smooth and elastic—that means you’ve properly developed the gluten scaffolding that holds the air. The second, and perhaps more important, is the rising. Those air pockets created by hungry yeast need time to settle in and expand evenly throughout the dough during their long rest. If you don’t let the yeast do its job fully, you won’t get that characteristic light, airy, tender feel inside the loaf.
Is this recipe suitable for a Beginner Bread Baking?
Absolutely, yes! That’s precisely why I designed this version to be so gentle. This is a beautiful introduction to making a Simple Yeast Bread. We aren’t dealing with fancy pre-ferments or overly complicated folding routines here. We mix, we knead until it feels right, we wait, and then we bake!
The biggest hurdle for beginners is usually yeast activation, which we covered step-by-step, and not over-kneading once the gluten develops. If you can follow the ingredient list and watch for the dough to get smooth, you can master this! If you have any further questions at all while you’re in the thick of it, please don’t hesitate to reach out through my contact page; Richard and I love hearing from new bakers!
Nutritional Estimate for Homemade French Bread Recipe
Richard always says that tracking nutrients shouldn’t take the joy out of eating, but sometimes it’s helpful to have a general idea. Please remember that these numbers are an estimate based on the standard ingredients called for in this Homemade French Bread Recipe. If you swap white flour for whole wheat, or use salted vs. unsalted butter, those values will change, of course!
- Serving Size: 1 slice
- Calories: 150
- Sugar: 1
- Sodium: 250
- Fat: 1
- Saturated Fat: 0
- Unsaturated Fat: 1
- Trans Fat: 0
- Carbohydrates: 31
- Fiber: 1
- Protein: 5
- Cholesterol: 0
This is just a snapshot, of course! For my full thoughts on simple, balanced eating that celebrates flavor over fuss, you can read more on my philosophy on the site.
Share Your Homemade French Bread Creations
Seeing your loaves makes my day! There is no greater compliment than knowing a recipe we developed from a cherished memory has traveled into your kitchen and brought a little joy to your table. Once you’ve tried this method for the Best Homemade Bread, please let me know how it went!
Did you achieve that perfect shatter in the crust? Did your family dive in before the bread had a chance to cool completely? Leave a rating for the recipe below and share your thoughts in the comments. Richard and I adore reading about your adventures!
PrintEasy Homemade French Bread for a Soft and Crusty Loaf
You can make truly soft, fluffy French bread with a satisfyingly crusty exterior right in your kitchen. This simple, beginner-friendly recipe delivers bakery-style results perfect for dinner or sandwiches.
- Prep Time: 20 min
- Cook Time: 30 min
- Total Time: 140 min
- Yield: 2 loaves
- Category: Baking
- Method: Baking
- Cuisine: French
- Diet: Vegetarian
Ingredients
- 3 cups All-Purpose Flour
- 1 teaspoon Salt
- 1 packet (2 1/4 teaspoons) Active Dry Yeast
- 1 1/4 cups Warm Water (about 105-115°F)
- 1 tablespoon Sugar
- 1 large Egg White, lightly beaten (for brushing)
Instructions
- In a large bowl, mix the warm water, sugar, and yeast. Let this stand for 5 to 10 minutes until foamy. This shows the yeast is active.
- Add the flour and salt to the yeast mixture. Mix with a wooden spoon until a shaggy dough forms.
- Turn the dough out onto a lightly floured surface. Knead for 5 to 7 minutes until the dough is smooth and elastic. You should feel the texture change from sticky to soft.
- Lightly oil a clean bowl. Place the dough in the bowl, turning it once to coat. Cover the bowl with plastic wrap or a clean kitchen towel.
- Let the dough rise in a warm place for 60 to 90 minutes, or until it has doubled in size. This first rise develops the flavor.
- Gently punch down the dough. Divide it into two equal pieces.
- Shape each piece into a loaf about 12 inches long. Place the shaped loaves onto a baking sheet lined with parchment paper.
- Cover the loaves loosely and let them rest for a second rise for 30 minutes. Preheat your oven to 400°F (200°C) during this time.
- Just before baking, brush the tops of the loaves lightly with the beaten egg white. Use a sharp knife to slash the tops of the loaves diagonally three times.
- Bake for 25 to 30 minutes, or until the crust is golden brown and sounds hollow when tapped.
- Remove the bread from the oven and let it cool on a wire rack before slicing. Enjoy this fresh baked bread warm with butter.
Notes
- For an extra crusty exterior, place a shallow pan of water on the bottom rack of the oven while preheating to create steam.
- If you want a softer crust, skip the egg white wash and simply mist the loaves with water before baking.
- This homemade French bread recipe is excellent for making simple sandwiches.
Nutrition
- Serving Size: 1 slice
- Calories: 150
- Sugar: 1
- Sodium: 250
- Fat: 1
- Saturated Fat: 0
- Unsaturated Fat: 1
- Trans Fat: 0
- Carbohydrates: 31
- Fiber: 1
- Protein: 5
- Cholesterol: 0