

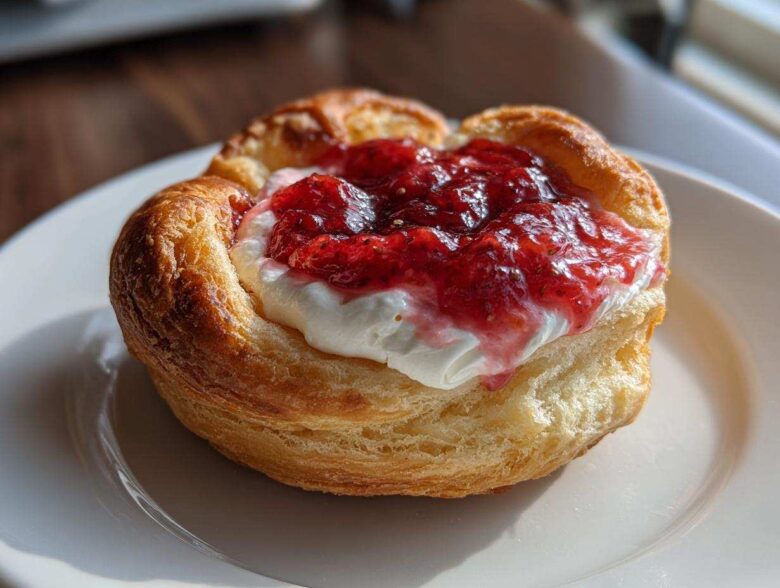
Oh my gosh, finding truly magical, flaky pastries when you’re baking gluten-free can feel like chasing a unicorn, right? I swear I spent years wrestling with crumbly crusts and dense bottoms. But I finally cracked the code on these incredible Gluten-Free Strawberry Cream Cheese Danishes, and trust me, they are game-changers for any weekend brunch! The absolute secret weapon here is hacking that store-bought gluten-free puff pastry—it gives us that glorious, visible layering you expect from a bakery case. I promise you won’t believe they’re GF; they puff up so beautifully!
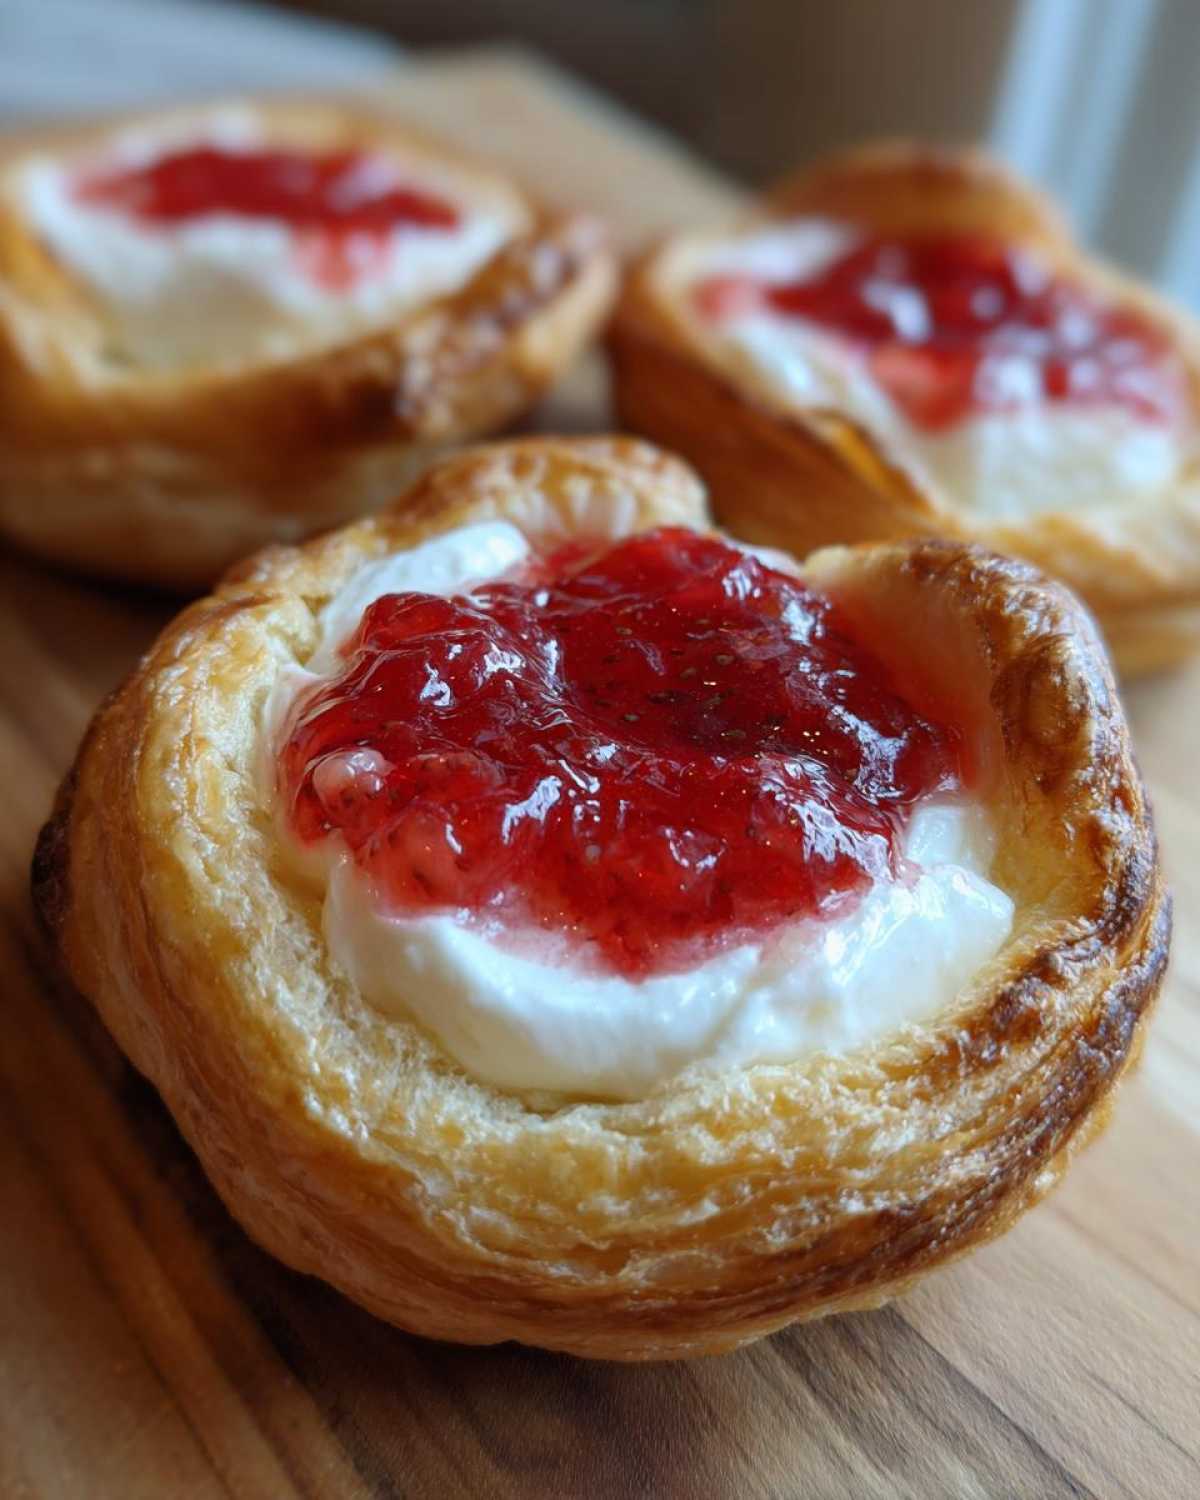
I’ve tried every trick in the book to keep gluten-free baked goods moist and structured, especially when dealing with sweet fillings. This method, which uses a quick chill and the right egg wash technique, guarantees that rich, soft cream cheese center nestled inside flaky, golden layers. You’re going to want to try these the second you have an hour free! For more of my deep dives on perfecting tricky bakes, check out my latest posts on the blog.
Why You Will Love This Gluten-Free Strawberry Cream Cheese Danish Recipe
I know what you’re thinking: gluten-free pastry means hours of complicated folding and chilling, right? Nope! That’s why this recipe for Gluten-Free Strawberry Cream Cheese Danishes is my new go-to for making homemade breakfast pastries feel easy and achievable.
- Bakery Quality Texture Achieved: We get that unbelievably flaky, light crust! This recipe beats the common problem of dense, dry GF dough by relying on high-quality frozen puff pastry. It’s pure magic when it bakes up.
- Simple Assembly Using Store-Bought Pastry: Seriously, pull it from the freezer and go! This cuts down the prep time so much, making these perfect for your next big gathering or just surprising the family on a Sunday. It’s one of my favorite Weekend Gluten Free Brunch Baking Ideas when I don’t want to start from scratch.
- The Perfect Filling Ratio: We balance the slightly tart strawberry jam with rich, tangy cream cheese. Every bite is the perfect harmony of sweet and creamy, never overly sweet like some commercial pastries.
Bakery Quality Texture Achieved
The flaky layers are the crowning glory here. Gluten-free dough struggles to hold those structural integrity lines, but the store-bought puff pastry is already layered with butter. When you score the edges lightly before baking, you’re giving those layers the direction they need to explode outwards in the oven. It truly mimics that classic Danish bite!
Simple Assembly Using Store-Bought Pastry
I won’t lie, making gluten-free puff pastry from scratch is a marathon, not a sprint. That’s why I rely on the best quality GF frozen sheets I can find. They thaw beautifully, cut cleanly, and handle the filling without getting soggy. If you’re looking for Delicious Gluten Free Morning Treats without the three-day commitment, this shortcut is everything!
Essential Ingredients for Gluten-Free Strawberry Cream Cheese Danishes
You only need a handful of things to make these gorgeous pastries, but the quality of the gluten-free components really matters here. Since we are leaning on store-bought dough for ease—which I highly recommend if you want that perfect flaky exterior—make sure you get a puff pastry designed to bake up layered. Skip anything that lists itself as standard GF pie crust, because those don’t have the necessary structure for this!
For the filling, it’s straightforward! You need really soft cream cheese—don’t even try to rush this by using it straight from the fridge, or you’ll get chunks! We mix that with some sugar, a little vanilla, and just one egg yolk. That yolk is my secret weapon for richness; it makes the cream cheese filling melt in your mouth instead of tasting chalky. And finally, top it off with thick strawberry preserves. Everything goes together so easily, which you can see in my collection of breakfast recipes.
- 1 package (14.1 ounces) store-bought gluten-free puff pastry, completely thawed
- 8 ounces cream cheese, softened until perfectly spreadable
- 1/2 cup granulated sugar
- 1 large egg yolk (save the white for brushing!)
- 1 teaspoon vanilla extract
- 1/4 teaspoon salt
- 1 cup strawberry preserves or a very thick strawberry jam
- 1 tablespoon milk or water (for that pretty final drizzle)
Ingredient Notes and Substitutions for Your Gluten Free Strawberry Cream Cheese Danish Recipe
The puff pastry is non-negotiable if you want that true Danish experience without spending two days folding butter into flour. If you absolutely cannot find store-bought GF puff pastry, you must search specifically for recipes labeled as Gluten Free Puff Pastry Alternative for Danishes, which likely involve using a special GF all-purpose flour blend mixed with lots of cold butter that you cut in repeatedly to mimic lamination. Trust me though, the pre-made kind saves so much worry!
When it comes to the jam, thickness is key. If your strawberry preserves are too runny, they can soak into the dough and make it soggy before it even hits the oven. If that’s the case, just pop the preserves in a tiny saucepan over low heat for five minutes to cook out some of the excess liquid. We are aiming for a thick dollop that sits proudly on top of the cream cheese layer!
Flaky Gluten Free Danish Dough Instructions and Shaping
Alright, now for the part that makes these pastries earn the “Danish” title! Even though we’re using store-bought puff pastry, handling gluten-free dough—even pre-made—requires a gentle touch. We need to keep everything cold to lock in those layers!
First thing: flour your work surface lightly. Unroll those beautiful thawed sheets. I usually cut each rectangle right down the middle to get 12 squares total. Don’t stress about perfect symmetry; these are homemade, remember? They don’t need to look like they came off a machine line. We are aiming for the crucial step next: the scoring.
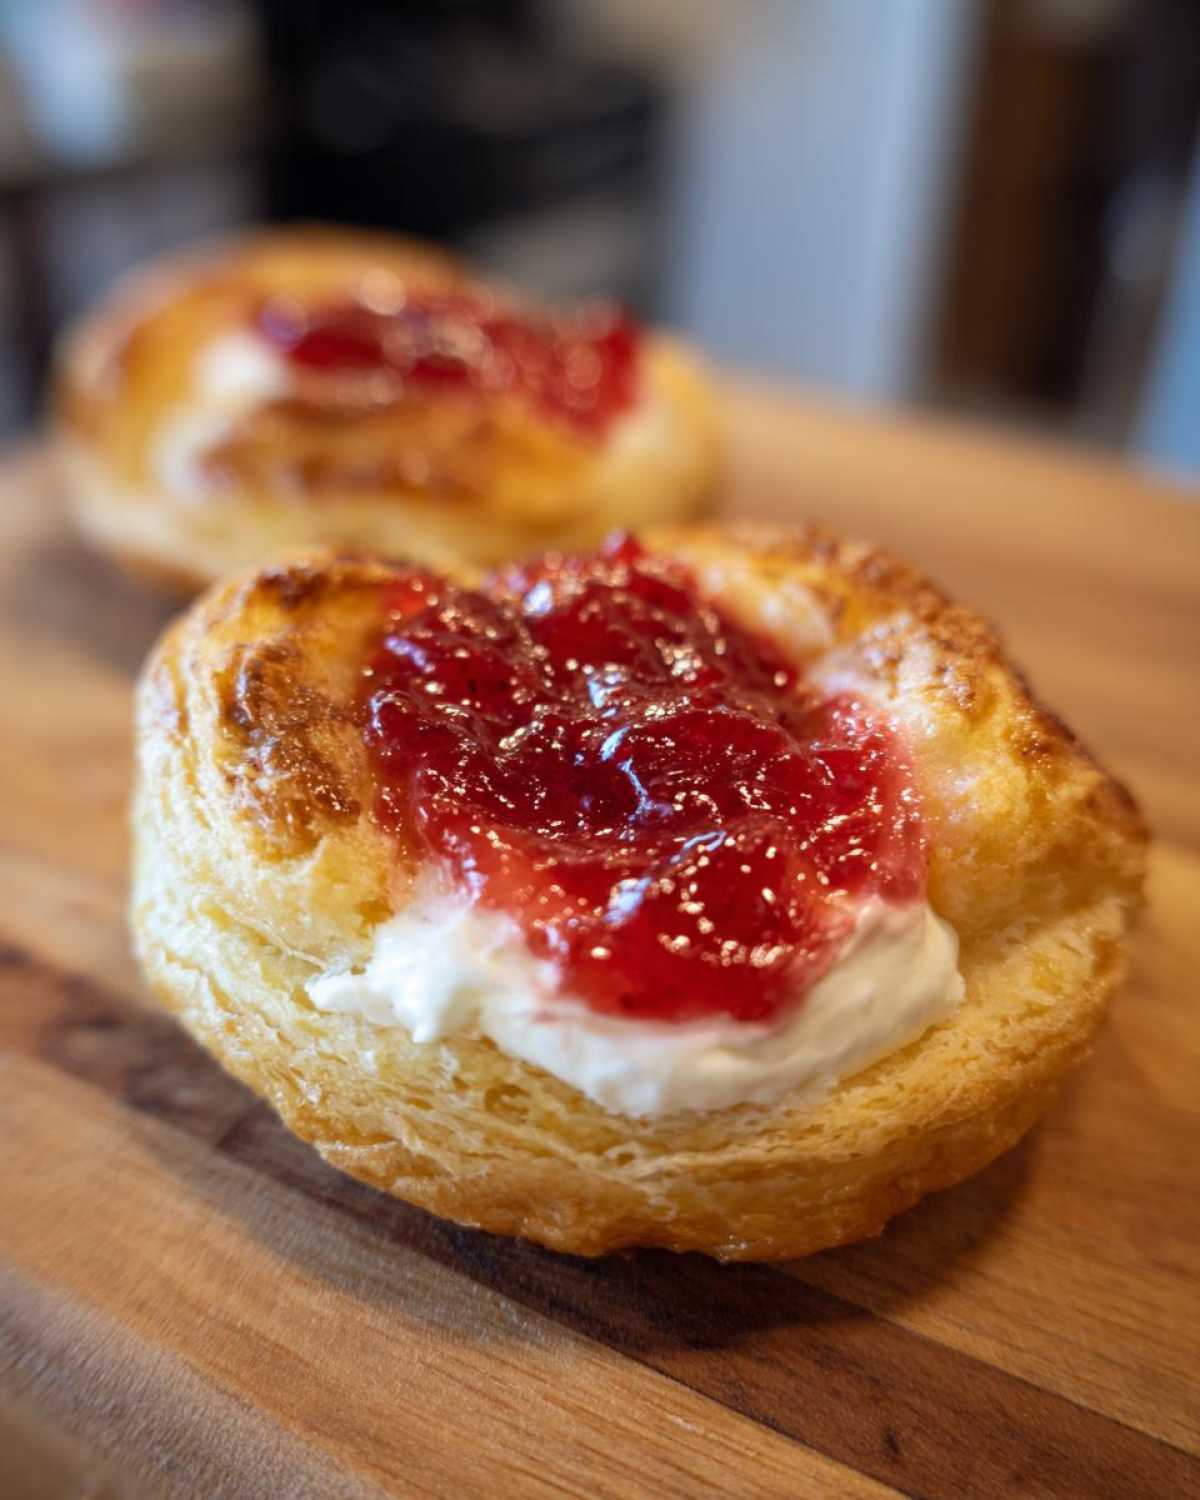
Take a sharp little paring knife—nothing dull! Now, gently score a border about half an inch in from the edge on every square. You want to press down firmly enough so you can see the line, but *do not* cut all the way through the bottom layer. This indentation is what forces the outside edge to puff up majestically while baking. This technique is essential for getting those fantastic Flaky Gluten Free Danish Dough Instructions, giving you that bakery look. After scoring, pop those squares onto your lined baking sheets and straight into the fridge for 15 minutes. We need them firm before they see the oven!
If you want more tips on how to fold and seal pastries beautifully (even though we aren’t folding here, the delicate touch is the same!), check out my notes on handling hand pies. It’s all about respecting the dough!
Assembling the Rich Strawberry Danish with Cream Cheese Gluten Free
Now that our dough is perfectly chilled, it’s time to make the filling! This is the easiest part, truly. You just need your cream cheese to be super soft—I mean, you should be able to stir it with a wooden spoon without straining yourself. If it fights you, it’s too cold, and that leads to slightly lumpy filling, which we definitely want to avoid for these delicate pastries.
I just toss the softened cream cheese, sugar, that single egg yolk, vanilla, and a pinch of salt right into a bowl. Beat it up until it looks fluffy, pale, and beautifully creamy. That texture check is important; for high-quality Gluten-Free Strawberry Cream Cheese Danishes, you want everything homogenous before it goes on the pastry. If you find you added a bit too much liquid or your cream cheese was surprisingly soft, just pop the bowl in the fridge for ten minutes while you wash up a few things. That short chill will firm it up nicely before you start spreading.
Once you pull those scored squares out of the fridge, we spread a nice, generous tablespoon of that luscious cream cheese mixture inside the border. Don’t go over the lines! Then, spoon a tiny dollop of your preserves right on top of the cream cheese. See? So fast! If you want a reminder on making delicious, no-bake fruit fillings, I shared some great tips when I made those cheesecake cups!
Tips for the Easy Gluten Free Strawberry Filling
Listen, the filling needs to hug the dough, not drown it. That’s why using thick strawberry preserves is always my recommendation for the most Easy Gluten Free Strawberry Filling. If you use a thinner jam, it can wick moisture into the surrounding gluten-free puff pastry, and we lose that beautiful lift we worked so hard to achieve when scoring the edges.
If you only have thinner jam, here’s my trick: warm it gently on the stove for just a few minutes until some of the water evaporates. Let it cool slightly, and then spoon it onto the cream cheese layer. It firms up just enough during the final chill and the bake time to stay neatly contained inside those flaky walls. You’ll end up with gorgeous, perfectly set centers!
Baking the Perfect Texture Gluten Free Danish
We’ve done all the hard work layering and filling, so now we need to treat these beauties right in the heat! The most important thing before these go into the oven is that final chill. Seriously, don’t skip pulling those baking sheets out of the fridge after 15 minutes—we need that cold dough hitting that hot oven for maximum lift.
Preheat your oven to a solid 400 degrees Fahrenheit. That higher heat is what convinces the butter inside that gluten-free puff pastry to steam rapidly, creating those glorious, distinct layers. Before they bake, grab that beaten egg—the one you saved the yolk from, remember?—and brush just the outer border lightly. You don’t want egg wash on the filling, or it won’t brown nicely, but that wash on the edges is what gives us that rich, shiny, golden finish.
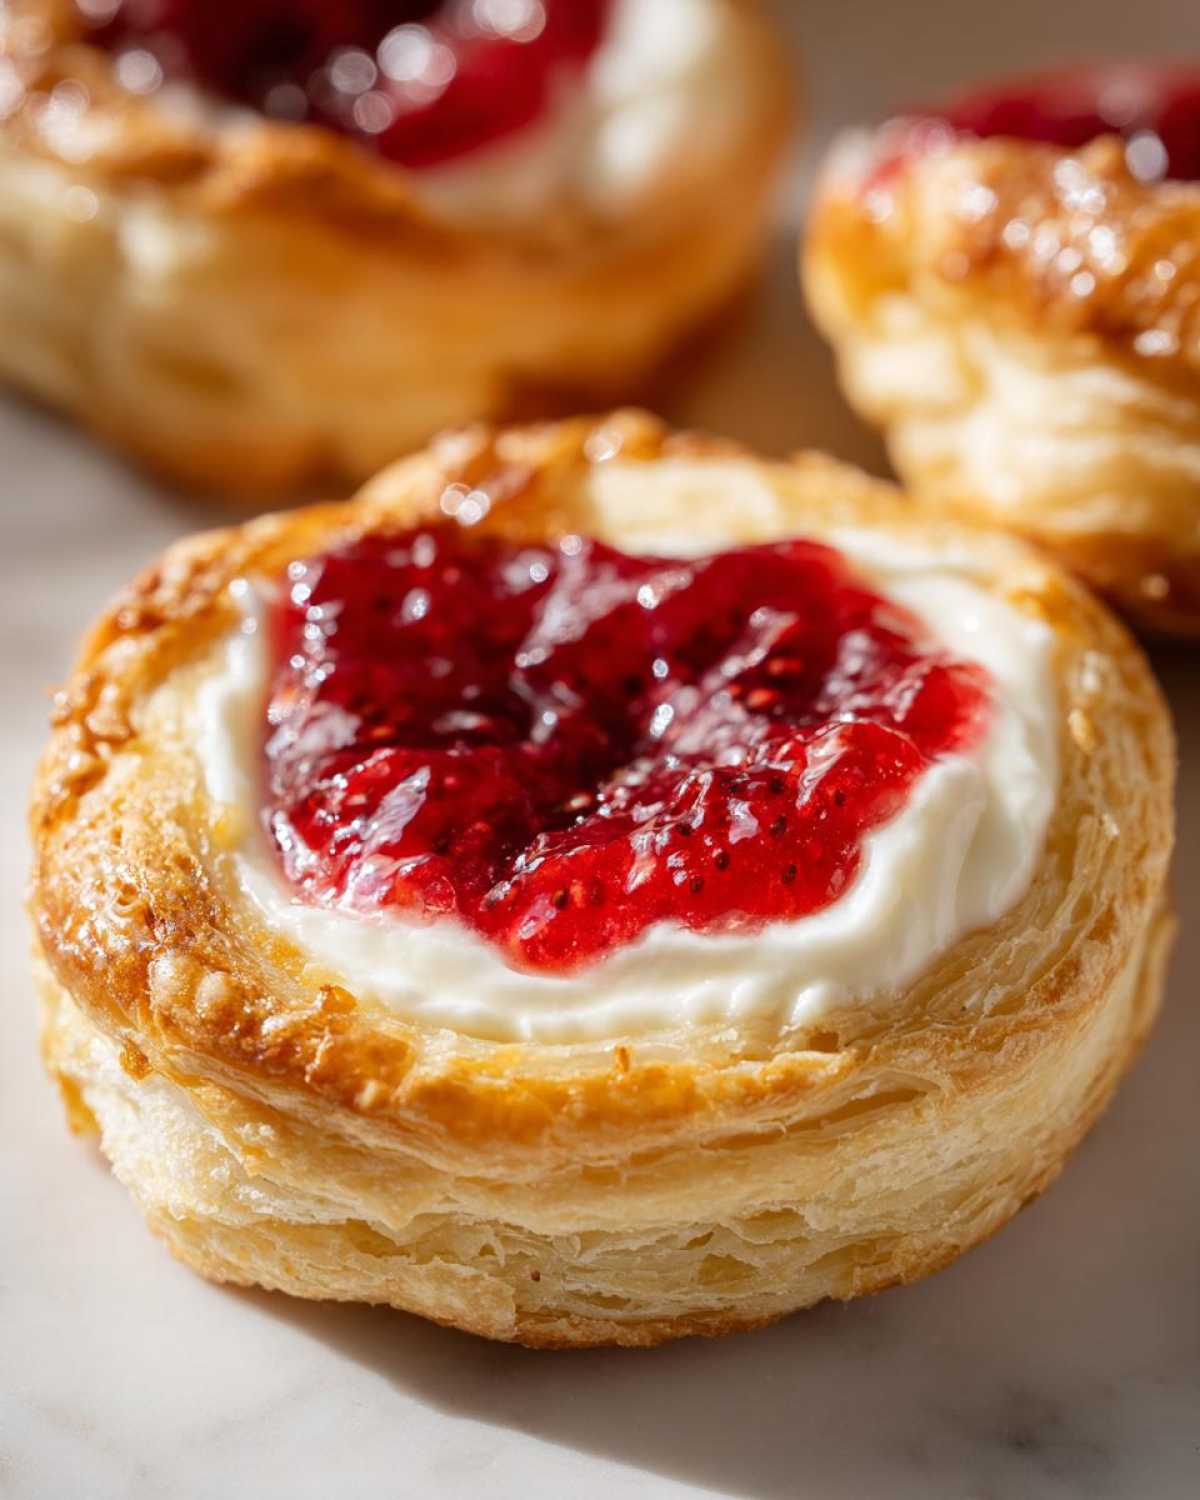
Bake them for 15 to 18 minutes. You’re watching for the edges to be deep golden brown and completely puffed up around the center dollop. If you want to see how I handle the egg wash and baking temperatures when testing things like croissant dough, you can peek at my notes for air fryer chocolate croissants—the principles for flaky dough are the same! Once they look perfect, pull them out and let them cool just a bit before moving them to a wire rack. That’s how you guarantee the Perfect Texture Gluten Free Danish!
Finishing Touches: Glazing Your Gluten-Free Strawberry Cream Cheese Danishes
Once these beauties come out of the oven, smelling like heaven, resist the urge to dive in immediately! They need a little rest time to set up their structure. Let them cool on the baking sheet for about five minutes—this prevents them from collapsing when you move them. Then, gently transfer them to a wire rack to cool down completely.
You might notice they look gorgeous already, but if you want that final, extra little bakery touch? We make a super quick glaze! This isn’t complicated; it’s just powdered sugar, a splash of milk or water, and that’s it. Whisk it up until it’s smooth and drizzles nicely right off the spoon.
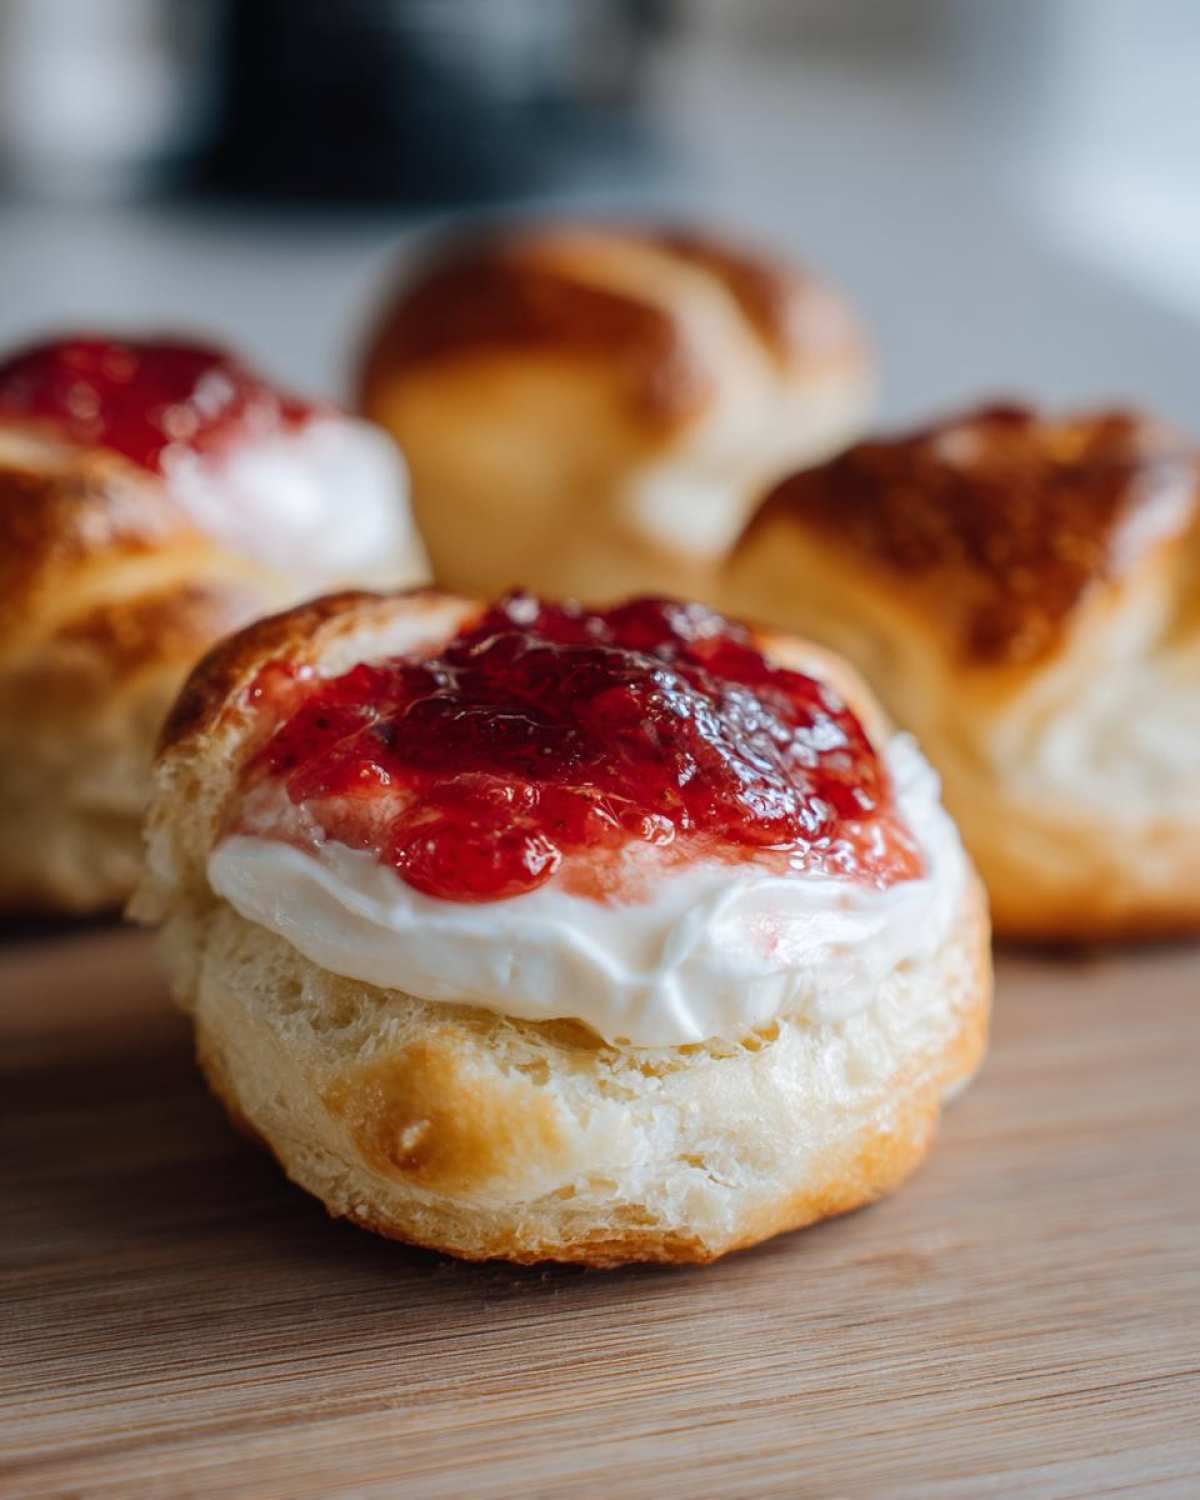
You do not want to put this glaze on when the danishes are hot, or it will just turn into clear syrup. Wait until they are mostly cool. Then, you just take a spoon and drizzle it artfully back and forth over the tops. If you want to skip this step, a light dusting of powdered sugar is also totally gorgeous and classic. Either way, these Gluten-Free Strawberry Cream Cheese Danishes are ready to be devoured!
Make Ahead and Storage Instructions for Gluten Free Strawberry Cream Cheese Danishes
One of the best things about these Gluten-Free Strawberry Cream Cheese Danishes is that they are incredible candidates for Make Ahead Gluten Free Breakfast Recipes! You absolutely can prep these ahead of time and wake up to practically finished pastries. If you plan to make them the day before you bake, assemble them completely—filling and all—score the pastry, but skip the egg wash for now.
Place the assembled danishes on their parchment-lined baking sheets and cover them tightly with plastic wrap. They just need to chill thoroughly in the refrigerator for up to 24 hours. When you’re ready to bake them the next morning, pull them out, brush with the egg wash, and bake them just as the recipe says. If they seem a little cold going into the oven, they might need just an extra minute or two to bake through.
If you’re way ahead of the game, they freeze fantastically after baking! Just let them cool completely, skip the glaze for now, and wrap them individually in plastic wrap, then toss them into a freezer bag. When you want one later, just reheat it briefly in a toaster oven—that’s the best way to re-crisp that flaky pastry! You can learn more about my methods for meal prepping things like sandwiches that reheat well over here: reheating.
Serving Suggestions for Homemade Gluten Free Breakfast Pastries
Honestly, these Gluten-Free Strawberry Cream Cheese Danishes are so decadent they pretty much stand alone, but presentation is everything, especially when you want to show off your amazing gluten-free baking skills! They taste like they cost a fortune at a fancy cafe, so let’s pair them right.
My absolute favorite way to serve them is still warm—not hot, but warm enough that the cream cheese filling is soft. Pair that with a strong cup of coffee! The slight bitterness of the coffee cuts right through the sweetness of the filling and the glaze. It’s the perfect setup for a lazy Saturday morning.
If you’re serving these up for a bigger brunch spread, you need some brightness to balance out the richness. I always put out a big, simple bowl of fresh berries—blueberries or raspberries work great—and maybe skip the drizzle if you want to keep the focus purely on the pastry. The fresh fruit makes them feel lighter, even though we both know what’s in that delicious cream cheese center!
You can also slice them in half, almost like an open-faced sandwich, and serve them alongside a savory counterpoint. A little bit of crispy bacon or some vegetarian sausage links pairs surprisingly well with the sweet strawberry. It’s that classic balance we aim for! It reminds me of serving up slices of my super moist banana bread; you need something salty to round out the taste experience.
Frequently Asked Questions About Gluten Free Strawberry Cream Cheese Danish Recipe
I know you might have a few last-minute thoughts or worries before you dive into baking these gorgeous pastries. It’s totally normal when dealing with gluten-free baking! I’ve gathered some of the most common questions I get about making these Gluten-Free Strawberry Cream Cheese Danishes so you can approach the oven with total confidence. If you have any more questions after trying this recipe, please don’t hesitate to reach out via my contact page!
Can I use fresh strawberries instead of preserves for this recipe?
That’s a great question! You certainly can, but you must treat the fresh berries first. If you just chop up fresh strawberries and drop them on the cream cheese, they will release far too much water during baking, leading to a soggy bottom and potentially the filling spilling over. If you want to use fresh fruit, I highly recommend gently macerating them first. Toss sliced fresh strawberries with about a tablespoon of sugar and a tiny squeeze of lemon juice. Let that sit for 20 minutes, drain off most of the liquid, and *then* spoon the slightly sweetened berries onto the cream cheese layer. This gives you that bright, fresh flavor without ruining the texture of your Best GF Strawberry Cream Cheese Pastry!
What is the best gluten-free flour blend to use if I wanted to attempt making the dough from scratch?
If you decide to tackle making homemade Flaky Gluten Free Danish Dough Instructions, the blend you choose is crucial. You absolutely need a blend that *contains* xanthan gum or a similar stabilizer. I’ve had the best luck with 1-to-1 blends specifically designed for pastry or pie, usually containing a mix of rice flours, potato starch, and tapioca starch. If your blend doesn’t have xanthan gum, add about 3/4 teaspoon per cup of flour called for. Remember, for homemade puff pastry, the key isn’t just the flour blend, it’s keeping the butter ice-cold for all those folding rounds!
How do I prevent the cream cheese filling from oozing out?
Filling oozing is the enemy of a beautiful Bakery Style Gluten Free Sweet Roll! We combat this two ways, and both are non-negotiable for me. First, make sure your cream cheese filling is nice and thick; if it looks runny, chill it for ten minutes before you start spreading. Second, and most important, is the scoring. You must create that deep, distinct border about half an inch in from the edge of the dough square, but remember not to cut all the way through the bottom layer! This wall traps the filling perfectly as the sides rise, ensuring you get that lovely pocket of cream cheese and strawberry goodness.
Is this a good recipe for making ahead for a big weekend brunch?
Oh, yes! This is one of my favorite Weekend Gluten Free Brunch Baking Ideas precisely because you can prep it the night before. As I mention in the storage section, you can assemble the entire danish—fill it, score it—and keep it on the baking sheet covered in the fridge overnight. Just make sure you don’t apply the egg wash until the morning you plan to bake. That way, come morning, all you do is apply the wash and pop them in the oven. You get all the glory of serving Homemade Gluten Free Breakfast Pastries without any early morning stress!
Can I use different fruit preserves instead of strawberry?
Absolutely! Feel free to substitute the strawberry preserves with any thick jam or curd you love. Raspberry or blueberry preserves work wonderfully. Just follow the advice above: ensure your jam isn’t watery! If you are trying to make these more decadent, try a lemon curd instead of fruit for a fantastic tart contrast to the sweet cream cheese base. These variations make fantastic Decadent Gluten Free Fruit Filled Pastries.
PrintGluten-Free Strawberry Cream Cheese Danishes

Follow this recipe to make flaky, bakery-style gluten-free strawberry cream cheese danishes using a simple puff pastry method and a rich cream cheese filling.
- Prep Time: 20 min
- Cook Time: 18 min
- Total Time: 38 min
- Yield: 12 danishes
- Category: Breakfast
- Method: Baking
- Cuisine: American
- Diet: Gluten Free
Ingredients
- 1 package (14.1 ounces) store-bought gluten-free puff pastry, thawed
- 8 ounces cream cheese, softened
- 1/2 cup granulated sugar
- 1 large egg yolk
- 1 teaspoon vanilla extract
- 1/4 teaspoon salt
- 1 cup strawberry preserves or thick strawberry jam
- 1 large egg, beaten (for egg wash)
- 1/4 cup powdered sugar (for glaze)
- 1 tablespoon milk or water (for glaze)
Instructions
- Prepare the cream cheese filling: In a medium bowl, beat the softened cream cheese, granulated sugar, egg yolk, vanilla extract, and salt until smooth and creamy. Set aside.
- Prepare the pastry: Unroll the thawed gluten-free puff pastry sheets onto a lightly floured surface. If using a block, roll it out to about 1/8 inch thickness. Cut each sheet into 6 equal squares (you should have 12 squares total).
- Shape the danishes: Place the squares on baking sheets lined with parchment paper. Using a small knife, score a border about 1/2 inch from the edge of each square, being careful not to cut all the way through. This helps the edges puff up.
- Fill the danishes: Spread about 1 tablespoon of the cream cheese mixture inside the scored border of each square. Top the cream cheese with about 1 teaspoon of strawberry preserves over the center.
- Chill the pastries: Place the baking sheets in the refrigerator for 15 minutes to firm up the dough before baking. Preheat your oven to 400 degrees Fahrenheit (200 degrees Celsius).
- Bake: Brush the edges (the border) of each danish lightly with the beaten egg wash. Bake for 15 to 18 minutes, or until the pastry is golden brown and puffed.
- Cool: Remove the danishes from the oven and let them cool on the baking sheet for 5 minutes before transferring them to a wire rack to cool completely.
- Make the glaze (optional): Whisk together the powdered sugar and milk or water until smooth. Drizzle the glaze over the cooled danishes.
Notes
- Use a high-quality gluten-free puff pastry designed for baking; these often work better than standard GF pie crust dough for achieving layers.
- If your cream cheese filling seems too soft, chill it for 10 minutes before filling the pastries.
- For a brighter strawberry flavor, you can gently warm the preserves slightly before spooning them onto the cream cheese.
- These danishes freeze well once baked and cooled; store them in an airtight container and reheat briefly in a toaster oven for best texture.
Nutrition
- Serving Size: 1 danish
- Calories: 280
- Sugar: 20
- Sodium: 150
- Fat: 18
- Saturated Fat: 10
- Unsaturated Fat: 8
- Trans Fat: 0
- Carbohydrates: 26
- Fiber: 1
- Protein: 4
- Cholesterol: 55